
On Git, developers can view the commit history using the “git log” command. However, another fantastic feature of the git log command can be utilized to display the graphical overview of the commits history with a detailed view for understanding the added changes and related saving operations. For this purpose, the “$ git log –graph” command is most widely utilized.
This manual will describe the usage of the git log graph command.
Example: How to Use the git log graph Command?
To use the git log graph command, first, we will move to the local repository and list the content of the current Git repository. Next, create a file using the “$ touch <file>” command and add it to the repository. Then, run the “$ git status .” command to check the status and commit changes. Lastly, run the “$ git log –graph” command.
Now, move ahead to the given instructions!
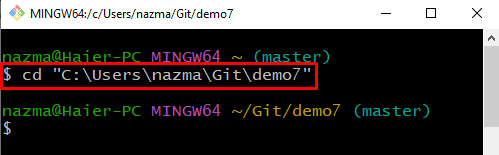
Step 1: Navigate to Git Repository
Execute the “cd” command to move to the Git local directory:
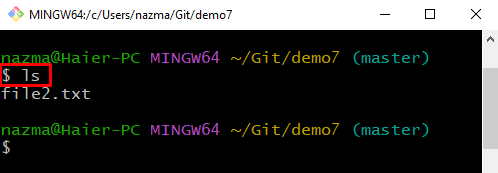
Step 2: List Directory
To view the existing content of the Git directory, run the “ls” command:
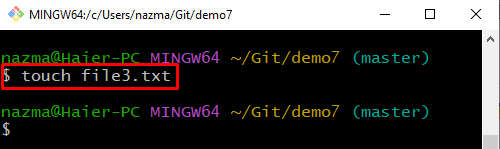
Step 3: Create File
Then, create a new file by specifying its name in the following “touch” command:
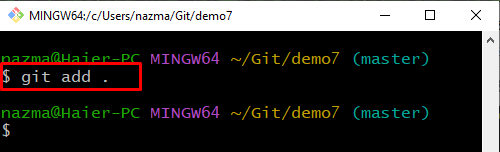
Step 4: Add File
Now, track the newly created file to the staging area:
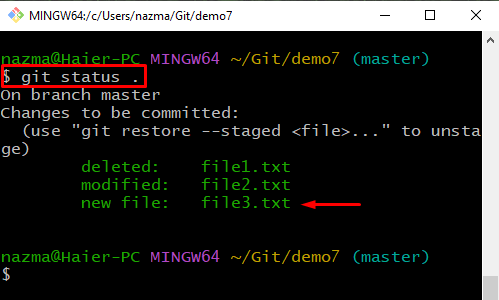
Step 5: Check Status
Check the Git repository status using the following command:
It can be seen that our newly created “file3.txt” is added successfully:
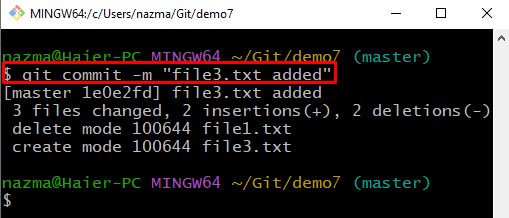
Step 6: Commit Changes
Next, commit changes with the “git commit” command and add any message using the “-m” option:
Step 7: git log graph
To check out the graphical overview of the commits history, write-out the “git log” command with the “–graph” option:

We have explained the method to use the git log graph command.
Conclusion
To use the git log graph command, first, move to the local directory and list the content of the current Git repository. Then, create a file using the “$ touch <file>” command and add it to the repository by executing the “$ git add .” command. After that, check the status and commit changes. Lastly, execute the “$ git log –graph” command. This guide demonstrated the procedure of how to use the git log graph command.