This study will elaborate
- When “fatal: no upstream branch” error occurs
- Example: How to fix “fatal: no upstream branch” error quickly
So, let’s start!
When “fatal: no upstream branch” Error Occurs?
The above-stated error occurs when the user creates a new branch and pushes it to the Git remote repository. To give you a better idea, we will first display the error and then provide the solution to resolve it.
Let’s move on and check out the procedure!
Step 1: Move to Git Local Directory
Execute the below command and move to the specified Git directory:
Step 2: Clone Remote Directory
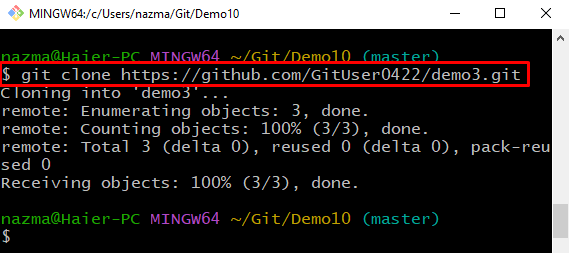
Next, clone the remote directory on Git local repository using the “git clone” command:
Step 3: Create and Switch Branch
Then, run the following command to create and switch immediately to the newly created branch:
Step 4: Git Push
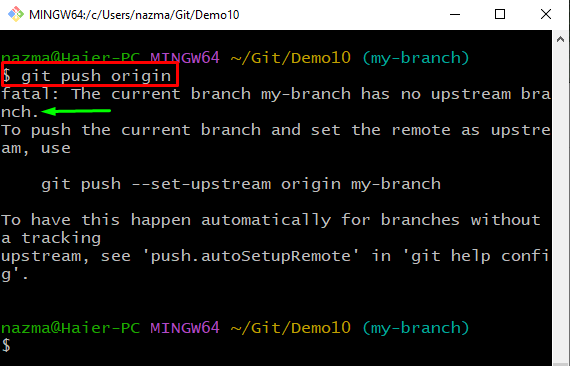
To push the newly created branch to a remote repository, execute the “git push” branch with the remote name:
As a result, you will get the following fatal error:
Now, move ahead to the solution to the above-displayed error.
Example: Fix Git’s “fatal: no upstream branch” Error Quickly
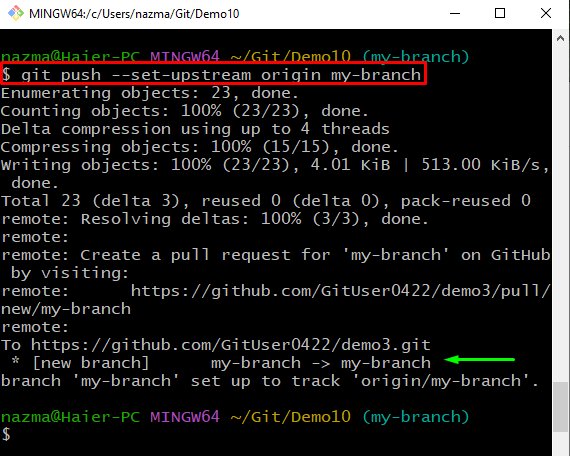
To fix the “fatal: no upstream branch” error, execute the provided “git push” command with your branch name:
Adding the “–set-upstream” option in the above-given command will set the remote as upstream directory and fix the previously encountered error:
That’s all! We have effectively provided the solution to fix the “fatal: no upstream branch” error.
Conclusion
Most of the time, developers encounter the “fatal: no upstream branch” error while pushing the newly created branch to the Git remote repository. To resolve this issue, the “$ git push –set-upstream origin <branch-name>” command is utilized to push the branch and set remote as upstream. This study demonstrated when the mentioned error occurs and how to fix it.


