
“Sending huge-size files over the internet is a big issue. Sometimes the uploading limit does not allow uploading a big file greater than a certain size. So, we need to compress the file before uploading it. And it is also better to compress the file to take up less space on the drive. In this manual, we will see how to compress a file in Linux using the pigz command. This article is designed to learn the basic use of the pigz command in the Linux operating system.”
What is a Pigz Command?
Pigz stands for parallel implementation of GZip. It is a compression tool provided in the Linux operating system to compress or decompress files. It is an improved and updated version of the gzip function and was created using the most common zipping library functions. It utilizes different processors and cores to compress files and data at a very high speed compared to the older gzip utility. Let us learn how to compress or decompress files in Linux operating system using the pigz command. But before performing the compression or decompression function, we must ensure that our ubuntu system has installed the pigz library or package. If it does not have it already, we need to install it explicitly so that we can use the pigz command to compress or decompress our large data files.
Install the Pigz Command in Ubuntu 22.04 Operating System
The installation process of the pigz command is straightforward. It can be installed quickly and easily just by using the apt command. The apt command is used to install any or all kinds of commands, packages, or libraries in the Linux operating system. Hence, we will use the same apt command to install the pigz library in our ubuntu 22.04 operating system.
Use the following “sudo apt install pigz” command to install the pigz library in ubuntu 22.04:
![]()
If your system is protected with an admin password, you need to provide the password before the installation process begins:
![]()
This will install the pigz and make the system capable of executing the pigz command to perform the compression and decompression of the files. See the result of the install command below:
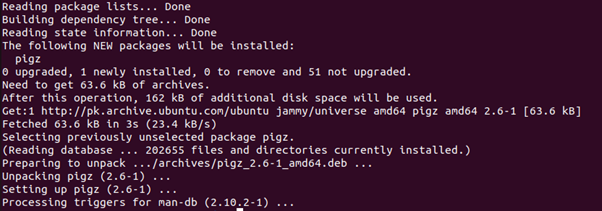
A single command is used to install the complete pigz packages and all of the dependencies. Now our system is prepared to use the pigz command to compress or decompress the files. So let us see how the pigz command actually works in the Linux operating system and how it compresses or decompresses a file quickly. We are using the Ubuntu 22.04 system, so make sure you have the same version so that you do not encounter any bugs or issues while following the same examples and commands. Let us compress a file using the pigz command in the Ubuntu 22.04 system.
Syntax of Pigz Command
Before we demonstrate an example of the pigz command, let us understand its syntax of it so that we can easily use it in the examples. The syntax of the pigz command is as follows:
![]()
The pigz commands take only one argument, and that is the file name. The “pigz” is the name of the command that indicates to the interpreter that a function of compression needs to be performed. The “file-name” represents the file that needs to be compressed.
Now let us understand how the pigz command performs the compression function with the help of the examples given below.
List All the Options of the Pigz Command
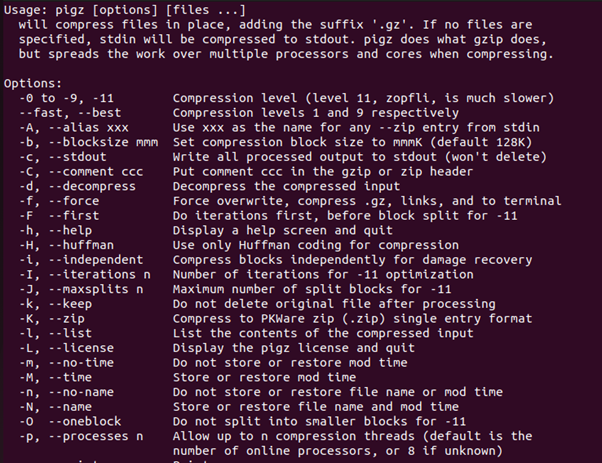
The pigz command in Linux comes with various options that enable the user to perform certain functions along with compression and decompression. To display the list of all the options available with the pigz command, use the –help flag:
![]()
This will give you the complete list of options for the pigz command, along with the description of each:

Compress the File With the Pigz Command in Linux
As we know, the pigz command only takes one argument, which is the file name that needs to be compressed, so let us compress a file named “input.tar”. This is a binary file; we will compress it using the pigz command on the command line terminal. See the command below:
![]()
This will overwrite the original file with a compressed file and will also ask for your permission to overwrite the original file:
![]()
This has created a compressed file named “input.tar”, a compressed version of the input.tar binary file. We can list the file and see the extension of it with the “ls” command:
![]()
The “ls” command will display all the files in the directory with their extension. In our case, the extension of the file should be “gz” which means that the file has been compressed. Confirm this from the output given below:
![]()
Note that the file is compressed, and it has the extension “.gz”. We have seen that the original file has been replaced with the new compressed file and now only has the compressed version of the file. In this way, you retain the compressed file while keeping the original. See the command below to know the syntax:
![]()
This will compress the file named “compress” and give a new compressed file with an extension .gz, “compress.gz”. Now list down all the files in the directory to check whether we have the original file or not. Use the same “ls” command again to list the files in the folder:
![]()
See the result below:
![]()
Note that the original file “compress” is still there with the compressed version of the file as “compress.gz”. This way, you can keep the original and the compressed file.
Decompress the File Using the Pigz Command
Just the way we compressed the file with the pigz command, we can easily decompress it using the same command. The -d flag is used to decompress the compressed file. See the command below:
![]()
Ensure you provide the correct file name with the compression extension to ignore any errors. This will remove the compressed file and give the original decompressed file. Let us confirm this by listing the files again with the “ls” command:
![]()
See the list of files below:
![]()
As you can see, there is only one file in the folder, “compress”, the original version of the file we created.
Conclusion
In this post, we briefly introduced the pigz command in the Linux operating system. The pigz command is used to compress and decompress files. We installed the pigz library using the apt command, and then we explored some examples to learn how to compress or decompress a file using the pigz command in Linux.