
“Creating an art craft in any operating system is always amazing. But it is quite difficult to do with programming codes. However, the built-in commands, functions, and predefined libraries for creating art and crate in the terminal make things simple and easier. We will walk you through the figlet command in Linux to guide you on how to create ASCII text banners. We will use some examples to show you how figlet works in the Linux operating system. So let us begin!”
Figlet Definition
Figlet is a command line or a terminal utility available in the Linux operating system that allows us to create some amazing and appealing ASCII text banners. It creates large letters or ASCII text banners using simple text. It takes the input data and converts it into a banner using ordinary text.
Syntax of Figlet
The syntax of the figlet command in Linux is as follows:
![]()
The “figlet” is the command that will perform the main function. The “-flag” represents one of the options that will be used with the figlet command. The figlet commands come with multiple useful options, and every option serves a different purpose and performs a different action. The user can use any flag option according to his needs and according to the requirement of the situation.
The various options for the figlet commands are -c, -d, -f, -k, -l, -r, and -w. The -c flag is used to print the banner in the center of the screen, the -d flag is used to select the directory of the font, the -f flag is used to choose the font style, and the -k flag is used to create the letters separately instead of merging, the -l flag is used to align the text to the left, the -r flag is used to align the text to the right, and lastly the -w flag is used to specify the size of the output. The “input” represents the data that will be represented in ASCII on the banner.
Install the Figlet Command in Ubuntu 22.04 System
To use the figlet command, we need to install it in our system. As it does not come with Ubuntu 22.04 in the general installation, so we need to manually install it with the apt command. Installing the figlet command is as simple as installing any other command or package in the Ubuntu operating system. The apt or apt-get command is used to install any package or command, or library in the Ubuntu operating system.
Use the following apt install command to install the figlet:
![]()
As we have a password-protected system, it is asking to provide the password:
![]()
Enter the password so that the process of installation can begin. See the result below:
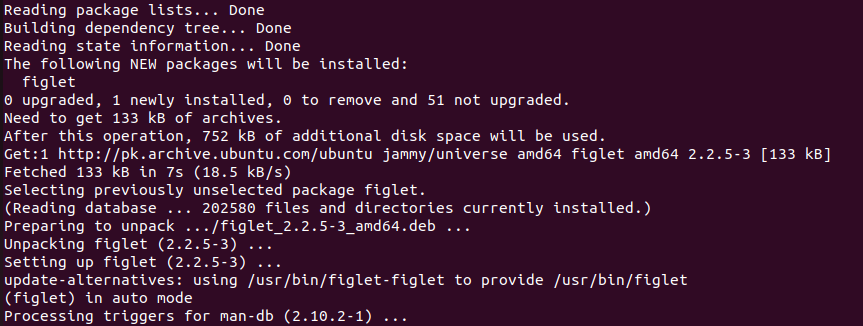
Now the figlet package is installed successfully; we are ready to use the command with different options. Now let us transform a text into an ASCII banner using the figlet command. Here, we will provide the figlet command without any flag or argument to see the basic result of the figlet command:
![]()
Let us check out the result of the figlet command and see how it converted the text “input” into an ASCII banner:

Here is a simple but appealing artwork created by the figlet command. Now let us print it in the center. We can do this by using the -c flag with the figlet command:
![]()
The -c flag indicates the figlet command to display the output in the center of the screen. Let us see the output below:

Note that the text banner is right in the middle of the screen. Now let us shift the input to the right side of the screen. Here, the banner is displayed on the right side by using the -r option. See the command below, copy it, and execute it in your terminal to create some amazing artwork:
![]()
This should print the text “input” at the extreme right of the screen. Let us confirm this by checking the output given below:

Note that the -r flag worked and shifted the text to the extreme right side of the screen. The figlet command also provides us the option to define the width of the output screen. The default columns included in the width are 80; if you need more because you may have large text to print, you can explicitly provide the number of columns that you need to display the banner. Here is how to do it:
![]()
Now, the terminal will use the 120-column width to display the input text on the banner. See the banner below:

If you want to use the complete width of the terminal, you can use the -t flag with the figlet command:
![]()
Here is the output banner:

This is a very congested banner; there should be some space between the characters so that they are visible, right? Well, that is not a problem; the -k flag is available for creating some reasonable space between each character. Use the -k flag together with the -t flag so that the figlet command takes up the full width of the terminal, and the -k flag can easily manage some reasonable spaces between each character. See the command below:
![]()
This will print the same banner with some additional spaces. Here is the output:

The difference can be seen here. Compare this banner with the banner displayed previously and observe the difference between both outputs. Let us show both outputs together for your ease:
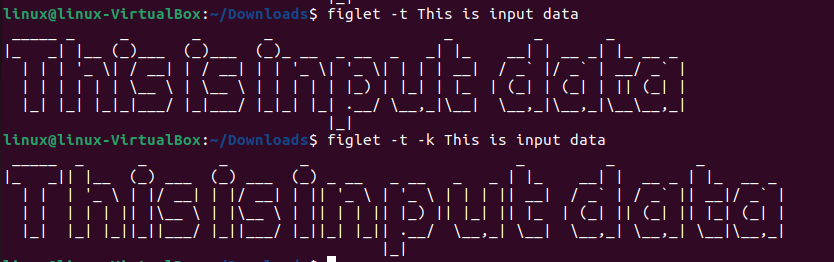
This will give you a clear picture of both banners, and you can easily compare both outputs and see the difference. In the first banner, characters are merged with no space between them. While there is a space between each character in the second banner, and each of the input characters is displayed on the banner separately, taking up more space and columns on the terminal.
Conclusion
We learned how to create some artwork in Linux operating using the built-in or predefined commands in Linux. The Linux operating system provides a simple and useful command line utility to print simple text in the form of an ASCII banner. The figlet command is used to display the ASCII banner on the screen. Using easy-to-understand examples, we learned how to use the figlet command in Linux.