Git is most commonly used for handling small to large projects efficiently. It tracks the folders from the Git working area to the staging area. While tracking, users changed or updated the project files for some reason. After that, if they want to remove or reset uncommitted changes, Git permits them to do so.
In this manual, we will provide the different ways of deleting uncommitted changes in Git.
How to Remove Uncommitted Changes in Git?
To remove uncommitted changes in Git, multiple approaches are available, such as the “rm” command, the “git reset” command with the “–hard” option, and the “git stash” command. These commands are utilized in different scenarios. For instance, to remove uncommitted changes from staging, the “rm” command and the “git reset –hard” command are utilized. However, if you have untracked changes, the “git stash drop” command can be useful.
Let’s try them out one by one!
Method 1: Remove Uncommitted Changes in Git Using rm Command
While working in Git, you might first create new files or update the existing files. After that, you want to know how to remove some untracked files. For this corresponding purpose, you can utilize the “$ rm <filename>” command.
To understand this scenario, follow the procedure steps.
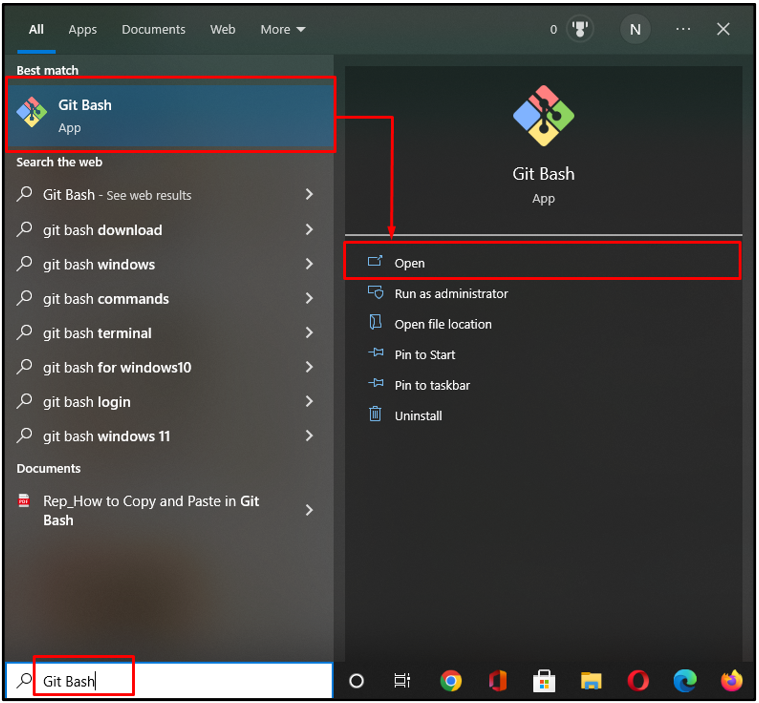
Step 1: Launch Git Bash
Press the “CTRL + Esc” key to open the “Startup” menu, search and launch the “Git Bash”:
Step 2: Move to Git Directory
Next, move to your Git directory by utilizing the “cd” command:
Step 3: Create File
Now, execute the “touch” command to create a new in the current directory:
Step 4: Track File
Track the created file to the staging area using the “git add” command:
Step 5: Remove File
Execute the “rm” command with the file name which needs to be deleted:
Step 6: Check Repository Status
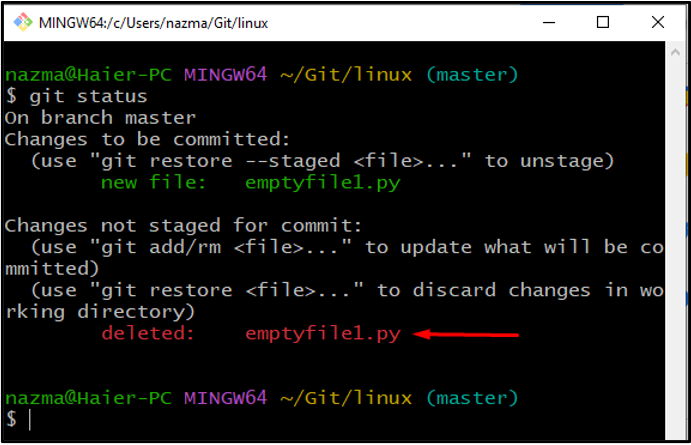
To verify the previous action, run the “git status” command:
As you can see, our “emptyfile1.py” file is successfully removed from the Git directory:
Let’s move toward the next section to remove the uncommitted changes using the “$ reset command” with the “–hard” flag.
Method 2: Remove Uncommitted Changes in Git Using git reset With –hard Flag
If you want to remove the changes from the staging area, which is ready to move to the repository, you can utilize the “$ git reset” command with the “–hard” option. Here, the –hard option will specify Git to delete all changes between the last commit and the current state. Note that the users are required to use the mentioned command after executing the git status to check working files.
Now, look at the provided steps to understand it’s working!
Step 1: Create Multiple Files
Execute the “touch” command to create multiple files in the Git repository:
Step 2: Track Files
Next, add all files to the staging area from the working directory:
Here, we have added multiple files with the git add command followed by the shorthand “ .”, which shows that, by default, we are on the top of our project folder:
Step 3: Check Git Repo Status
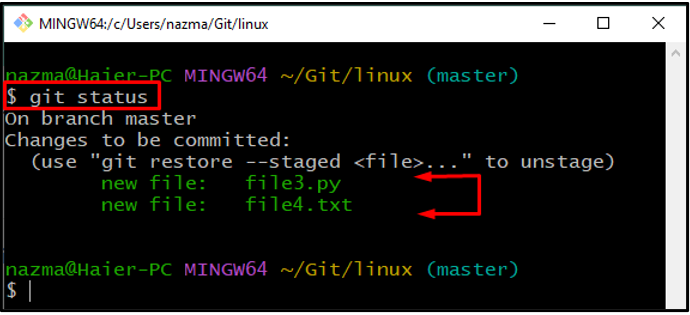
Now, check the current Git directory status by utilizing provided command:
As you can see, we have successfully added files into the staging area:
Step 4: Remove Uncommitted Changes
Run the “git reset” command with the “–hard” option and add the HEAD alias to move to the previous commit:
Below output indicates that our HEAD is moved to the previous commit and most recent uncommitted changes remove successfully:
Step 5: Check Status
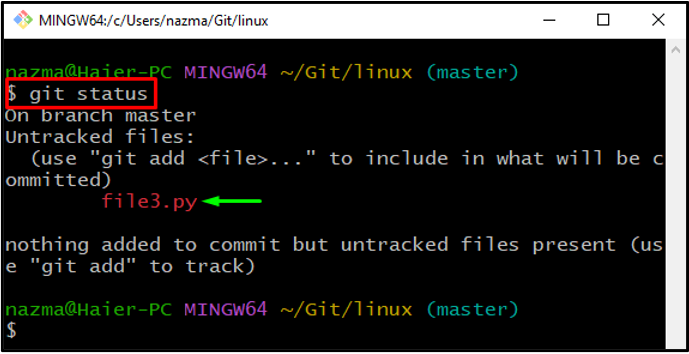
To verify and display the current HEAD position, execute the “git status” command:
As you can see, our uncommitted changes are removed from Git repository:
Now, check out the below next section to remove uncommitted changes using the git stash command.
Method 3: Remove Uncommitted Changes in Git Using git stash Command
If you want to remove an untracked file from the Git directory, use the “git add .” and the “git stash” command. As the “git reset” command can not remove the untracked files.
Let’s try out the below procedure for removing untracked files!
Step 1: Add Files
Add all files to the Git repository utilizing the “git add .” command:
Step 2: Save Working Directory State
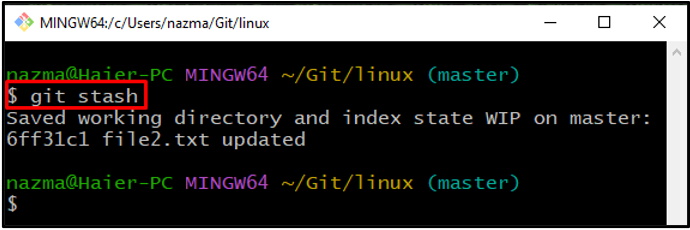
Now, execute the “git stash” command to save the state of the working directory and its index on the current branch:
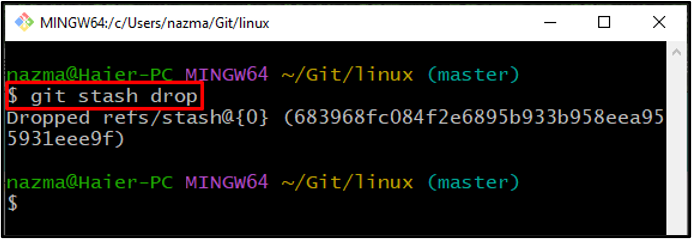
Next, drop all of the saved changes by adding the “drop” option in the same command:
As you can see, our saved working directory state and index is now removed from the current branch:
Step 3: Check Status
Lastly, run the “git status” command to check the directory status:
Below output indicates that our working directory is clean and uncommitted changes are removed successfully:
We have provided the different ways to remove uncommitted changes in Git.
Conclusion
To remove uncommitted changes in Git, first, navigate to the Git directory. Then, create and track files to the repository. After that, execute the “$ rm <filename>” command or the “$ git reset –hard HEAD” command to remove the uncommitted changes from the staging area. However, to remove the untracked files from the Git directory, utilize the “$ git stash drop” command. This manual elaborated on the methods of removing uncommitted changes in Git.

