In the beginning, when you start work on Git, you come across a common situation where it is required to change or create new branches. At that time, it can be confusing to understand how to create new branches or switch to previous branches. This operation can be performed using the “git switch” and “git checkout” commands; however, knowing the difference between these two is essential.
In this blog, we will differentiate git switch and checkout.
What is the Difference Between git switch and checkout Commands?
The “git checkout” command is the old command that was utilized to create and switch a new branch simultaneously in the current working repository and also switch to the recently active branches. This command undoes and restores the changes from a commit and allows the users to directly copy files from any commit or branch into their tree without navigating branches.
On the other hand, the “git switch” command is used only to create new branches, navigate to another branch, and switch to the current HEAD branch of the current working directory.
To understand the difference between the working of the git switch and the git checkout command, let’s check out the below-provided procedure.
How to Create and Switch Branch Using git checkout Command?
To create and switch branches utilizing the git checkout command, first, move to a specific directory, then execute the “$ git checkout -b <branch>”.
Let’s follow the below-provided procedure for this specific purpose!
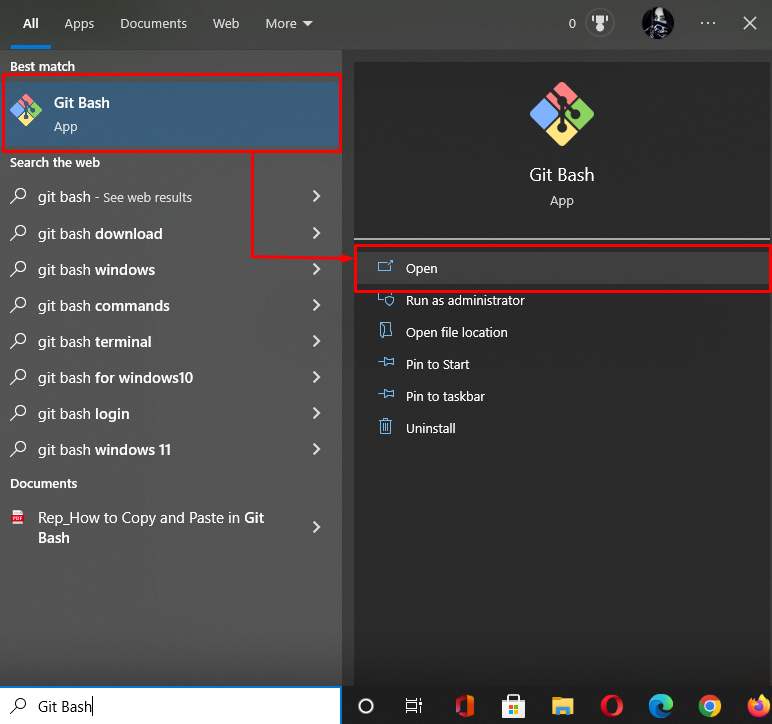
Step 1: Launch Git Bash
Search and launch the Git terminal using the “Startup” menu:
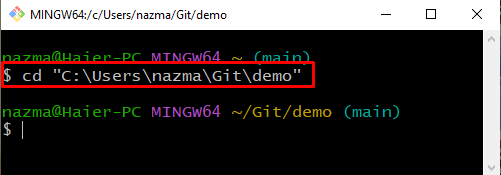
Step 2: Navigate to Git Directory
Navigate to the Git directory using the “cd” command:
Step 3: Execute git checkout Command
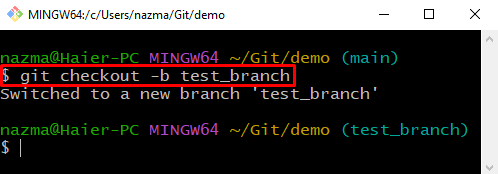
Execute the “git checkout” command with the “-b” flag which indicates the branch:
As you can see, we have successfully created and switched to the new branch:
How to Switch Branch Using git checkout Command?
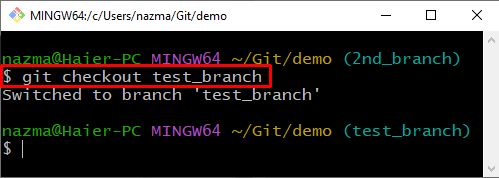
If you are working on one branch and want to switch to another branch that already exists in the Git directory, then execute the “git checkout” command without the “-b” flag as provided below.
Here, “test_branch” is our existing branch name:
Below output indicates that we have successfully switched to the existing branch:
Let’s move to the below section to understand the usage of the “switch” command.
How to Create and Switch Branch Using git switch Command?
If you are required to create and switch to the branch directly, then utilize the “git switch” command as follows.
Step 1: Navigate to Git Directory
Execute the “cd” command to move to the specific Git directory:
Step 2: Execute git switch Command
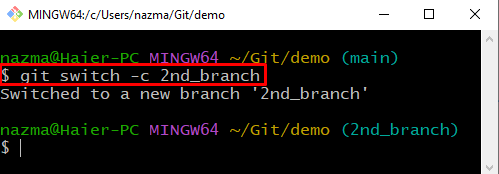
Now, create and switch to the new branch utilizing the “git switch” command:
Here, the “-c” flag is used to create a new branch. As you can see, we have successfully created and switched to the new branch simultaneously:
How to Switch Branch Using git switch Command?
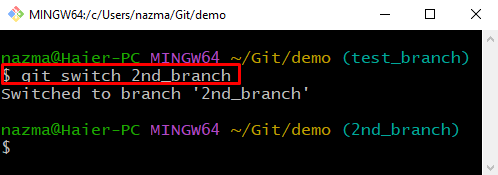
If you want to switch to the existing branch, then execute the “git switch” command with the “-c” flag. Let’s run the below-provided command:
As you can see, we have successfully switched from the “test_branch“ branch to the “2nd_branch” branch:
We have elaborated the difference between git switch and checkout commands.
Conclusion
The git checkout command creates, switches branches, restores, and undo the changes from a commit, and allows the users to directly copy files from any commit into their tree without navigating branches. On the other hand, the git switch command is used only to create new branches, navigate branches, and switch to the current HEAD branch of the current working directory. In this blog, we have illustrated the difference between git switch and checkout commands.

