This write-up will discuss the approach that must be followed to start programming in Java.
Pre-requisites
The fundamental requirement to start programming in Java is to have the most recent version of Java with JDK (Java Development Kit) and JRE (Java Runtime Environment).
Download and Install Java and its Components
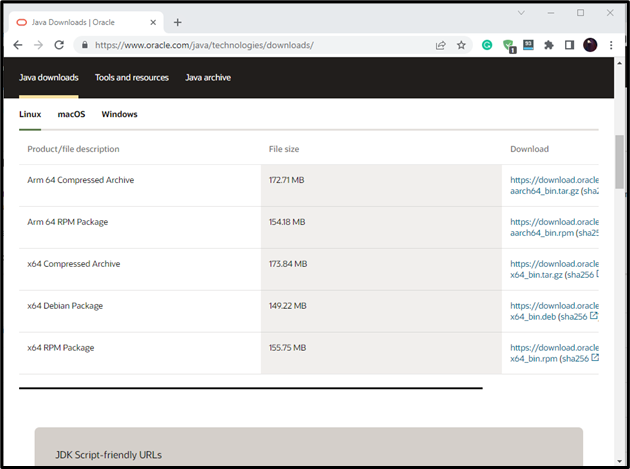
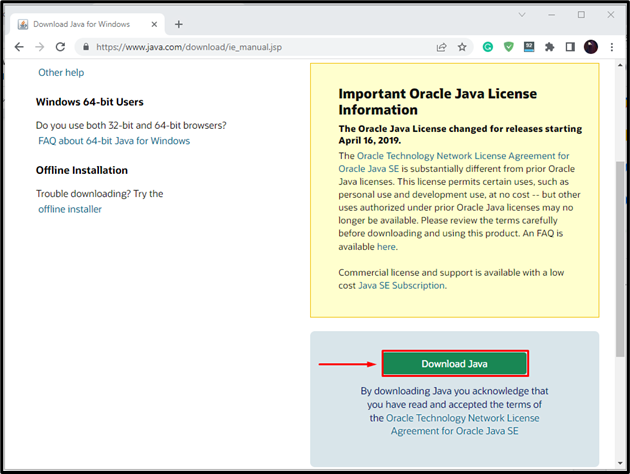
First, download the latest version of Java by visiting the official website. Then, click on the “Download Java” button and follow the given instructions for its installation:
There are two other components of Java: “Java Runtime Environment” (JRE) and the “Java Development Kit” (JDK).
JRE is a basic component of Java that comes pre-installed with Java. JRE comprises the Java Virtual Machine (JVM) and other components required for executing Java applications. The code is compiled into bytecode that the computer can understand using JRE.
In contrast, the Java Development Kit (JDK) is a tool that permits you to write Java code from your desktop. It includes several tools that are quite useful for writing, optimizing, and running Java code. It can be utilized in collaboration with other tools such as Eclipse to make coding easier.
Therefore, you must first download and install the JDK on your computer before using it:
How to Start Your First Java Program?
To write a Java program, you must install an IDE (Integrated Development Environment) on your system. It provides an environment to build a project, write code, compile it, and debug it.
There are several Java IDEs available such as Android Studio, Eclipse, and NetBeans. In our case, we have selected Eclipse.
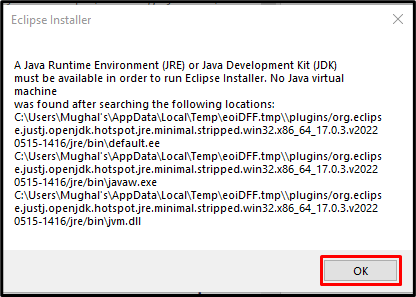
Note: Make sure that you have JDK and JRE installed before installing Eclipse; otherwise, the Eclipse installer will show you the following error:
Now, follow the below-given instructions to start programming in Java using Eclipse.
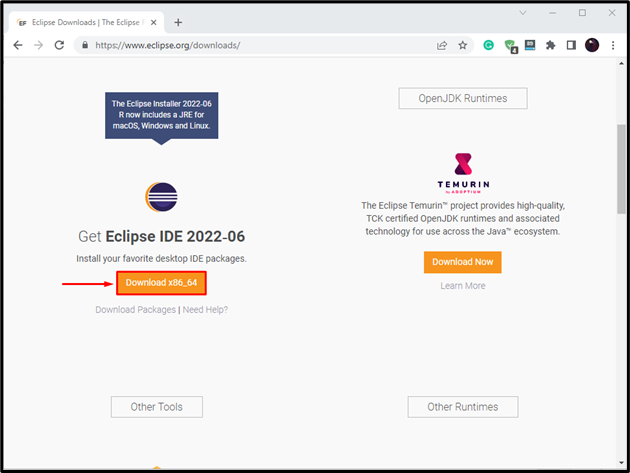
Step 1: Download Eclipse
Firstly, download Eclipse by visiting its official website:
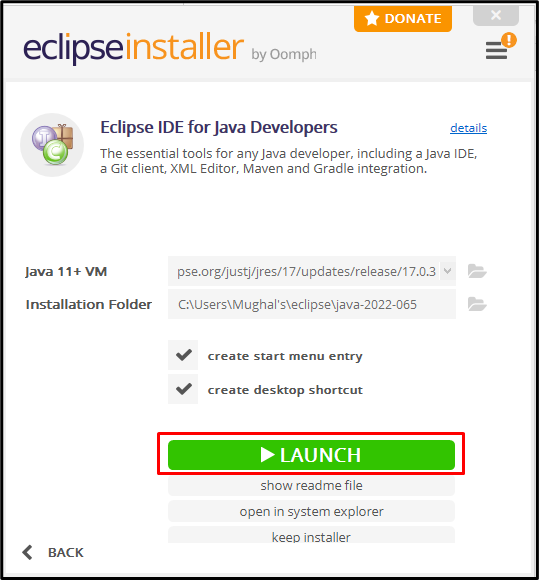
Step 2: Launch Eclipse Installer
Now, launch the downloaded “Eclipse Installer”:
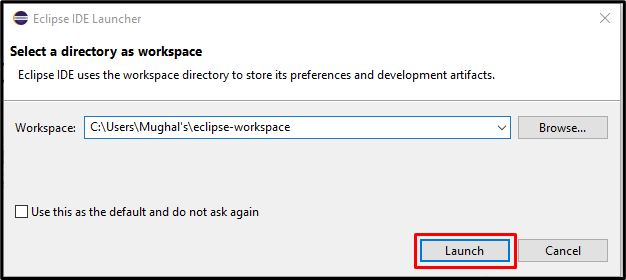
Step 3: Select Workspace Directory
Select a directory as a workspace or browse for a new location and click on the “Launch” button:
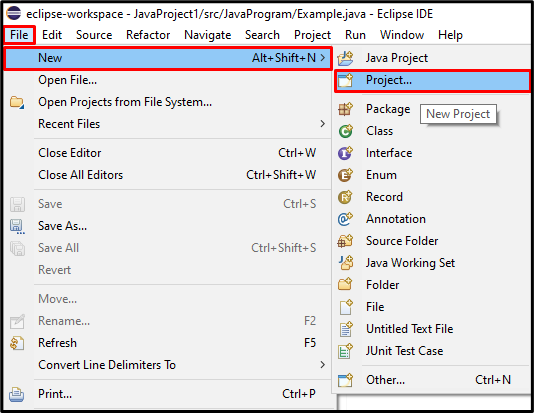
Step 4: Create New Project
Create a new project with the help of the “File” menu and navigate to the “New> Project” option:
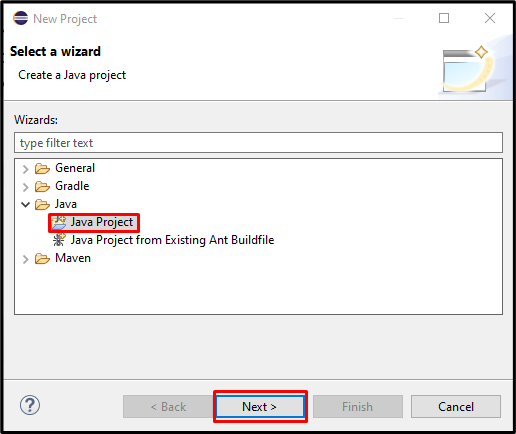
Step 5: Select a Wizard
Select a Java Project from the Java folder and click “Next>”:
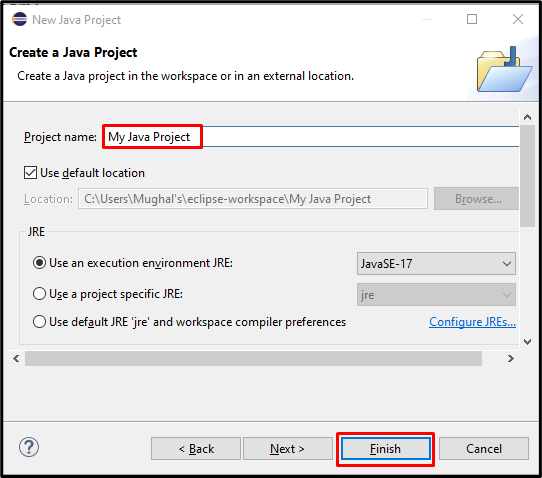
Step 6: Create a Java Project
Name your Java project, select a “JRE”, and hit the “Finish” button:
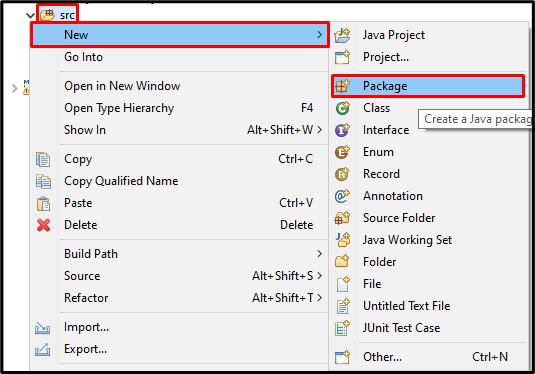
Step 7: Create a Java Package
Create a new Java package by right-clicking on the “src” folder of your project and move to “New> Package” option:
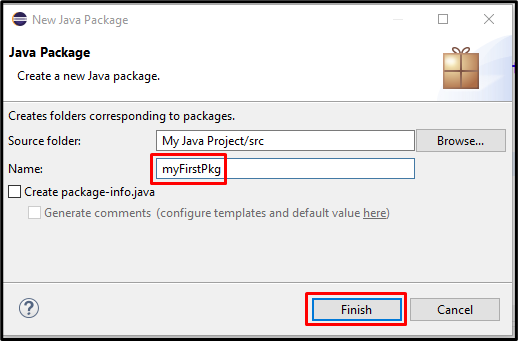
Specify the name for the Java package and click “Finish”:
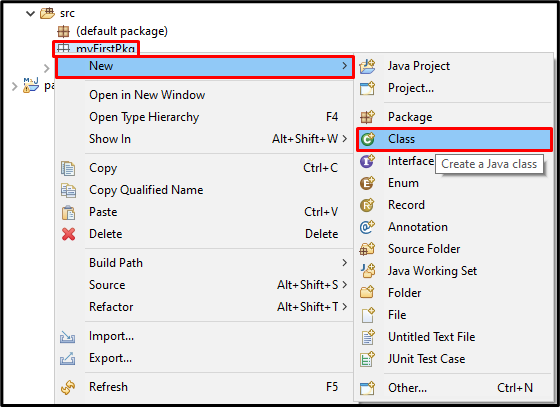
Step 8: Create a Java Class
Right-click on the newly created package name “myFirstPkg” and select the “Class” option from the “New” option’s menu:
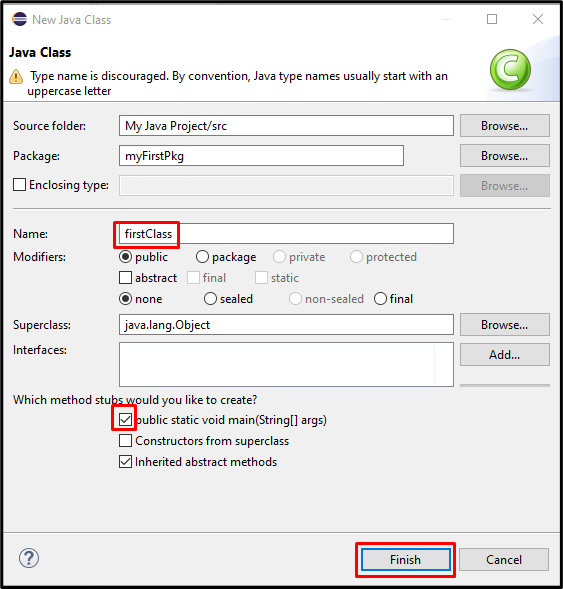
Set the name of the class and make sure to mark the checkbox “public static void main(String[] args)” and click on the “Finish” button. This operation will automatically create the main() method in the newly created Java class:
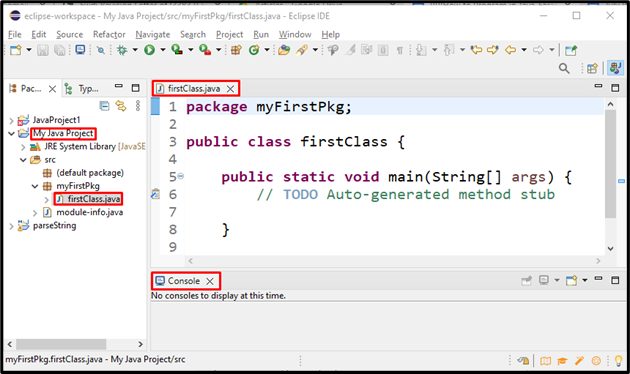
The process is completed, and we have a project named “MyJavaProject” with the package “myFirstPkg” and the class named “firstClass”:
Step 9: Write Java Program
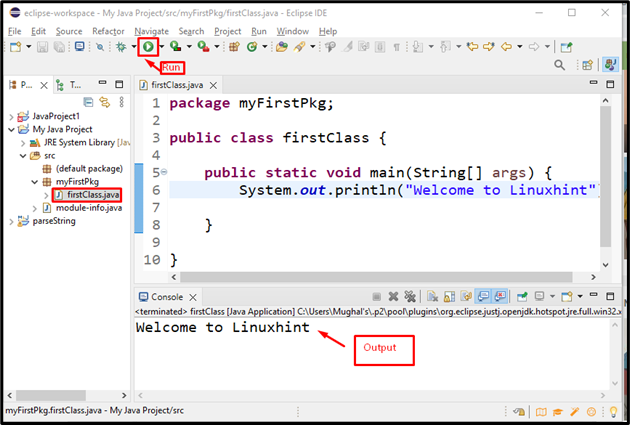
Now, we are all ready to write a Java program. To do so, simply add the following “System.out.println()” method in the main() method of the created “firstClass”:
Step 10: Run Java Program
Run the Java program by clicking the highlighted “Run” button or pressing the “Ctrl+F11” keyboard shortcut. After doing so, the output will be displayed on the console window:
We have offered all important information related to writing a Java program.
Conclusion
To program in Java, firstly, install an IDE (Integrated Development Environment) such as Eclipse, JRE (Java Runtime Environment), and the JDK (Java Development Kit) on your system. After installing all the basic components, create a Java project, add a package, and write a program. To run the Java program, click the Run button or utilize the Ctrl+F11 keyboard shortcut. In this write-up, we have discussed writing and executing a Java program.

