This blog will discover how to install, set up, and use a C Compiler on Windows.
How to Install C Compiler on Windows?
To install C Compiler on Windows, firstly install the “MinGW” installer on Windows. For this purpose, follow the listed steps.
Step 1: Download MinGW Setup File
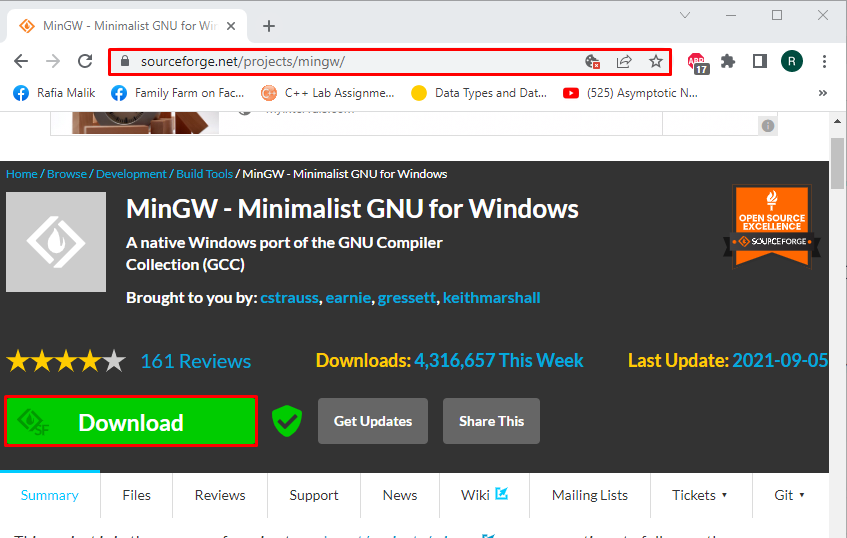
Navigate to the below-mentioned link and download the MinGW setup file:
Step 2: Execute MinGW Setup File
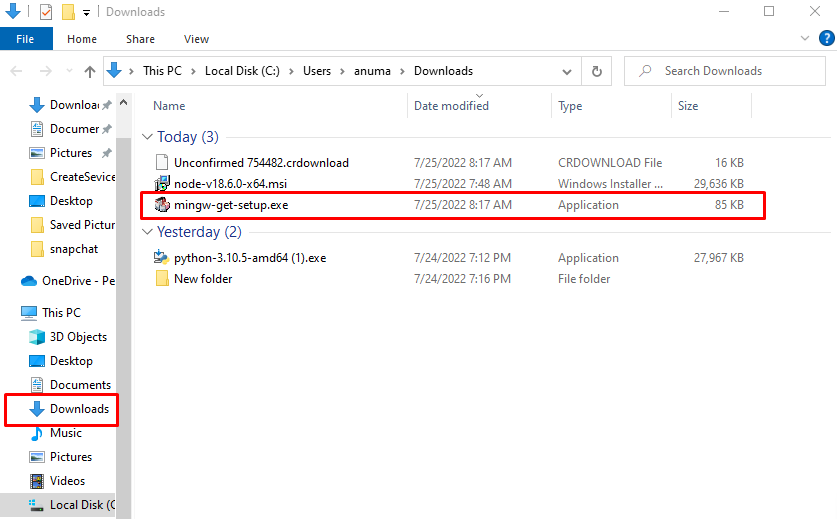
Go to the “Downloads” directory and double click on the “mingw-get-setup.exe” file to execute it:
Step 3: Install MinGW Installation Manager
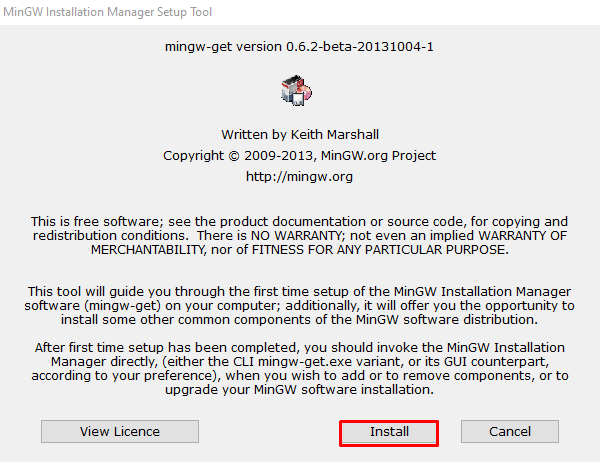
Upon doing so, the “MinGW Installation Manager Setup tool” wizard will appear on the screen. Press the “Install” button to start installation:
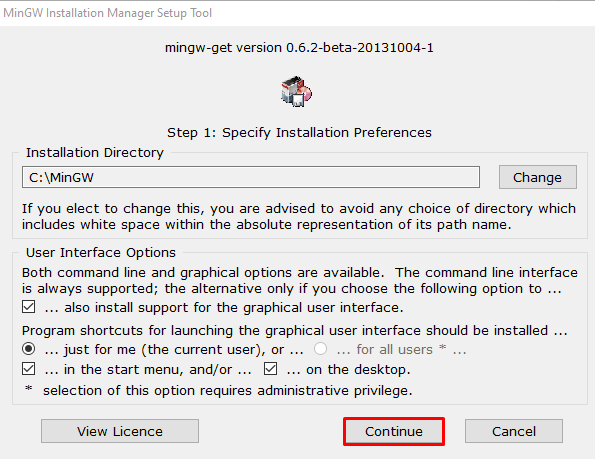
Go with the default path, and mark the below-provided checkboxes according to your preferences. Then, hit the “Continue” button:
Step 4: Install Additional Packages to Get C Compiler
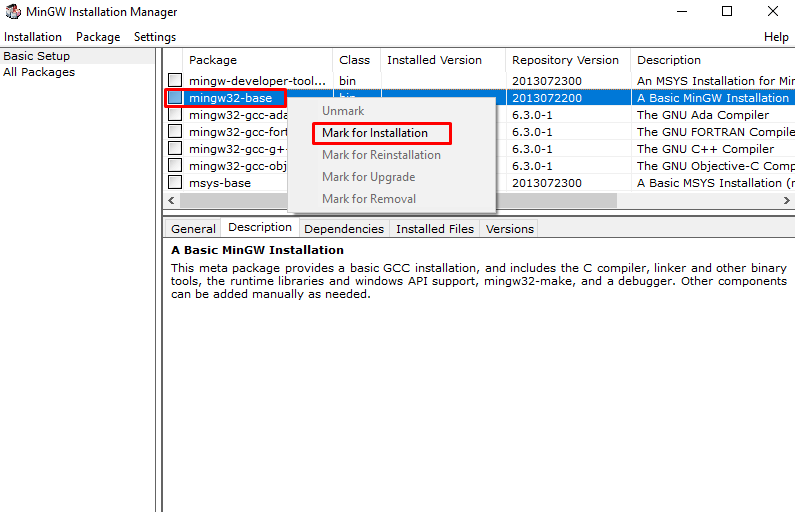
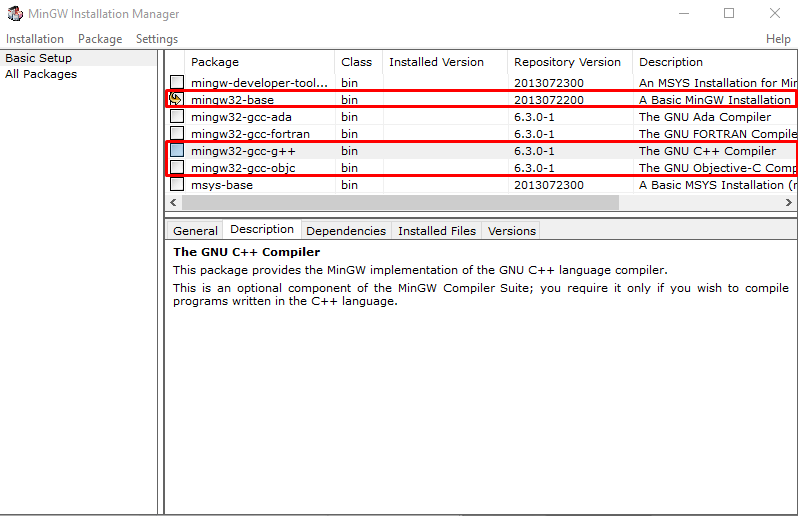
Select and right-click on the “mingw32-base” package and click on the “Mark for Installation” option to mark it for the installation:
Similarly, Mark the “mingw32-gcc-g++” and “mingw32-gcc-objc” packages. Here, the “mingw32-gcc-g++” is used to install the GNU C++ compiler, and the “mingw32-gcc-objc” will install the GNU Objective C compiler:
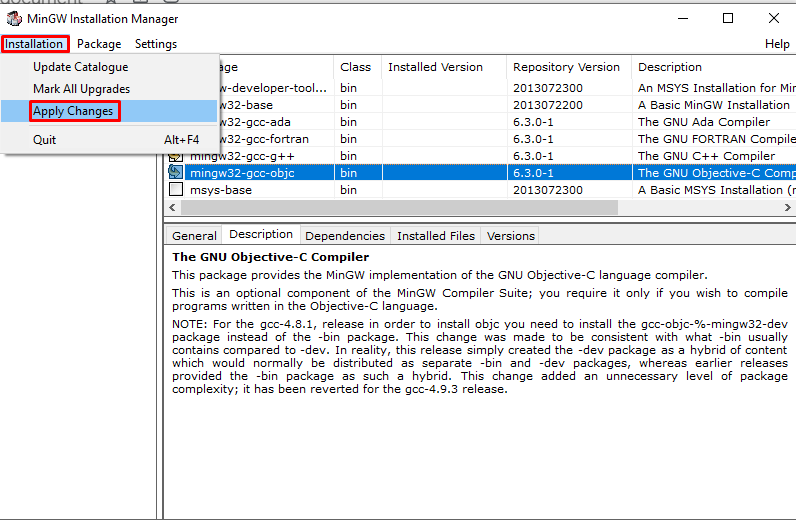
Then, go to the “Installation” menu, and select the “Apply Changes” option:
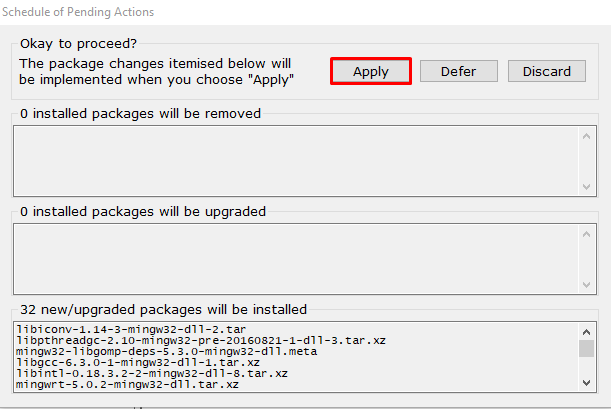
Hit the “Apply” button to start the installation of the selected packages:
Upon doing so, the installation of Marked packages will be started. After installation closes the MinGW Installation Manager:
Let’s move forward to check how to set up the C compiler on Windows.
How to Setup C Compiler on Windows?
To set up a C compiler on Windows using PATH environment variables, follow the below provided steps.
Step 1: Open Command Prompt
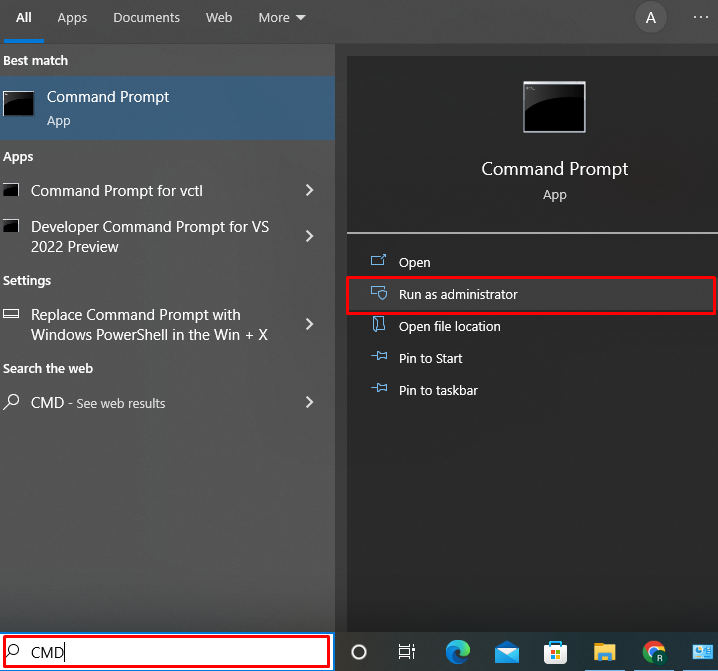
First, search for “CMD” in the “Startup” menu and run the Command Prompt as administrator:
Step 2: Set PATH Environment Variable
Utilize the below-provided command to set a PATH environment variable. By default, the packages and C Compiler setup files will be stored in the “C:\MinGW\bin” location:
Step 3: Verify C Compiler Installation
Verify the C Compiler installation by checking out GCC version:
The given output indicates that we have successfully installed GCC version “6.3.0” on our system:
Let’s head toward the usage of C Compiler.
How to Use a C Compiler on Windows?
To use the C compiler on Windows, follow the instructions given below.
Step 1: Create a C program
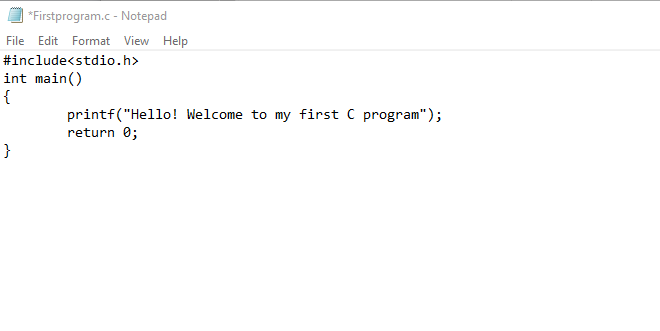
Create a new text document file and replace the file “.txt” extension with “.c”. Upon doing so, the rename alert box will appear on the screen. Hit the “Yes” button to save the file with the .c extension:
Paste the below-provided code into the file:
int main()
{
printf("Hello! Welcome to my first C program");
return 0;
}
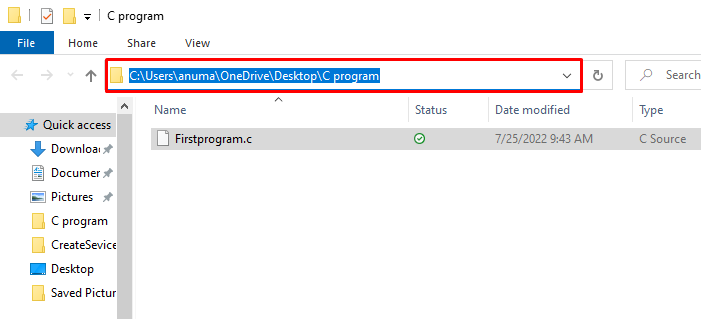
Copy the path where you have created the C program from the address bar:
Step 2: Open C Program Directory
Go to the Windows Command Prompt and move the directory where the C program is saved by using the “cd” command:
Step 3: Compile Program
Compile C program file using GNU C compiler:
When we have compiled our C program. As a result of the previous command, an “a.exe” file will be created. Run “a” on the command prompt to get the output:
The given output indicates that our C program is successfully executed on the system:
We have effectively elaborated the method to install, set up, and use the GNU C compiler on Windows.
Conclusion
To install C Compiler in Windows, you can use the MinGW installer manager. For this purpose, first, download the “mingw32-get-setup.exe” file from the provided link. Then, install the GNU C compiler by installing “mingw32-gcc-g++” and “mingw32-gcc-objc” additional packages using the MinGW installer manager. In this blog, we have elaborated on the way to install, set up, and use the GNU C compiler on Windows.

