Changing Color Saturation Using “vibrant-cli” Command Line Utility
Vibrant-cli is a free and open source command line tool that can be used to change the vibrance of Linux displays using a software based solution. It is based on the “libvibrant” library, also developed by the creators of vibrant-cli utility. The libvibrant library can be used to develop third party command line and graphical apps while vibrant-cli can be used as a standalone command line application in any Linux distribution.
To install vibrant-cli in Ubuntu, you will have to install certain dependencies from the package manager and then compile source code from its GitHub page. Complete instruction set for compiling it from source code can be found here.
If you are using Arch Linux or any other Arch Linux based distribution, you can install it from “Arch Linux User Repository (AUR)” by following instructions available here.
Once you have installed vibrant-cli in your Linux system, run a command in the following format:
You need to replace <display_id> with a unique identifier assigned to the display connected to your Linux system. You can find display identifier by running the command below:
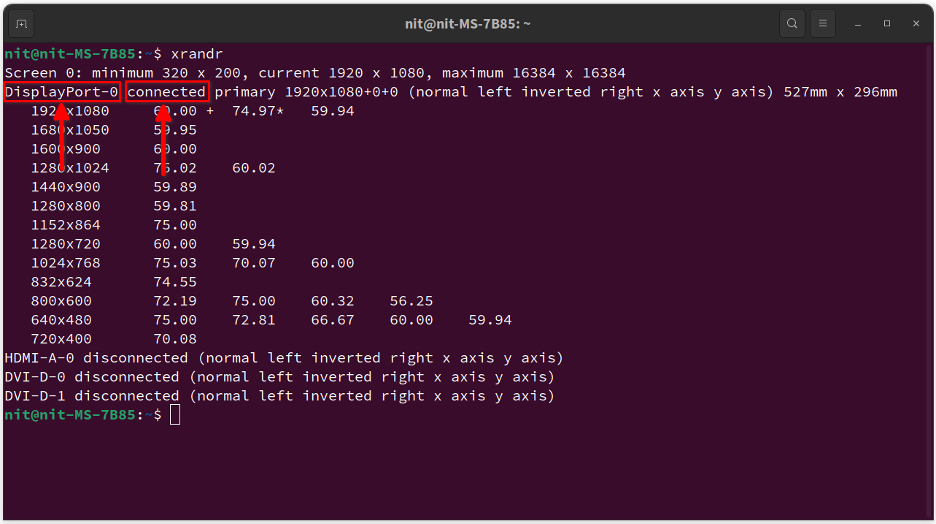
You will get some output similar to this:
Look for the line with the word “connected”. The preceding word is the identifier for the connected display. So in this case, the identifier is “DisplayPort-0”. This identifier is different for different displays, including multi-monitor setups, so make sure that you correctly note the identifier for the display whose vibrancy you want to change.
Now run a command in the following format, replacing <numerical_value> with a value between 0.0 and 4.0. Here is an example:
If you set a value of 0.0, your display will turn greyscale. A value of 4.0 will show highly saturated colors. You can revert to normal color saturation by setting a value to 1.0.
Changing Color Saturation Using “vibrantLinux” Graphical Application
A graphical application called “vibrantLinux” allows you to change display vibrancy using a nice graphical interface. It is based on the libvibrant library mentioned above and allows you to configure vibrancy for individual applications and games.
You can compile vibrantLinux source code from its GitHub page. Alternatively, you can install it from the Flathub store. The flatpak package works on all major Linux distributions including Ubuntu.
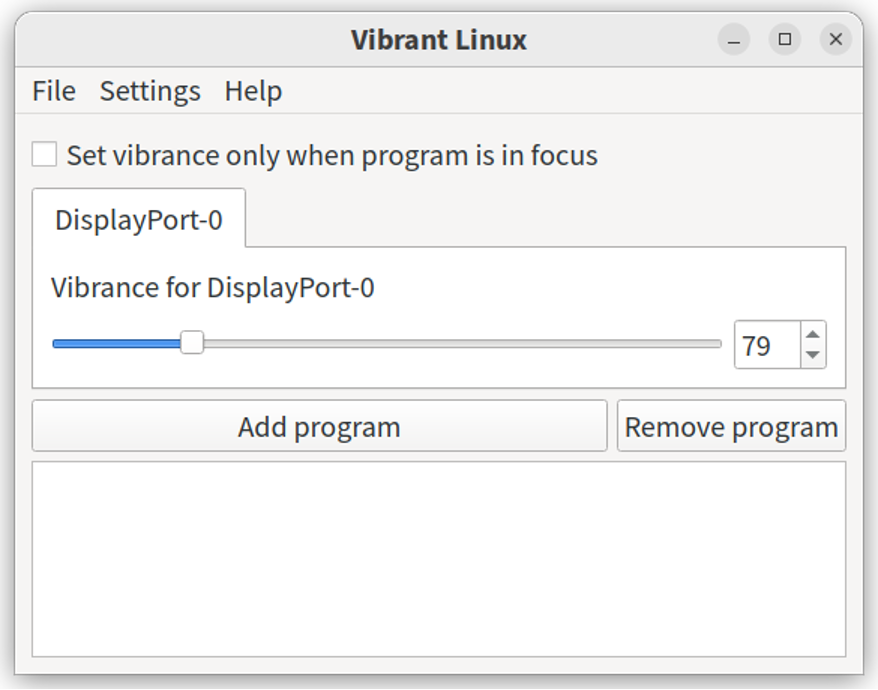
Once installed, launch the “Vibrant Linux” app from the application menu. You will see a new window similar to this:
You can use the slider to set a vibrance value between 0 and 400. A value of 0 makes the display grayscale while a value of 400 makes the display overly saturated. A value of 100 sets normal levels of color saturation.
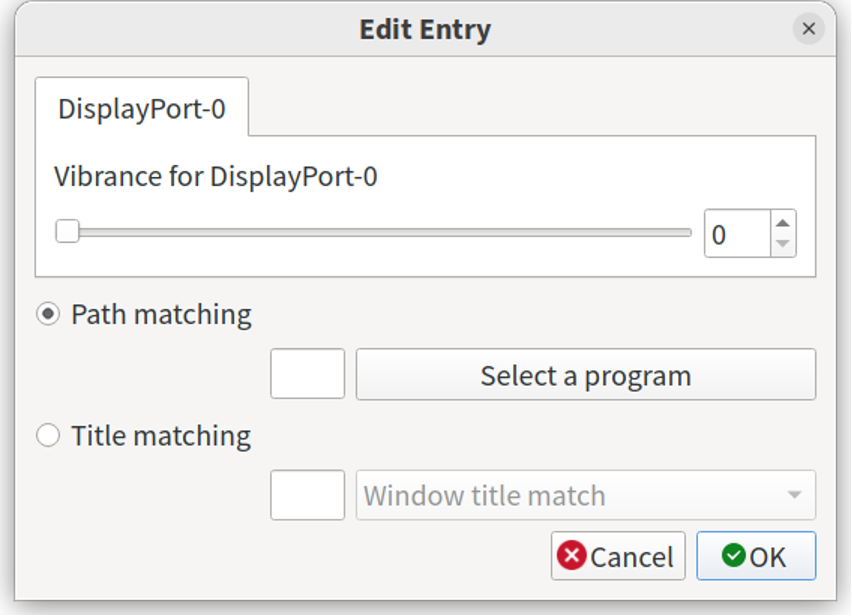
The “Add program” button shown above allows you to set the vibrance level for individual apps and games without applying a system wide color saturation level. When you click on this button, a new window pops up where you can select the executable binary of an application or set a name based rule to match the title of an app.
Now whenever a new application (for which a rule has been added) is launched on Linux desktop, the vibrantLinux app will automatically set the predefined saturation level (for the launched application only). This gives you finer control over the saturation level of individual applications and games.
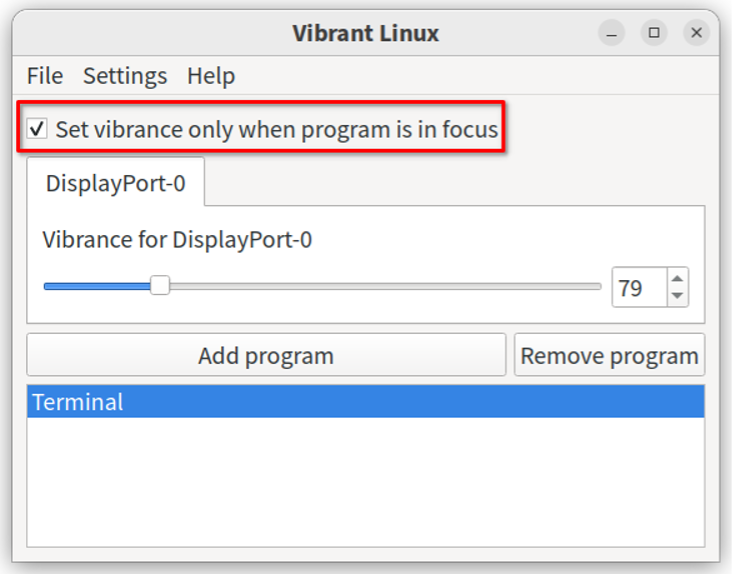
There is another setting that allows you to further control automatic application of color saturation. By clicking on “Set vibrance only when program is in focus”, you can choose to apply vibrance on focused applications only, ignoring minimized and background applications.
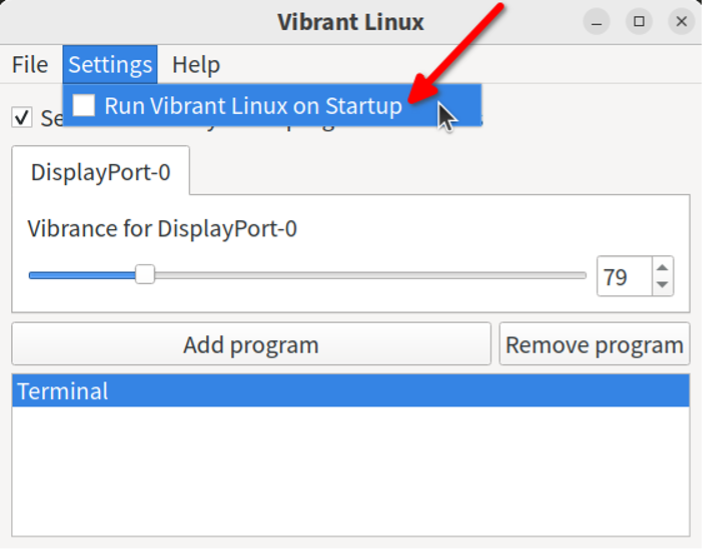
Finally, you can use a setting to automatically start vibrantLinux at boot up. To do so, click on Settings > Run Vibrant Linux on Startup menu entry.
Note that when you close the vibrantLinux app, it will continue to work in the background until you launch it again to make new changes.
Conclusion
Vibrant-cli and vibrantLinux apps allow users to easily control the color saturation level of their Linux display. Usually, this is done through applying custom color profiles and may require display calibration to get accurate results. However, these apps make it easy to set vibrancy levels without manually setting system wide color profiles.

