Installation
Jenkins can be installed on Ubuntu 20.04 by adding the repository keys to the system, but before that, we must have Java Development Kit installed first. Let’s install the OpenJDK by the open-source community of Java if it is not installed on your Ubuntu 20.04 system yet.
Install Open Java Development Kit
The latest stable version of OpenJDK can be installed from the official Ubuntu package repository. At the time of writing this post, the latest stable version of the Open Java Development kit was OpenJDK 11.
First, update the system’s APT cache repository:
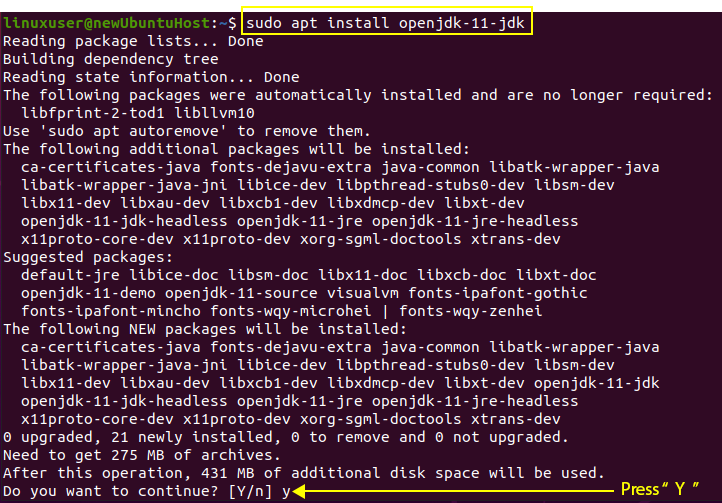
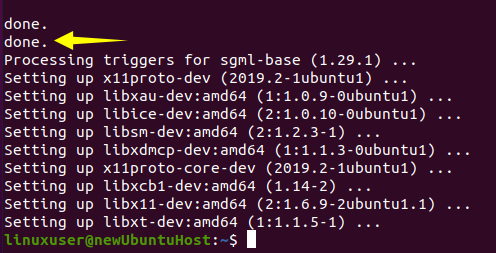
Type the command given below to install OpenJDK 11:
If it asks for taking additional disk space, type “y” and hit “Enter”.
After the completion of the installation process, the version of Java can be verified by typing the given command below:
You can witness that version 11.0.9.1 is successfully installed on Ubuntu 20.04 system. Now, we can move to the installation of Jenkins.
Installation of Jenkins on Ubuntu 20.04
Jenkins can easily be installed on Ubuntu by importing and adding the GPG keys to the system.
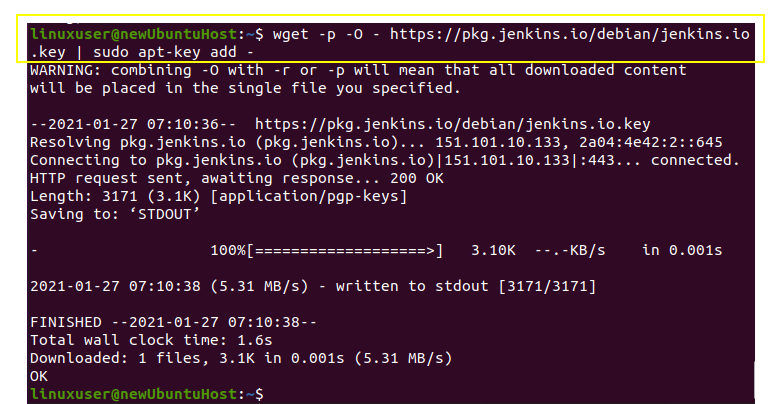
Now you got to add GPG keys:
After adding GPG keys, add the Jenkins package address to the sources list by typing the command given below:
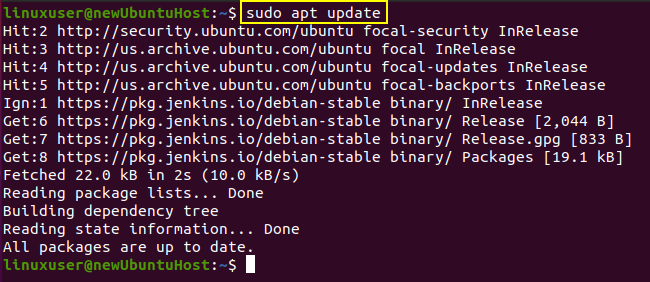
After enabling the Jenkins repository, simply update the system’s APT cache once.
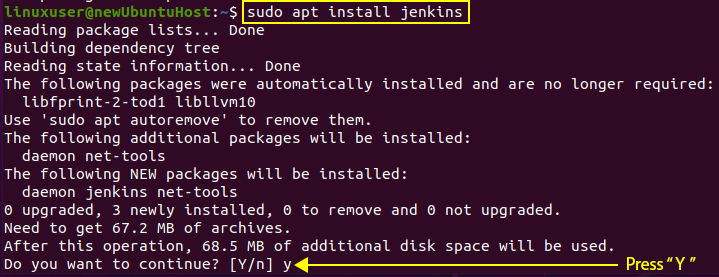
Let’s move forward and do the real work of installing Jenkins.
Type in the required “y” and continue the installation process by pressing the “Enter” key.
The Jenkins is installed successfully. Let’s start and configure the Jenkins server.
Start the Jenkins Server
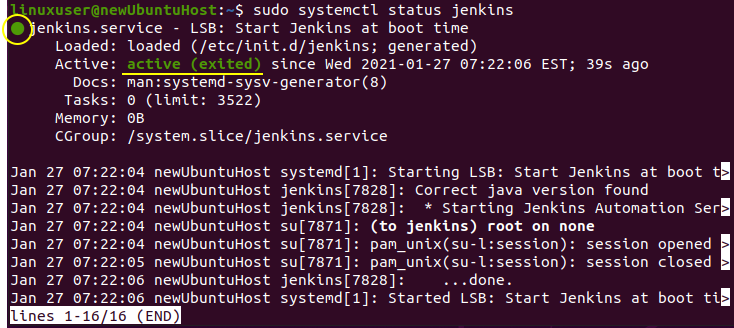
The Jenkins service should automatically start on the installation of Jenkins. To verify the status of Jenkins service, type the below command.
It is active in my case but if it is not in your case, then start by typing the command given below:
After checking and starting the service, let’s adjust the firewall.
Configure the Firewall for the Jenkins Server
Now, in order to configure the firewall for the Jenkins server using the UFW tool, we need to enable the firewall and open port 8080 for remote access from anywhere. Simply type the command below:
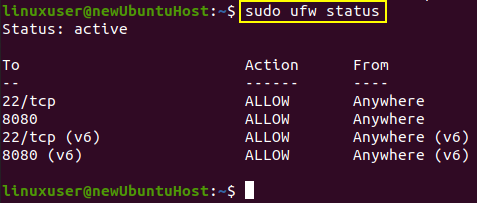
And check the status of UFW by typing the command given below:
If the status is inactive, then enable it by typing the command given below:
Now, recheck the status of UFW.
You can witness that port 8080 is allowed.
Set Up Jenkins
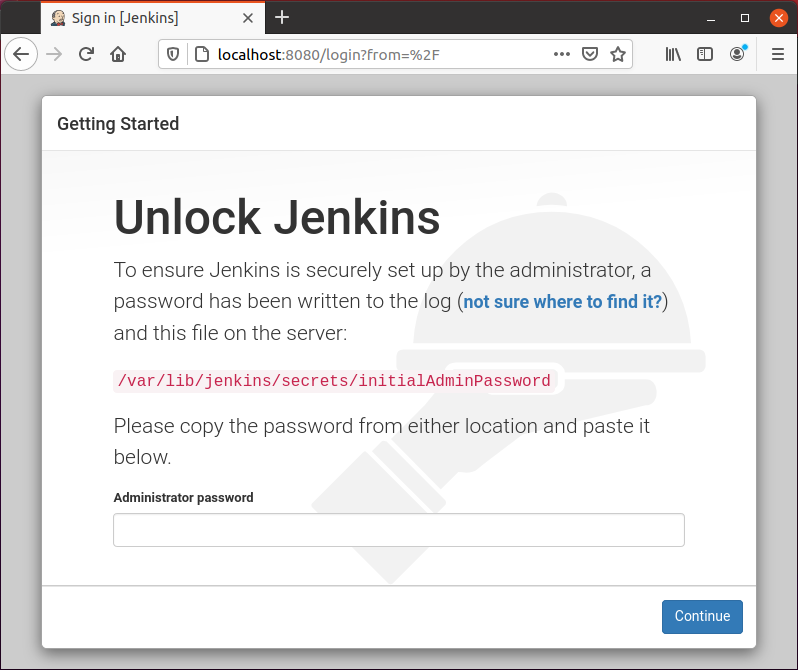
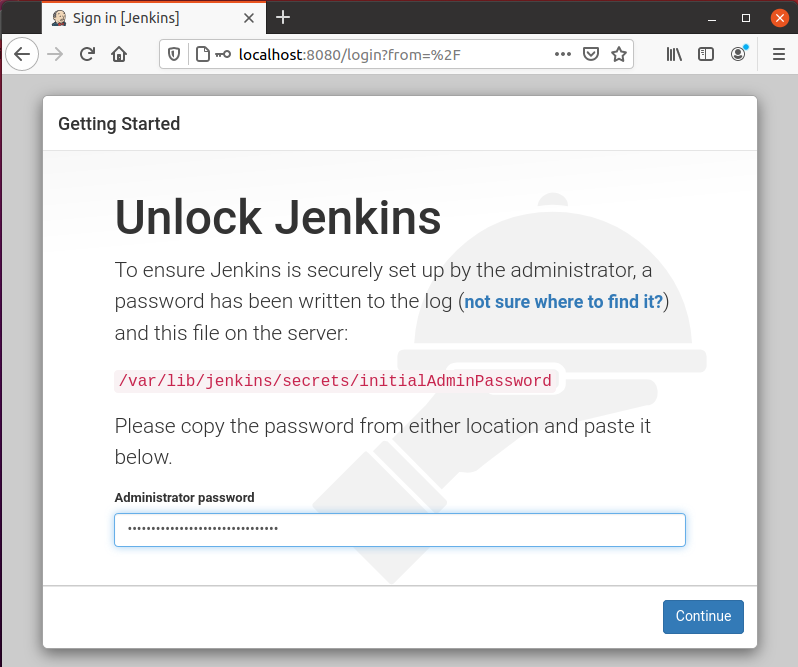
To set up Jenkins, type your domain name or IP address along with port 8080 in the browser’s address bar, and you should have the Unlock Jenkins page asking for a password, like the shown picture below.
You can get the password from the given location using the cat command in the terminal. The command for getting the password would be like this:
This command will print the password straight out and you can copy and paste it into the password field on the Jenkins Unlock screen and click on the “Continue” button.
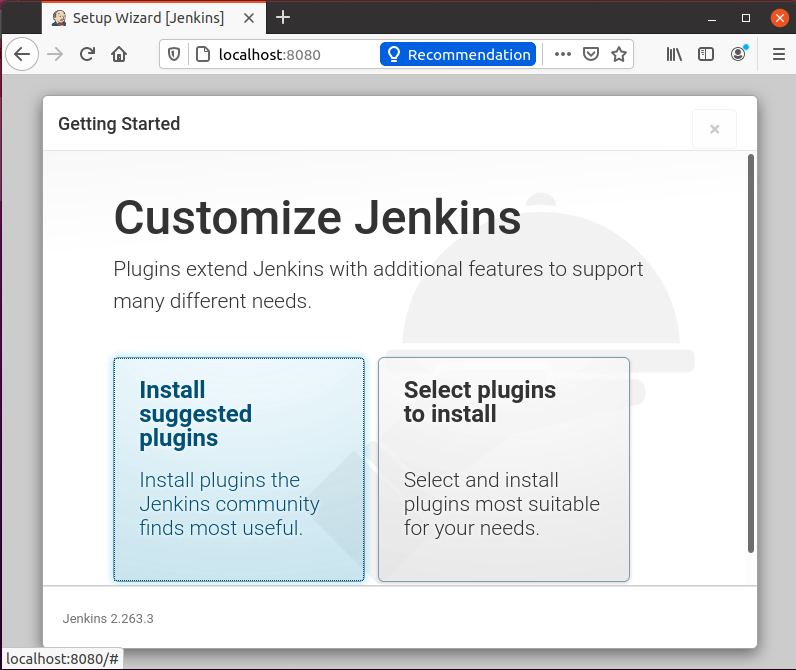
It will navigate you to the next screen where it will ask for either “install the suggested plugins” or “select the plugins of your choice”.
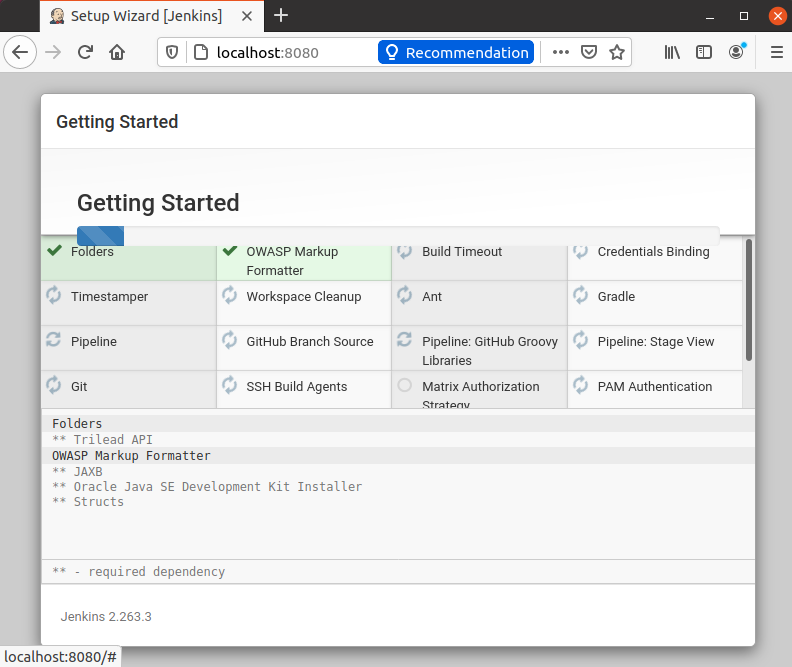
Select the “Install suggested plugins”. On the click, it will start installing the default plugins.
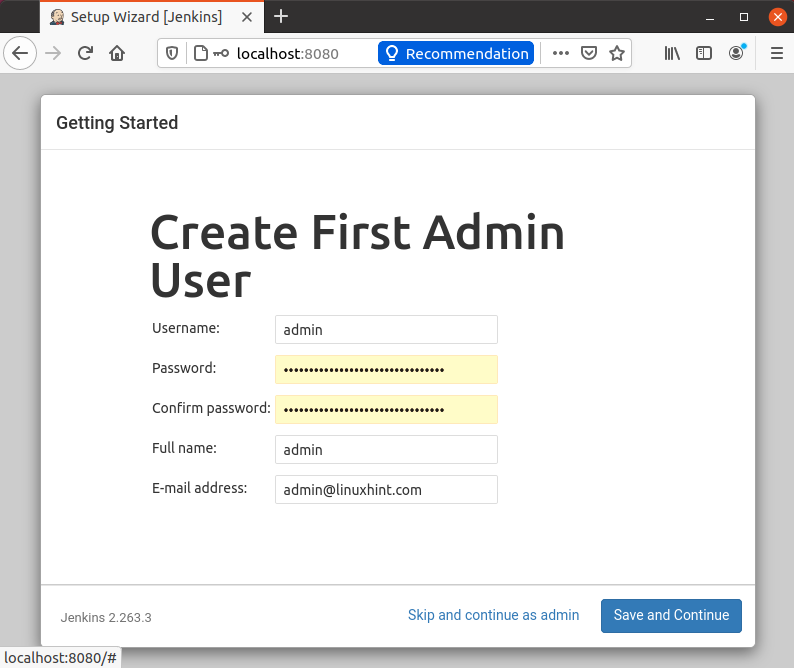
After the successful installation of plugins, it will ask for the setting of the admin user’s user name, password, and email address.
Provide the required input fields and hit the “Save and Continue” button.
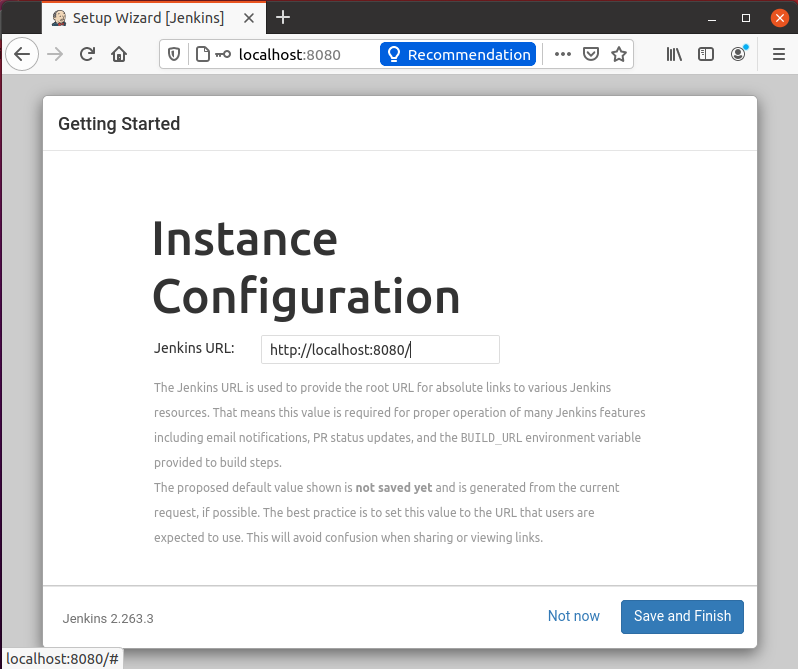
Next, it will navigate you to a page for configuring the Jenkins URL.
For now, go with the default auto-generated URL and click on the “Save and Finish” button in the bottom right corner.
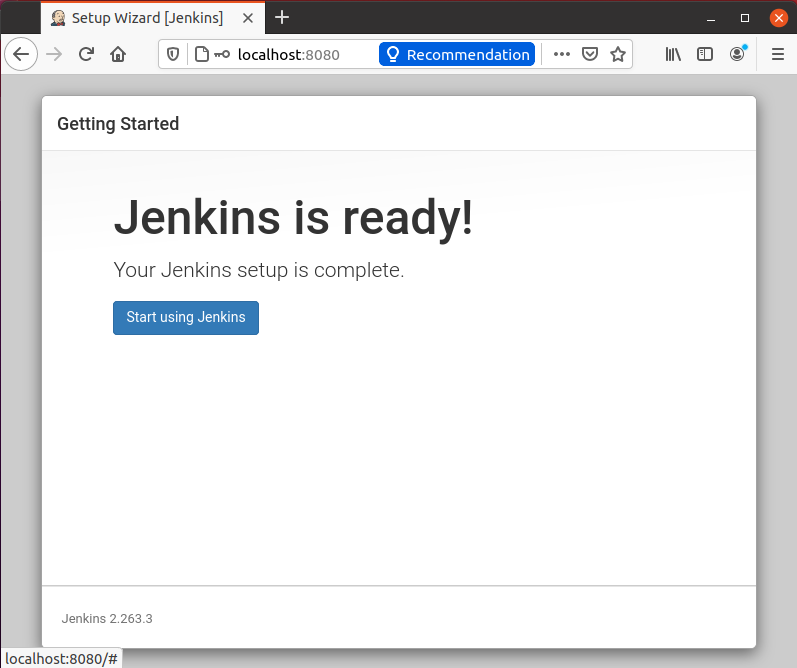
On the completion of the Jenkins setup, you can have the screen with the success message “Jenkins is ready!”, as shown below.
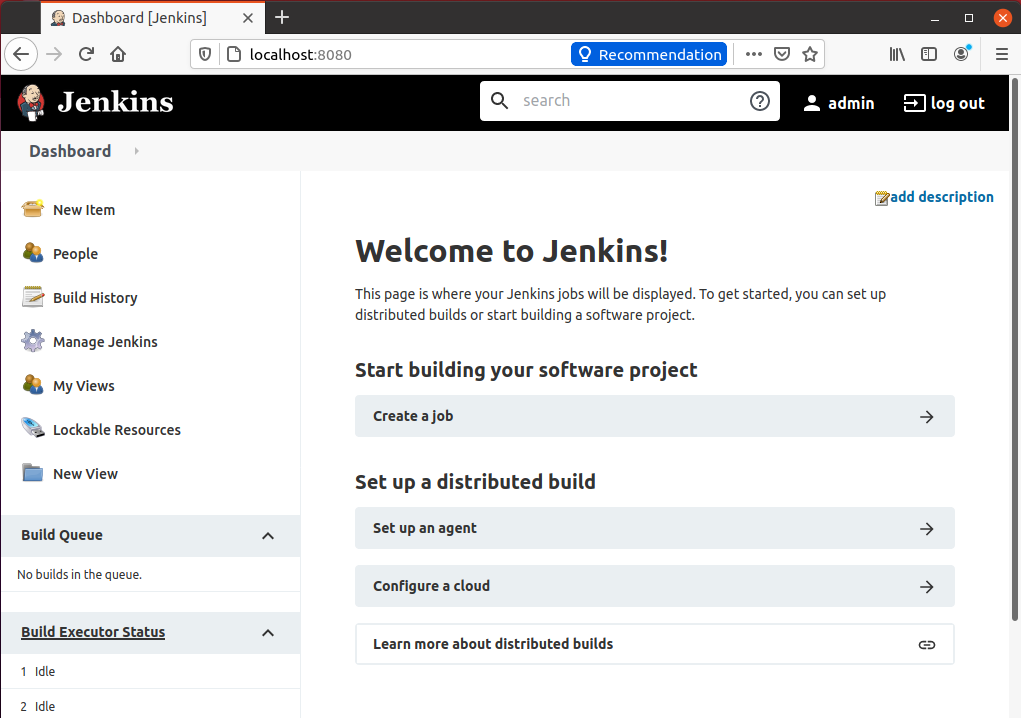
Hit the “Start using Jenkins” button, and on the next page, you will have a clean look at the dashboard.
And this is how we come to the end of installing and setting up Jenkins on the Ubuntu 20.04 LTS system.
Conclusion
In this post, we have covered the installation of OpenJDK 11 and Jenkins on the Ubuntu 20.04 LTS system. We have also covered the firewall configuration for Jenkins and learned how to set it up for the first time. After reading this post, any beginner can install and start using the Jenkins on Ubuntu 20.04. If you want to learn, explore, or dig deeper into the Jenkins, feel free to visit and read the official documentation of Jenkins.


