One of the methods of seeing the script history is to have software that can copy all the typed material in a text file. After copying the script history, you can look at the parts of the scripts you want to look at and locate the mistake you thought you made.
tmux is a command terminal multiplexer that allows you to open multiple command prompts at the same time. You can run different tasks on different tmux windows and panes. This allows you to save time, be flexible, and improve your productivity.
Another advantage of using tmux is that it has a built-in feature of capturing all the script and commands history. You can download all the types of things in all the tmux panes and save them in a text file.
If you are using tmux and are wondering how to use the tmux capture history feature, you are at the right place. This article will guide you on the necessary steps and the commands that you can use to utilize the capture history feature.
Capture History Using Command Terminal
The first way of capturing history we will be discussing is through the Linux command terminal.
You can use the following command to store the contents of the current pane in a capture buffer. Capture buffers are locations in memory that store incoming data.
After saving the contents to the capture buffer, the next step is to save it in the ~/tmux.log file. This is the designated file where the information gets stored. This command can be used to save the capture buffer.
After finishing up, remember to delete the capture buffer.
Although you cannot capture the whole scrollback history of the panes, you can use the command terminal to save each pane continuously by executing the above-mentioned commands.
However, this can prove to be time-consuming.
Capture History Using tmux Commands
tmux has a specific command that can be used to capture the command and script history of all the panes. Unlike the commands previously mentioned, you can save an unlimited amount of script lines and history. The command that you can use for this purpose is:
The N in the command represents the number of previously written lines of code. This can be any number depending on how back you want to go. The default value for the command is 2000. The default value is assumed when the number N is not specified.
You can also save this command as an alias. An alias in the Linux terminal is a way to represent a command or a set of code. They essentially perform the same function as “functions” in traditional programming languages. You can save an alias using the following command:
After saving the alias, you can use it like this:
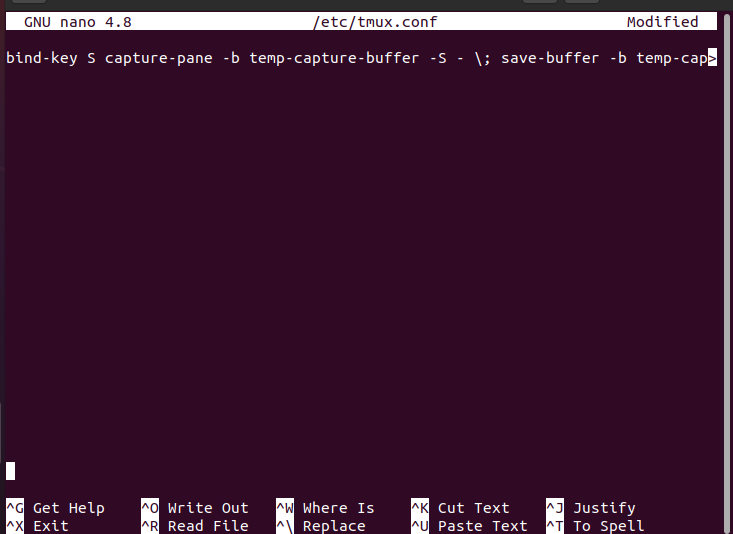
Another method you can use is to add these commands to the tmux configuration file.
After adding these commands, reload tmux to save and execute the changes you made.
So, these were the tmux commands to enable the capture history feature.
Capture History Using tmux Logging Plug-In
The third option you have is to use the “tmux Logging” plug-in available in the Github repositories. You need to install the plug-in first and then add the plug-in to the tmux configuration file. Follow these steps:
Open the command terminal.
Once opened, type in the following command:
This command will clone the plug-in to your system.
Next, add this line to the configuration file.
Lastly, reload tmux again to save and execute the changes you made.
Now, that you have added the plug-in, let’s take a look at the commands that you will use to capture history.
To capture the contents of the tmux screen, you need to press “Ctrl+b+Alt+p”. This will save the contents to the home directory in the form of text.
To capture the whole history of the work you have done in the session, press “Ctrl+b+Alt+Shift+P”. It will also save the contents to the home directory in the form of text.
To enable the logging function, you need to press “Ctrl+b+Shift+p”. This command will then save all the scripts you are typing in the terminal at that moment.
Conclusion
This was an article on how to save the scripts and commands written on the tmux pane and how to capture the whole history of the commands typed in. Capturing history can be important in certain situations and tmux allows you to save all the contents so you can go through them again. There are various methods of capturing history and they have all been mentioned above.


