What is Hostname?
The hostname indicates the device name over the network. Since it identifies the device name on the network, so it is not a better practice to have the same name over the same network. Normally, it is set during the Operating system’s installation process, but we can also change it to avoid name duplication.
In Ubuntu 20.04, the hostnames are stored in the “/etc/hostname” file, and only the root user or the user having the sudo privileges can alter these hostnames. So let’s start with the very first command for showing the current hostname in the terminal.
Show Present Hostname
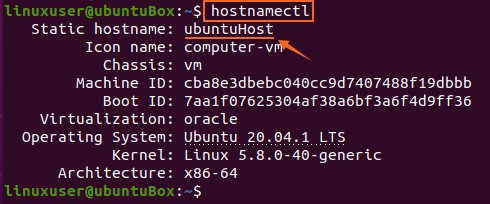
The present hostname can be printed out on the terminal by typing the terminal’s following simple command.
You can see in the screenshot above that the hostname of my Ubuntu system is ubuntuBox. Now let’s see how to change it.
Change the Hostname
We can change the hostname on Ubuntu 20.04 LTS system using two different methods.
Method 1:
The hostname can easily be changed by providing the new hostname to the hostnamectl command with sudo privileges by using the following syntax.
After running the command for changing the hostname, you can verify the new hostname by again typing the “hostnamectl” command.
You can witness in the screenshot that the hostname is updated successfully.
Method 2:
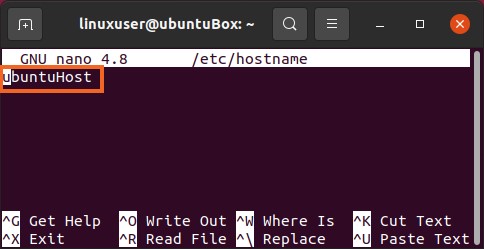
We can also change the hostname on Ubuntu by editing the “/etc/hostname” file by opening it in any text editor like nano. To open the “/etc/hostname” file in the nano editor, type the command given below.
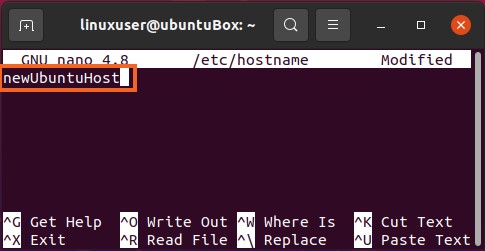
And now replace the old hostname with the new hostname of your choice.
After changing the hostname, save the file and exit using the shortcut keys(CTRL+S) and (CTRL+X).
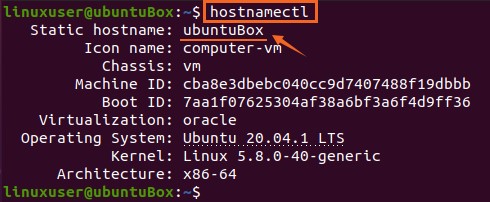
Now again, run the command “hostnamectl” to verify the newly assigned hostname.
You can see the newly provided hostname is changed successfully on Ubuntu 20.04.
If you close and reopen the terminal or open a new tab in the terminal, you can also see the changed hostname highlighted in the attached screenshot.
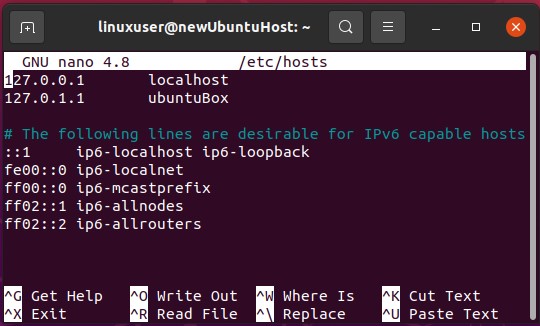
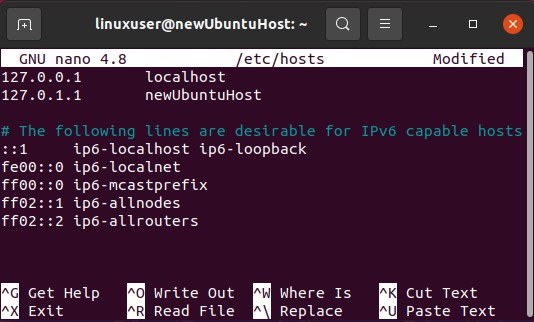
You have successfully changed the hostname, but you need to edit the “/etc/hosts” file and provide the new hostname there as well because the hostnames are mapped in this file.
Change the mapped hostname
Replace the old hostname with the new one you have just set for the device in the “/etc/hostname” file.
Once it is altered as well, Save it and exit from the nano text editor using the shortcut keys (CTRL+S) and (CTRL+X).
Now, you have successfully changed your hostname.
Conclusion
This article shows how to change the Ubuntu 20.04 LTS system’s hostname without even restarting your system.

