
This tutorial will provide you with some methods to secure the SSH server in Ubuntu 22.04.
Advanced methods to Secure the SSH Server in Ubuntu 22.04
To perform the SSH configuration, you will first need to check whether an SSH server is installed on your system. If it’s not, execute the following command to install it.

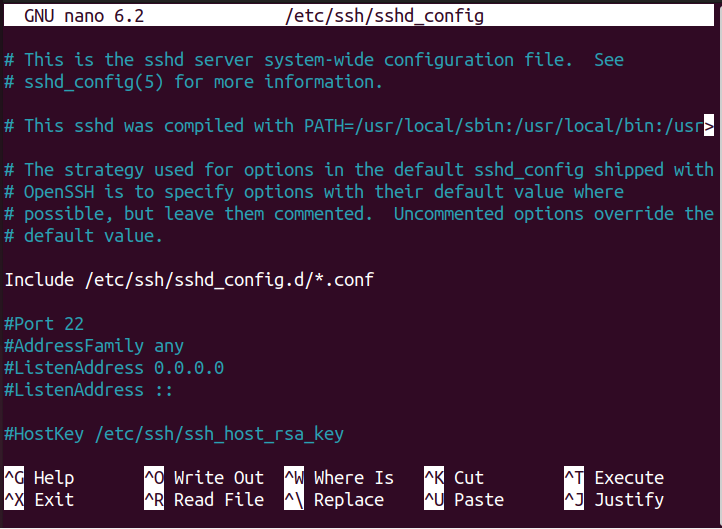
After the installation, open the SSH configuration file with the name “sshd_config” placed in the “/etc/ssh” directory.
However, before making any changes to this file, we highly recommend you create the configuration file backup using the following command.

After creating a backup file, you can then be able to edit the configuration file according to your wish, as in case you experience an error, you can then be able to replace it with the backup file.
After the backup, use the following steps to secure the SSH server on the Basic level.
Step 1: Open SSH configuration file
First, open the SSH configuration file using the following terminal command.
Step 2: Disable Password-Based Authentication
After opening the configuration file, you will need to disable password-based authentication for the SSH server. Scroll down and locate the line “PasswordAuthentication yes”. The reason to perform this step is that we will add SSH keys for login, which is more secure than password-based authentication.
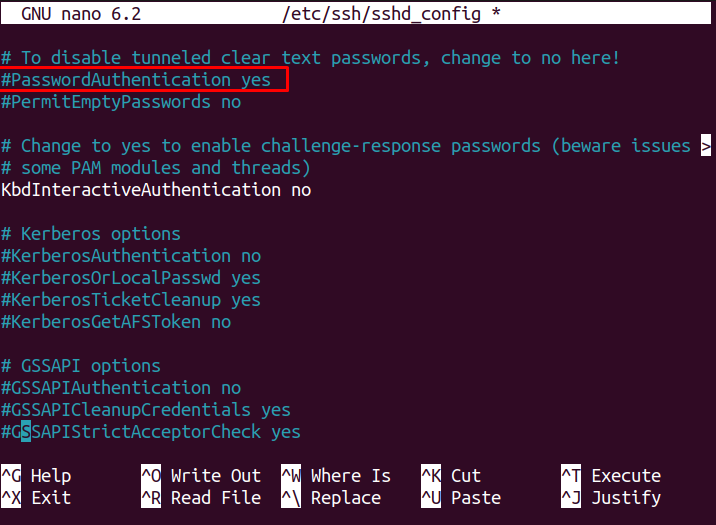
Uncomment the line as shown below and replace “yes” with “no” as shown below.
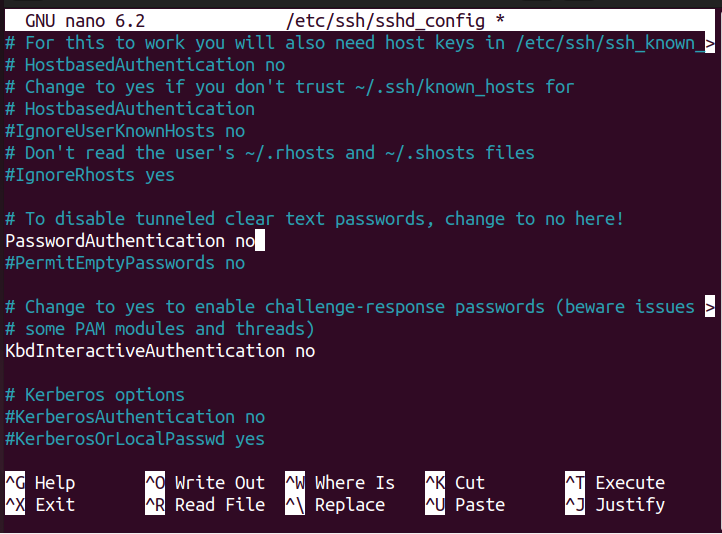
Now, save the file using the keys “Ctrl+X”, add “Y” and press Enter.
Step 3: Denying Empty Password
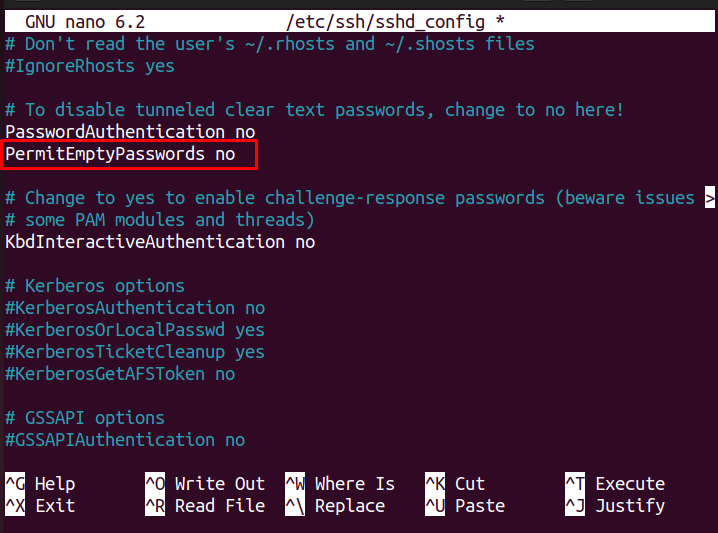
Sometimes, the users may find it convenient to use an empty password for authorized login, which puts the SSH security at high risk. Thus, to secure the SSH connection, you will require to deny all the login attempts with an empty password. To perform this step, locate the line “PermitEmptyPasswords” and uncomment it.
Step 4: Permitting Root Login
To make your SSH server more secure, you will need to deny root login access so that it will permit the intruder to access your server through root login. To do this, find the option “PermitRootLogin”.
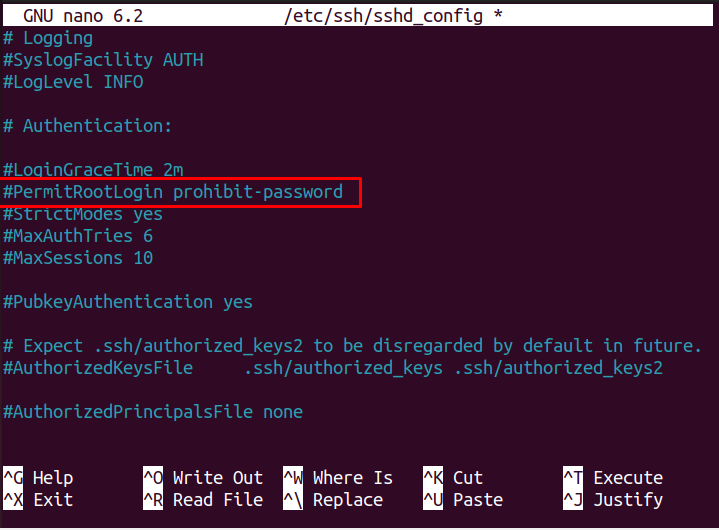
Uncomment the line and replace the text “prohibit-password” with “no”.
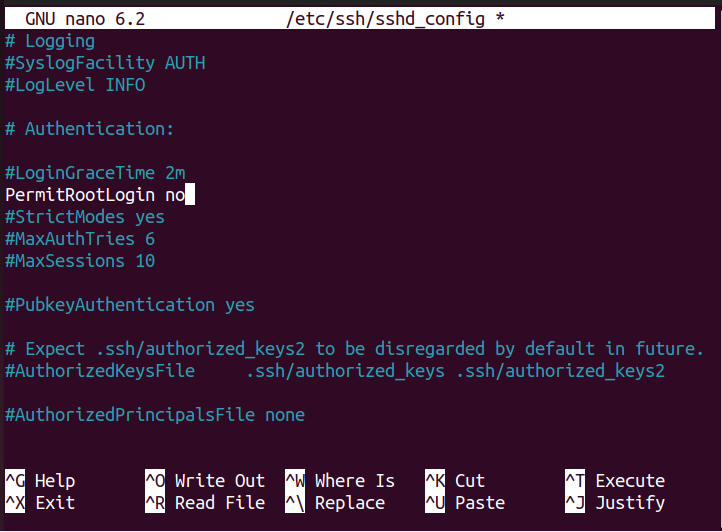
Save the file.
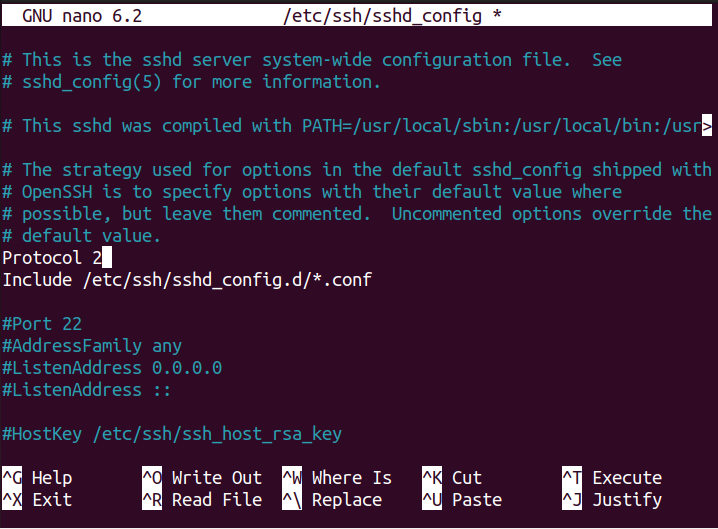
Step 5: Via SSH Protocol 2
The SSH protocol works on two protocols, namely Protocol 1 and Protocol 2. Protocol 2 has more advanced security features than Protocol 1, so if you want to use that, you will need to add the line “Protocol 2” into the configuration file as shown below.
Step 6: Setting a Session Timeout
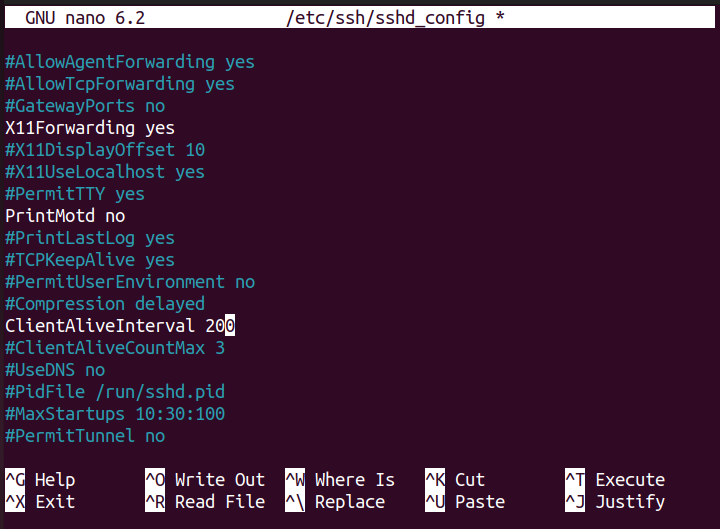
This step is pretty useful at the time when someone leaves their computer for a longer time. You can reduce the session time of your SSH server to permit the intruder to access your system. In our case, we set the value to 200 seconds. If the user stays away from his system for 200 seconds, it will automatically log out.
To do this step, find the variable with the name “ClientAliveInterval”.
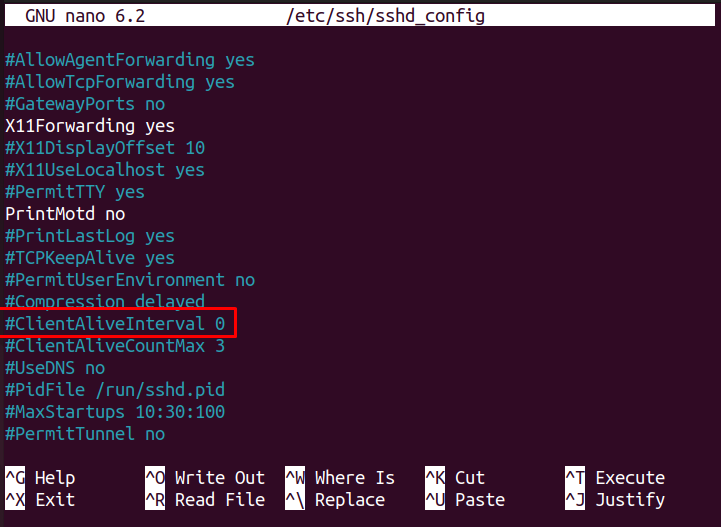
Uncomment the variable and replace the value 0 with the value of your choice and then save the file to make the changes.
Step 7: Allow specific user to access the Server
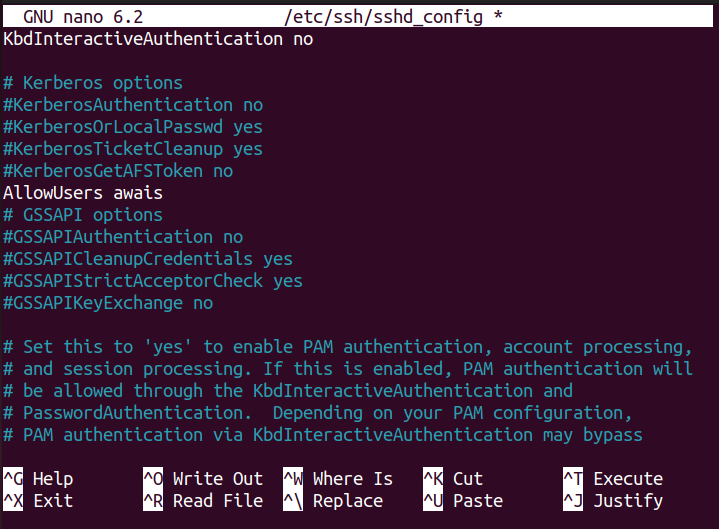
You can also secure the SSH server by allowing only the specific user to access it. To perform this step, add the variable “AllowUsers” in the configuration file. Then add the user’s name in front of the variable as shown below.
Step 8: Limit the number of login attempts
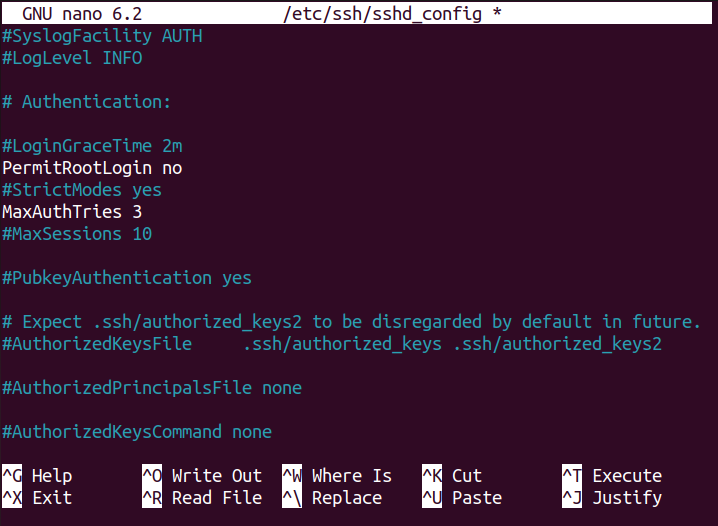
You can also limit the number of login attempts to secure your SSH server, as the case may arrive when the intruder may perform a brute force attack to log in to your system through multiple tries. In that case, you can set the limit of login attempts to permit the intruder to guess the right password through numerous tries. To perform this step, locate the “MaxAuthTries” variable.
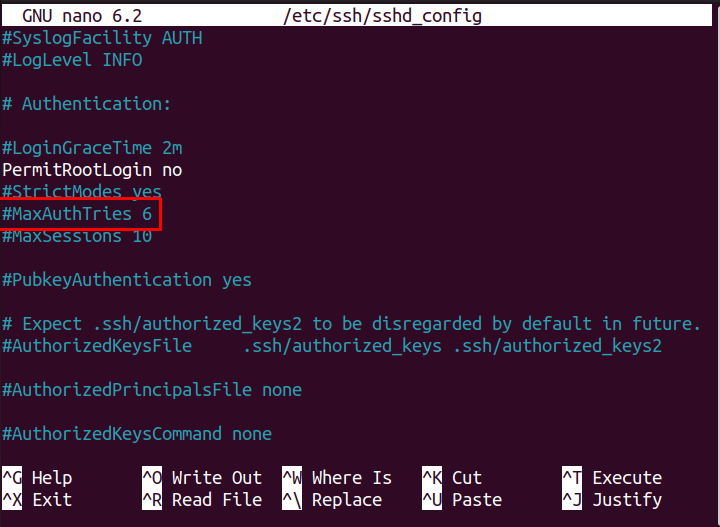
Uncomment the above highlighted variable and set its value according to your choice as the default value is already set to 6.
Step 9: Running the server in Test Mode
After performing the above steps, it’s now time to run the SSH server in test mode to ensure that the above configurations we have made are correct . To test the SSH server, run the following command:

The above command doesn’t provide you any output, however, if it runs without an error, it means that the configurations are correct.
Step 10: Reloading the SSH server
After configuring the SSH server, it’s now time to reload the server to make the changes to your Ubuntu system. For that, use the following command:

Advance Steps to secure the SSH server
After doing the basic steps to configure the SSH server in Ubuntu, it’s time to implement advanced measures to further increase your SSH server’s security.
Step 1: Opening the Authorized_keys File
Besides implementing basic level SSH server security in the configuration file, you can further improve the security by securing each SSH key separately. However, this step requires you to execute some SSH sessions to generate your SSH keys in the file. After some SSH sessions, open the authorization file using the following command:
The above file will contain the SSH keys that you have generated so far.
Step 2: Specific Configurations for Particular Keys
After opening the authorized_keys file, you can now have five options to achieve an advanced-level security. These options are as follows:
- no-agent-forwarding
- no-user-rc
- no-pty
- no-port-forwarding
- no-X11-forwarding
Now, if you want to use any of the above options for a single SSH key. For example, if you want a no-agent forwarding option for the desired SSH key, you can do this using the following syntax:
In the above syntax, replace the DesiredSSHKey with an actual key stored inside the authorized_keys file. Once the above changes are done, you can save the file, and the SSH server will automatically read it as you don’t need to reload the server.
Through this approach, you will be able to implement advanced security for the SSH server on Ubuntu.
Tips and Tricks
Besides performing basic and advanced level security, you can further secure your SSH server through some additional methods as well, whose details are as follows:
1 : Keep your Data Encrypted
Data Encryption is one of the fundamental aspects of securing your SSH server, which can only be possible if you use a strong encryption algorithm. This algorithm will further boost the privacy of your data.
2 : Keep your Software Up to Date
You should also ensure that the software running on the SSH server is well up to date, as this will increase the security of your server. The latest software update comes up with the latest security patches that help improve the security of a system.
3 : Always Enable SELinux Mechanism
SELinux is an enhanced security mechanism built especially for Linux operating systems and by default, it is already enabled in the system. However, it is still mandatory to ensure that this system is enabled so that nothing will affect your SSH server.
4 : Choose Strong Password
If your SSH server is secured using a password, ensure that you have set a strong password for your server. A strong password must include numerical and special characters, making it difficult for the intruder to guess it easily, making your SSH well secured.
5 : Maintain Data Backup
You should maintain a daily backup of your SSH server data to easily recover the lost data being corrupted due to any mishap. This backup will also help you in case your server goes down.
6 : Maintain Daily Server Check and Audit logs
You should also need to check on your SSH server and audit logs daily, as this helps you prevent any major issues in the first occurrence. The audit logs are pretty helpful to incase if anything happens with your SSH server as you can easily track the root cause of the problem in audit logs and fix them easily.
Conclusion
Securing your SSH server is one of the fundamental requirements of every Ubuntu user, as this prevents other users from accessing the system data. Although setting a password is a good option, you can further secure your SSH connection with more high-level security. The SSH security level varies from basic to advanced. The details of both these levels are discussed in the above guide, with some useful tips to improve the SSH server security in Ubuntu.