This post covers all the steps to upgrade Ubuntu 20.04 to 22.04. When you have Ubuntu 20.04, you miss out on the new features and the benefits offered with Ubuntu 22.04. Besides, staying updated is recommended to enjoy the security fixes that the newer Ubuntu versions offer. Ubuntu 22.04 comes with the codename “Jammy Jellyfish”. By the end of this post, you will learn what it takes to get the recent LTS version. Let’s begin!
How to Upgrade Ubuntu 20.04 to 22.04 via the Command Line
Mastering the command line gives you superiority. Although updating Ubuntu via GUI is possible, our focus will be via the command line.
First, let’s check the current Ubuntu version that we are running using the following command:
For this case, we confirmed that we currently have Ubuntu 20.04 with the codename, “focal”.
Before upgrading your Ubuntu, it’s wise to back up your system. Whenever possible, take a snapshot of the entire system so that if anything happens, you can revert it without losing your data. There are different tools and commands that you can use to create the backup. Once you created the backup, proceed as follows:
Step 1: Update and Upgrade
You should update the current Ubuntu version to ensure all that packages are up-to-date before you can initiate the upgrade. A simple “update” command is all you need.
After updating the packages, run the “upgrade” command to ensure that all packages get upgraded for a clean transition.
Lastly, run the following command to check and cater for all package dependencies:
Step 2: Reboot the System
After updating and upgrading your Ubuntu repositories, some packages may no longer be required. You can optionally remove them with the “autoremove” command. You must then reboot your system to ensure that all changes take effect before we upgrade to Ubuntu 22.04. Use the following commands:
$ sudo reboot
Step 3: Upgrade to Ubuntu 22.04
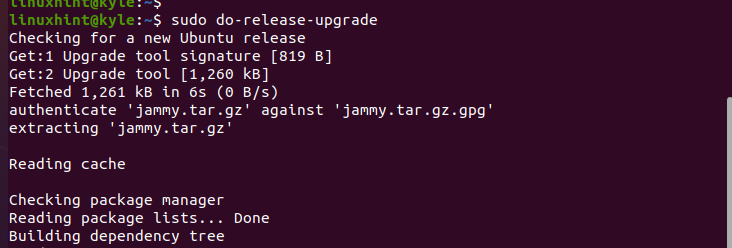
A quick way to upgrade Ubuntu is using the “do-release-upgrade” command. Once executed, it will check for new Ubuntu releases, update the “sources.list”, and initiate the upgrade.
Notice how, after we ran the previous command, Ubuntu identifies “Jammy” as the new release which is the codename for Ubuntu 22.04. It then proceeds to prepare for the upgrade.
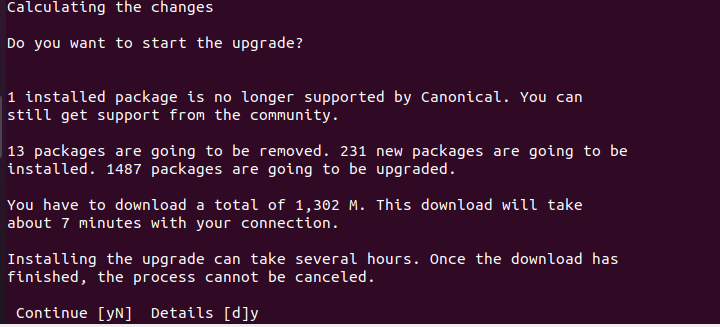
Once all preparations including updating the “sources.list” are made, you will get prompted to confirm whether to proceed with the upgrade. You can type “d” to view the upgrade details or start the upgrade by pressing “y” as shown in the following image:
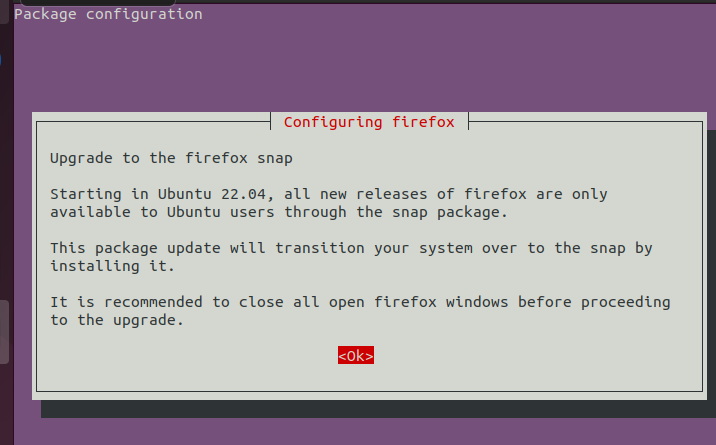
When you get prompted to confirm to upgrade Firefox, hit the “Enter” key on your keyboard, and the upgrade will continue. For any prompt that appears, check its details and select the ideal action that suits you.
You will also get prompted to remove the obsolete packages before the upgrade completes. You can choose to stick with the packages and remove them later or confirm the action and get all the packages removed to retain only those that come with Ubuntu 22.04.
The last step is to reboot the system and boot to the new Ubuntu 22.04. Press “y” when you get the following prompt and wait for your system to reboot.
After the restart, open your terminal and check the Ubuntu version that runs on it. You will see that the codename and LTS version have changed. That’s it! You managed to upgrade your Ubuntu 20.04 to 22.04 successfully.
Optionally, you can run the “update” and “upgrade” commands to ensure that all packages are updated and your system is ready for use.
Conclusion
Upgrading your Ubuntu is recommended to stay updated with the latest security fixes and updates. With the simple steps that are covered in this post, you can upgrade from Ubuntu 20.04 to Ubuntu 22.04. Hopefully, you now understand what it takes to upgrade your Ubuntu.


