The network administrators tend to assign static IP addresses to the web servers or the FTP-servers. The static IP addresses are suitable for the businesses as the customers can easily track the website via static IP address.
In this guide, we have demonstrated possible methods to change from DHCP to static IP address on Ubuntu 22.04.
How to change from DHCP to static IP address in Ubuntu 22.04
The static IP address can be assigned using the terminal or the graphical interface support of Ubuntu 22.04. We have provided the steps for both methods and you can follow the method which better suits you.
How to change from DHCP to static IP address on Ubuntu 22.04 using terminal
The terminal is the most used and powerful tool for a Linux user. Here, you will learn to change to a static IP address on Ubuntu 22.04 using its terminal.
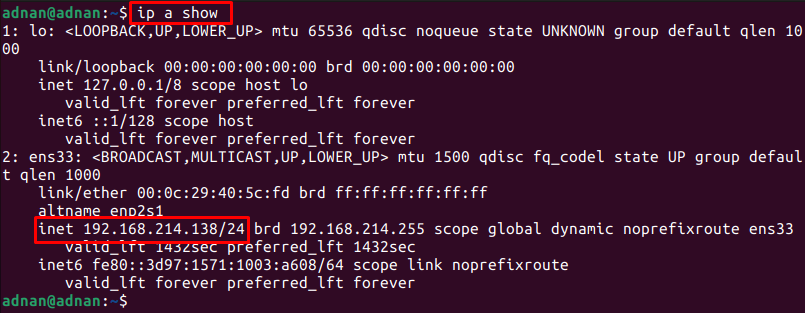
Step 1: Fire up the terminal (CTRL+ALT+T) and execute the following command to get the current IP address, DNS, Gateway of your network interfaces:
The current IPv4 address of our network interface is 192.168.214.138.
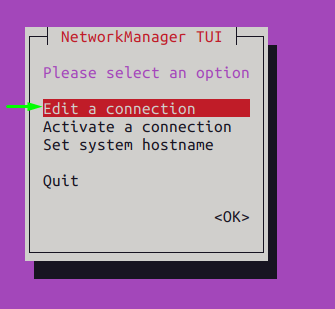
Step 2: NMTUI is a command line tool to configure your IP on Ubuntu 22.04. Execute the following command to launch it:
Choose “Edit a connection” option to continue:
Note: To navigate in a nmtui, you have to use the “tab” and “enter” key.
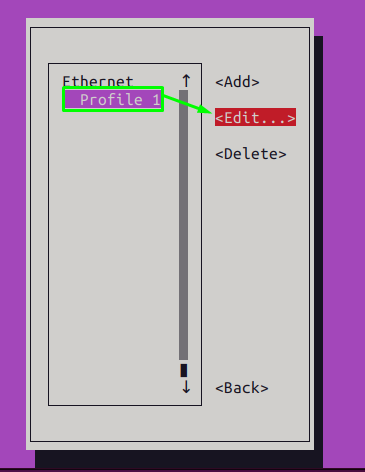
Choose the network profile and navigate to “Edit” option as shown below:
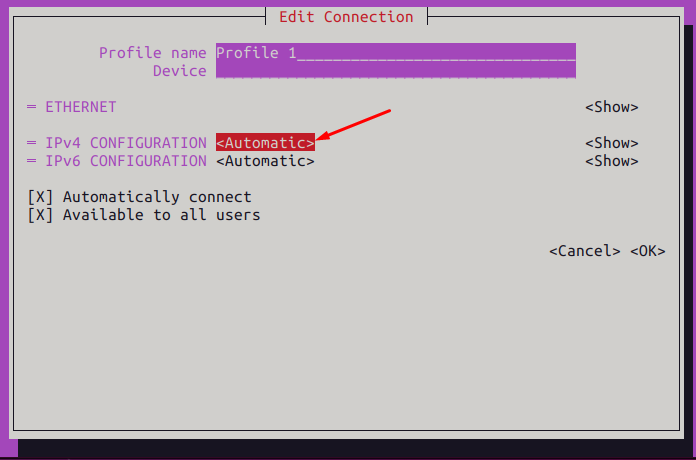
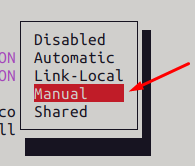
Change the “IPv4 CONFIGURATION” option from “Automatic” to “Manual”
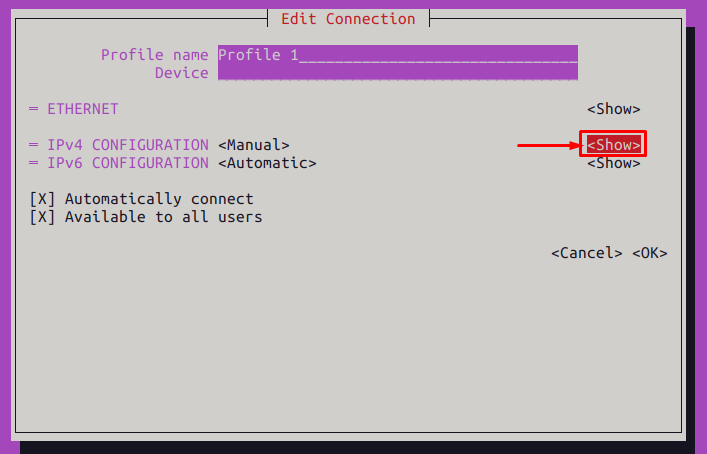
After that, press the tab key to navigate to “Show” and hit enter.
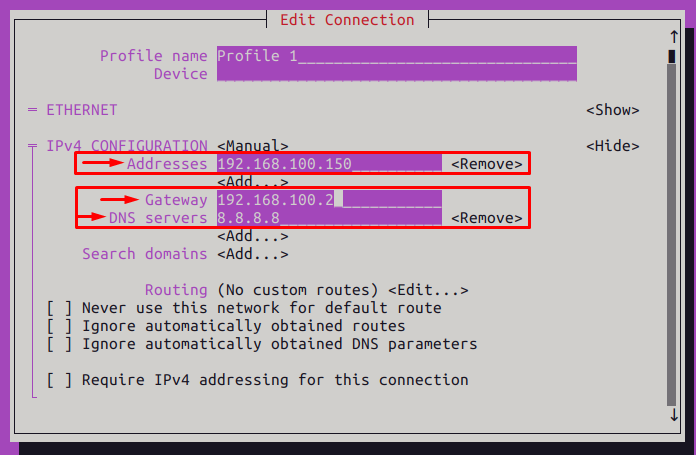
You will find the options for IPv4 configuration where you can set the IP-address, Gateway, and the DNS as we did here.
We have set the following values:
- Address: 192.168.100.150
- Gateway: 192.168.100.2
- DNS: 8.8.8.8
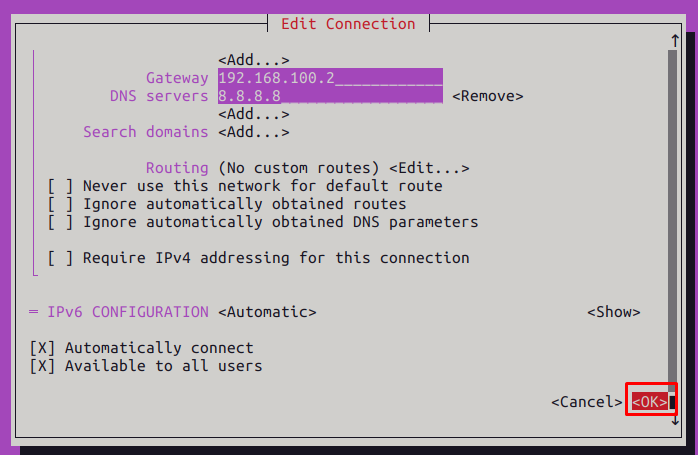
After that, use the tab key to scroll down and hit enter on “OK“.
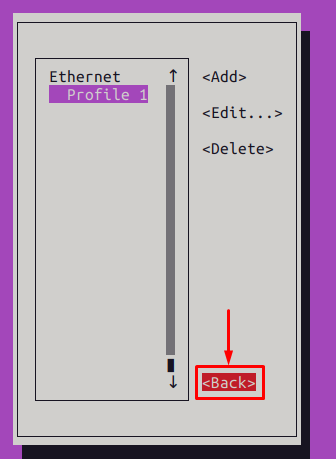
Step 3: Now, choose the “Back” option to go to the main interface of nmtui tool.
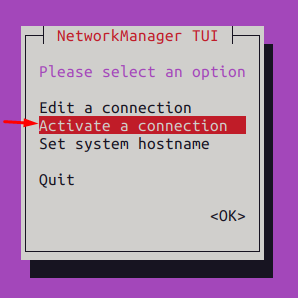
Choose Activate connection:
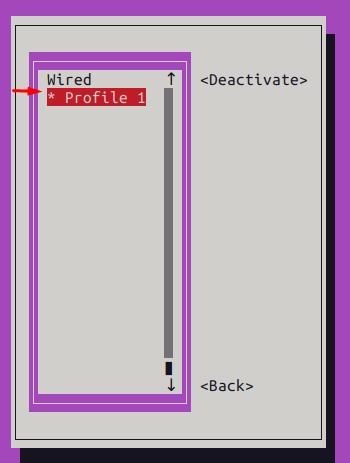
Choose the profile where you have performed the changes and navigate to the “Deactivate” option:
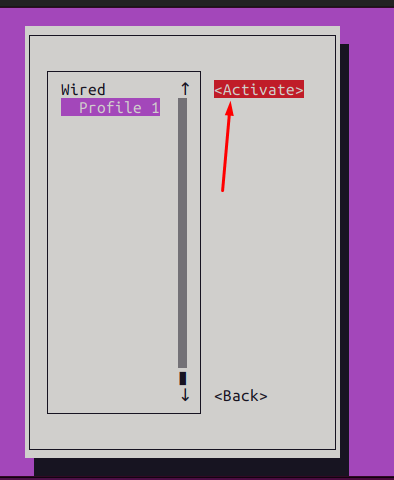
Activate the connection profile to adapt to the changes:
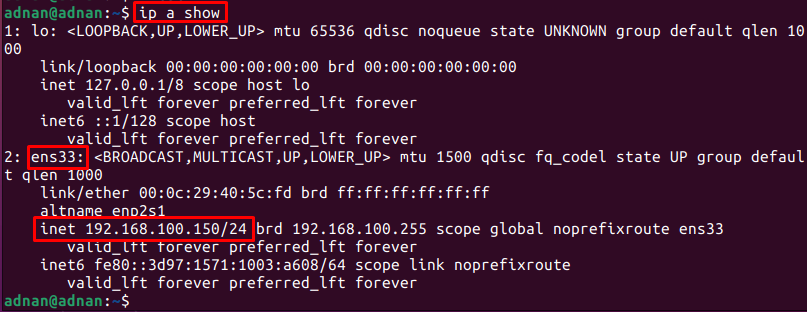
Step 4: Once all done, you can check the newly changed IP address from the terminal via the following command:
The output shows the IPv4 address of the “ens33” has been changed.
How to change from DHCP to static IP address on Ubuntu 22.04 using GUI
We have performed various steps using the GUI of Ubuntu 22.04 to switch to the static IP address.
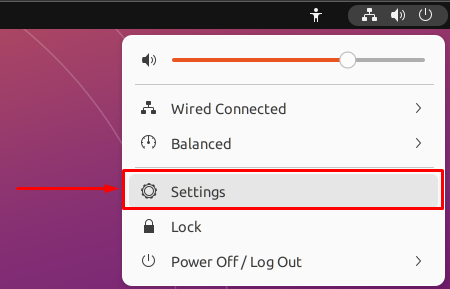
Step 1: Open the system Settings:
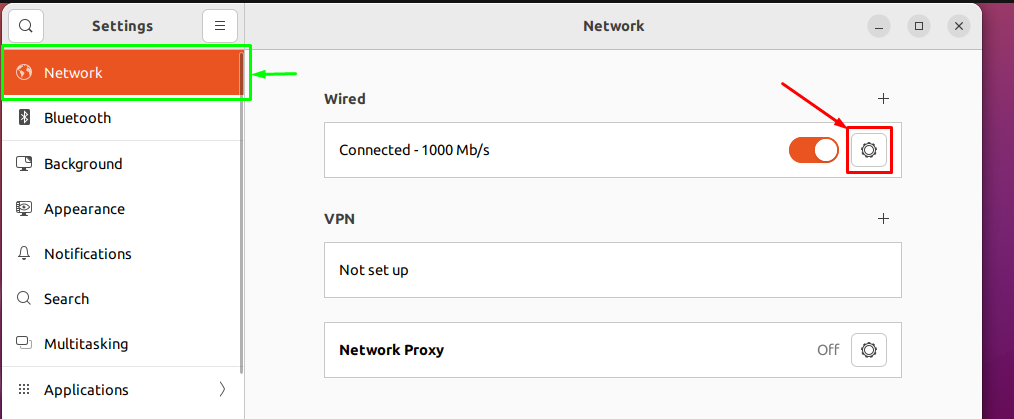
In the Network tab, click on the settings icon as shown below:
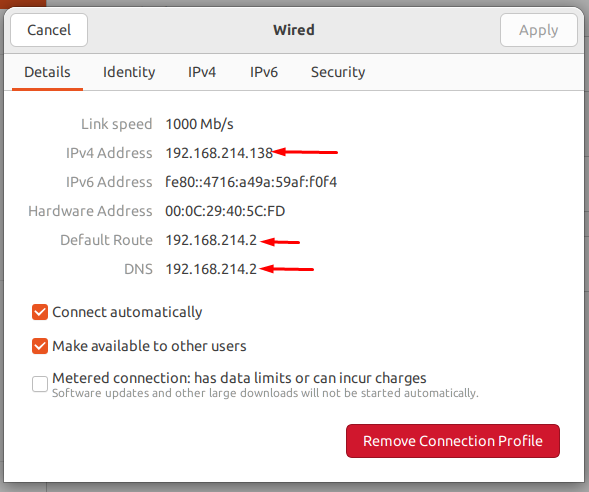
You will get the details of the connection(IP addresses, DNS, default route, Link speed) as shown in the following image:
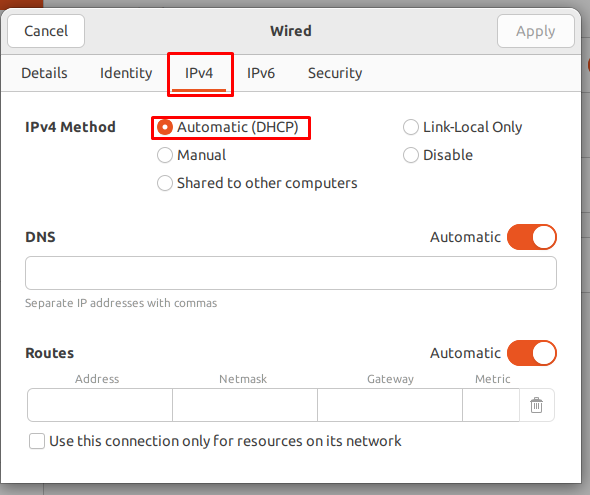
Step 2: Now, navigate to the IPv4 tab to configure the static IP address. Currently, the IP addresses are being assigned automatically:
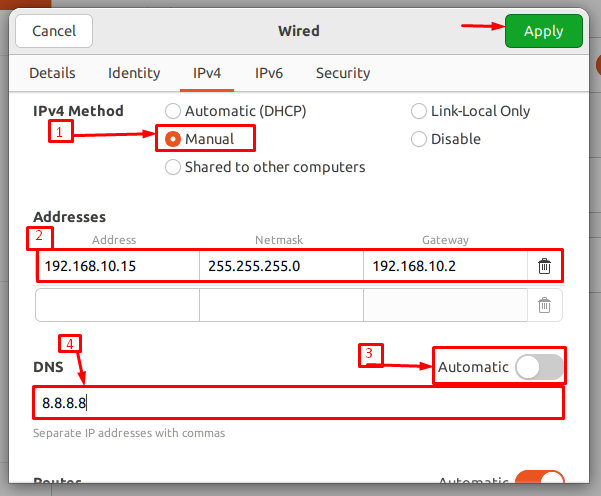
Change the radio-button to Manual and set the value for Address, Netmask, Gateway, and DNS as we did here. Moreover, you need to turn off the toggle button in-front of DNS to set its manual value.
After doing all the changes, click on the Apply button:
After changing the connection’s settings, turn off/on the toggle button to restart this connection:
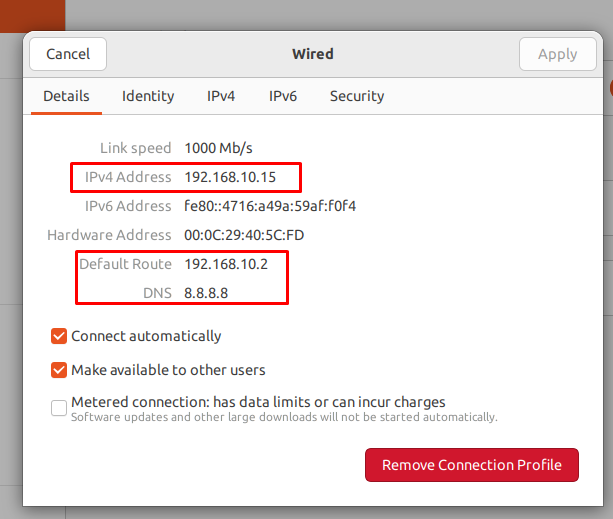
After restarting, click on the settings gear again to check if the IP address has changed or not?
If you notice the details tab, the IPv4 address, the Gateway (default route), and DNS are changed as per the values we assigned.
Here you go!
Conclusion
The DHCP (Dynamic Host Configuration Protocol) assigns the IP addresses to the network devices. However, if your device is a web server or FTP-server, then it is recommended to assign a static IP address to your device. In this post, we have demonstrated various methods to change from DHCP to static IP on Ubuntu 22.04 using the GUI and terminal.

