Archiving has its advantages, the biggest of them being ease of portability. It allows you to group files of different types and compress them into a single portable .zip/tar file which can be decompressed to retrieve the original files later on.
Ansible also provides archive options with the help of the ansible.builtin.unarchive module. This module has the unzip options available, along with some options that allow it to copy files before extracting them.
This guide is meant to help you learn how you can use the Unarchive Module in Ansible. We will go over the basics of the Unarchive Module, some common parameters and examples on how to implement them.
That being said, let’s begin.
Prerequisites of Unarchive in Ansible
Following are the requirements for the Ansible Unarchive module to work properly on your system.
- A system with Ansible preinstalled. We recommend that you use a Linux distribution.
- Remote hosts, either separate systems or virtual machines. Software like Oracle VirtualBox, Vagrant, and VMware Workstations are perfect for the job.
- The “zipinfo”, “gtar”, and “unzip” commands should be installed on the host.
We’d also recommend that you have some basic know-how of how to execute commands in the Terminal.
Limitations of Unarchive in Ansible
While the Unarchive Module works well with .tar, and .zip files, it cannot be used with files of the type .gz, .bz2, .xz files. Files must contain a .tar archive for the module to work. For files that use gtar, make sure that the –diff argument is supported.
The next section of this guide will cover the parameters of the Unarchive Module.
Parameters of the Ansible Unarchive Module
The Ansible Unarchive Module has its own list of parameters that extend the functionality of the overall module.
A list of important modules is given below.
- “attributes” – These govern the attributes of a given filesystem object.
- “copy” – This feature comes with two choices, yes or no. If the selected option is yes, the file gets copied to the remote host from the local device.
- “creates” – Used to create a path/directory.
- “exclude” – Allows you to exclude certain files and directories from getting extracted.
- ”group” – Designates a group to which the filesystem object belongs.
- “include” – Include files and directories that you would like to extract.
- “mode” – Governs the permissions of the filesystem.
- “owner” – Designates a user as the owner of a filesystem object
Aside from the above parameters, multiple options are available with the Ansible Unarchive Module. For more details about the parameters, check out the official Ansible Unarchive Module Documentation online.
The next section of this guide will go over some examples on how to use unarchive in Ansible.
Using Unarchive for Extracting a File into a Given Directory
The following example illustrates how you can extract a .tgz file (named archive.tgz) into a given path.
ansible.builtin.unarchive:
src: archive.tgz
dest: /var/lib/archive
Now, execute this command in the Linux terminal for running a playbook.
“src” denotes the file that is to be extracted whereas “dest:” is used to specify the path.
We shall see more examples to understand how to use the Unarchive Module better.
Unarchive a File Available on the Remote Host
The following example illustrates how you can extract a file that’s already present on the remote host or machine.
ansible.builtin.unarchive:
src: /tmp/archive.zip
dest: /usr/local/bin
remote_src: yes
The aforementioned code will extract the file archive.zip in /usr/local/bin.
Using the Unarchive Module to Extract a File that’s Online
This was a feature that was added in Ansible version 2.0. It allows you to extract a file that’s available online that hasn’t been downloaded yet on the system.
The following example illustrates how you can achieve this.
ansible.builtin.unarchive:
src: https:///.zip
dest: /usr/local/bin
remote_src: yes
The aforementioned block of code will extract the file into the destination path /usr/local/bin.
The Difference in Playbook Code with and Without Unarchive
The following example is meant to help you see the difference between code that makes use of the Unarchive Command Module.
We start by taking a look at how to write the code to copy and unarchive files. We’ll be using the Copy Module along with the tar -xvf command for extraction.
- name: Copy a given file and extract its contents
hosts: test_servers
vars:
- userid : "LinuxUser1"
- oracle_home: "/opt/oracle"
- jdk_instl_file: "server-linux.tar.gz" (name of the .tar.gz file.)
tasks:
- name : Copy the contents of the JDK files
become: yes
become_user: "{{ userid }}"
tags: app,cpbinaries
copy:
src: "{{ item }}"
dest: "{{ oracle_home }}"
mode: 0755
with_items:
- "{{ jdk_instl_file }}"
- name: Install java
become: yes
become_user: "{{ userid }}"
tags: javainstall
shell: "tar xvfz {{ oracle_home }}/{{ jdk_instl_file }}"
args:
chdir: "{{ oracle_home }}"
register: javainstall
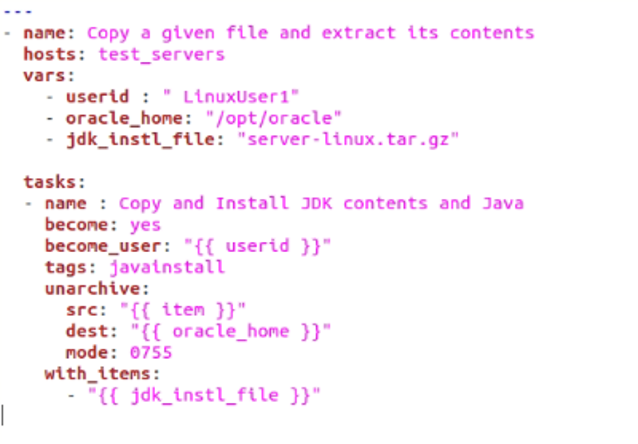
The same tasks can be achieved in a much simpler manner using the Unarchive Module as shown below.
- name: Copy a given file and extract its contents
hosts: test_servers
vars:
- userid : " LinuxUser1"
- oracle_home: "/opt/oracle"
- jdk_instl_file: "server-linux.tar.gz"
tasks:
- name : Copy and Install JDK contents and Java
become: yes
become_user: "{{ userid }}"
tags: javainstall
unarchive:
src: "{{ item }}"
dest: "{{ oracle_home }}"
mode: 0755
with_items:
- "{{ jdk_instl_file }}"
Notice how there’s a significant decrease in the lines of code when compared with the method that doesn’t use the Unarchive Module. By using the Unarchive Module, we were able to merge the task to copying and unarchiving into one.
Conclusion
We hope this guide helped you learn how you can use the Unarchive module in Ansible. We covered the basics of the module along with limitations, prerequisites, and parameters. We also went over some examples to better our understanding. With this, we wish you all the best in learning how to use Ansible.


