Although Chef and Puppet are quite popular and commonly used, they are considered a tad bit complex. On the other hand, the tool we will discuss today, Ansible, is a simpler and more efficient configuration management tool.
Ansible is an open-source tool that, other than configuration management, can be used for software provisioning and application deployment as well. Ansible is all CLI, and you have to write pieces of code to perform various functions.
This tool can manage multiple systems or “hosts” simultaneously as it is built for multi-tier deployment. In Ansible, all of your hosts are considered interrelated, thus making cross-platform management possible.
For Chef and Puppet, you require software to be installed on nodes. However, Ansible doesn’t require such arrangements, and you use SSH protocols to perform different automation.
The different features provided with Ansible, such as plug-ins, inventories, and playbooks, make it a perfect large environment manager. Although it isn’t very straightforward, the comprehensive documentation available online makes it easier to learn and perfect. Another plus point of Ansible is that it is lightweight and has no constraints regarding the operating system.
If you are looking forward to learning Ansible and its functions, this article will discuss how you can install the Ansible framework on your Linux system. Furthermore, we will also discuss one of the plug-ins available with Ansible called “Lookup.”
How to Install Ansible?
Ansible could be found in Ubuntu’s repositories. So, installing it is possible from the command terminal directly. Follow these steps.
1. The first step is to update your system repositories. You can update using this command.
2. After your repositories have been updated, you can install Ansible.
You will be prompted to confirm the installation; press “Y” to confirm.
1. The next thing you need to do is configure the “inventory files” for Ansible. This file contains the basic information of the hosts you will manage using Ansible. You can include as many host servers as you like. This file also includes such variables that can be assigned to specific hosts and subgroups.
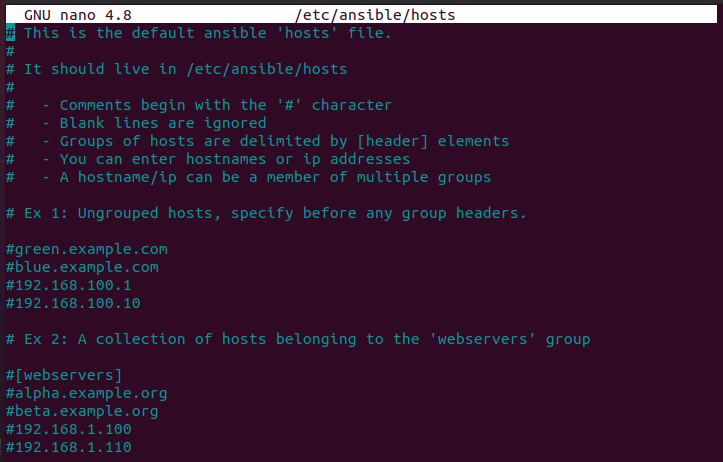
Open the following file using your preferred text editor to edit and configure your inventory file.
The inventory file installed in Ansible by default contains examples that you can use as a reference to configure your file.
2. Next, you will check whether the connection made by ansible is stable or not. The commands you will use to check the connection require root privileges. You can do that using the -u operator. Run the following command.
With this, you are done with the installation of Ansible and its basic configuration. Next, we will look at the Lookup plug-in.
Lookup Plug-in
In Ansible, as the name suggests, lookup and its plug-ins are used to read and extract data from external sources. These sources can be files in our systems or external databases and services. The data read can be used in tandem with other plug-ins such as filters to gather data on your preference and usage.
All the processing on the received data is done locally and must be stored in a variable. Performing a lookup on Ansible is somewhat hard. However, the people who are accustomed to the basics of Ansible can perform and understand lookup easily.
Working on Ansible Lookup
There are different lookup plug-ins available in Ansible. Each plug-in performs the basic function of reading data. However, these plug-ins can be used in special situations where you might want to read data in a special way or where you might want to represent data in a specific way.
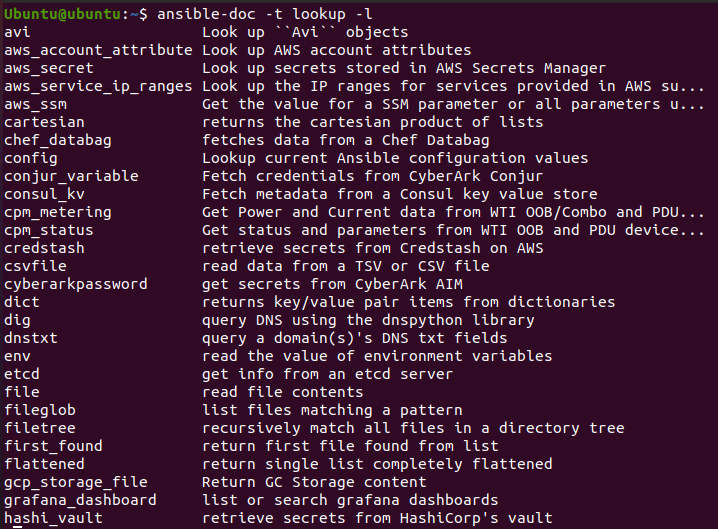
For example, the “sequence” plug-in will represent the retrieved data in a list based on a number sequence. Another plug-in called “first_found” will give you the first file in a list. There are several similar plug-ins, and if you want to see all of them, you can use the following command.
You will receive an output similar to this.
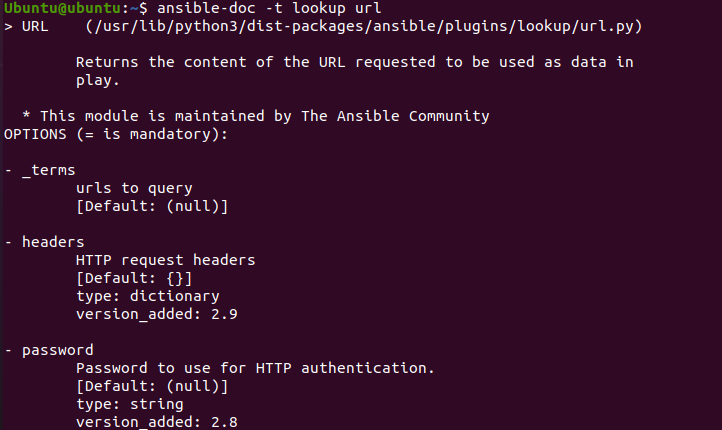
You can also read more information/documentation on a certain plug-in and examples of how to use them by typing this command.
For example, let’s take a look at the “url” plug-in.
Other than the plug-ins you can see in the above image, these are some common plug-ins used in Ansible and their functions.
- Config: This plug-in gives the values present currently in the Ansible configuration file.
- env: env gives us the values present inside the env file.
- dig: This plug-in is used for making DNS queries.
- lines: This is used for reading lines from commands.
- file: This is used for reading contents from a file.
Conclusion
This was a guide on how you can install and configure Ansible and one of the plug-ins available with Ansible. We discussed lookup and the different plug-ins available with it. Lookup is a great feature, and the plug-ins available with it provide you with several options to read and represent data.


