The curl command is a powerful tool for developers to transfer data to and from servers. It’s based on the libcurl development library, compatible with most other libraries. We can use the curl command to imitate different user agents when communicating with a server.
Curl user-agent
The curl command sends its own user agent in the HTTP request by default. The curl user-agent follows the following structure:
To get the version number of curl, use the following command:

As the output reports, it’s v7.68.0. So, the default user agent of curl would look like this:
Setting custom user agent in curl
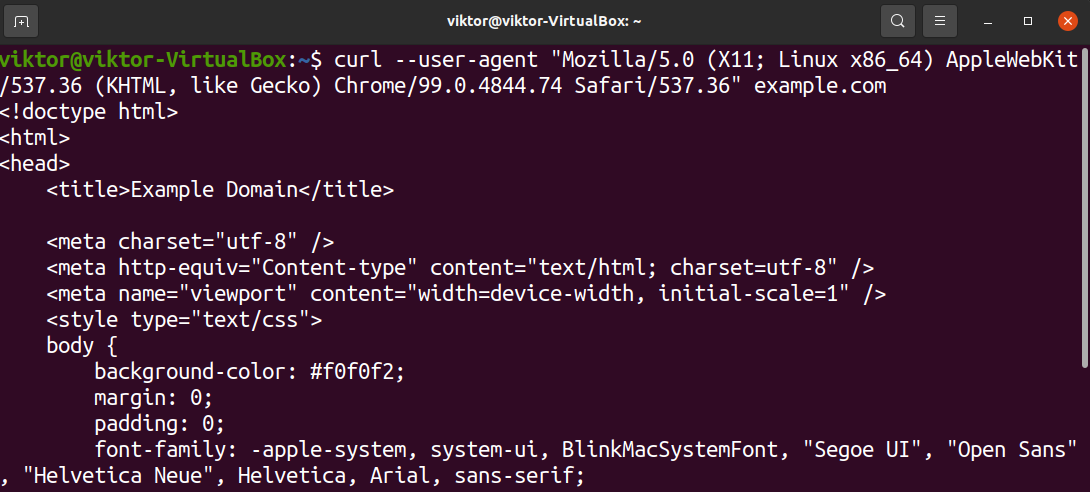
We can tell curl to send a different user agent string instead. To do so, use the flag “-A” to describe the new user agent. The command structure will look something like this:
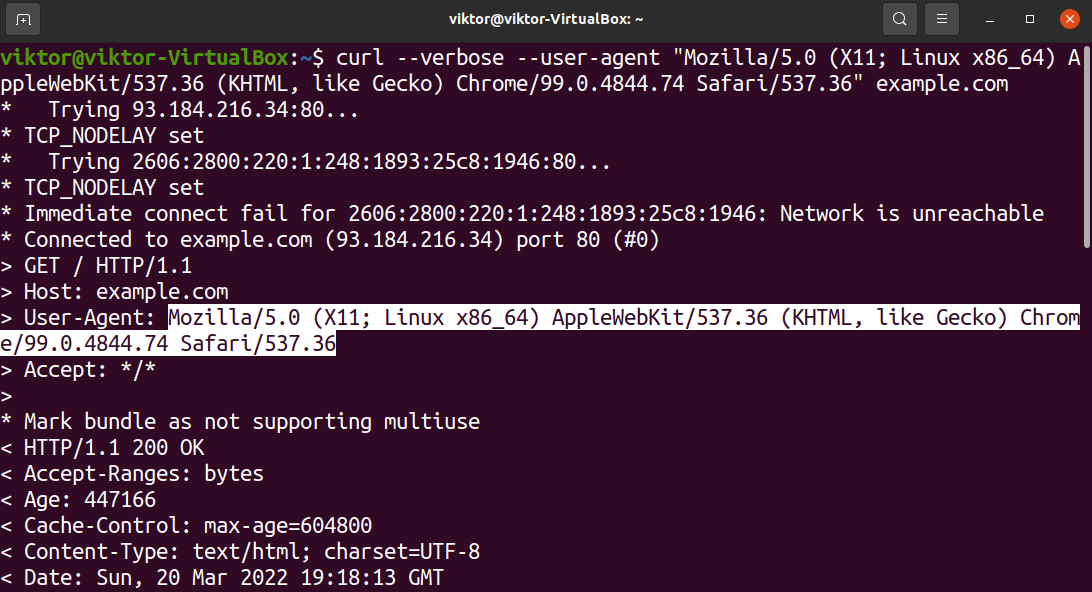
The flag “-A” is an abbreviation for the option “–user-agent”. We can also use that for better clarification:
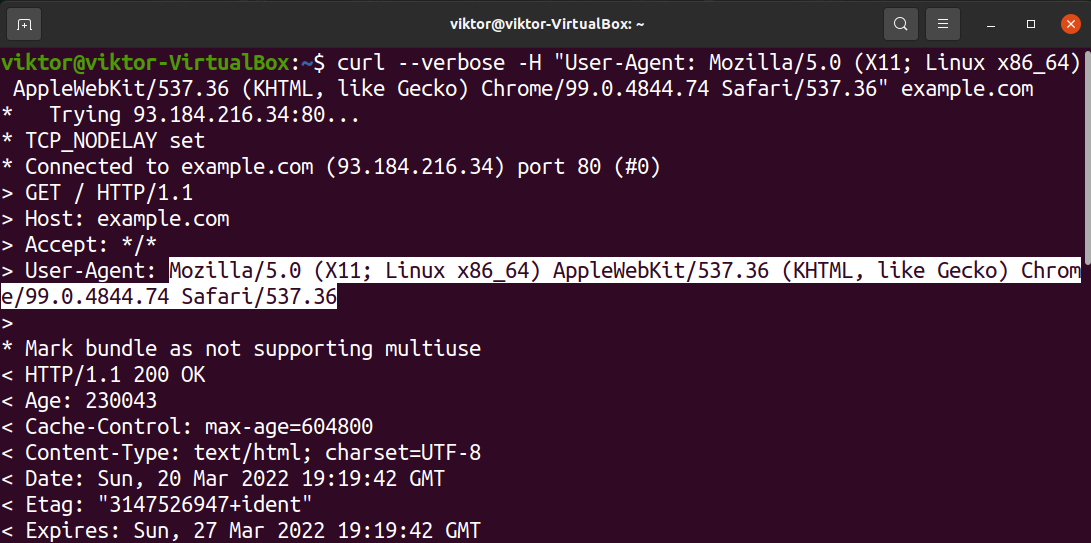
Another method we can use is the flag “-H.” This flag allows tweaking a single parameter of an extra header to be embedded into the curl request. The command structure would look like this:
Getting custom user-agent
Now, it’s a question of getting a custom user agent. Any user agent consists of multiple variables (operating system, browser version, browser type, etc.), each with multiple possible values. This easily pushes the number of possible user agents to millions.
If you’re interested, check out this WhatIsMyBrowser database on numerous user agents. The massive database records millions of unique user agents. For demonstration purposes, I will be using the following user agent string:
This user-agent describes the following info:
- Operating system: Linux (x86_64)
- Browser: Chrome
- Browser version: 99.0.4844.74
Note that there’s no established standard for defining a user agent. This leads to a very wide (and wild) range of user-agent strings.
Sending custom user agents using curl
Now that we have our hand on the desired user agent, we will demonstrate how to implement it. In the following example, we’re going to send a request to example.com using our custom user agent string:
Using the verbose mode, we can see additional info curl is sending to the remote server:
Final Thoughts
This guide demonstrates setting a custom user agent in curl. Depending on the user-agent, the requesting service may respond differently. The curl command sends its own user agent by default. However, it allows specifying a different user agent for its web requests.
This is just a single way of using the curl command. Check out this guide on curl in Linux that demonstrates many ways of using curl (with examples). As always, it’s also recommended to take a look at the man page:
Happy Computing!


