After reading this tutorial, you will learn how to manage the following Pfsense features:
- Forwarding a single port
- Forwarding to multiple ports
- Forwarding all traffic to a specific computer within your network
This article includes screenshots and a deep explanation for all steps, making it easy for any user to follow them.
Forwarding a single port with Pfsense:
To begin, I will explain how to redirect a single port to a client within the network.
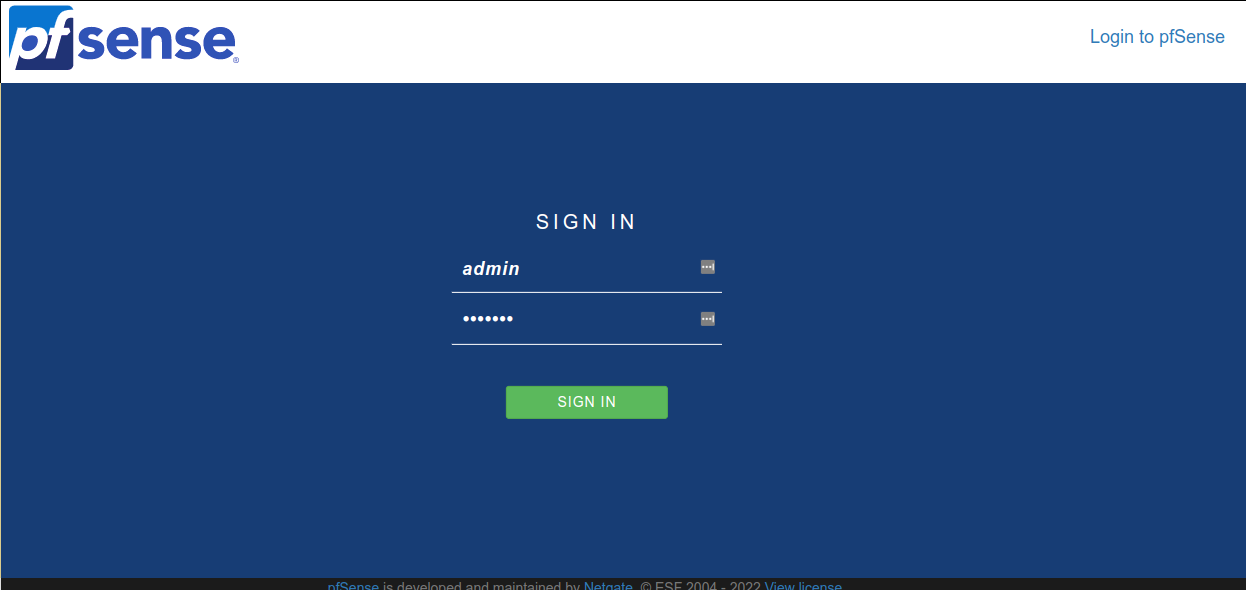
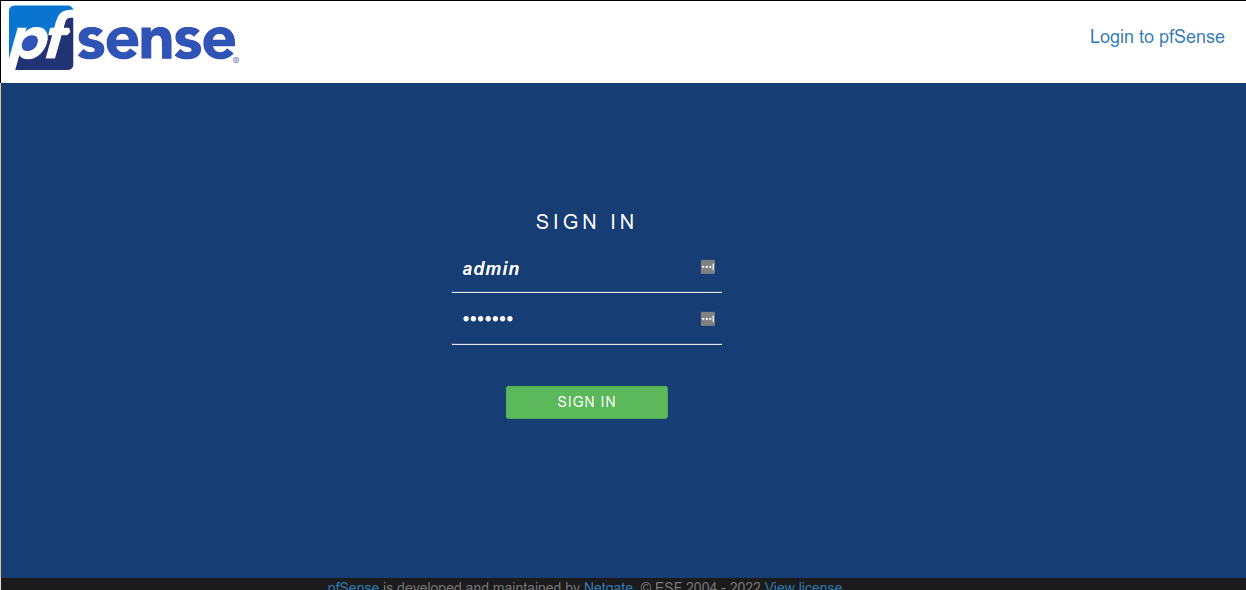
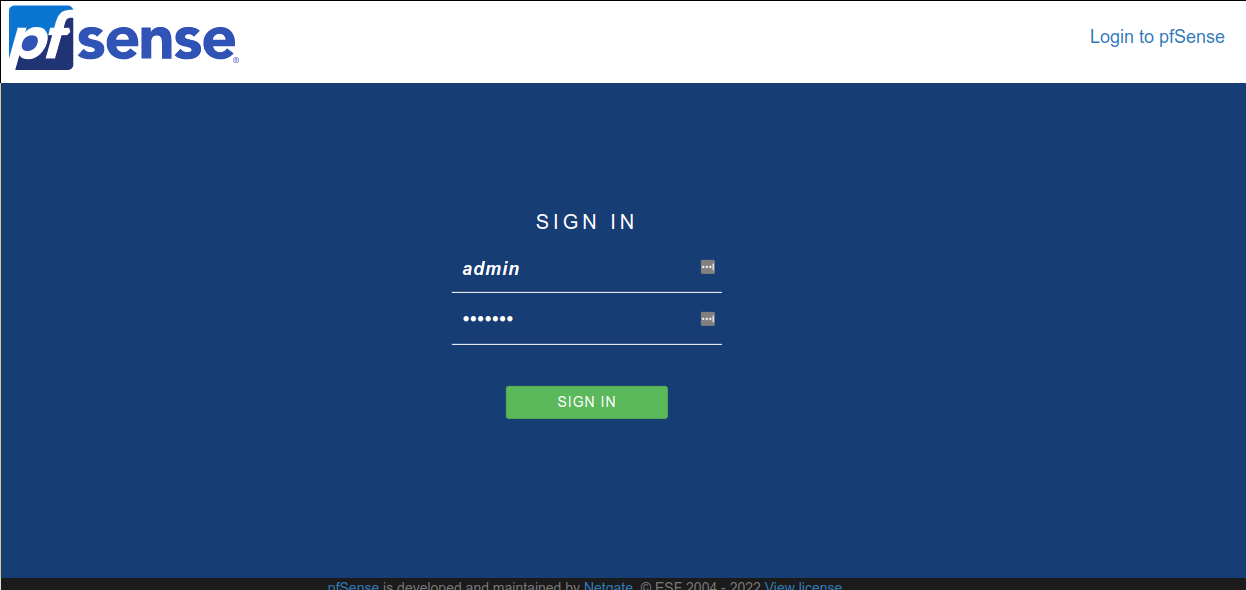
Login to your Pfsense web interface. If you recently installed it, the default user is ‘admin’, and the default password is ‘pfsense’.
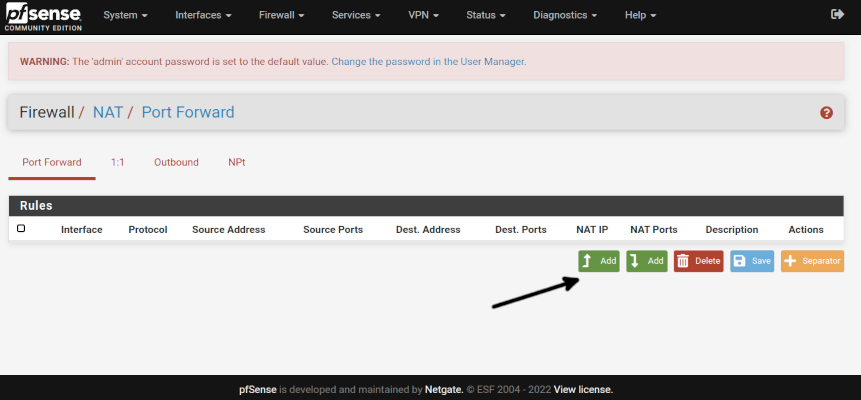
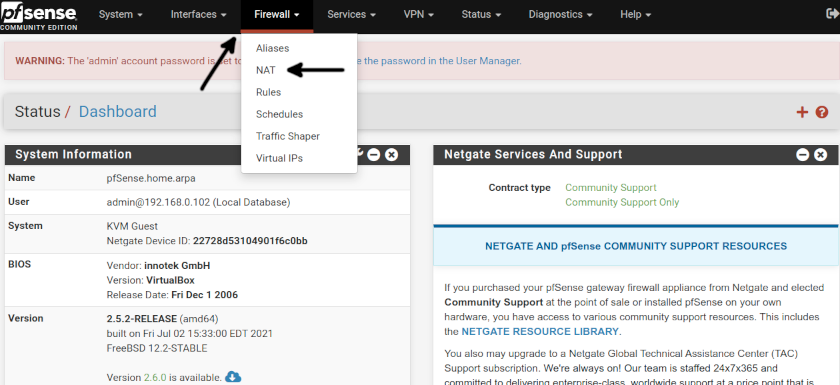
Once inside your web interface, press Firewall, and then press NAT on the top menu.
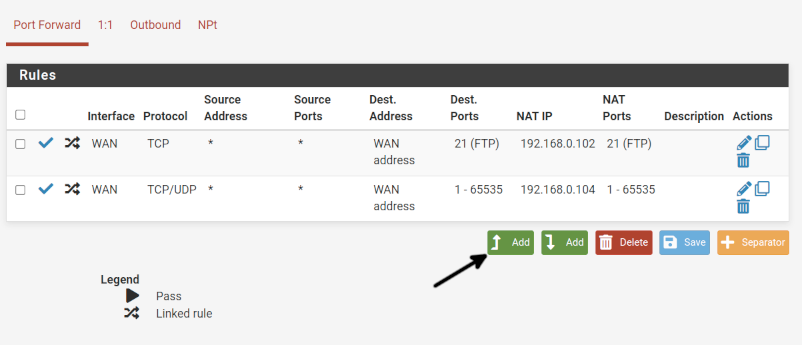
Press the Add button on the Port Forward screen, as shown below.
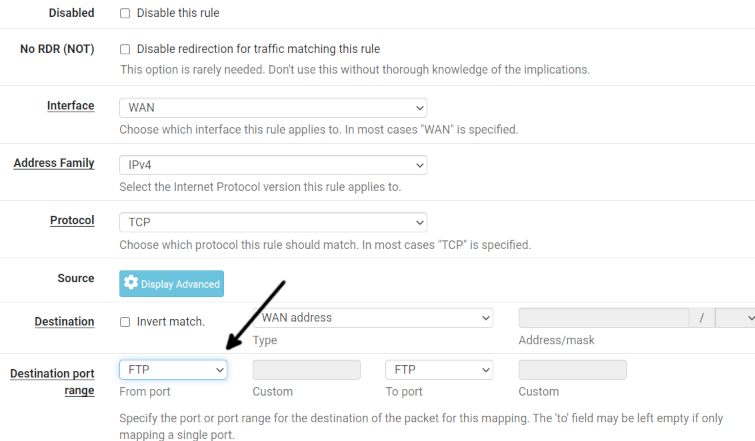
By default, the WAN interface, TCP protocol and IPv4 are selected. In this example, I will forward the FTP port, which uses the TCP protocol, so I leave the default selection.
Choose the port you want to forward from; in this case, I will forward the FTP port, as you can see below (Arrow).
Let’s assume you want to forward the FTP port to a specific computer, select Single host and type the IP address (Upper arrows). Then select the redirection port, FTP, since our client will receive and send traffic through this port.
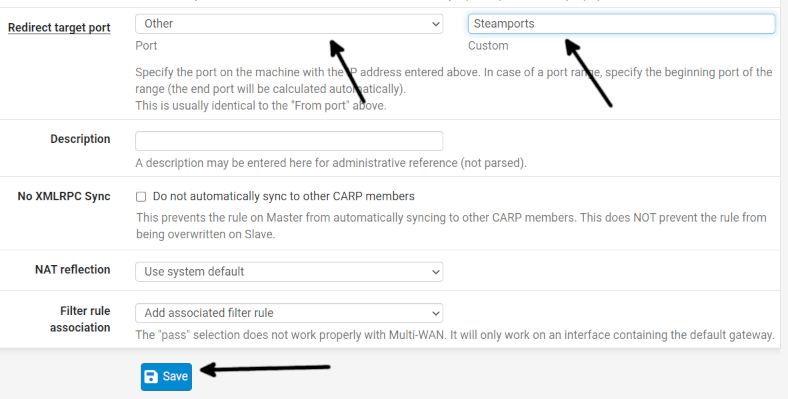
Then, scroll down and press the Save button.
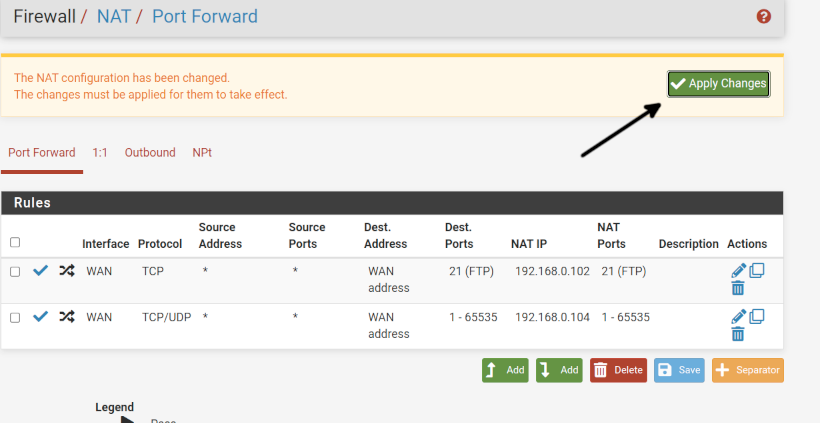
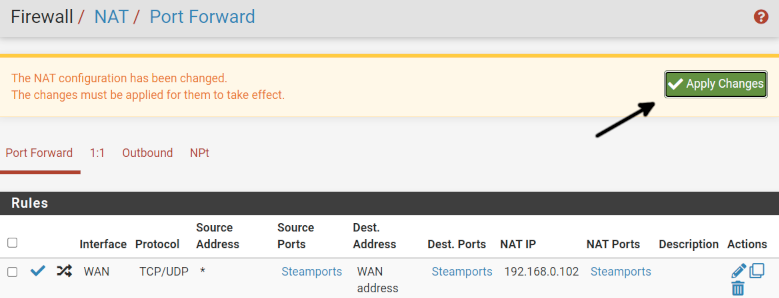
You will return to the Port Forward screen. As you can see, the rule was created (Upper rule), but the changes were not applied. To apply NAT, press the Apply Changes button.
Now the FTP traffic will reach the client with IP address 192.168.0.102.
Forwarding multiple ports to a specific computer:
To begin, I will explain how to redirect multiple ports to a client within the network.
To achieve it, we will define an Alias representing different ports to be redirected to a single host, some ports are TCP, and others are UDP.
Login to your Pfsense web interface. If you recently installed it, the default user is ‘admin’, and the default password is ‘pfsense’.
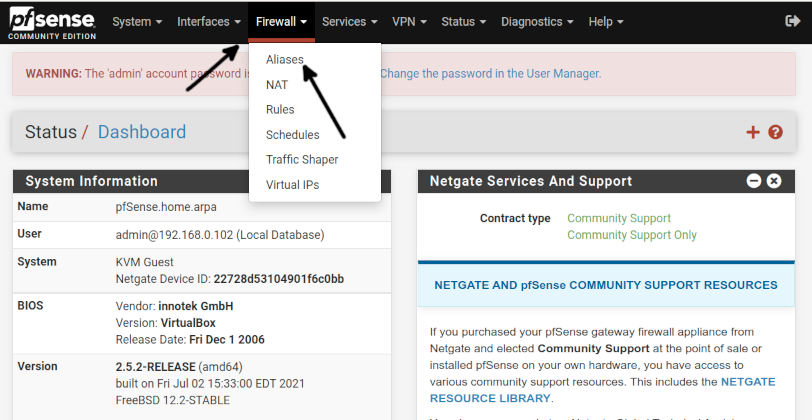
After logging in, press Firewall on the top menu and press Aliases, as shown in the screenshot below.
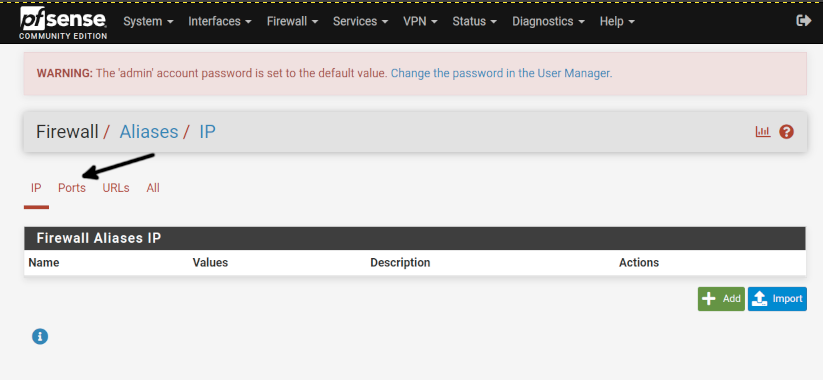
In the Alises screen, press Ports as shown below.
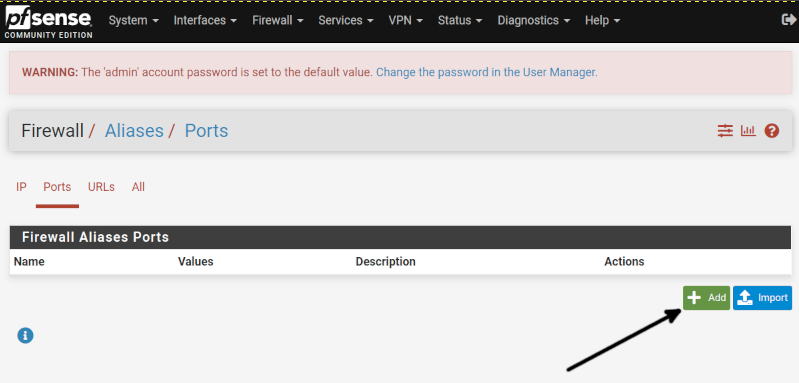
Once in the Aliases>Ports screen, press the +Add button.
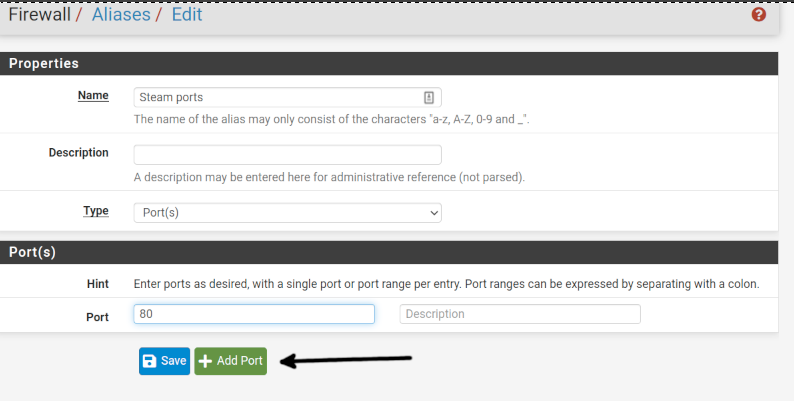
In the Ports section at the bottom of the page, type the first port to be added and press the +Add Port button. You can press the +Add Port button many times depending on the amount of ports you need to redirect.
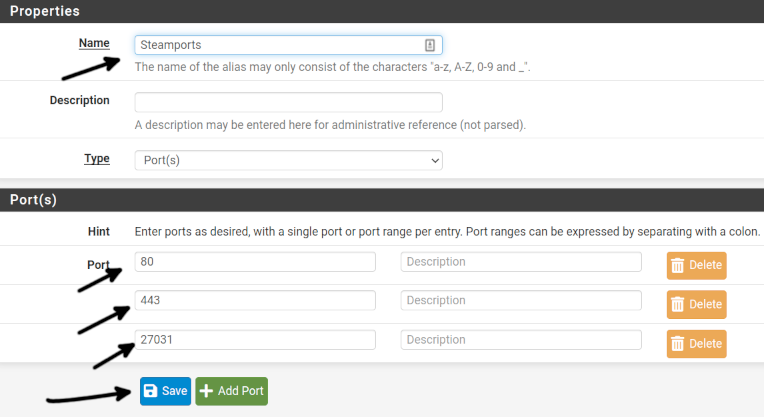
Type the Alias name, and once you have added all ports you need to forward, press the Save button.
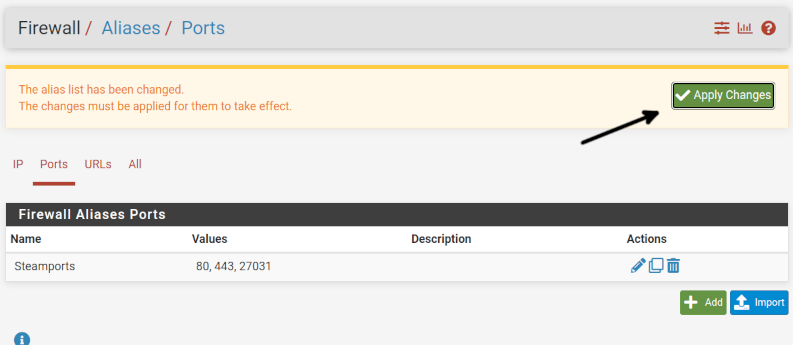
To finally create the alias, press the Apply Changes button as shown in the following image.
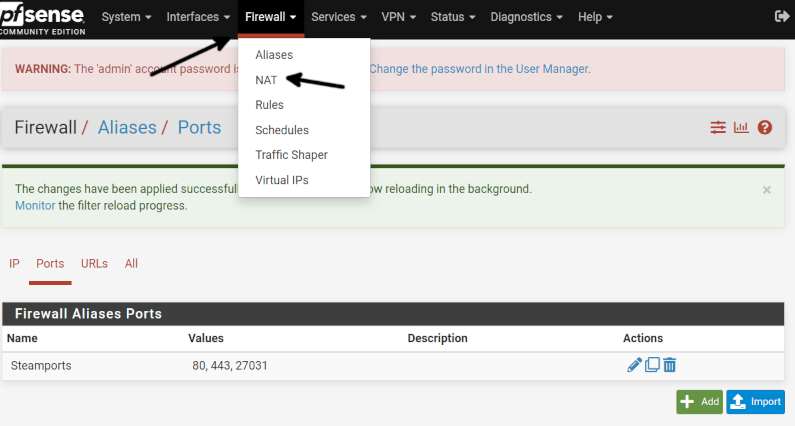
Now on the top menu, press Firewall, then press NAT.
On the NAT screen, press the Add button as shown below.
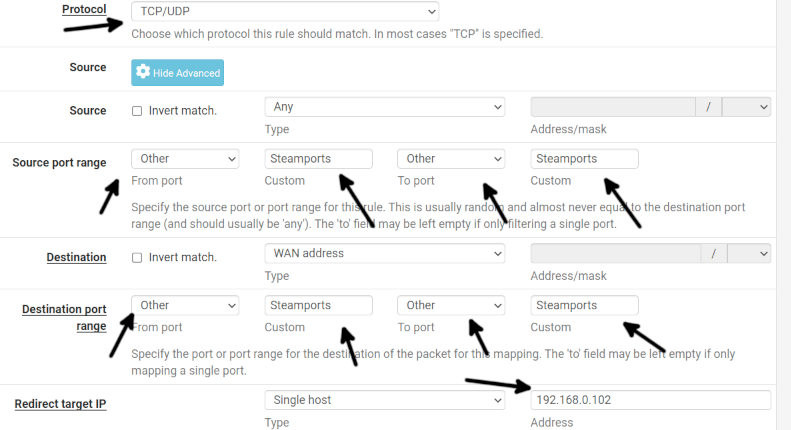
Since I added both TCP and UDP ports in the Protocol option, I added both of them.
In the Source port range, select Other, and on the Custom field, type the alias you created previously. Don’t worry; this has an autocomplete function: select Other and the alias you created on the To port field.
On the Destination port range section, select Other and the alias both in From port and To port.
On the Redirect target IP field, select Single host and type the IP address of the client to which you want to forward. Keep scrolling down.
On the Redirect target port, select Other and the alias. Then press the Save button.
Now that the multiple ports forwarding is ready press the Apply Changes button.
That’s how you can forward multiple ports by creating an alias.
Forwarding IP address with Pfsense:
This section describes how to forward an IP address using Pfsense.
To begin, log in to your Pfsense web interface; if this is the first time you log in, the default user is ‘admin’, and the default password is ‘pfsense’.
On the main screen, press Firewall on the top menu, then press NAT, as shown in the screenshot below.
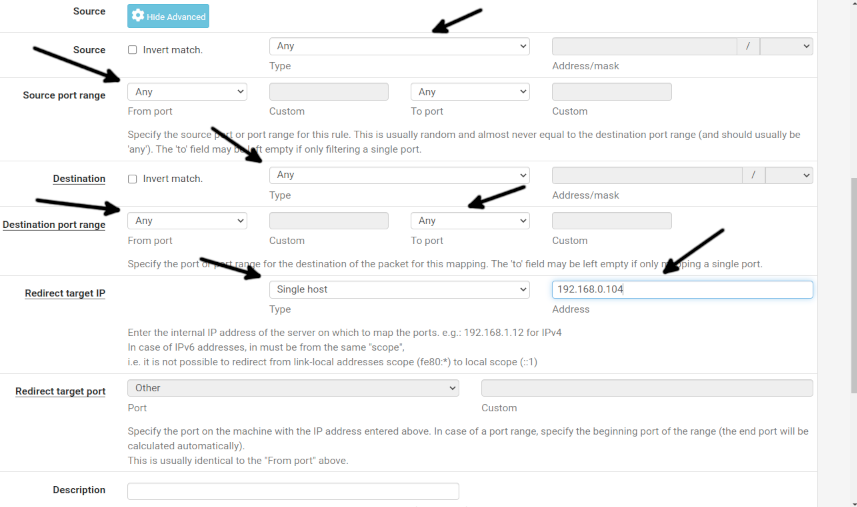
We want to deliver all traffic to a specific computer; therefore, in Source, select Any.
In the Source port range, also select Any.
Also, select Any for the Destination port range, both in From port and To port.
In the Redirect target IP section, select Single host, and in the Address field, type the IP address of the client to which you want to forward the traffic.
Then scroll down and press the Save button.
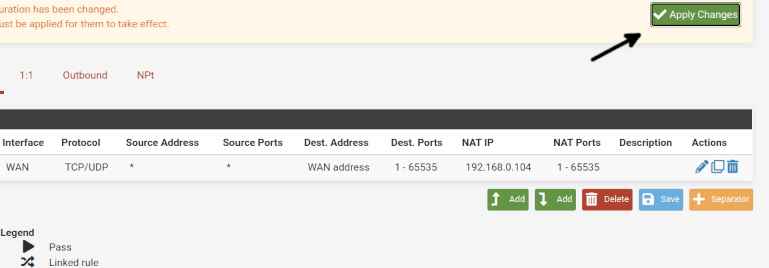
Press the Apply Changes button to apply changes.
Now the IP redirection is ready to reach your client.
Conclusion:
As you can see, Pfsense is an excellent tool to manage your network. Configuring NAT rules for port or IP redirection is pretty easy, thanks to the user-friendly interface. Any user can easily configure it by following the rules described above. Pfsense is not only a friendly tool to configure your network, but it also can increase your network security by implementing Snort (Intrusion Detection System) rules in addition to the firewall rules. It can even be useful to run speed tests, explained in the next tutorial we will publish.
Thank you for reading this tutorial explaining how to configure port forwarding using Pfsense. I hope it was useful for you. Keep following LinuxHint for more professional Linux tutorials.

