In this write-up, we will discuss the interference of the 16×2 LCD with the Raspberry Pi 4 and also display some strings on the LCD.
How to interface the 16×2 LCD with the Raspberry Pi 4
To connect the 16×2 LCD with the Raspberry Pi 4, we will need the following electronic components:
- Breadboard
- 1 16×2 LCD
- Jumper wires
- 1 Potentiometer
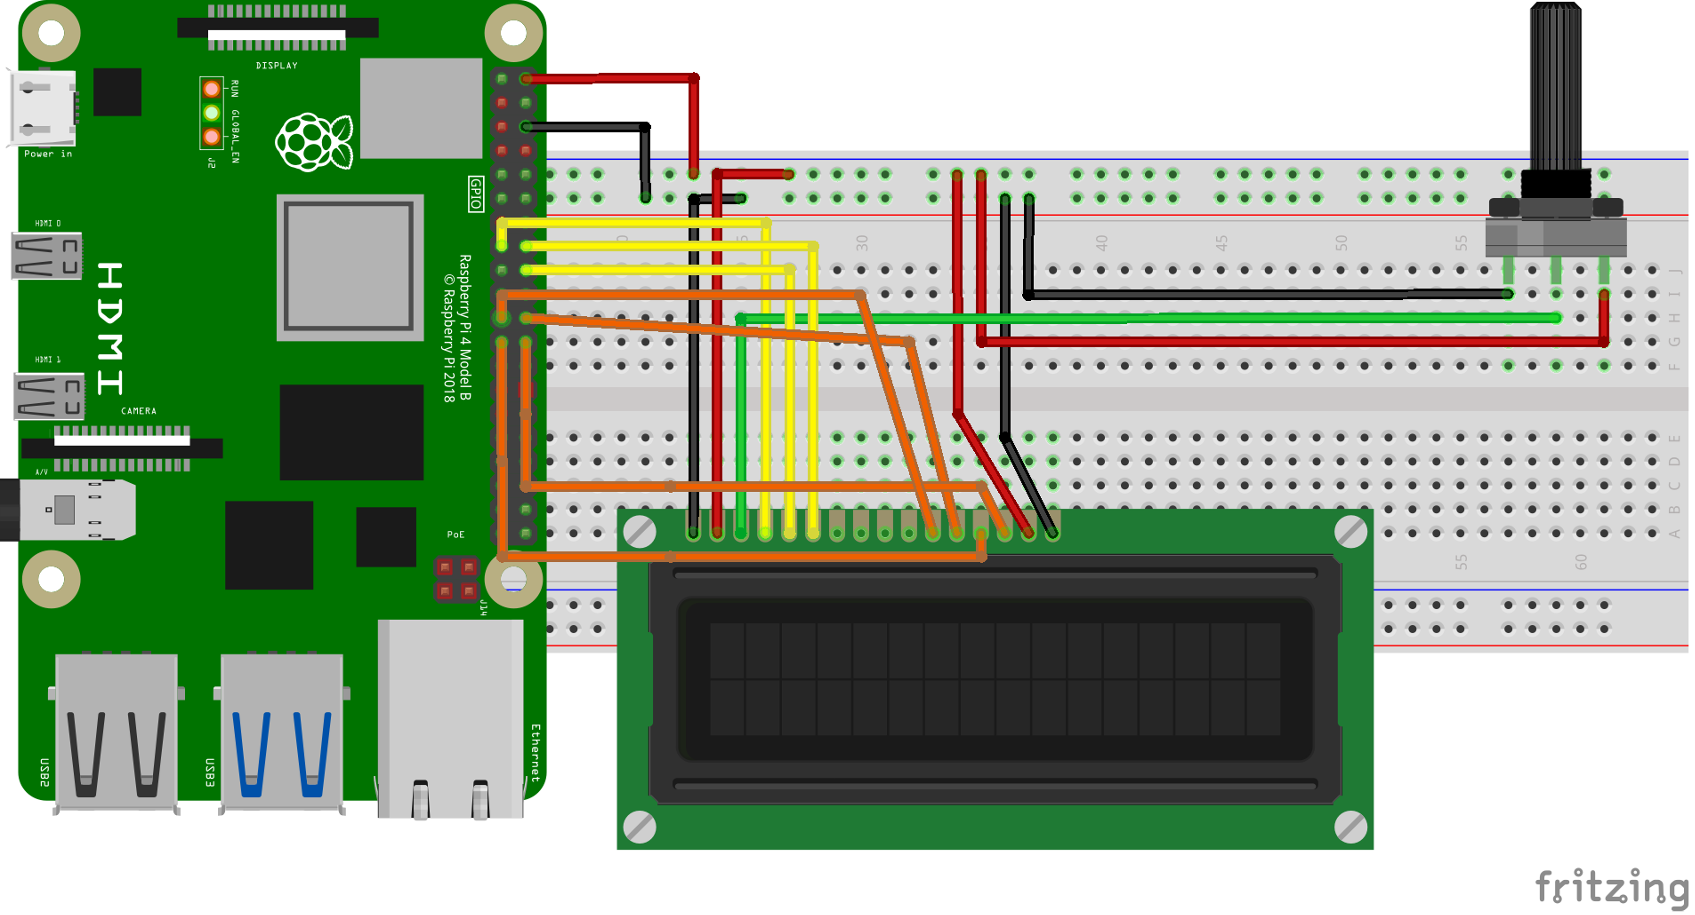
The circuit diagram of the circuit of interfacing the 16×2 LCD with the Raspberry Pi 4 is:
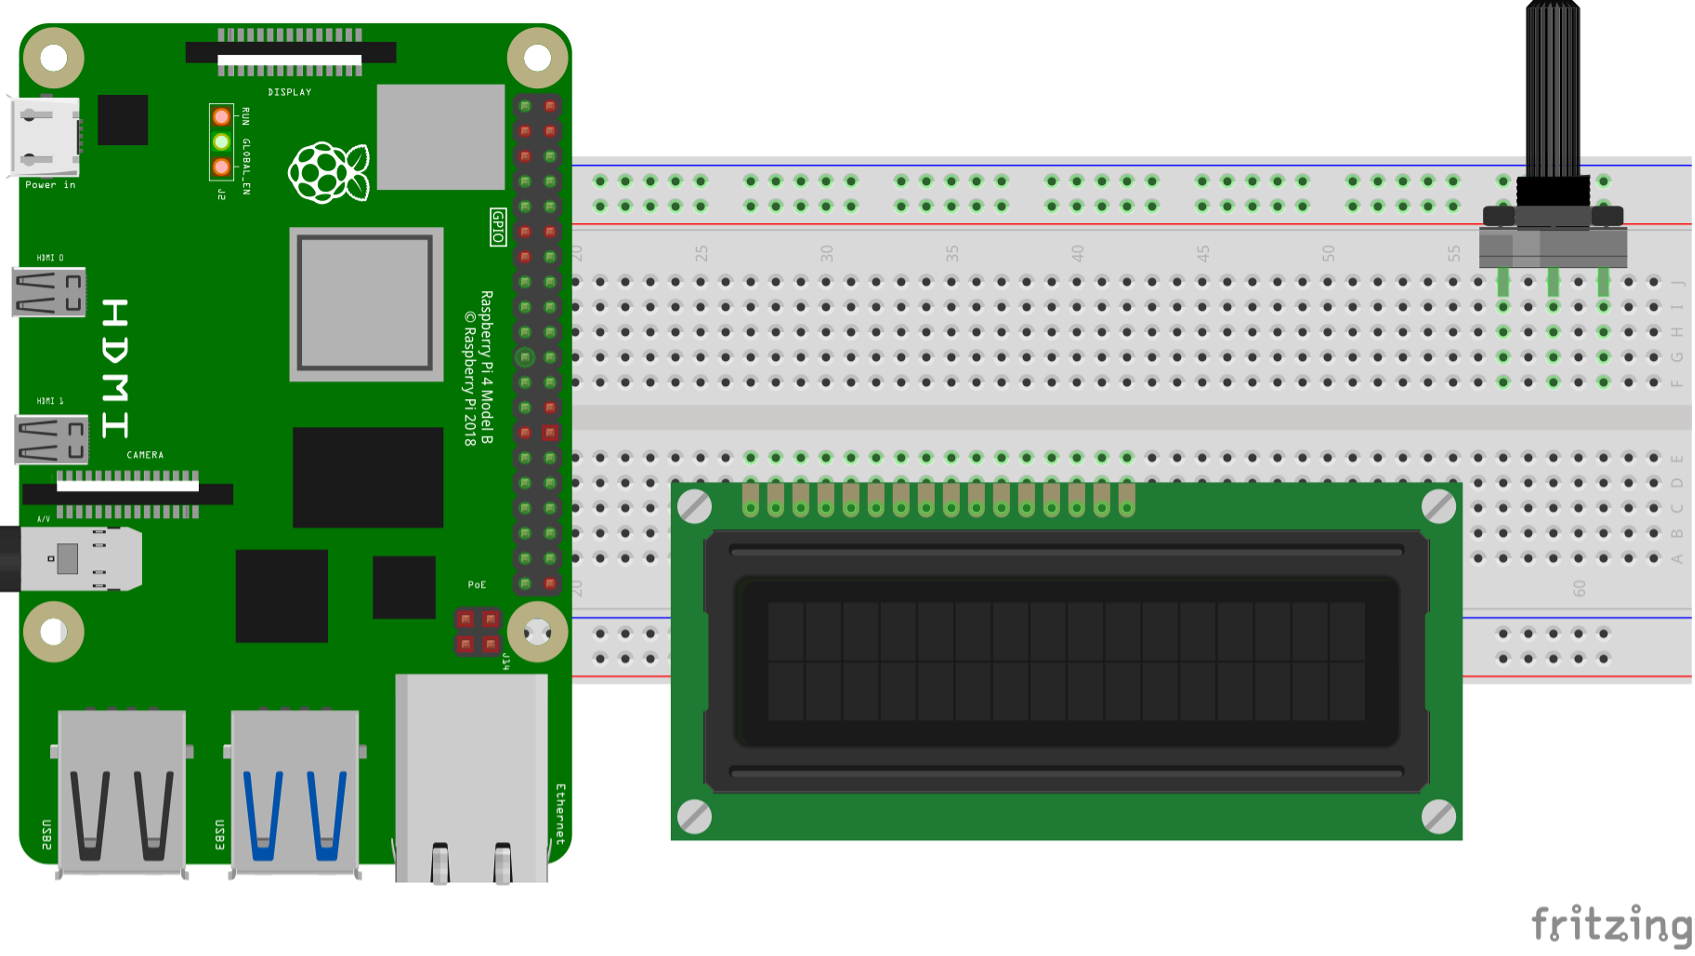
First, we will place the Raspberry Pi, a potentiometer, and the 16×2 LCD on the breadboard:
Now with the help of jumper wires, we will connect the 16×2 LCD with the GPIO pins of Raspberry Pi 4 according to the table:
| GPIO pins of Raspberry Pi | BCM pins of Raspberry Pi | LCD pins |
|---|---|---|
| GPIO 22 | 15 | RS |
| GPIO 24 | 18 | RW |
| GPIO 23 | 16 | E |
| GPIO 9 | 21 | D4 |
| GPIO 25 | 22 | D5 |
| GPIO 11 | 23 | D6 |
| GPIO 8 | 24 | D7 |
| Ground | 6 | K, VSS |
| 5V | 2 | VDD, A |
Other than these connections, the Vo pin of the LCD is connected to the output pin of a potentiometer and the remaining two pins of potentiometer are connected to the 5V and the ground of the Raspberry Pi.
How to download the RPLCD library in the Raspberry Pi 4
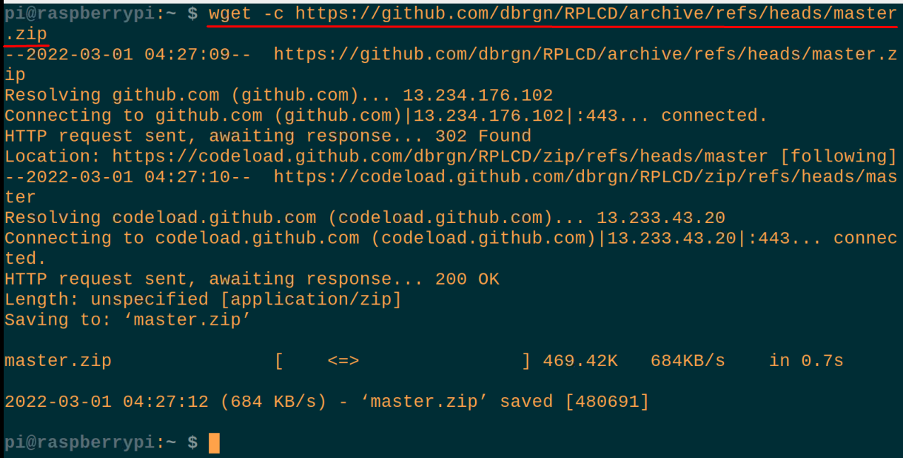
To interface any LCD either its 16×2 or 16×4, we have to download the library of RPLCD which we can download by using the wget command:
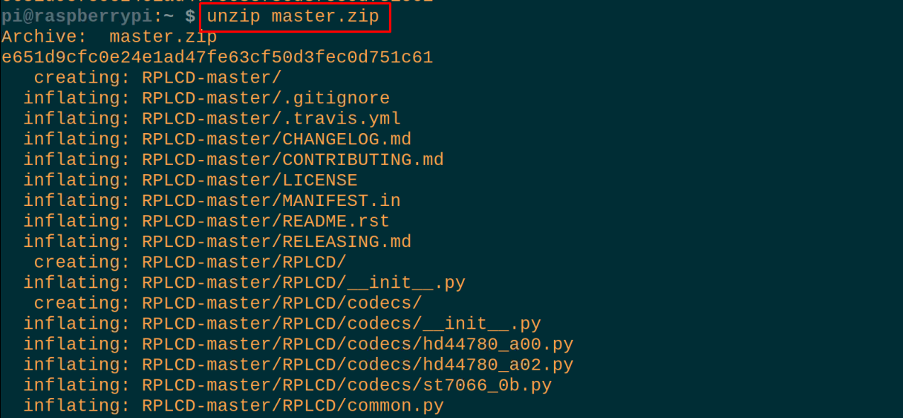
When the command executed successfully, a zip file will be downloaded with a name of “master.zip”, to unzip it, we will use the command:
Now, we will go to the unzipped folder, RPLCD-master, directory using the cd command:
What is the Python code to connect the 16×2 LCD with Raspberry Pi 4
Once we are in the “RPLCD-master” directory, we will create a Python file with the name of “LCD.py” to write the Python script to interface the LCD with Raspberry Pi 4 using the command:
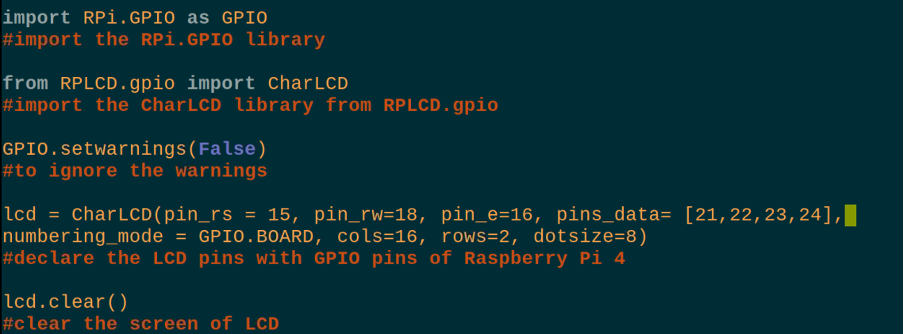
Type the following python code to display the “LinuxHint” on the 16×2 LCD:
#import the RPi.GPIO library
from RPLCD.gpio import CharLCD
#import the CharLCD library from RPLCD.gpio
GPIO.setwarnings(False)
#to ignore the warnings
lcd = CharLCD(pin_rs = 15, pin_rw=18, pin_e=16, pins_data= [21,22,23,24],
numbering_mode = GPIO.BOARD, cols=16, rows=2, dotsize=8)
#declare the LCD pins with GPIO pins of Raspberry Pi 4
lcd.clear()
#clear the screen of LCD
lcd.write_string("It’s LinuxHint")
#display the text on 16x2 LCD
Explanation of code: In the above code, we have imported the libraries RPi.GPIO and RPLCD.gpio from the CharLCD. Then we set the function of set.warnings to False to ignore the warning of LCD and initialize the 16×2 LCD. Then clear the display of the 16×2 LCD and display “It’s LinuxHint”.
Note: During the initialization of the LCD, we set numbering_mode= GPIO.BOARD because we are using the BCM nomenclature of the pin number of Raspberry Pi which is mentioned in the above table.
To compile and execute the script of the file “LCD.py”, we will use the command in the terminal of Raspberry Pi:
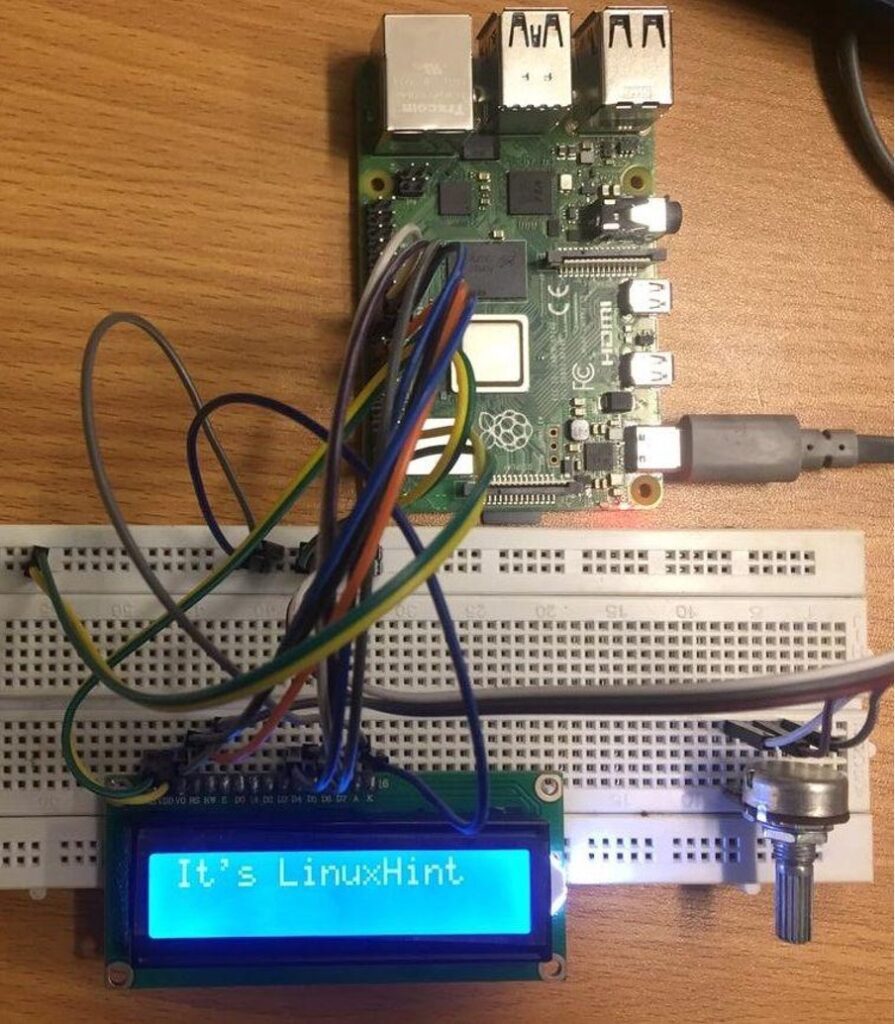
The hardware working of the above project of interfacing the 16×2 LCD with the Raspberry Pi 4 is
Conclusion
There are different types of LCDs that can be interfaced with Raspberry Pi. They are used to display the characters, strings, and any sensor output on its screen. In this write-up, we have configured the LCD with the Raspberry Pi 4 and displayed a string on its screen using the Python code.


