How to interfacing keypad with Arduino
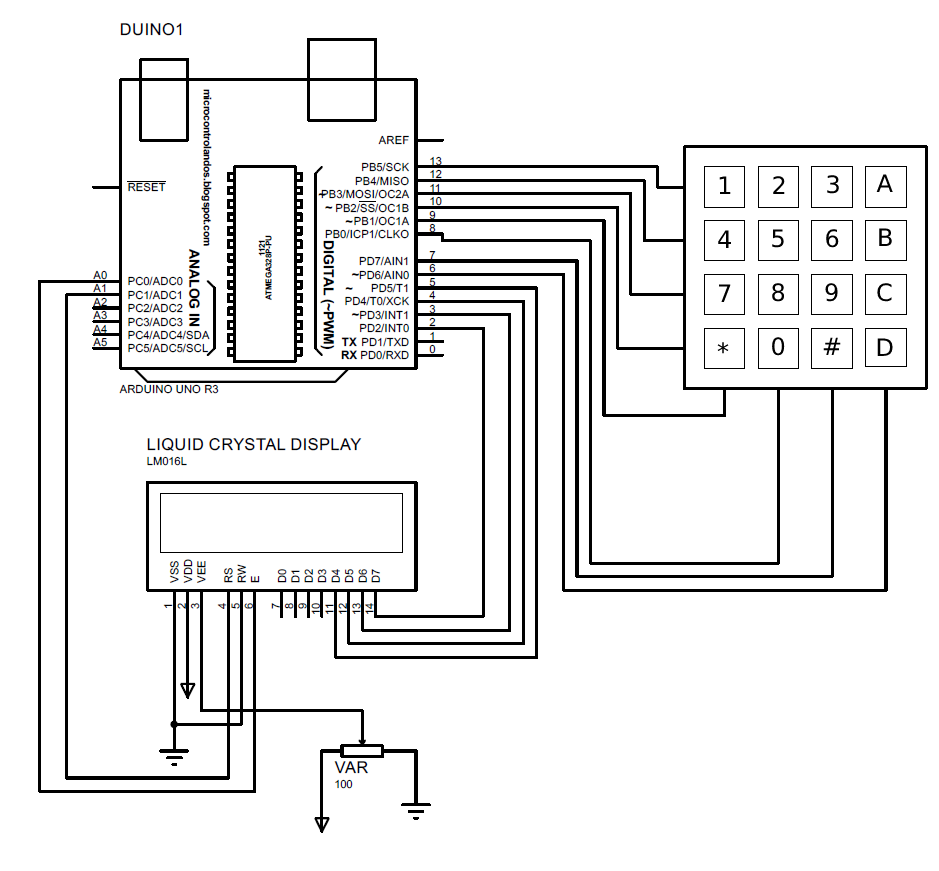
The keypad normally comes in two sizes one is 3×3 and the other is 4×4 so here in this project we are using a 4×4 keypad. The schematic of the circuit of the interfacing the keypad with Arduino and displaying it input at LCD is:
Hardware implementation
The components we have used for displaying the input of keypad on LCD using Arduino are:
- Arduino Uno
- Connecting wires
- Potentiometer
- One 4×4 membrane keypad
- Liquid crystal display
- Breadboard
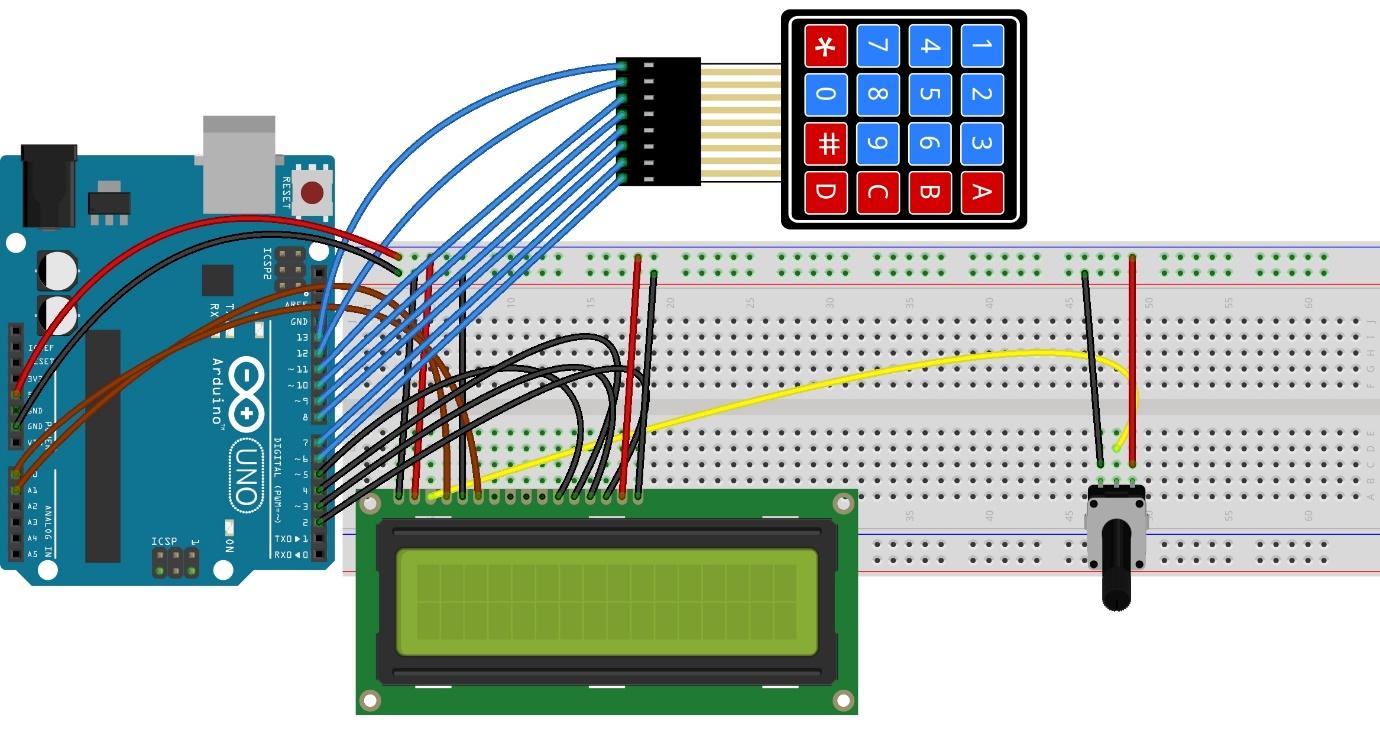
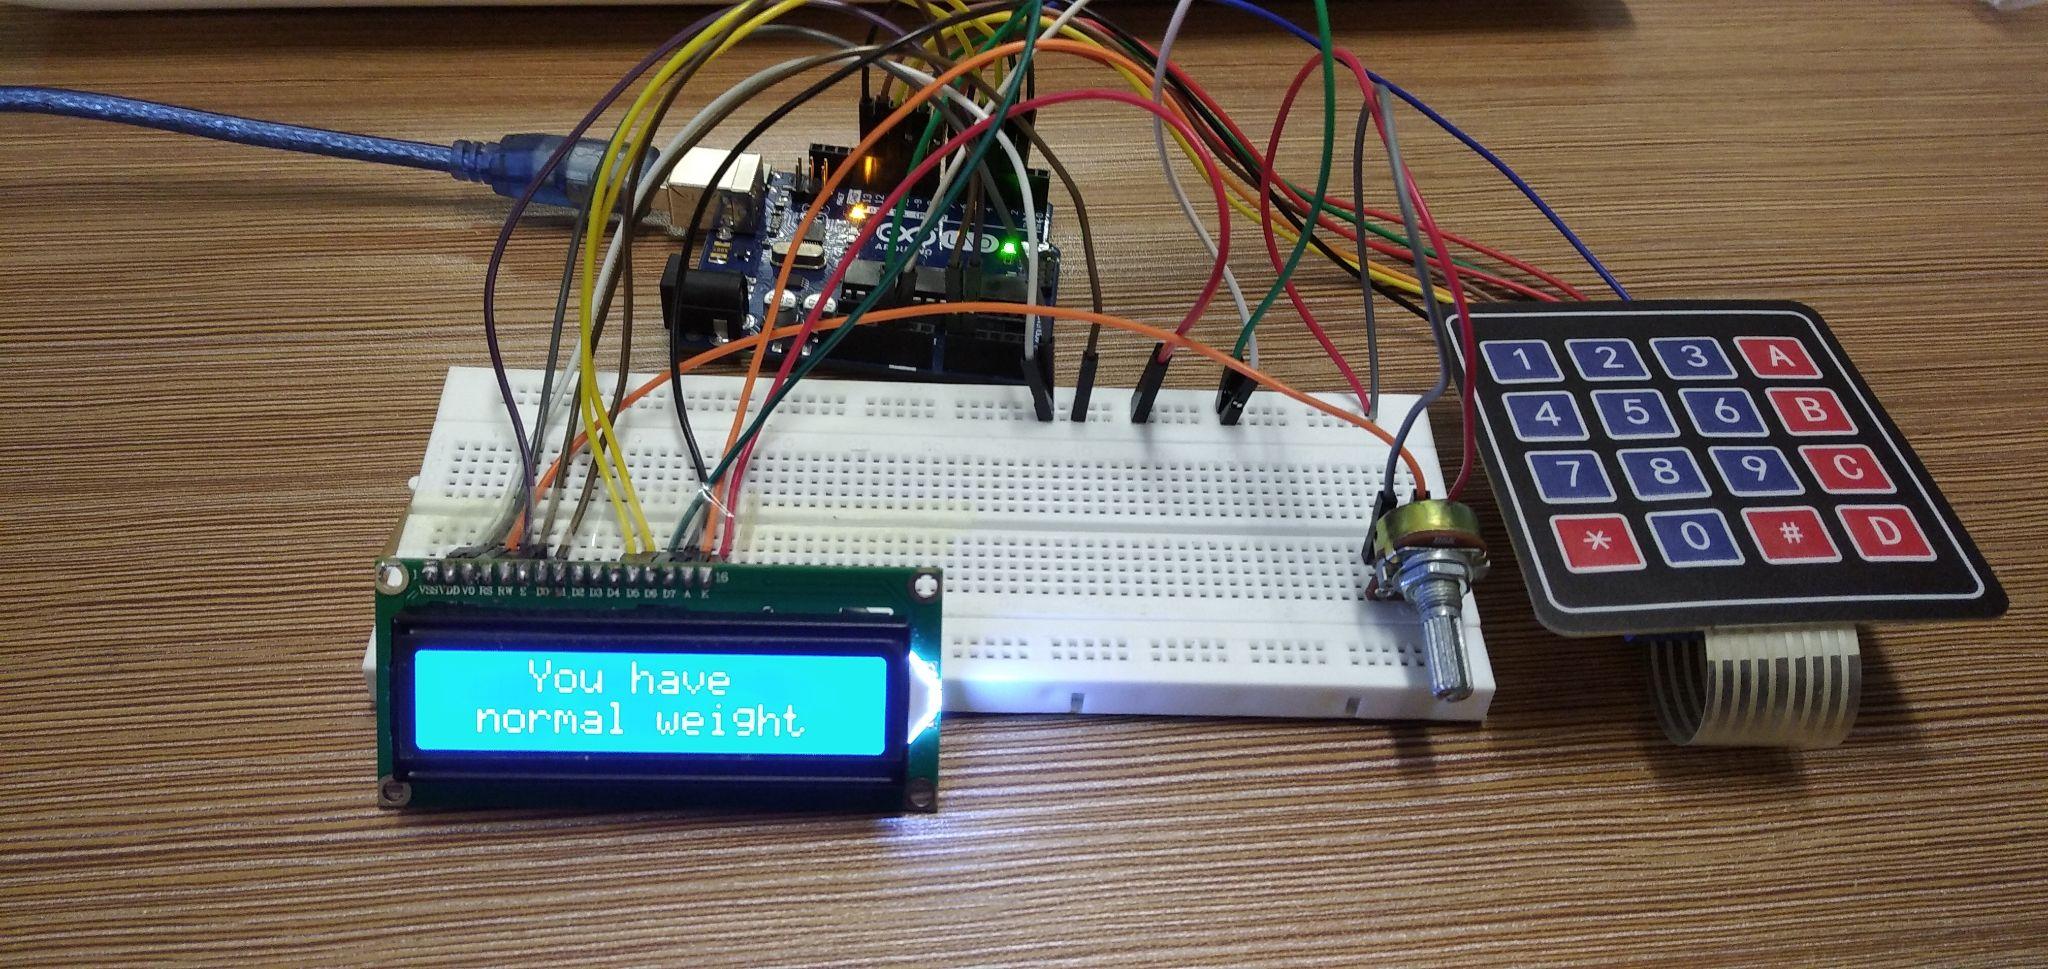
We have used the breadboard for interfacing the LCD with Arduino whereas we have directly connected the keypad with Arduino Uno board. This can be illustrated by the figure given below and we have used the potentiometer to control the brightness of the LCD.
Arduino code for displaying the input of the keypad on LCD
In this project the Arduino program is calculating a Body Mass Index (BMI) by taking the weight and height of the person as an input from the keypad. To calculate the BMI we have used the following formula:
To calculate the BMI in a metric system and mostly the height is measured in centimeters so we have converted height in meters by multiplying the whole result by 10,000.
#include <LiquidCrystal.h>// library for LCD
LiquidCrystal lcd(A1, A0, 5, 4, 3, 2);// Arduino pins for LCD
const byte ROWS = 4; //initializing the rows of keypad
const byte COLS = 4;//initializing the columns of keypad
char keys [ROWS] [COLS] = { // giving values to each key of the keypad
{'1', '2', '3', '&'},
{'4', '5', '6', 'B'},
{'7', '8', '9', 'C'},
{'*', '0', '=', 'D'}
};
byte rowPins[ROWS] = {13,12,11,10}; //Arduino pins for rows of keypad
byte colPins[COLS] = {9,8,7,6}; // Arduino pins for columns of keypad
Keypad myKeypad = Keypad( makeKeymap(keys), rowPins, colPins, ROWS, COLS ); /* function for mapping the values on the keys*/
// assigning boolean data type to the variables and initializing them with zero
boolean present = false;
boolean next = false;
boolean final = false;
String num1, num2; // variables to display the keypad integer input
float ans;// variable for storing the result of the BMI
char op;// assigning character data type for the character used for BMI
void setup()
{
lcd.begin(16,2); // initializing the LCD
lcd.setCursor(3,0); // setting the place for displaying the first data line
lcd.print("LinuxHint"); //data to be displayed
lcd.setCursor(1,1);//setting the place for displaying the second data line
lcd.print("BMI Calculator");// data to be displayed
delay(2000);// time for which the data will be displayed on LCD
lcd.clear();// clearing the LCD
lcd.setCursor(0,0);// setting the place for displaying the second data line
lcd.print("Enter Wgt & Hgt");//data to be displayed
}
void loop(){
// using the getkey function to get the value of the key pressed
char key = myKeypad.getKey();
if (key != NO_KEY && (key=='1'||key=='2'||key=='3'||key=='4'||key=='5'||key=='6'||key=='7'||key=='8'||key=='9'||key=='0'))// check which key is pressed by checking its integer value
{
if (present != true)
{
num1 = num1 + key; // storing the value of key pressed in num1
float numLength = num1.length();
lcd.setCursor(0, 1); /* decaling the place where the first entry will be displayed*/
lcd.print(num1); // printing the first number entered
}
else
{
num2 = num2 + key;//storing the value of second key pressed in num2
float numLength = num2.length();
lcd.setCursor(4, 1);/*decaling the place where the second entry will be displayed*/
lcd.print(num2); //printing the second number entered
final = true;
}
}
// condition if key having the assigned operator for BMI calculation is pressed
else if (present == false && key != NO_KEY && (key == '&'))
{
if (present == false)
{
present = true;
op = key; // saving the key pressed for calculating the BMI
lcd.setCursor(3,1); // setting the place for the data to be displayed
lcd.print(op); // displaying the character used for BMI
}
}
// conditions to calculate the BMI
else if (final == true && key != NO_KEY && key == '='){
if (op == '&'){
ans = (num1.toFloat() / (num2.toFloat()*num2.toFloat()))*10000;// formula to calculate the BMI
}
lcd.setCursor(0,2); // setting the place for the data to be displayed
lcd.print("Your BMI is:");// data to be displayed
lcd.print(ans); // displaying the answer for BMI calculation
lcd.clear();// clearing the LCD
if (ans<18.5){ // if BMI is less than 18.5 then you are under weight
lcd.setCursor(0,0);
lcd.print(" You are ");
lcd.setCursor(0,1);
lcd.print(" under weight ");
}
else if(ans<25){// if BMI is less than 25 then you have normal weight
lcd.setCursor(0,0);
lcd.print(" You have ");
lcd.setCursor(0,1);
lcd.print (" normal weight");
}
else if (ans<30){ if BMI is less than 30 then you are over weight
lcd.setCursor(0,0);
lcd.print(" You are");
lcd.setCursor(0,1);
lcd.print(" Over weight")
else{ // else you are obese
lcd.print("You are obese ");
}
delay(2000);// time or which the data will be displayed
}
// condition for clearing the LCD or starting the Arduino code again
else if (key != NO_KEY && key == 'C'){
lcd.clear();
present = false;
final = false;
setup();// calling the setup function to start the code again
num1 = "";
num2 = "";
ans = 0;
op = ' ';
}
}
To calculate the BMI, we have compiled the Arduino code in such a way that first we have defined the libraries of the keypad and LCD and pins of the Arduino are assigned for LCD. Next after initializing the dimension of the keypad, we have given each key of the keypad a value by creating a string.
Next we have assigned the pins keypad to Arduino and using the keypad function mapped the values to the keys of the keypad. Moving forward we have declared some variables that we used for taking the input for the keypad and storing the result for the BMI calculation.
In the setup function we have displayed some data on the LCD and coming to the loop function we have used the if condition for the keys having any integer values to recognize which value is entered.
The program takes the two inputs from the user one is weight, and the other is the height and when the designated key for BMI it will calculate the BMI and tell the status by deciding it through BMI value.
To reset the program, we have defined a key that when it is pressed it will clear the LCD and the setup function will be called to restart the Arduino code. Here in the code we have assigned the key “A” of the keypad to perform the BMI calculation and the key “C” of the keypad is used for clearing the LCD.
Hardware implementation for displaying keypad input on LCD
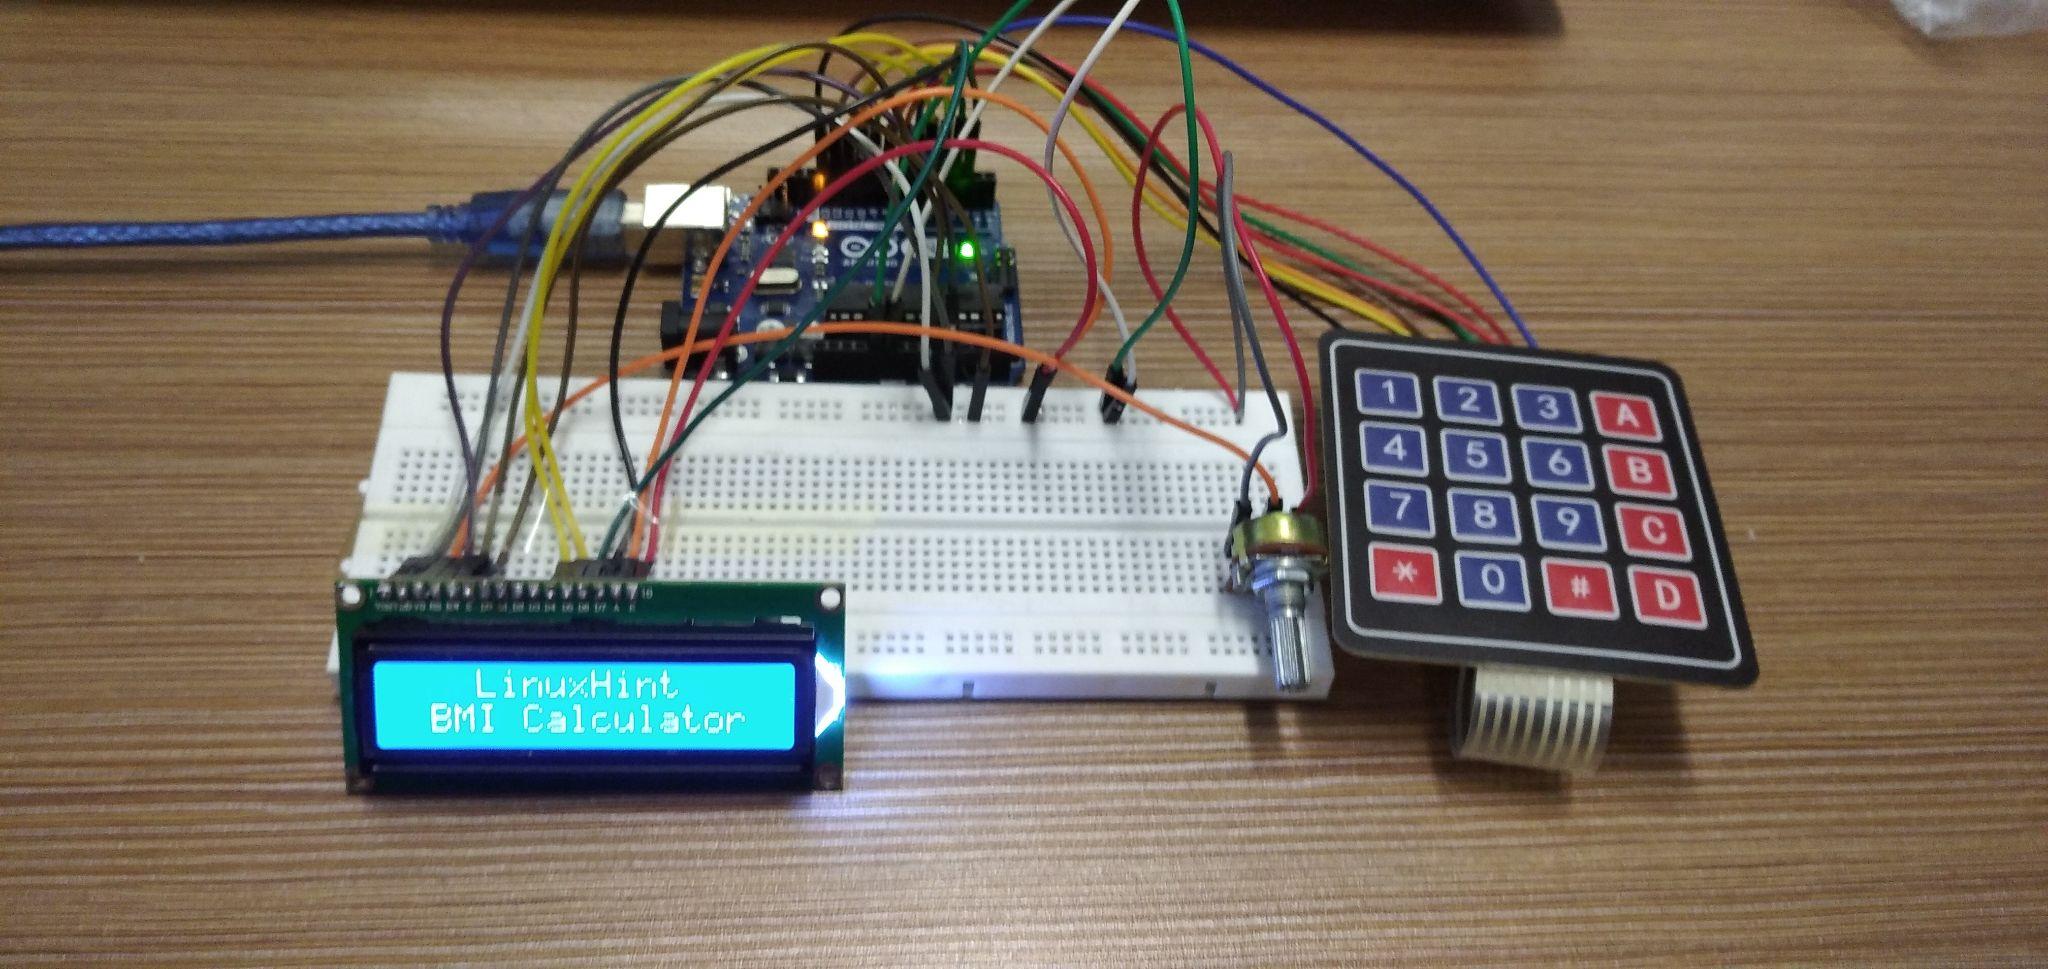
We have posted the image below of the hardware implementation for displaying the keypad input on the LCD.
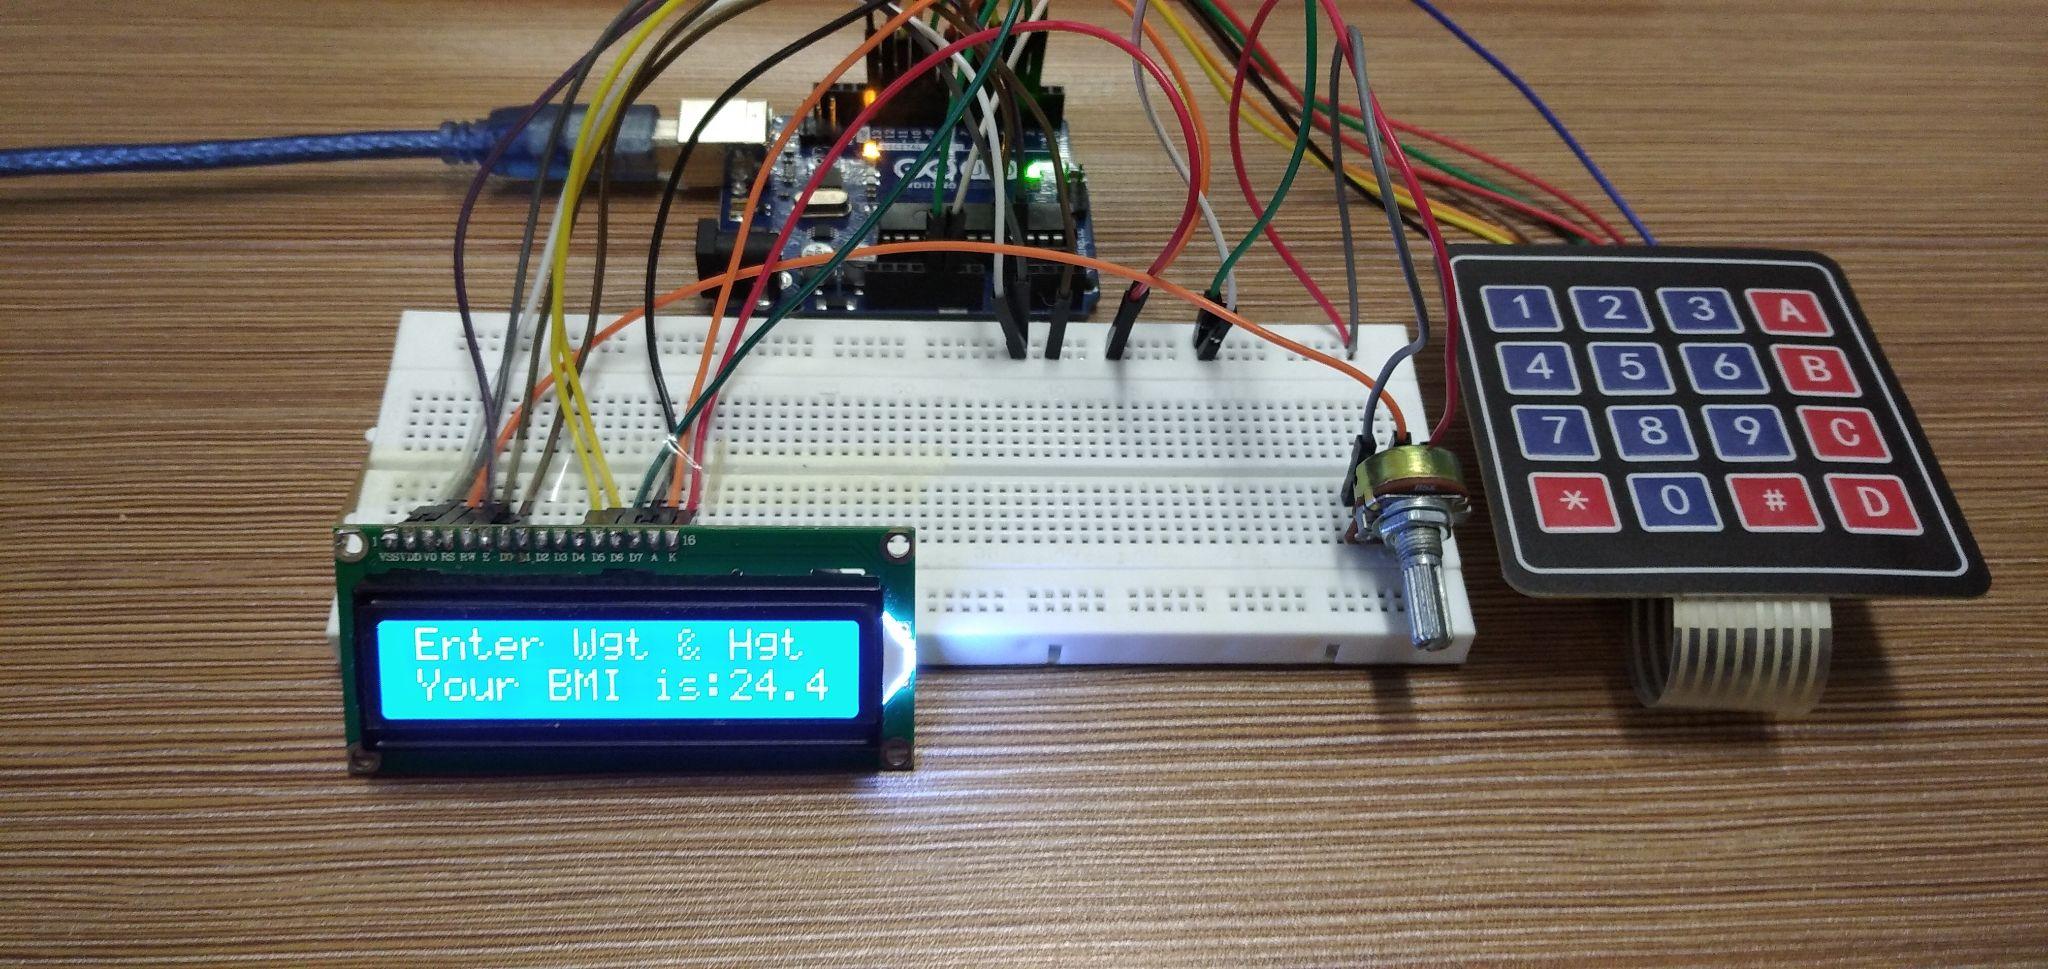
The Arduino code will ask the user for weight and Height and using the keypad the user will enter values for the weight and height as in the image posted below.
Next to calculate the BMI press the key “A” of the keypad and the BMI will be displayed on the LCD as in the figure below.
Based on the BMI value the Arduino code will give the status of the BMI and it can be seen in the figure posted below.
Conclusion
When we have to give the inputs to the Arduino program manually we have to interface a keypad with Arduino. The keypads are smaller versions of keyboards that can perform some basic functions like giving inputs to any device. These inputs can either be characters or an integer and the keys of the keypad are easily configurable. In this write-up we have displayed a keypad input on the LCD by compiling a code of BMI calculator in which there are two inputs required by the Arduino code : weight and height.

