Despite the numerous types, audio and video formats have the common purpose of saving information in a retrievable manner without experiencing any corruption in data over a long period of time.
Regardless of this, you might find yourself wanting to save your media in a different format. This might be for various reasons. For example, the media file may not be transferable over the internet without converting it into a different format, or you might just want to save space on your device by converting the media file into a format that allows for file compression.
Although there could be many reasons, you would require the help of a media converter to achieve these feats. Fortunately for you, this guide is meant to solve that problem.
Introducing MystiQ: The all-in-one converter for you. MystiQ is a free-to-use software that allows you to convert between different audio and video formats. With its simple-to-understand interface, using MystiQ is a walk in the park.
This guide is meant to help you learn how to use MystiQ on Linux. Although this guide uses Ubuntu 20.04 LTS as the Linux distro, the method shouldn’t differ for the other Linux distributions.
Let’s look at the method to install and use MystiQ on Ubuntu.
Installing MystiQ on Your Linux Distribution
The easiest method to install MystiQ on any Linux distribution is the Command Terminal. By using the Terminal, the installation process simply involves running some lines in the Command Terminal.
Follow the steps below to Install MystiQ on your Linux Distribution.
Start by running the Command Terminal using the keyboard shortcut Ctrl + Alt + T. Alternatively, you can run the Command Terminal by typing “Terminal” in the search bar and clicking on the first result.
In the Terminal window, type the following to update all packages and repositories:
Now, type the following commands to add and install the repository for the MystiQ package:
$ sudo apt-key add - < Release.key
Once the repositories are added, type the following commands to install MystiQ.
$ sudo apt install mystiq
If you followed the steps in this guide correctly, you should now have installed MystiQ on your system. The next section of the guide covers how to use MystiQ to convert different media formats.
Getting Started With MystiQ
As stated earlier, the key feature of MystiQ is the ability to convert between different Audio and Video formats. This guide section helps you get started with MystiQ. In this example, we’ll convert a video file into a different format.
Start by opening the MystiQ video converter. You can achieve this by typing “MystiQ” in the search bar and clicking on the first option:
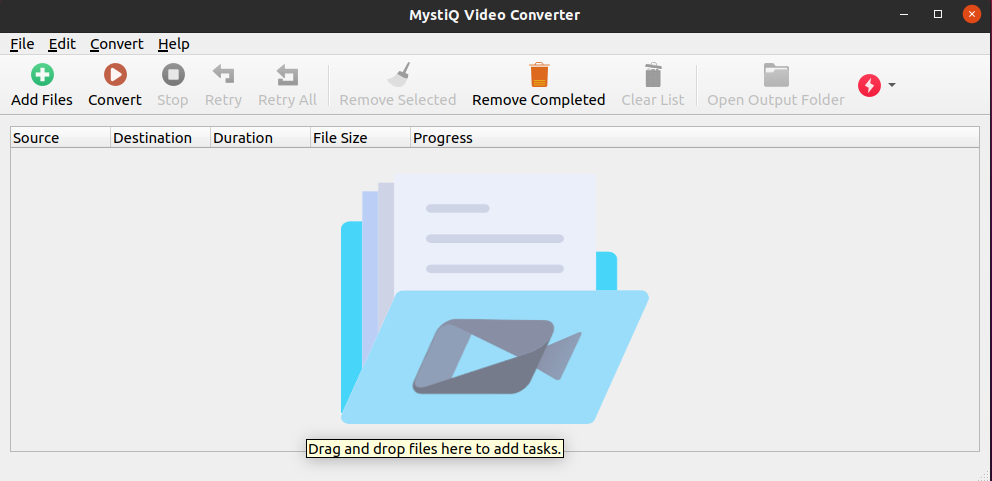
Once the converter opens, you should see a window similar to the image below:
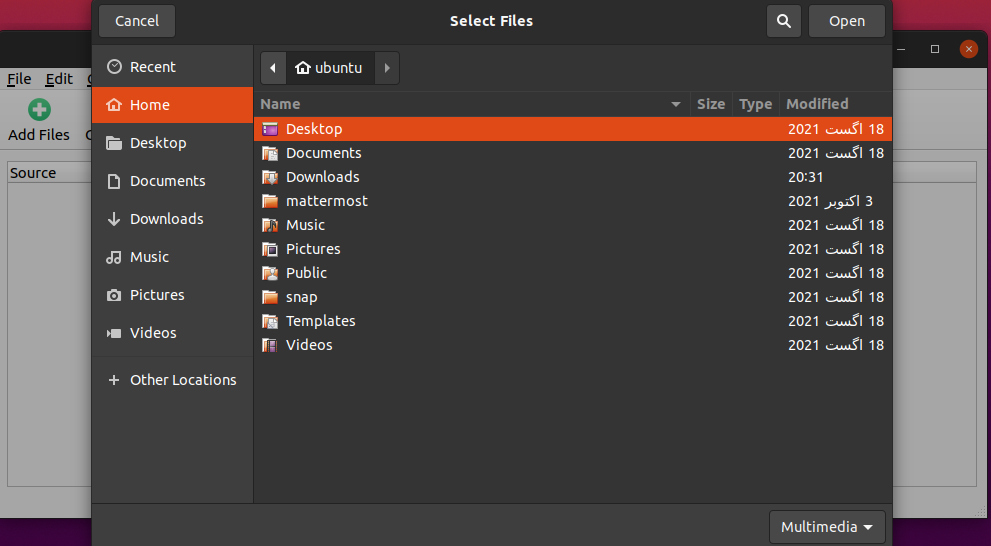
In the application window, click on “Add Files”. This should open a new window with a file explorer. Use the file explorer and navigate to the video that you wish to convert into a different format:
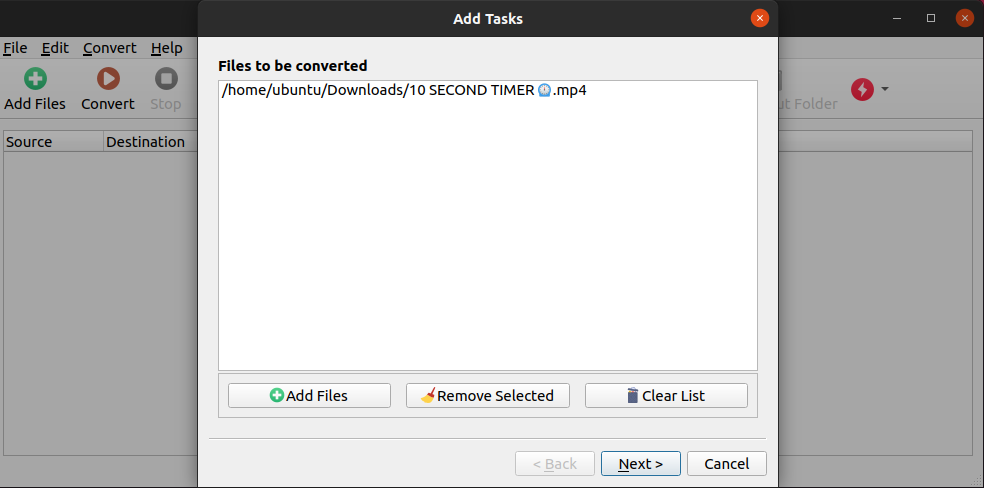
Once you have selected the files that you wish to convert, they should appear in the “Add Tasks” window. After reviewing these files, click on “Next” to proceed to the next step:
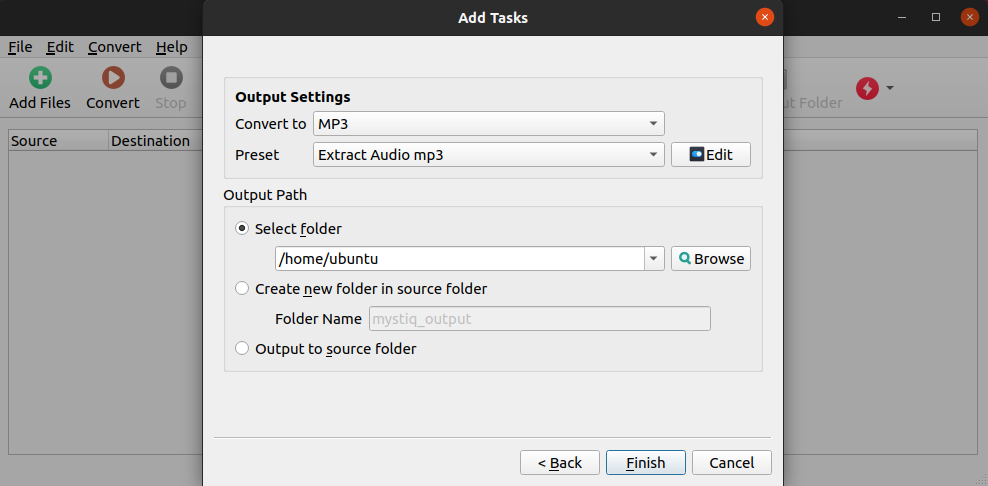
In the Output Settings panel, you should see the option to convert your file into the desired format. Choose the format for your file and select the location of the new file from the “Output Path” panel. Once you’ve made your selections, click “Finish”:
Now, all that’s left is to press “Convert” in the main window. This will start the conversion process. All that’s left is to wait.
It should be noted that in case you have queued multiple files at once, the process will take some time to complete. The progress bar will help you monitor how close your files are to conversion.
This covers the basics of MystiQ as a video and audio file converter.
Features of MystiQ
MystiQ comes with a wide variety of features, several features are listed below:
- Simple and beginner-friendly interface
- Support for multiple platforms
- Support for multiple languages
- Free-to-use
- Extensive control is provided to the user via the Advanced Options
- Supports conversion between almost every audio and video format out there
Uninstalling MystiQ on Linux
If you don’t use MystiQ video converter anymore or wish to re-install it because of some error, you can use the Command Terminal.
To remove MystiQ from your system, you can use the $ apt remove command.
Follow these steps to remove MystiQ from your Linux distribution.
First, open the Command Terminal. Once the Terminal is open, you can type the following command:
[cc lang=”bash” width=”100%” height=”100%” escaped=”true” theme=”blackboard” nowrap=”0″]
$ sudo apt remove mystiq
[/c]c
This should remove MystiQ from your system.
If you wish to uninstall MystiQ by using the GUI method, follow these steps:
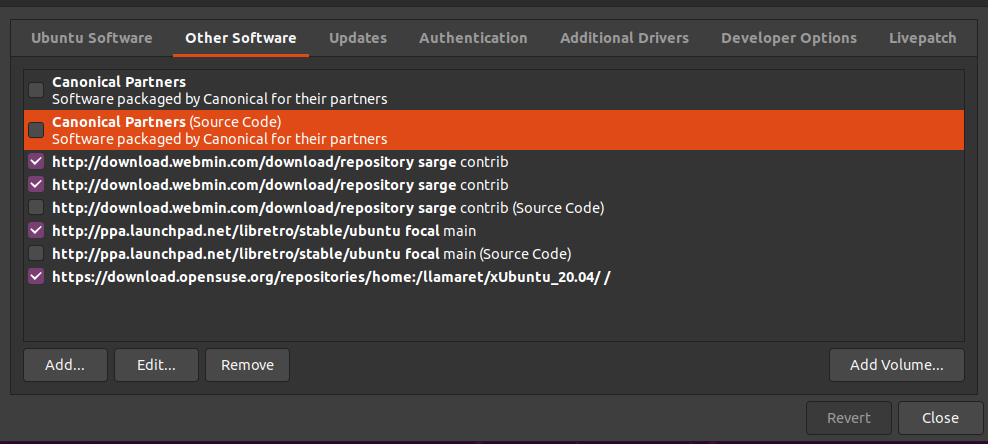
In the search bar, type “Software & Updates”. Once the window opens, navigate to the “Other Software” tab. Select the package you wish to remove and click on “Remove”. This will remove MystiQ from the system:
Conclusion
We hope this guide helped you learn how to use MystiQ on Linux. We covered the method of installation, along with a tutorial on how to use it. We also went over ways to remove it in case it was needed. With this, we hope that you have a wonderful experience using the MystiQ video converter. Check out other Linux Hint articles for more tips and information.


