Wget command is similar to curl command and can be installed on Linux/Unix, Mac OS, Windows. If a download task is stuck in the midway, you can resume it where it was left off.
What will we cover?
This guide will explore the wget command and learn how to use it with the Squid proxy server.
Using the wget command to download a file
wget is a very straight-forward tool. When used without any option, wget will retrieve the resources from the specified url and download them to the current working directory. As an example, look at the below example:
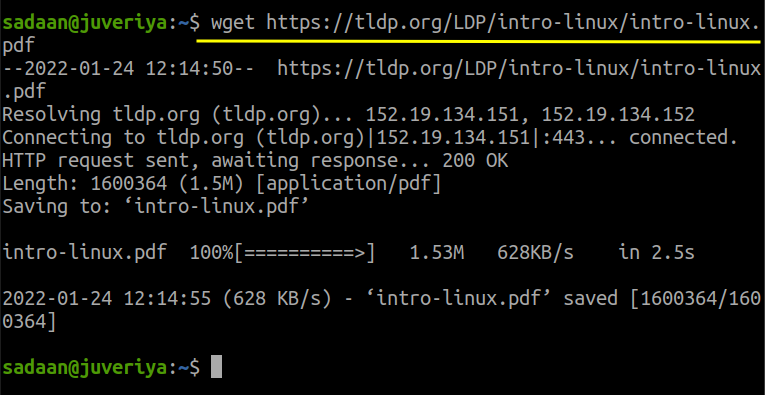
The above file is downloaded to the directory from where the wget command was used.
Setting proxy for wget
Now let us turn to our main subject today: configure wget with proxy. A proxy server has many advantages, of which security is the main concern. In this guide, we will be using the Squid proxy server, which is already configured for our network. Here is the configuration of Squid in our case, do change it to suit your needs:
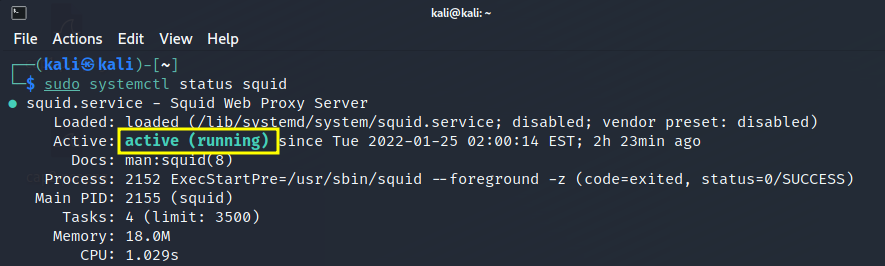
Step 1. We have installed Squid on our Kali Linux machine with the IP 192.168.186.161. If you have not installed squid yet, you can do it by simply running the command:

Step 2. Make sure that Squid is running with the command:
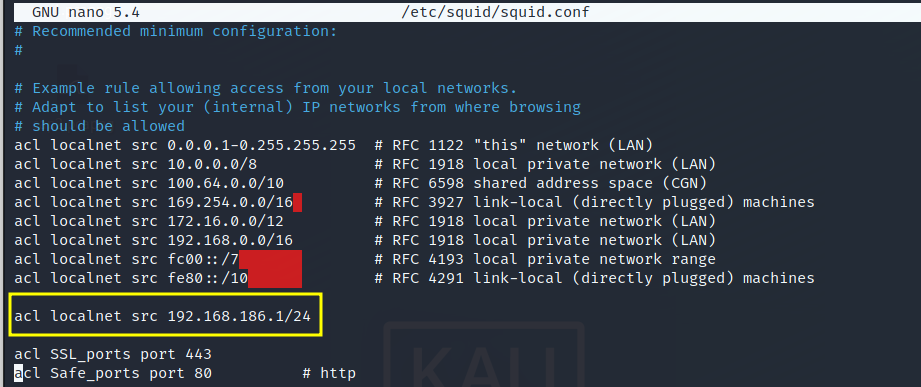
Step 3. Now modify the configuration of Squid as per your network. We have set Squid to allow devices on our network to use squid. For this, you can simply open the configuration file:
and add a line ‘acl localnet src’ along with the IP or network address you want to allow access for. Here in the picture below, you can see that we have allowed our network 192.168.186.1/24
Also, find and set the “http_access” to “allow all” as shown below:

Finally, restart the Squid server with:
Ok, this is enough for configuring Squid. We will now move on to configuring our client from where we will be running ‘wget’.
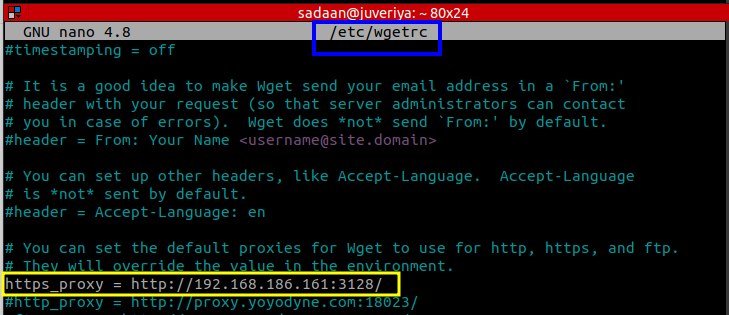
Step 4. In this step, our main work begins for configuring ‘wget’. We have selected another machine on our network. This is our Ubuntu 20.04 machine with IP 192.168.186.150. Now open a terminal here and open the wget configuration file:
And locate the three lines:
#http_proxy = http://proxy.yoyodyne.com:18023/
#ftp_proxy = http://proxy.yoyodyne.com:18023/
Step 5. Now uncomment the line you want to use for your proxy. In our case we are using only the https proxy, so we will configure it with the following format:
In our case, it looks like:
Step 6. After modifying the wgetrc file, let us move on to check if our configuration is working or not. Let us again download a file using wget:
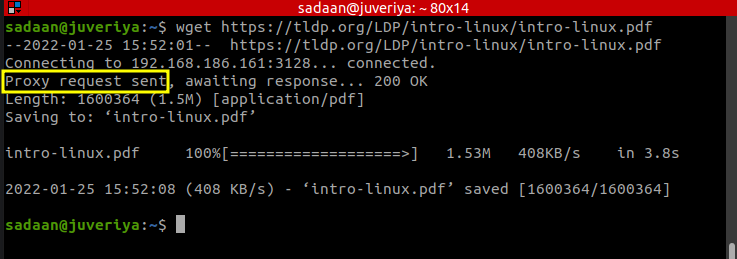
This time we can see that the wget uses a proxy connection to connect to the server.
Setting proxy for wget with Squid Authentication
In this section, we will configure wget to use Squid authentication. If we do not pass the credentials, wget will not download the resources. Let’s do it now.
Step 1. Install the below package:
Step 2. Create a passwd file inside the directory ‘/etc/squid/’
Set the ownership of this file Squid user proxy:
Step 3. We will now add a new user, ‘newuser’ to Squid whose credentials will be used for authentication:
The above command will ask to enter a password for the user ‘newuser’.
Step 4. Open the Squid configuration file:
Step 5. Now search for the line containing the string “auth_param basic program” and make it to look like below:
auth_param basic children 5
auth_param basic realm Squid Basic Authentication
auth_param basic credentialsttl 2 hours
acl auth_users proxy_auth REQUIRED
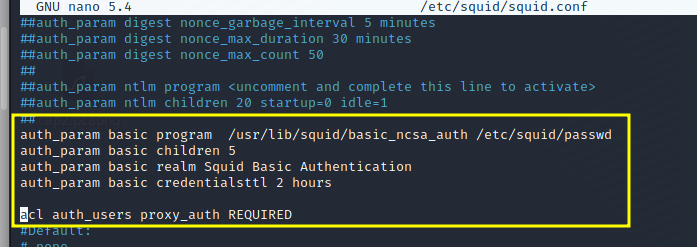
If you do not find any of the lines, then simply add them.
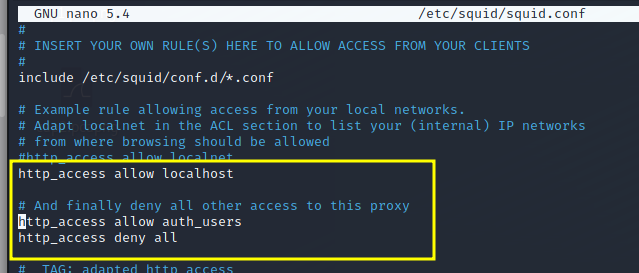
Step 6. Also, add the following line:
And below the above line, add or change “http_access allow all” to “http_access deny all” as shown below:
Step 7. Finally, restart the squid service:
Now first try run wget without user credentials:
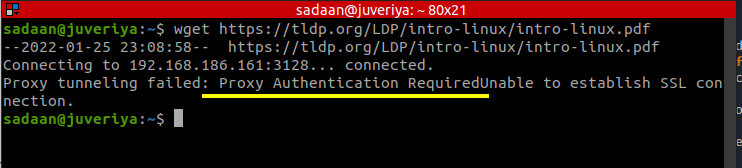
This time, it gives an authentication required error as: “Proxy tunneling failed: Proxy Authentication RequiredUnable to establish SSL connection.”
Now run the wget command with the credential of the user we just added in step 3:
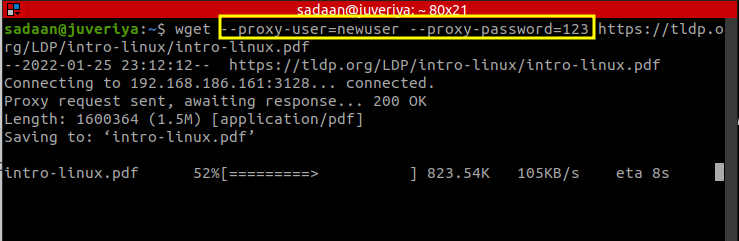
Awesome, this time, the wget command runs like a charm.
More to learn…
This completes our demonstration of setting wget with and without authenticated proxy. Hope you have learned too many new things in this tutorial. One thing to be careful of is that sometimes the configuration of packages may vary for different distributions. E.g., Squid may have a slightly different configuration file on Kali Linux and Ubuntu. In such cases, the config file should be changed wisely.