- Enabling the WSL on Windows
- Verifying that WSL is configured/enabled correctly
Method 1 : How to enable WSL on Windows using GUI
The following steps must be carried out to enable the WSL in the Windows operating system.
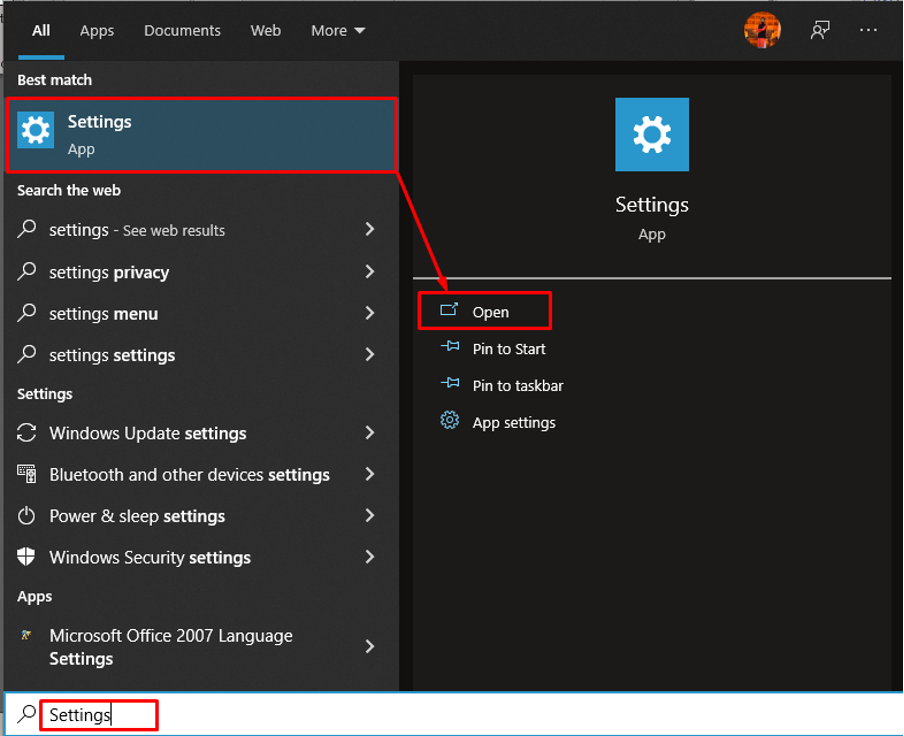
Step 1: As the WSL is used mostly by developers who work on open-source projects. Therefore, firstly, you have to enable developer’s mode in Windows. Open Settings by searching it from the search icon on the taskbar:
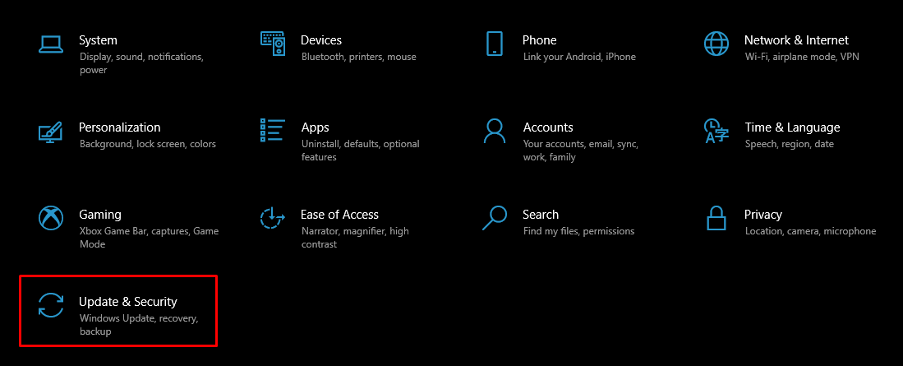
Open “Updates and Security“:
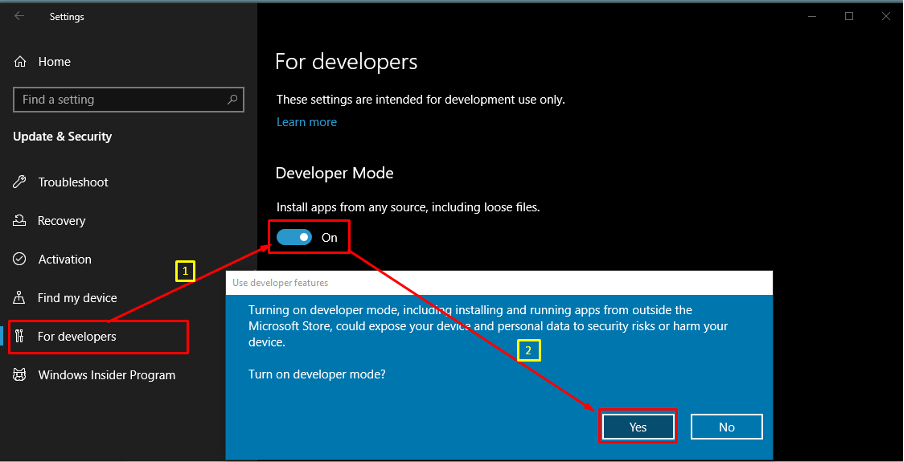
Scroll down the left pane and click on “For Developers“. Turn on the toggle button of “Developer Mode” and a prompt will appear to confirm the enabling of “Developer Mode”.
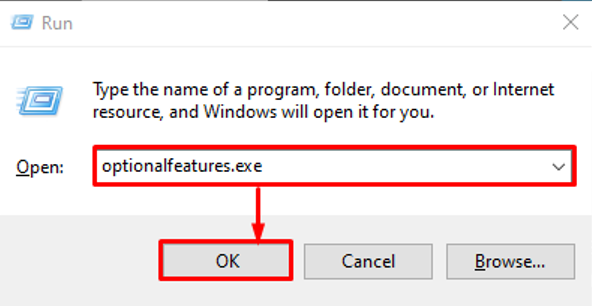
Step 2: After enabling the developer mode, press “Windows Key + R” to open the run box and execute the optionalfeatures.exe:
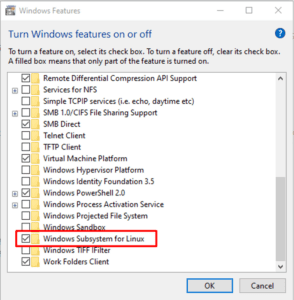
Scroll down and switch ON the feature named “Windows Subsystem for Linux”:
Note: The optionalfeatures.exe service is available by default on your windows system that shows several optional services.
Method 2: How to enable the WSL on Windows using PowerShell
PowerShell is an open-source and widely used command-line tool that automates several tasks. In order to enable WSL in Windows, one can also use PowerShell by using the following command.
How to get Ubuntu on Windows using WSL
Once the “Windows Subsystem for Linux” feature is enabled successfully, one can install several Linux-based distros from the Microsoft store. Here, we will guide you to install Ubuntu using the Microsoft Store:
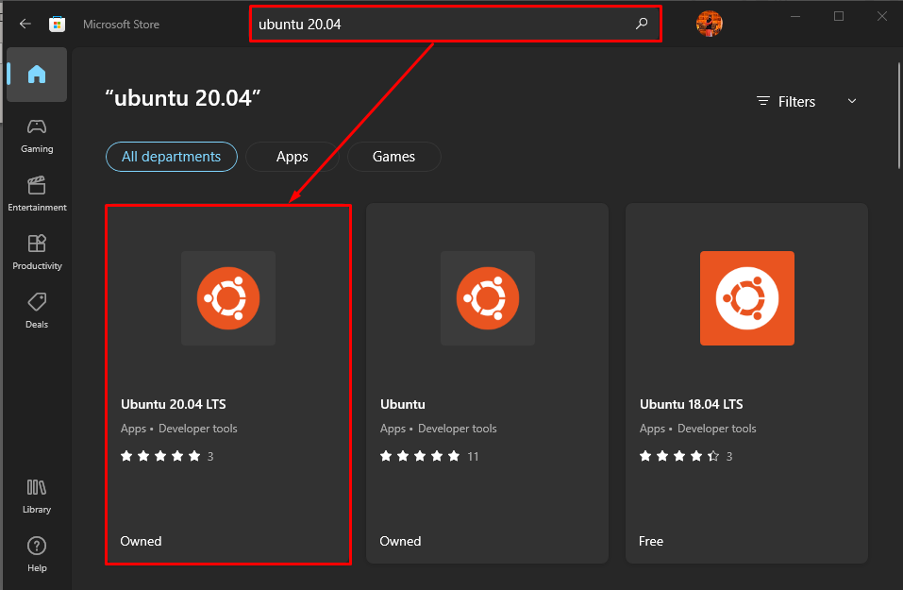
Open the Microsoft Store by searching it in the Windows search bar. Once the store is opened, search for Ubuntu 20.04(as the latest LTS is 20.04) and navigate to the Ubuntu 20.04 LTS:
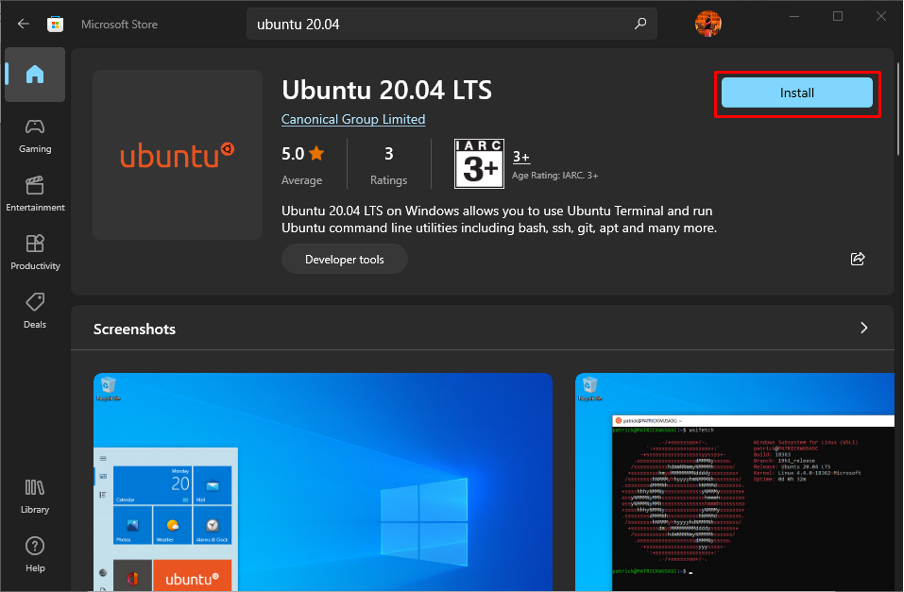
To proceed further, click on the Install button:
The downloading will be started:
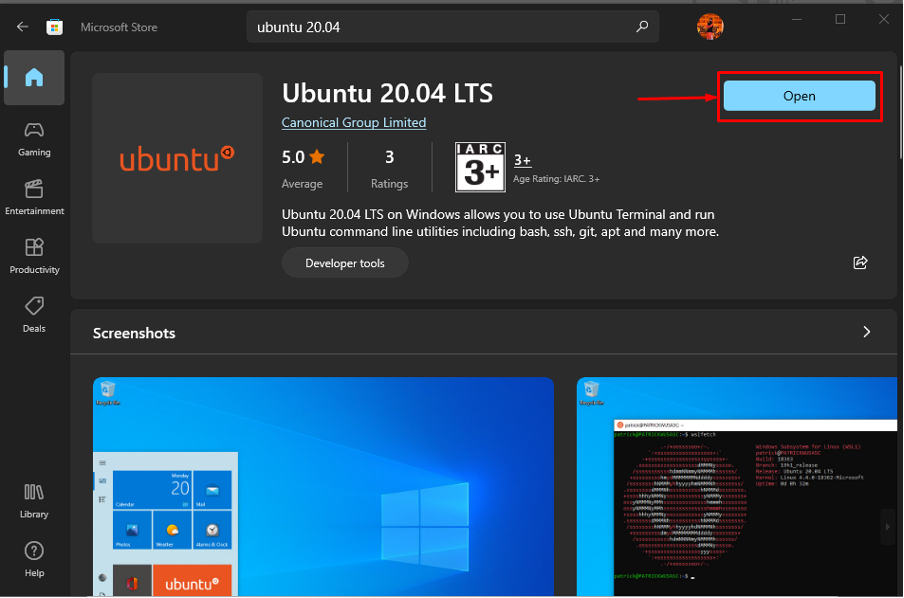
Once the downloading is finished, you will observe the Open button. Click on it to get yourself to Ubuntu’s terminal:
After opening the Ubuntu terminal, a few installation steps will start (automatically):
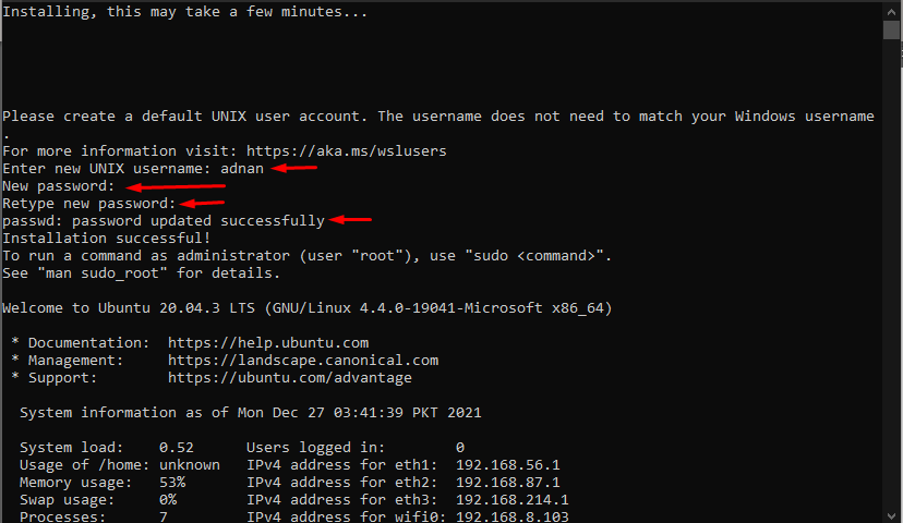
After installation, the terminal asks you to enter the UNIX username and set a password:
After successful installation, you can also verify the installation by using the following WSL command in PowerShell. The output displays the current state of Ubuntu and in our case, it is running:
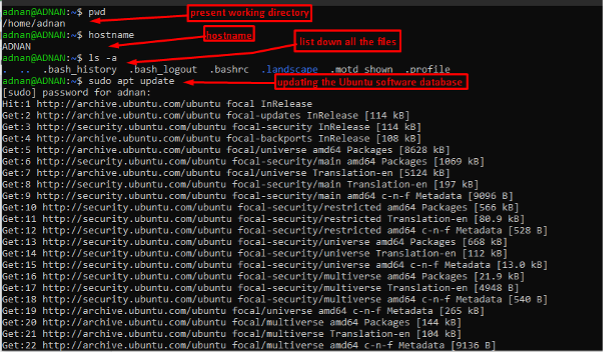
Yeah, here you go with Ubuntu 20.04 LTS. Let’s show you our experience as we have executed a few Ubuntu commands on the terminal:
Conclusion
Microsoft has evolved its operating system by keeping an eye on the modern day’s requirements. The WSL feature of Windows allows you to access various Linux distros from Windows. In this post, we have provided possible ways to enable the feature named Windows Subsystem for Linux(WSL). This guide contains two methods to enable the WSL feature: The first method refers to the graphical support for enabling whereas the second method can be practiced to enable WSL using PowerShell. For further verification, we have shown the installation of Ubuntu 20.04 LTS from the Microsoft Store.

