A single user can subscribe to multiple channels and view the publishers’ messages sent to that channel. They can also unsubscribe from the channel at any time.
This tutorial will learn how to implement a simple publish-subscribe model using Redis.
It is good to note that we will use native Redis commands and not a custom code in Python, Ruby, JavaScript, or others.
Redis Pub-Sub commands.
When working with the publish-subscribe model in Redis, two main commands come into play:
- SUBSCRIBE
- PUBLISH
These commands are straightforward and describe the function they undertake. For example, the SUBSCRIBE command is used to subscribe a client to a specific channel or channel.
The PUBLISH command allows a sender or publisher to send a message to a specific number of channels.
Basic Pub-Sub model
This tutorial will implement a simple Pub-Sub model to show how it works in Redis.
For this, you will require a Redis cluster up and running on your system.
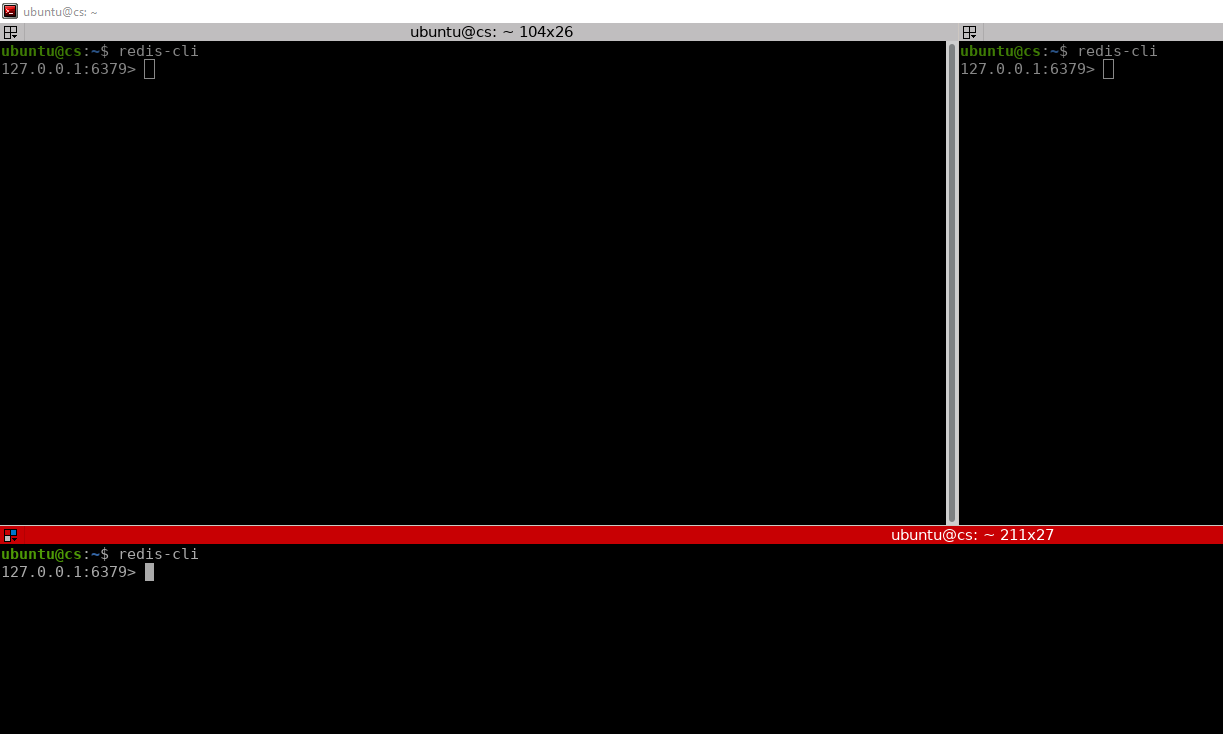
Start by opening three terminal sessions and launch the Redis CLI in each of them.
Once you have all the terminals open and set up, use one of the terminals to SUBSCRIBE to a channel.
The SUBSCRIBE command takes the name of the channel as the argument. The general syntax can be represented as:
The name will entirely depend on you, and you can name it whatever you want. For example, in the command below, we subscribe to a channel called Linuxhint.
Reading messages... (press Ctrl-C to quit)
1) "subscribe"
2) "linuxhint"
3) (integer) 1
In the example above, we subscribe to a channel called linuxhint, and we can start receiving any messages that are published to that channel.
Use it to publish a message to the linuxhint channel in the second terminal.
Use the PUBLISH command followed by the name of the channel and the message to publish.
For example:
(integer) 1
Pay attention to the first terminal and execute the command above. You will notice that the message automatically appears on the channel where the user has subscribed.
An example output on the subscriber terminal is as shown:
2) "linuxhint"
3) "Hello, Everyone!"
It contains the type, in this case, a message, the channel, and the actual content of the message.
Note: When you need to publish a message, you can enclose it in quotation marks, and Redis will treat it as a single message rather than command arguments.
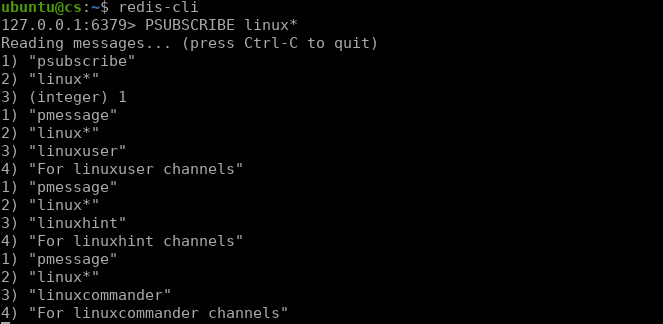
In the third terminal, we will use it to subscribe to multiple channels using the PSUBSCRIBE command.
The PSUBSCRIBE command takes a specific pattern and subscribes the user to those channels.
For example, to subscribe to all channels that start with the characters linux, we can set the command as:
Reading messages... (press Ctrl-C to quit)
1) "psubscribe"
2) "linux*"
3) (integer) 1
Once we run the command above, if we publish a message to any channel with the name Linux, the subscriber (in terminal 3) will receive the message.
For example, in the second terminal, execute the following commands:
127.0.0.1:6379> PUBLISH linuxhint "For linuxhint channels"
127.0.0.1:6379> PUBLISH linuxcommander "For linuxcommander channels"
Now pay attention to the third terminal with the pattern subscribe. You will notice that the subscriber in that terminal receives all three messages while the one in terminal 1 only receives the message sent to the “linuxhint” channel.
As you can see, the PSUBCRIBE command subscribes to channels that match a specific pattern.
Closing
This guide looked at the basics of using the Redis publish-subscribe model. Although the guide only covers the fundamentals, you can expand on it to create custom real-time applications.


