You may have tried to do some HTTP requests while working on your computer system. When it comes to some HTTP requests to get some information from a web, then the Invoke-WebRequest cmdlet in the PowerShell comes in handy. The Invoke-WebRequest is the utility of Microsoft PowerShell to send, get and do some requests to any webpage out there using your local system. So, we are using the “Invoke-WebRequest” cmdlet in our Ubuntu 20.04 system PowerShell to better understand. Open the command terminal from the Activity area of your Linux system and install PowerShell in it. The PowerShell can be started in the terminal using the simple “pwsh” command shown in the screenshot attached below.

As the PowerShell is successfully started, we will have some simple illustrations. So, let’s get started.
Example 1
We will make use of some parameters with the Invoke-WebRequest within the command. So, our very first parameter is “Url”. This parameter will be taking the URL path of the particular webpage to get information from. So, we have tried the Invoke-WebRequest cmdlet with the URL of google to get data using the parameter “Url”. We have got a lot of necessary data regarding google, i.e., status code, description, content, headers, etc.
This was the most simple and basic method to invoke-WebRequest from a particular webpage. Example 2
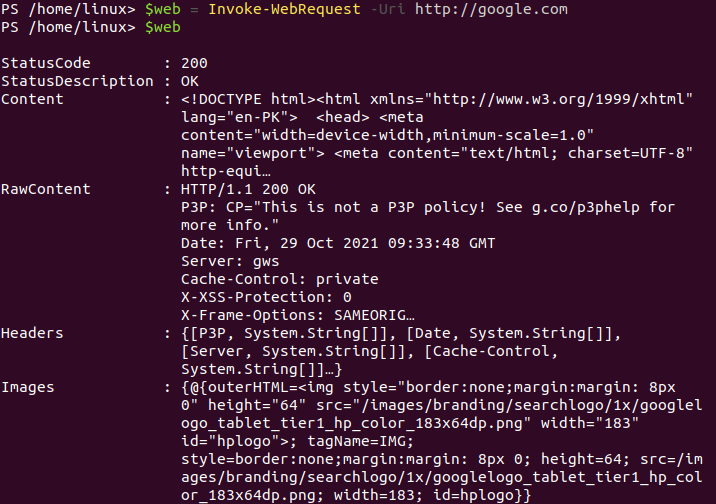
Now, we will be using the variable to store all the information of a webpage without directly displaying it on the PowerShell screen. So, we have been using the same Invoke-WebRequest Cmdlet command on the shell with the URL of Google. The content from google will be saved to the newly created variable named “web” using the “=” sign. After using this single line command, we will not be getting any output on the PowerShell until we use this variable to do so.
Therefore, we have used the variable “web” on the next line solely to print it out. As a result, the PowerShell has been filled with the same output as we have got in the above example, i.e., status code, description, images, headers, raw content, etc. This is how the variable can work for such types of commands.
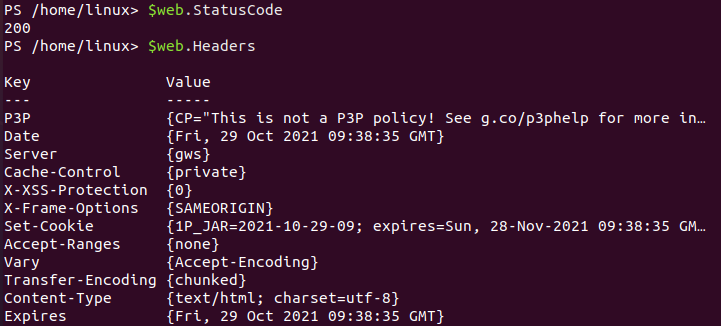
As the variable has been used to get all the information from the Webpage and display it all on the PowerShell, it can also be utilized to display the information separately. So, after getting all the information of google in a variable “new”, let’s use this variable to separate its value on the PowerShell. Hence, we have used this variable to get the “status-code” of a google webpage using the information stored in it as below. It shows the output 200 in return as the value of the Status Code of a webpage, i.e., Google.
Example 3
Let’s get the information regarding the headers of a webpage, i.e., google. So, we will be using the variable “new” once again to get the header data on the PowerShell screen. In return, the command displays the header data of google in a very styled format shown in the picture below. The information regarding the headers of a google webpage contains its policy info, date and time on which it has been accessed, the server on which it has been working, some memory and cache data, along with some additional information as below.
This was all about getting web page data with the variable, saved into the variable, and displayed on the PowerShell. Now, let’s take it one step further.
Example 4
We will be using the same variable to store the information of a webpage into some other location, i.e., some file. Therefore, after saving and getting the data from the Webpage of Google, we have to transfer the data into a new text file, i.e., new.txt. So, the data will be converted into Raw content using the built-in Raw-Content being applied on the variable and saved to the file “new.txt”.
The above command will not display anything on the PowerShell in return. You have to search for it by yourself. So, we have opened the home directory where our specified above file “new.txt” is located. Opened the file with a double click and got the below results. It shows that all the data regarding the Google webpage has been saved to the file new.txt successfully.
Example 5
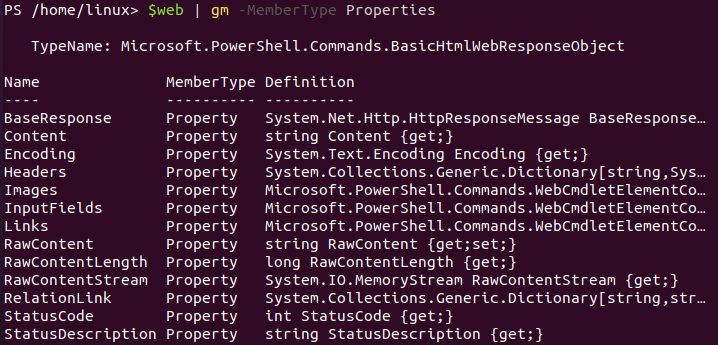
Let’s have a look at another parameter of the Invoke-WebRequest command. After getting all the required data within the newly created variable “new”, we used the parameter “MemberType” to get Properties of the content. So, the keyword “gm” has been used before the parameter within the command separated by the “|” sign. After the execution of this command, the PowerShell has been displayed with all Property type members, i.e., names, definitions, etc. The output is shown in the below image.
Example 6
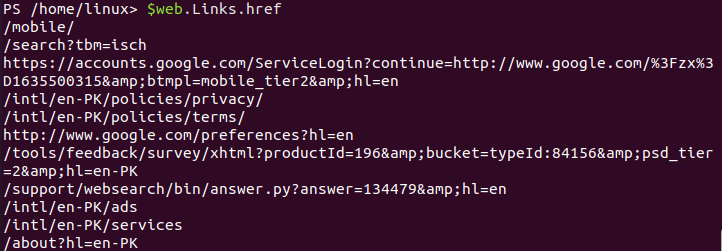
Let’s have a next example to use the variable having content fetched using the Invoke-WebRequest command. So, we have used the variable “web” to fetch all the links used in the webpage of Google after getting the content within the variable “web”. The “links.href” built-in has been used by the variable “web”. Upon the execution, we have got all the links used within the google home webpage on our PowerShell screen of the Ubuntu 20.04 system.
Let’s use another example to see how the Invoke-WebRequest works on the URLs. So, we have been using the variable “web” to get the contents of a google webpage with the help of an Invoke-WenRequest cmdlet. We have used the parameter “Method” to use the Get method for fetching the content. So, after getting the data, the variable “web” has been using the built-in “Content” to get the contents that are saved within it.
Conclusion
This guide contains all the required examples to implement the Invoke-WebRequest cmdlet within the PowerShell of the Ubuntu 20.04 system. We have used many of the parameters in all our examples to get customized results every time. We hope all the examples implemented in our article will be helpful to all the naïve users and some experienced users.


