Follow the procedures stated below to successfully change sleep settings in Ubuntu:
Method 1: How to Change Sleep Setting Through Power Setting in Ubuntu
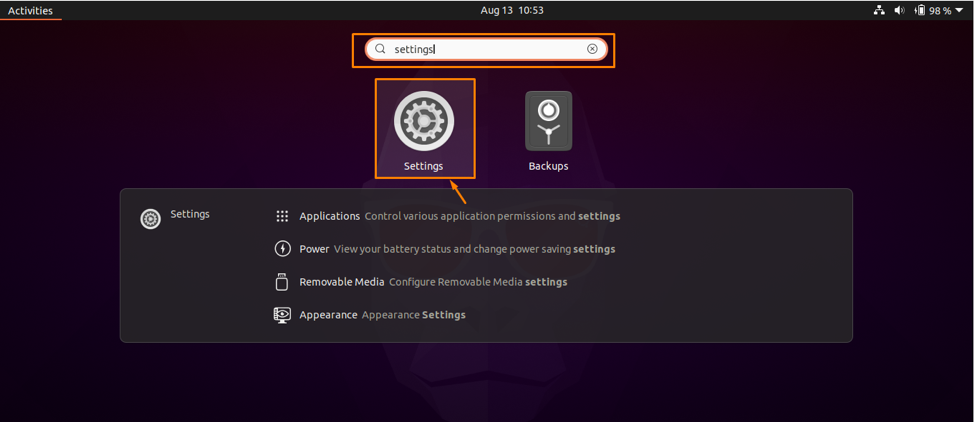
Step 1: Open Settings by going to Activities overview and type settings in the search bar and click on Settings icon:
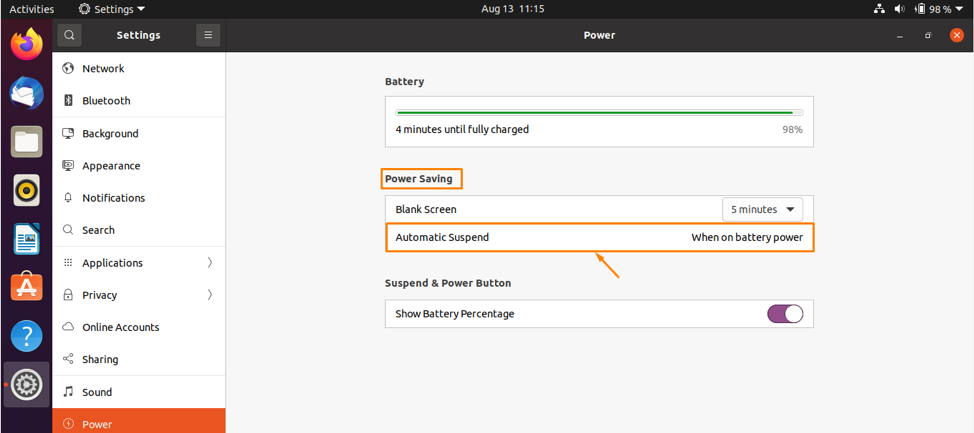
Step 2: The Settings window will be opened, click on “Power” from the left list and the Power panel will open on the right side:
Step 3: Under “Power Saving” option click on Automatic Suspend:
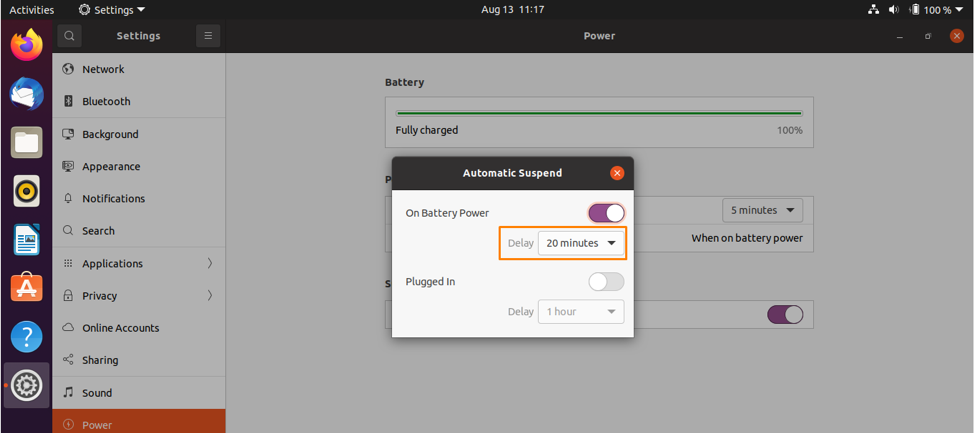
Step 4: Select on “Plugged In” or “On Battery Power”, turn on the switch and select Delay time of your choice. Both of these settings can be customized:
I switched on “On Battery Power” and set its delayed time to 20 minutes. You can change your settings accordingly. That means when your laptop is on battery power, it will be suspended after 20 minutes. You can set settings for Plugged In mode as well.
Method 2: How to put PC on Sleep through Terminal
There are no direct approaches to manipulate sleep settings in terminal, but there are couple of methods to suspend all activities of your Ubuntu PC or put it on hibernate mode through terminal:
Suspend your system : Firstly, open the terminal and run the below mentioned command to suspend your System:
After running the above command your system will be suspended and a black screen will appear.
Hibernate your system : Run the command mentioned below to make your system enter to hibernate mode:
After running this command, a black screen will appear, that means your system is now in hibernate state.
By moving the pointer or by pressing some key from the keyboard you will recover from hibernate state.
Conclusion
When your computer is not in use it automatically goes to sleep mode after a set time. We can change the sleep settings and, in this article, we defined easy approaches to change sleep settings in your Linux OS (Ubuntu), one is through power setting and other is through terminal approach. Moreover, you can create custom scripts to modify your sleep settings.


