How to modify screen resolution on Ubuntu
Like most Linux-based operating systems, Ubuntu also ships with graphical and command line support. One can perform all the tasks using the terminal and graphical support. The screen resolution can also be adjusted by using both methods as well. Let’s dig into them one by one:
How to modify screen resolution on Ubuntu using the terminal
The terminal support of Ubuntu requires careful execution but provides quick and accurate results. Follow the steps carefully to get into modifying the screen resolution.
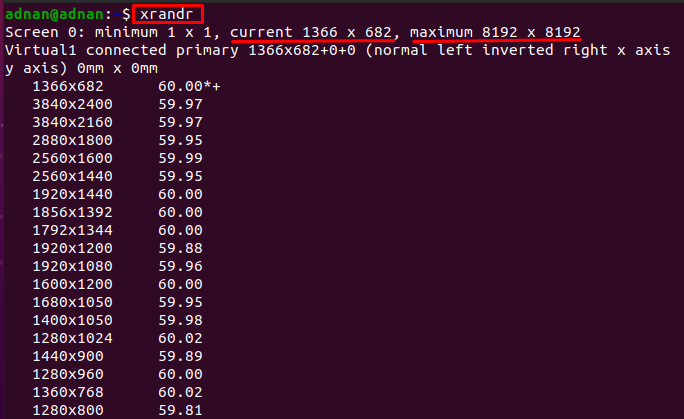
Step 1: Open the terminal (CTRL+ALT+T) and use the following command to get the available resolutions for your screen.
Note: The xrandr provides command-line access to the RandR (Resize and Rotate) extension which is responsible for handling the outputs on your screen. Moreover, the xrandr tool ships by default in Ubuntu; this requires no installation.
The output will show the current screen resolution, minimum and maximum resolution support available.
Step 2: To change the resolution to a specific value, you have to use either the “-s” or “–size” parameter of the xrandr command.
We have executed the following command to change the screen resolution to “1152×864“.
As soon as the command is executed, you will observe that the screen resolution will be changed to “1152×864” and your monitor screen will adopt a new resolution.
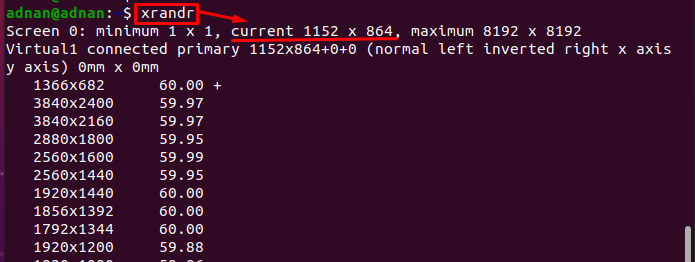
Moreover, you can use the “xrandr” command again to verify that changes are made successfully or not.
From the output, it is observed that the current resolution is “1152×864” which states that the changes made in the above command are adopted successfully.
Step 3(optional): Apart from providing the width and height to change the resolution, one can use the aspect ratio as well using the “xrandr” command as we did in the following command.
Although the aspect ratio and screen resolution do have some differences. However, aspect ratio also influences screen resolution, and thus it can be used to modify the screen resolution as well.
How to modify screen resolution on Ubuntu using GUI
The process of modifying the screen resolution using GUI can be carried out by using the following steps.
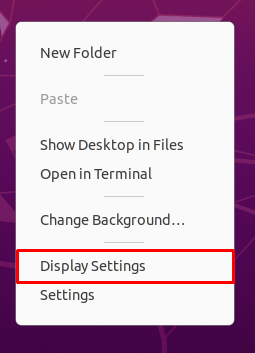
Step 1: Right-Click on the desktop and open the “Display Settings”
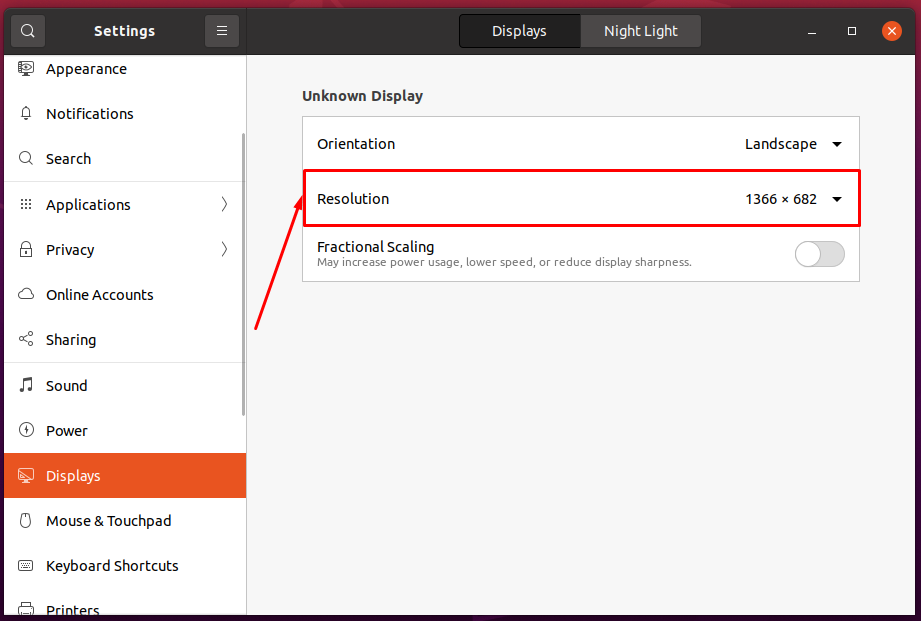
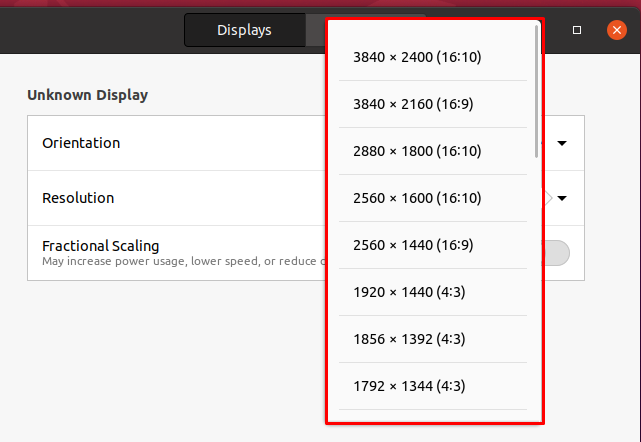
Here, you will find the “Resolution” option on the right pane of the window which shows the current resolution selected.
To change the resolution, click on the “Resolution” option and you will get a dropdown menu that contains various resolution settings as can be seen in the image below. Choose the desired resolution here.
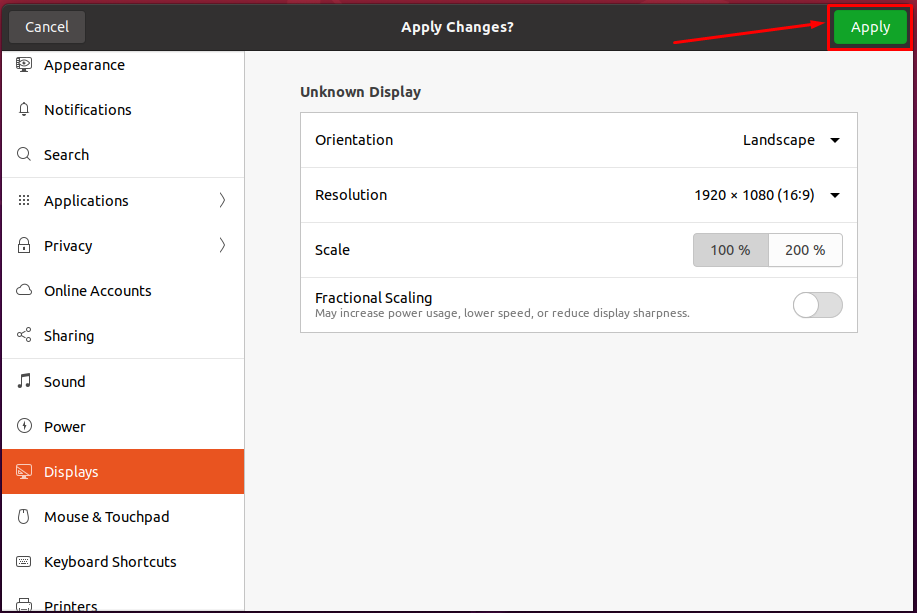
After selecting the resolution, click on the “Apply” button to change the current resolution to the new one.
After applying, a dialogue box will appear where you have to click on “Keep Changes” to set the resolution. If you do not do so within few seconds, the old changes will be considered
After going through this section, you would have learned to change the resolution using the graphical interface of Ubuntu.
Conclusion
The screen resolution can be changed using the terminal as well as the graphical support of Ubuntu. This article provides the steps that are recommended to modify the screen resolution on Ubuntu. The xrandr utility of Ubuntu enables you to modify the screen resolution. Additionally, the same utility can be exercised to check the current screen resolution and the available screen resolutions. However, the GUI method comprises simple steps that would lead you to modify the screen resolution on Ubuntu.

