
For creating a new group in Ubuntu, utilize the “groupadd” command. This article will show you how to use the groupadd command in different ways but first, let’s check out the types of groups in Ubuntu:
What are the group’s types in Ubuntu
Groups in Ubuntu are of two types: Primary and Secondary groups.
Primary Group : The logged-in user exists in the primary group. Any files that the user generates are added to its primary group automatically. An Ubuntu user belongs to one primary group at the moment. A primary group is created with the user’s name, and all files created by the user are added to the primary group.
Secondary Group : An Ubuntu user can be a member of as many secondary groups which he/she has on its system. Secondary groups manage the software applications and individual files. Secondary group members inherit the group’s read, write, and execute privileges.
How to use the groupadd command to create a group in Ubuntu
Now, we will show you how to utilize the groupadd command for creating a group in Ubuntu. For this, first of all, open your terminal by pressing “CTRL+ALT+T”. You can also search it manually in the Application’s search bar:

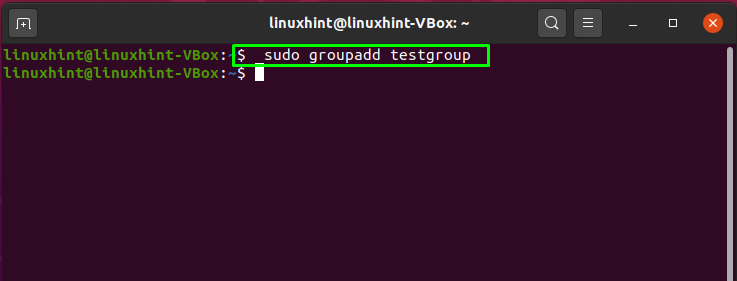
The “groupadd” command is used in different ways for creating groups in Ubuntu. The simplest method is to specify the group name you want to create in the groupadd command. For instance, we want to create a group named “testgroup”. For that, we will write out the “groupadd” command with the group name as follows:
Execute the above-given command. An error-free output shows that “testgroup” in successfully created in your Ubuntu system:
How to use groupadd command to create a group with specific GID in Ubuntu
Groups have a specific group ID, the “GID” which can be a positive integer. When an Ubuntu user creates a new group, the system assigns the next available GID from the group ID range. The “-g” or “–gid” options are used to specify group IDs for the group that will be created. Now, we will try to create a group named “testgroup1” with the GID 1010:

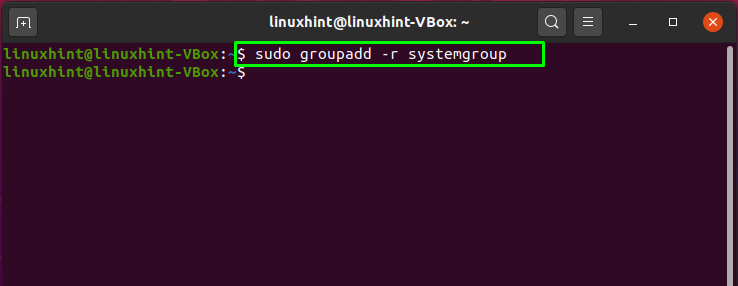
How to use the groupadd command to create a system group in Ubuntu
System groups are typically used for certain system operations, such as performing system maintenance or backing up data. You can use the “-r” or the “-system” option in the Ubuntu terminal to create a system user. For instance, we will create a system group named “systemgroup” using the groupadd command as follows:
How to display groups list in Ubuntu
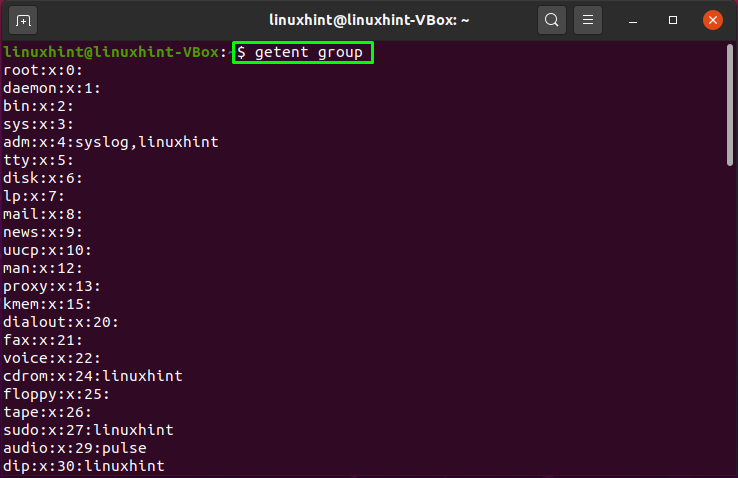
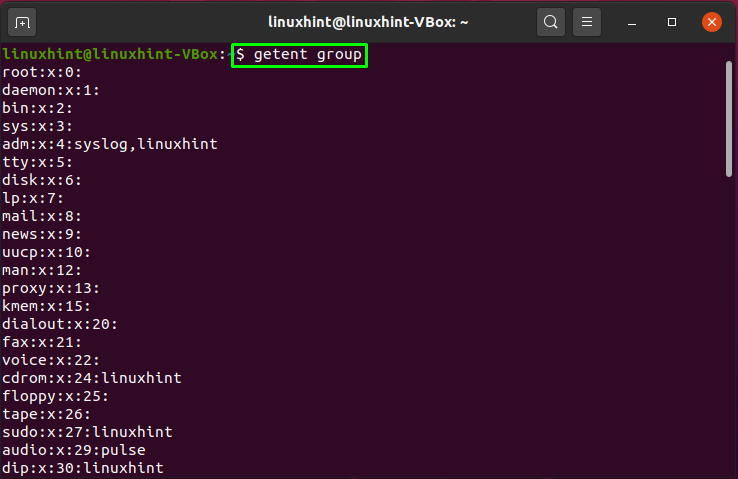
To list out all groups which a system has, the “getent” command is used in Ubuntu. Using this command, we will verify the existence of the created groups:
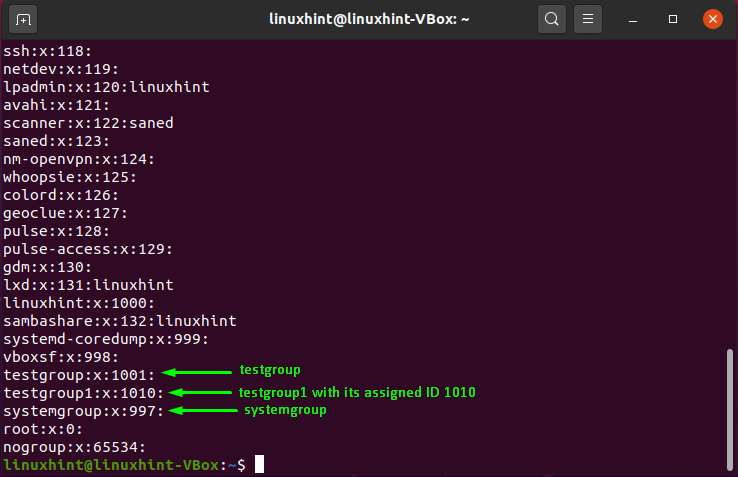
You can see the two created test groups named “testgroup”, “testgroup1”, and a system group named “systemgroup”. Moreover, you can also check the GID of the “testgroup1” as “1010”, which we assigned at the time of group creation:
How to add a user in a group in Ubuntu
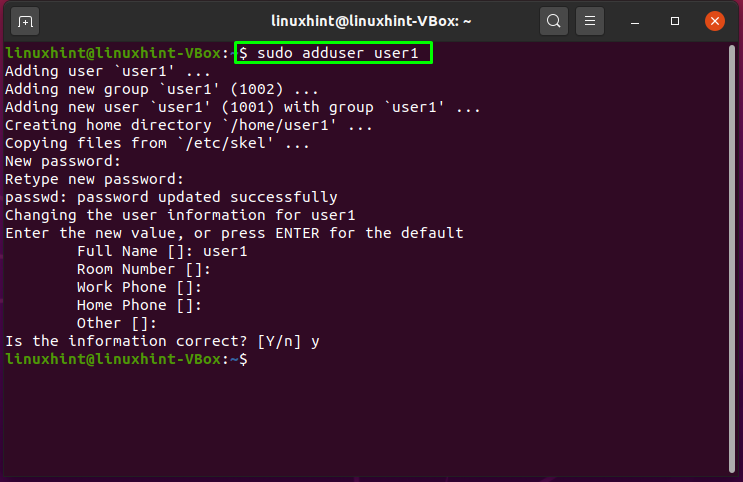
“adduser” command is used for adding a new user in Ubuntu. To begin the demonstration of the next section, we will add two new users, “user1” and “user2,” by executing the below-given commands:
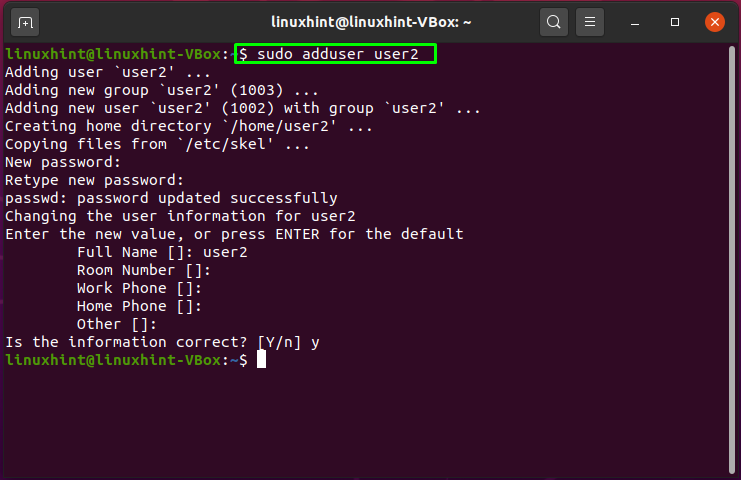
The “user1” and “user2” are successfully created. Now, we will add these users to the groups created in starting examples.
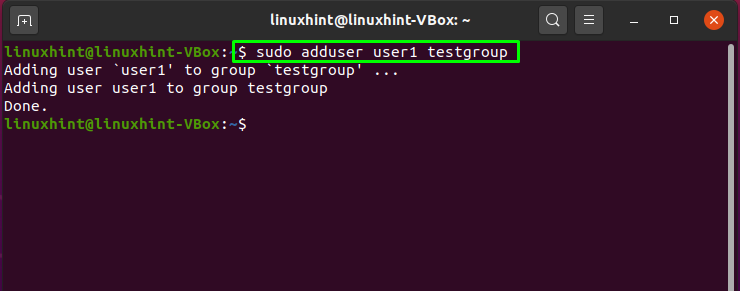
To add a user in an already created group, write out the user name with the specific group name in the “adduser” command. For instance, we will add the “user1” to the “testgroup”:
To check if the user is successfully added to a group, list out the groups which belongs to the specific user:
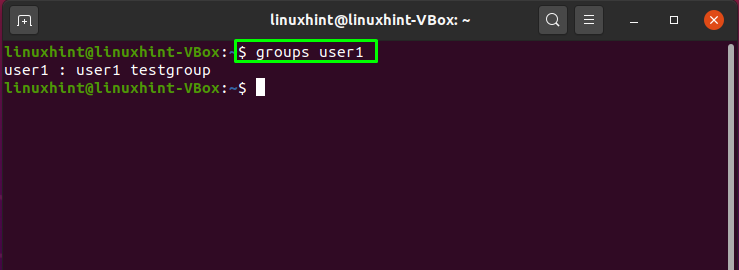
The output declares that “user1” was successfully added to the “testgroup”.
How to remove a user from a specific group in Ubuntu
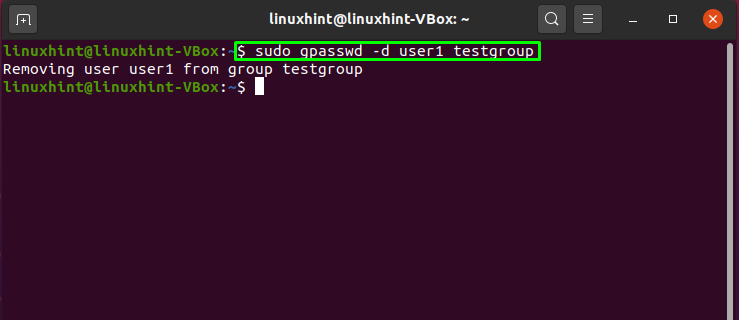
Ubuntu uses the “gpasswd” command for managing groups. The “-d” option is added for removing a user from a particular group in this command. To do so, write out the “gpasswd” command with the “-d” option having the user name and group name at the end. For instance, we will remove the “user1” from the “testgroup” by executing this command:
The output of the executed command declares that “user1” is removed from the “testgroup:
How to delete a group in Ubuntu
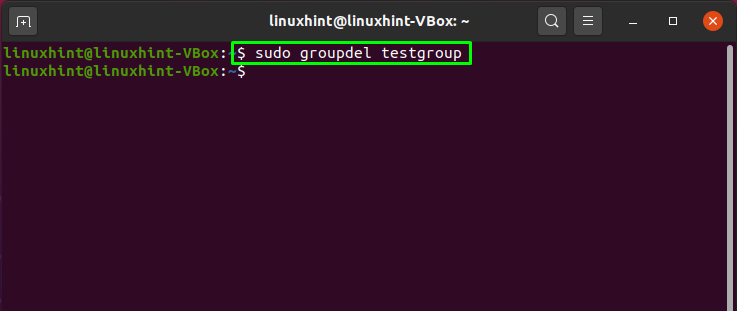
The “groupdel” command is utilized for deleting a group. For the demonstration, we will delete the “testgroup” by writing out the “groupdel” command as follows:
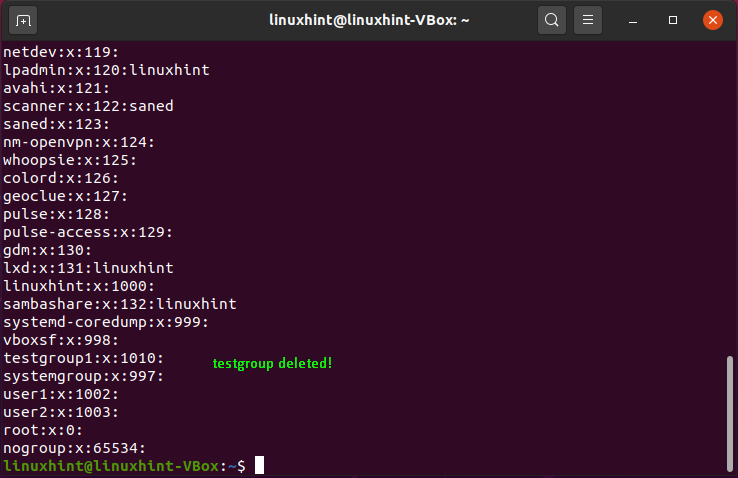
Now, list out all the groups present in your Ubuntu system:
The output shows that we do not have “testgroup” in the group list, which means we have successfully performed the group deletion operation:
Conclusion
Groups are created and used in the Ubuntu system to assign a set of privileges for individual users. Groups comprise a collection of users that have access to a system. The “groupadd” command is utilized in Ubuntu for adding groups. This article practically answered your question: how to use the groupadd command in Ubuntu. You have seen how to create a normal group and system group. Find this post helpful? Subscribe to our Linux Hint newsletter to get instant access to trendy technology topics.