Prerequisite:
Before starting the installation of Git, you have to update the system by running the following command.
Install Git using apt:
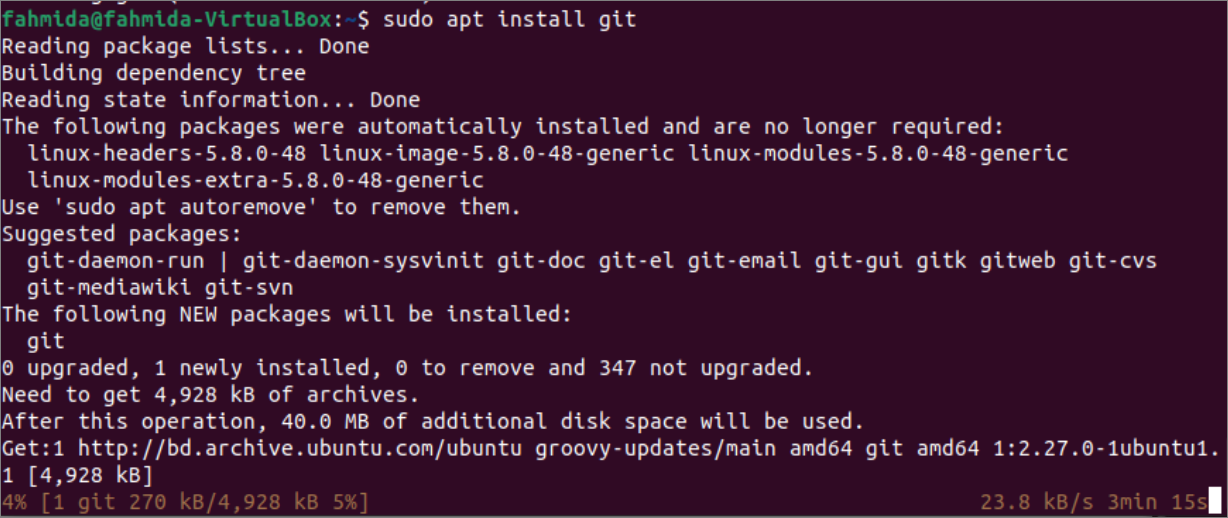
One way to install Git is to use the apt command. It is the easiest way to install Git on Ubuntu. Run the following command from the terminal to install the Git. You have to provide the root password to start the installation process.
The following similar output will appear after executing the command, and you have to wait for some time to complete the installation process.
After installing Git successfully, run the following command to check the installed version of Git.
The following output shows that git version 2.27.09 has been installed in the system by using the `apt` command.
Install Git from a source:
Installing Git by using the `apt` command has two disadvantages. The user will not be able to maintain the Git installation, and the `apt` package manager does not install the latest version of Git. You have to download the Git package from any particular source and install it later to use the updated version of Git. You can download the Git package in any location of the system. Suppose you want to download the package under the/usr/temp folder. temp folder does not exist by default. Run the following commands, create the temp folder under /usr folder and go to the folder. You will require root privilege to create any folder under /usr folder.
$ cd /usr/temp
Go to the following URL to get the list of all Git packages. You can select the latest version from the list.
https://mirrors.edge.kernel.org/pub/software/scm/git/
The git-2.29.3.tar.xz package contained the latest version of Git when this tutorial was written. You can down the package manually or run the following command to download the package in the current location.
Run the `ls` command to check the package is downloaded properly or not.
The following output will appear after executing the above command.
Run the following command to extract the compressed, check the Git installation folder is created or not, and go to that installation folder.
$ ls
$ cd git-2.29.3
The following output shows that the downloaded package has been extracted properly, and you can start the installation process now.
Before installing the Git, you have to remove the previously installed Git package and then install the required git dependencies for the new installation. Run the following command to remove the Git from the system if you installed it before. It will ask for the root privilege if you have not given it before and ask to press ‘y’ to start the removal process.
Run the following command to install the Git dependencies.
If the above packages are installed properly, run the following two commands to compile and install Git.
$ sudo make prefix=/usr/local install
Run the following command to replace the shell process to use the installed version of Git.
After executing the above all commands successfully, run the following command again to check the installed version of the Git.
The following output shows that the installed version of Git is 2.29.3, an updated version of the previously installed Git.
Setup the Git:
After installing the required version of Git using `apt` or from a particular source, you have to set up the necessary configurations to use the Git. The proper configuration will help the Git user to generate commit messages and built any project properly using Git.
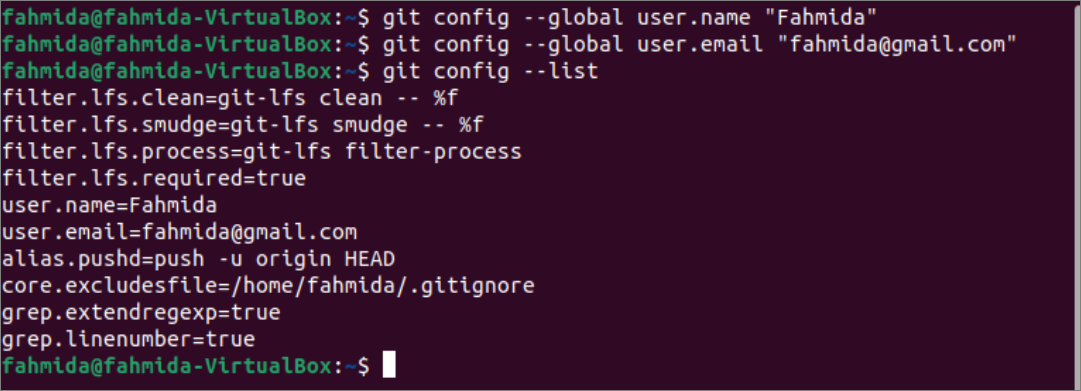
The `git config` command is used to set the configuration for Git. The most common configuration is to set the name and email of the user. You can check the configuration values from the terminal or by opening the ~/.gitconfig in any editor. Run the following commands to set the git user’s name and email and display the values of the git configuration from the terminal.
$ git config --global user.email "[email protected]"
$ git config –list
The following output shows that “Fahmida” has been set as the name of the git user, and “fahmida@gmail,com” has been set as the email address of the git user. The other configuration parameters show the default values.
You can edit the git configuration by opening the file, ~/.gitconfig file in any editor. Here, the nano editor is used to open the file. Run the following command from the terminal to open the ~/.gitconfig file in nano editor and check or update the existing configuration values of the git.
According to the above configuration, the following information will be displayed in the editor.
Conclusion:
The git is a useful package for the software development task when the developers mainly work in a team. Two ways to install Git on Ubuntu and the way to set up the configuration of git to use it have been explained in this tutorial. After reading this tutorial, I hope the readers will be able to install Git on Ubuntu and set it up properly to use it for their project.


