PowerShell can be used to perform different windows operations, such as creating folders, directories. Similarly, text files can also be handled using PowerShell; we can edit text files to append or remove the content from the text files.
We will demonstrate various ways to create and edit text files using PowerShell:
How to create and edit files using PowerShell
The following steps will enable you to create text files using PowerShell; moreover, this section also elaborates on different ways to edit text files.
Step 1: How to create a text file using PowerShell
There are two possibilities to consider while creating a new text file in PowerShell:
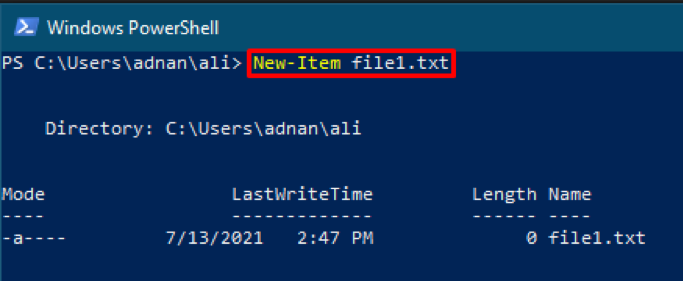
Possibility 1: Create the text file in the Present Working Directory (PWD): to accomplish this, execute the following command to make a new file: the order given below will create a text file named “file1” in the current directory:
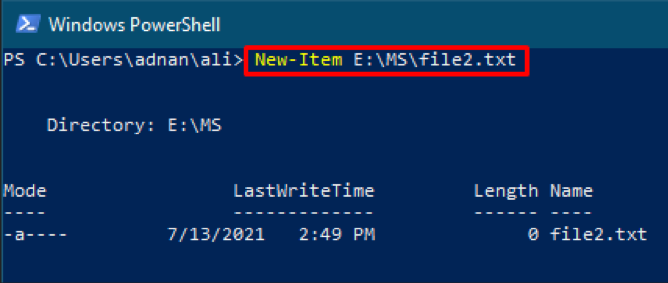
Possibility 2: If you want to get the new file in another folder, you must specify the complete path; and make sure that the targeted directory exists; Otherwise, you will be unable to make changes to the unknown directory or drive. The command given below will create a new text file “file2” in the targeted directory of drive “E“.
Once you have created a text file, you are ready to move to step 2.
Step 2: How to write inside text files using PowerShell
It is observed that each track has its pros and cons, so users must choose according to their requirements. Following are three methods that you can consider writing inside a text file:
Replacing the Data: If you want to replace the existing content of the text file with a new one, you must go for Method 1.
Appending the Content: However, if you want to add some lines to the existing content, you must follow Method 2.
Using nano editor to edit text files in PowerShell: If you want to add or remove the content of a text file multiple times, then it is recommended to consider Method 3.
Method 1: Replacing the Data
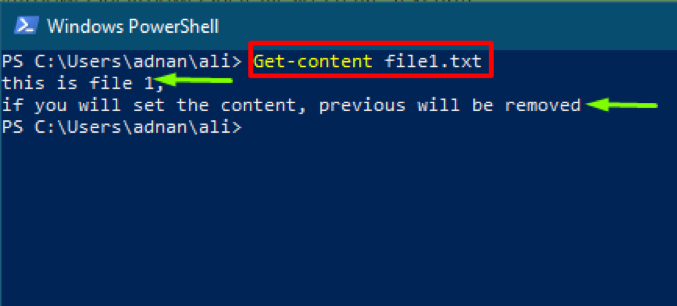
Before going to set the content, first; read the file using the following command:
After execution, the output is shown below:
If you want to write in a text file, execute the command given below to replace the text in the file1:
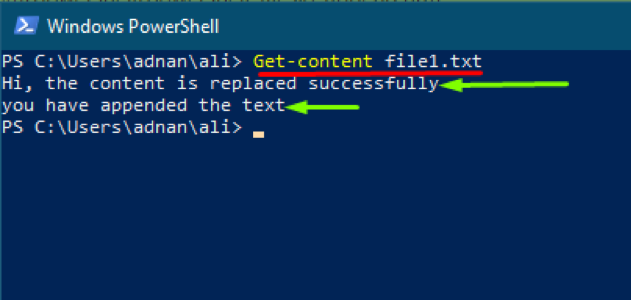
Once your command is executed successfully, read the content of your file to check whether the text has been replaced or not. The command given below will print the content of “file1.txt”
You will notice that the text has been replaced:
Method 2: Appending the Content
Contrary to the first method, the second method will add the content to the existing data in the file; the previous content will also be available in the file:
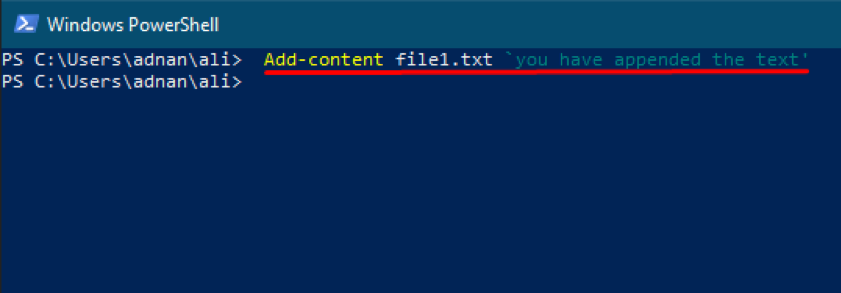
To append the text, execute the following command: the command given below will add the text written in single quotes to file1.txt.
After executing the above command, check whether the text has been added or not; to do that, run the following command to check. You will find that the line written in single quotes is now added as a new line to file1.txt.
Method 3: Using nano editor to edit text files in PowerShell
Another way to make changes to text files is using the “nano” editor in PowerShell:
The “nano” editor is not available to access in PowerShell; you must install the package. Before this installation, you must ensure that you are running the PowerShell with Administrator privileges; otherwise, the installation will not be successful. Once you have run the PowerShell as Administrator; you can continue further:
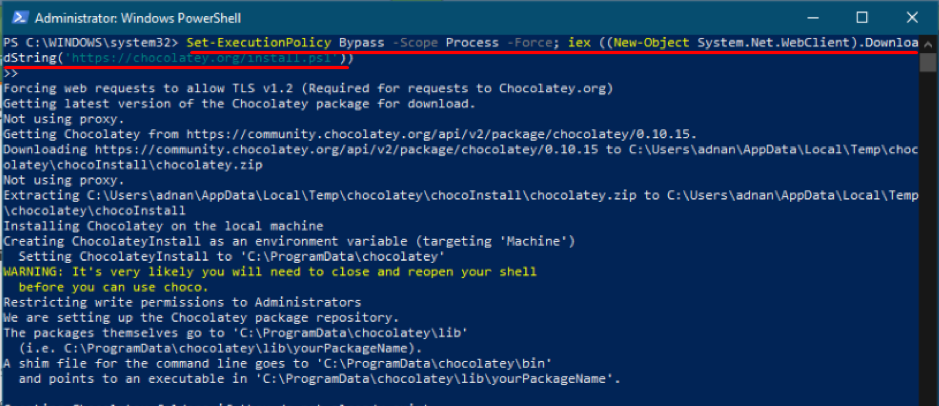
Firstly, you have to install the “chocolatey” package; the “chocolatey” package supports the nano editor. So, it is necessary to install it before adding the nano editor, and you can install it using the command given below:
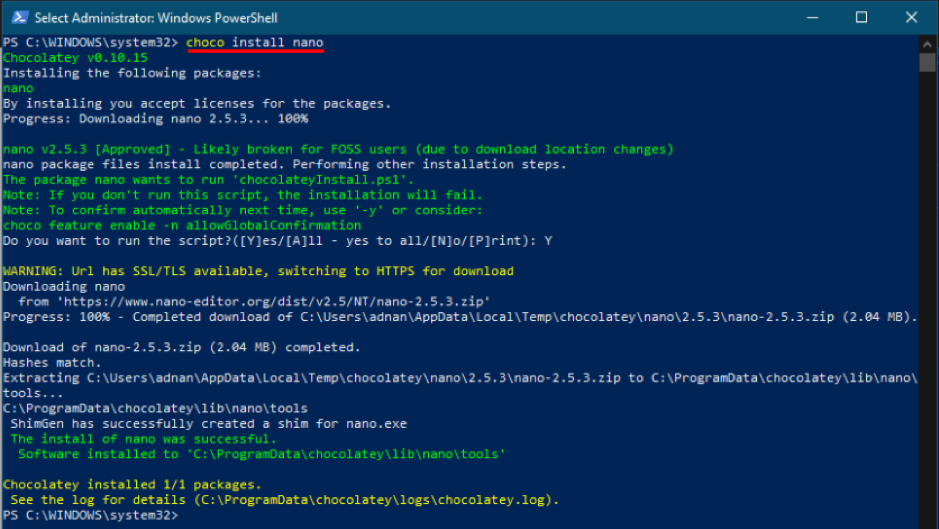
After successful installation of the “choco” package; now, install the “nano” editor with the help of the command given below:
During installation, it will ask to press “Y” to proceed installation further:
Once the above commands have been executed successfully, restart the PowerShell:
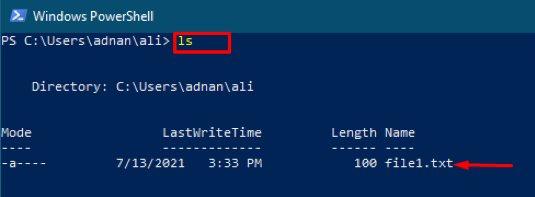
After that, open the targeted directory of your text file in PowerShell: Once you have reached the directory; check for the text file if it exists or not; to do this, run the following command in your PowerShell:
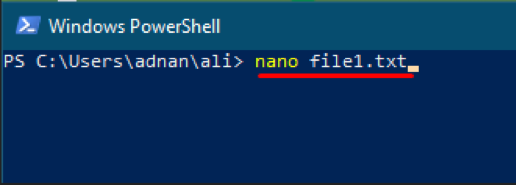
After that, you can edit your text file using the “nano” editor with the help of the command given below.
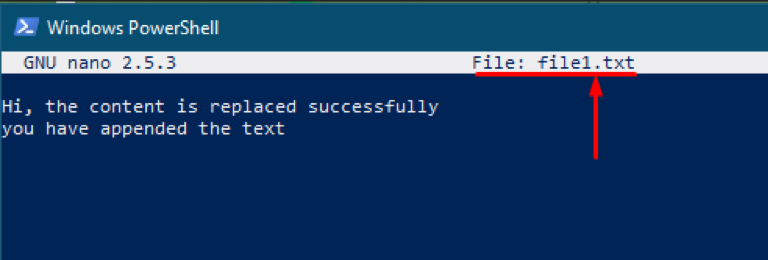
After execution, you will find that your text file will be opened in an editor, where you can add, delete, or replace the file’s content.
Nano editor enables you to edit, delete and append text the same as other text editors. For instance, if you want to append text, start writing after the existing text. After appending, press “Ctrl+X” to exit from the editor; after this action, press “Y” to save changes or press “N” to discard changes. Moreover, you can remove the existing content and save the changes as described above.

