“diff” Command Syntax and its Help Manual in Linux
The “diff” command in Linux can be used with the following syntax:
Here, “option” can be replaced with the parameters that can be used with this command, whereas “File1” and “File2” represent the two files to be compared.
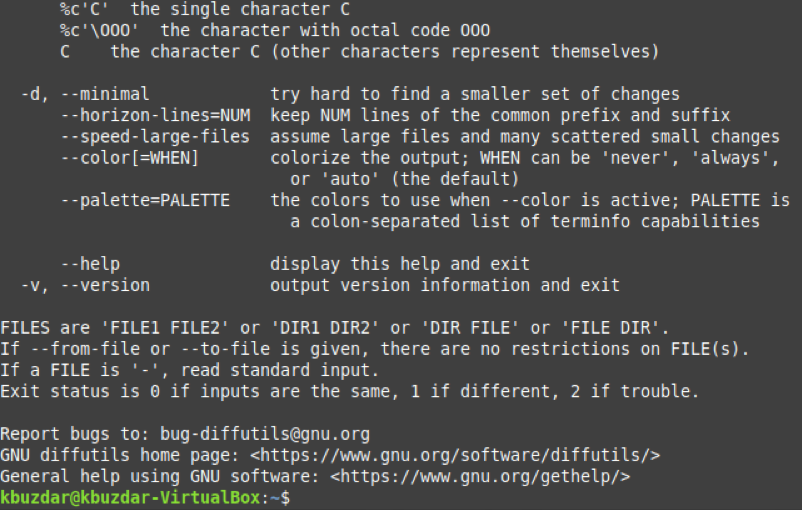
You can look through all the parameters that are available with this command by accessing its help manual with the command shown below:
![]()
The help manual of the “diff” command is as follows:
“diff” Command Examples in Linux
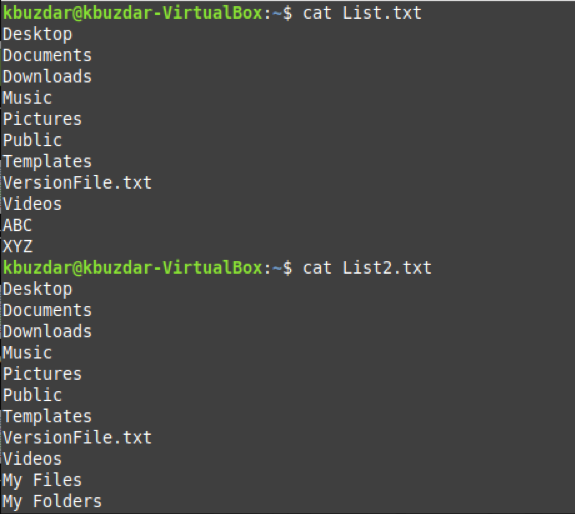
“diff” command can be combined with different parameters for comparing any two given files. We have created the following three examples to illustrate its usage. However, before going through these examples, we would like to show you the contents of the two files that we will use in all of these examples. We have simply used the “cat” command to display the contents of these two files on the terminal, as shown in the image below:
Example 1: Using the “diff” Command without any Options
If you want to display the output of the “diff” command in a standard format, then you can use it without any options as follows:
We have replaced File1 with List.txt and File2 with List2.txt.
The differences between our two files, along with the changes that are needed to carry out to make them both identical, are shown in the output below:
Example 2: Using the “diff” Command to Produce the Output in the Context Mode
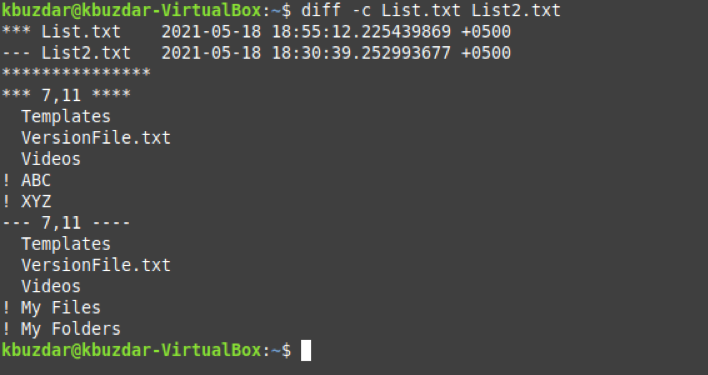
The context mode of the “diff” command allows you to view additional information related to the specified files and the changes needed to make them identical. We can use this mode in the following manner:
You can visualize from the output of this command that the modification date and time of both the files are also displayed along with the changes that are needed to be made.
Example 3: Using the “diff” Command to Produce the Output in the Unified Mode
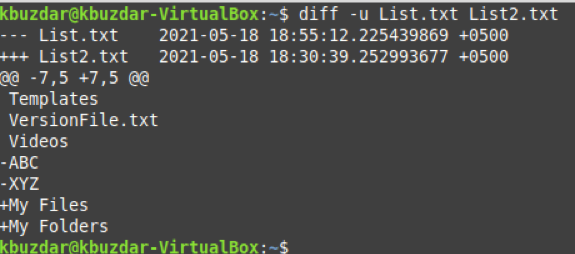
The unified mode of the “diff” command is very much similar to the context mode; however, the only difference is that it avoids displaying redundant information. To use this mode, we will have to execute the command shown below:
You can visualize from the output of this command that only relevant and unique information from both the files is being displayed on the terminal. In contrast, all the redundant information present in both the files has been omitted. To confirm this difference, you can compare this output with the output of Example # 2.
Conclusion
This article threw light on using the “diff” command in Linux to compare two files and suggest all the changes that can be made to both the files to make them identical. Moreover, it also explained the difference between the “cmp” and the “diff” command in Linux.


