
The following topics of bash scripting are covered in this article:
- Hello Bash Scripting
- Redirect to File
- Comments
- Conditional Statements
- Loops
- Script Input
- Script Output
- Sending output from one script to another
- Strings Processing
- Numbers and Arithmetic
- Declare Command
- Arrays
- Functions
- Files and Directories
- Sending Email via Script
- Curl
- Professional Menus
- Wait for a File system using inotify
- Introduction to grep
- Introduction to awk
- Introduction to sed
- Debugging Bash Scripts
1. Hello Bash Scripting
In this topic, you will learn about the basics of Bash scripting and how you can create a file for writing the script to print ‘Hello’ by using bash scripting. After that, you know how to allow the file to become executable.
Press ‘CTRL+ALT+T’ to open up the terminal or you can search the terminal manually. Type the following command in the terminal
Running the above ‘cat’ command gives the following output.
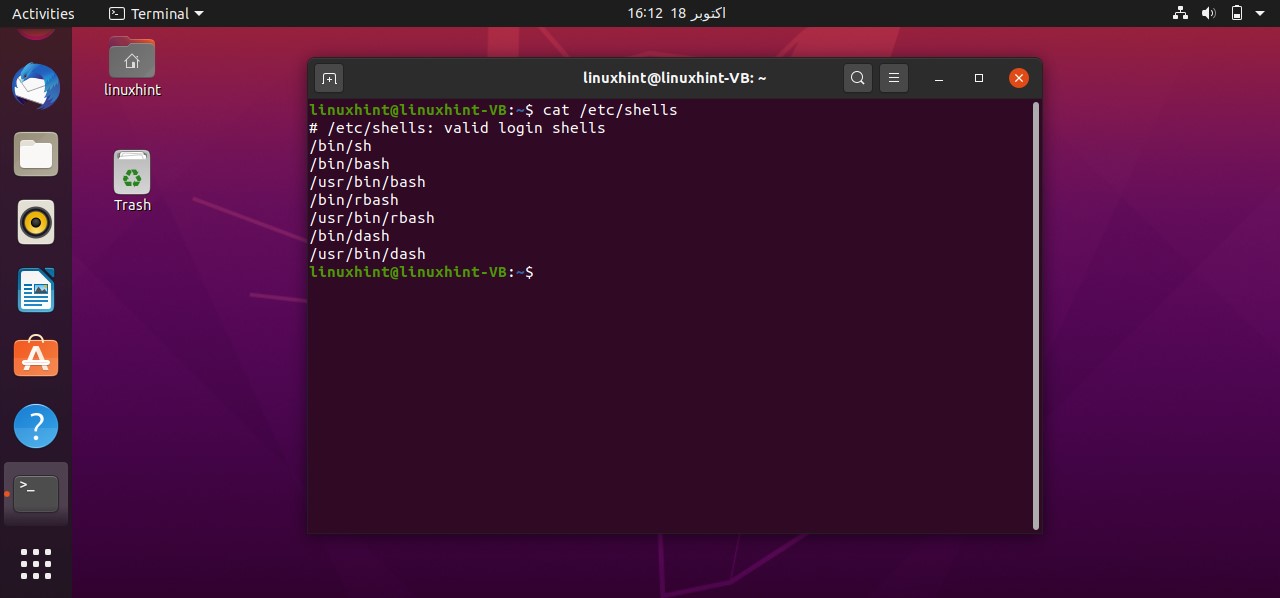
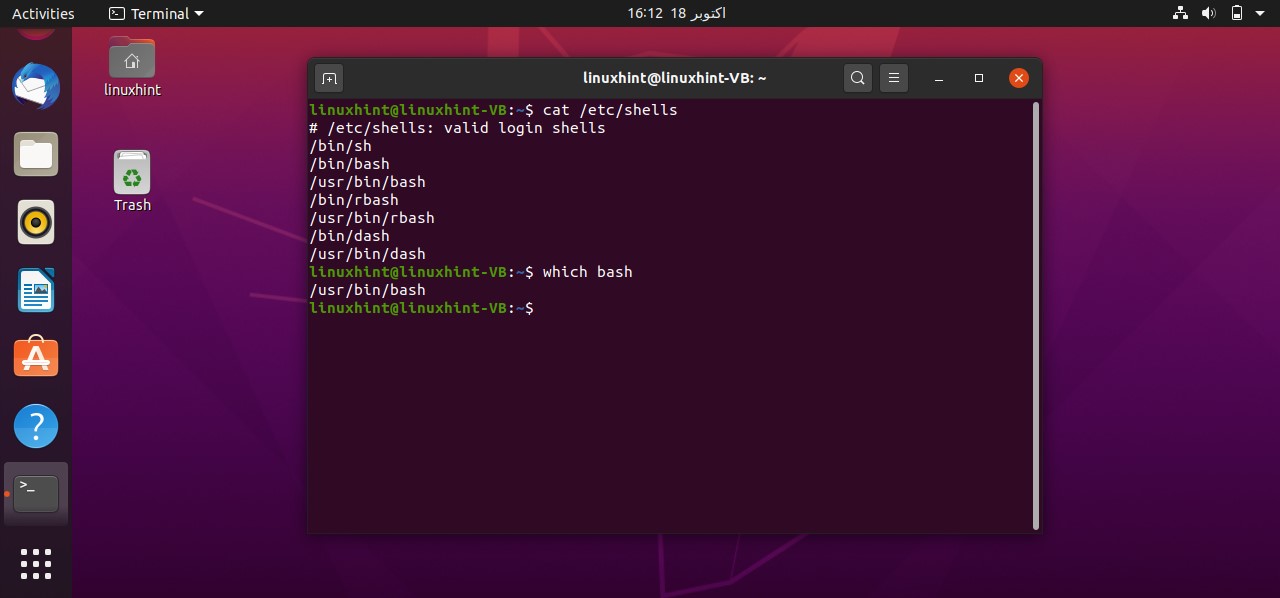
This command shows all the shells available on your system and you can use any of them. For this task, you should check whether you have a bash shell in your system or not. To know the path of the bash, you have to write the command ‘which bash’ in the terminal that gives the path of the shell. This path should be written in every bash script for its execution.
Now open the terminal from the Desktop. You can do it manually by going to the desktop and then by selecting the option of ‘open in terminal’ or by using the command ’cd Desktop/’ in the current terminal. Create a script using the command ‘touch helloScript.sh’

Open the ‘helloScript.sh’ file and the following commands in the file.
echo "hello bash script"
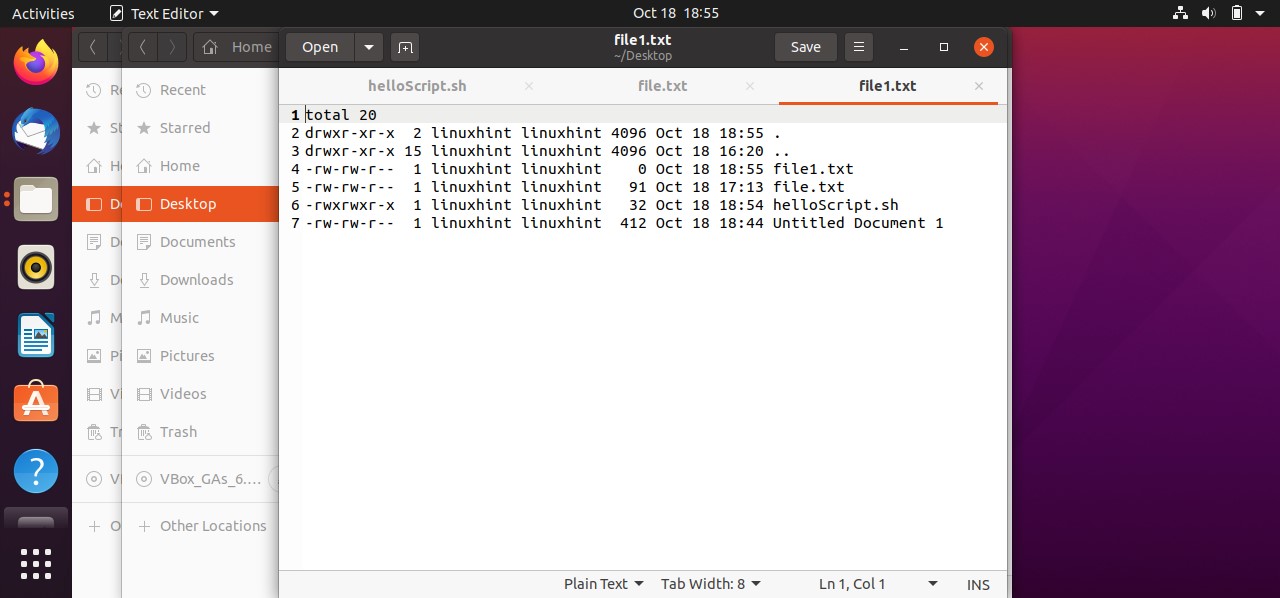
Save the file, go back to the terminal, and execute the ‘ls’ command to confirm your file existence. You can also use the ‘ls -al’ to get the details about your file, which results in the following:
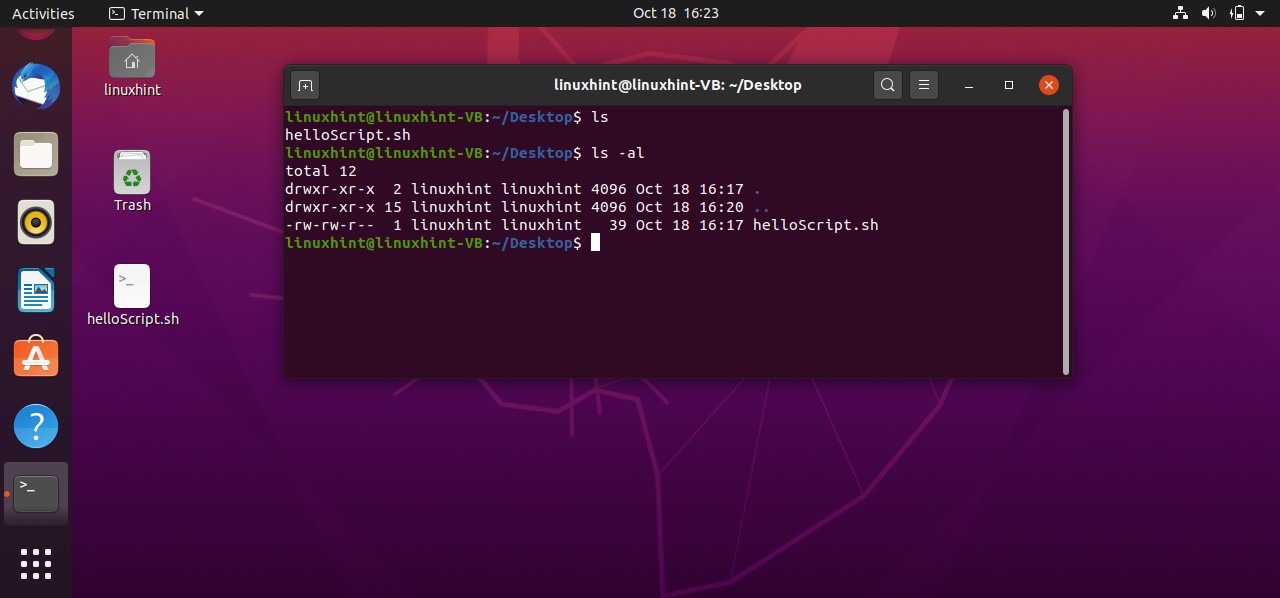
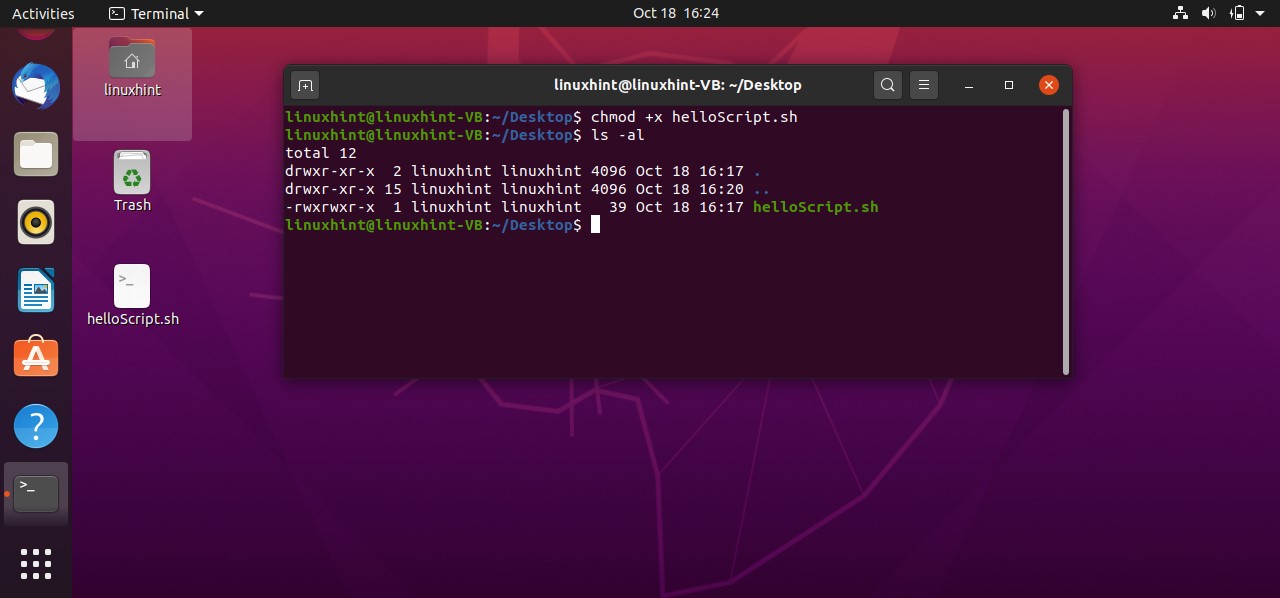
It is clear from the output that the file is not executable yet. ‘rw-rw-r–’ shows that the Owner of the file have the read and write permission related to the file, others Groups also have the same permissions, and the public have the only the permission to read the file. To make this script executable you have to run the following command in your terminal.
Then use the ‘ls -al’ command to check ‘helloScript.sh’ file permission, which should give you the following output.
Now execute the file using the command‘./helloScript.sh’ in the terminal. For changing the file content, you can go back to the file. Edit the content given in the ‘echo’ command and then execute the file again. It will display the desired result hopefully.
2. Redirect to File
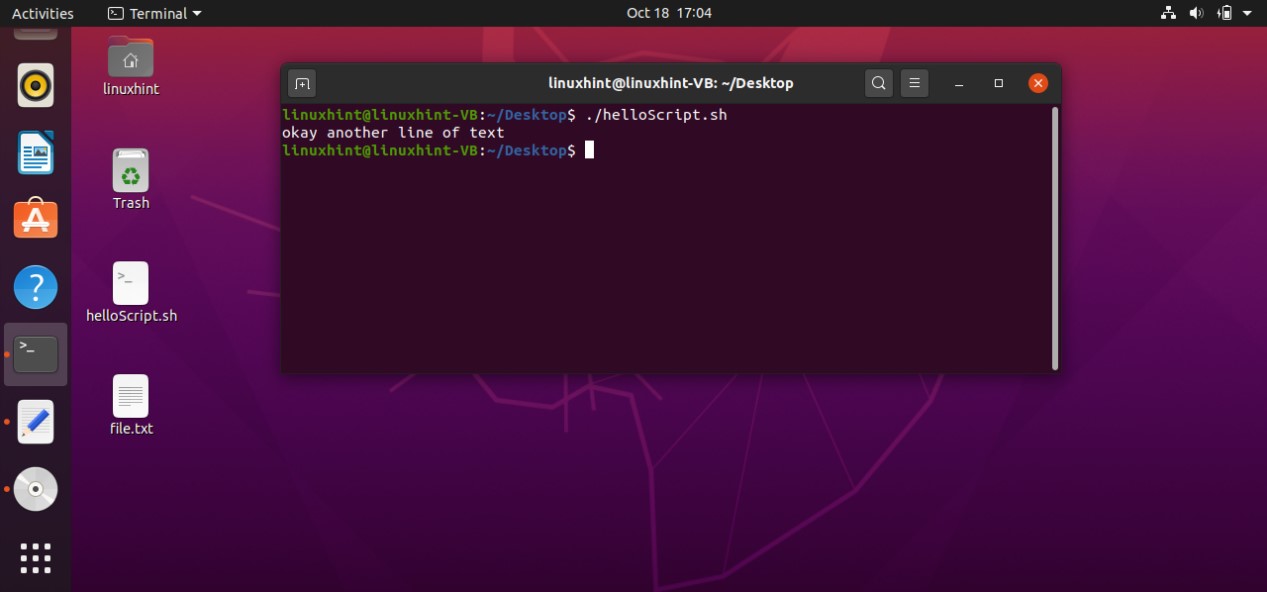
In this topic, you will learn how to capture the output from the shell or the output of a file and send it to another file. For that, you have to add the following command in your ‘helloScript.sh’
Save the file and go back to the terminal and run your script by the command ‘./helloScript.sh’. It will show you the following output. Press ‘ls -al’ to confirm the existence of a new file.

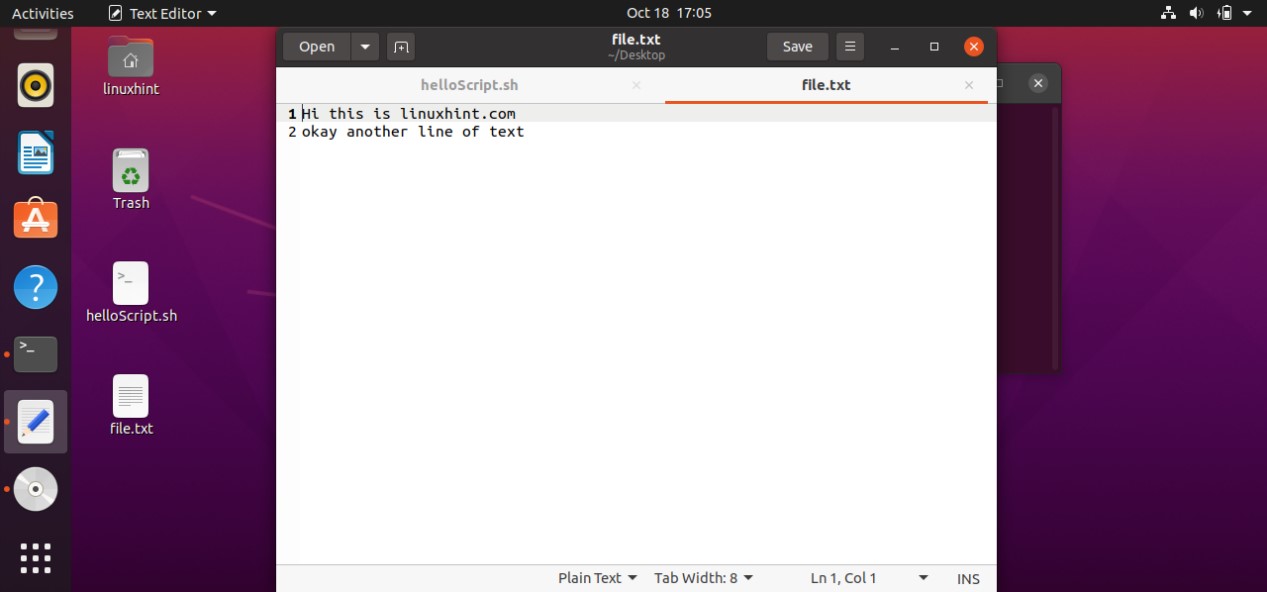
You can also take the file from the shell and save it into a file. For that, you have to write the script ‘cat > file.txt’. Save it and run the script. Now whatever you will write in this shell will be stored in the ‘file.txt’


And then come out of this process by pressing ‘CTRL+D’. The script ‘cat > file.txt’ will replace the text with whatever you write in the terminal. To create a script that can append the content of ‘file.txt’ you have to write ‘cat >> file.txt’ in your script. Save the file, run the script by the command ‘./helloscript.sh’ in the terminal. Now, anything you will write in the terminal will be added to the file along with the text the file already has.


3. Comments
Comments have no value in the script. In the script, if you write comments it does nothing. It explains the code to the current programmer which was written earlier. In the topic, you will learn these three things.
- One-line Comments
- Multi-line Comments
- HereDoc Delimeter
For a One-line comment, you can use ‘#’ sign before the comment statement. You can write the following code in your ‘helloScript.sh’.
#this is a cat command
cat>> file.txt
While programming, you may have multiple lines of code and for that case, you cannot simply use these one-line comments line by line. This will be the most time-consuming process. To solve this problem, you can prefer the other method of commenting, which is a Multi-line comment. All you have to do this is to put ‘: ‘ ‘ before the beginning of the first comment and then write ‘ ‘ ‘after the last comment. You may look up to the following script for a better understanding.
: ‘
This is the segment of multi-line comments
Through this script, you will learn
How to do multi-line commenting
‘
cat>>file.txt
So these lines have no value. They just exist in your script for a better understanding of the code.
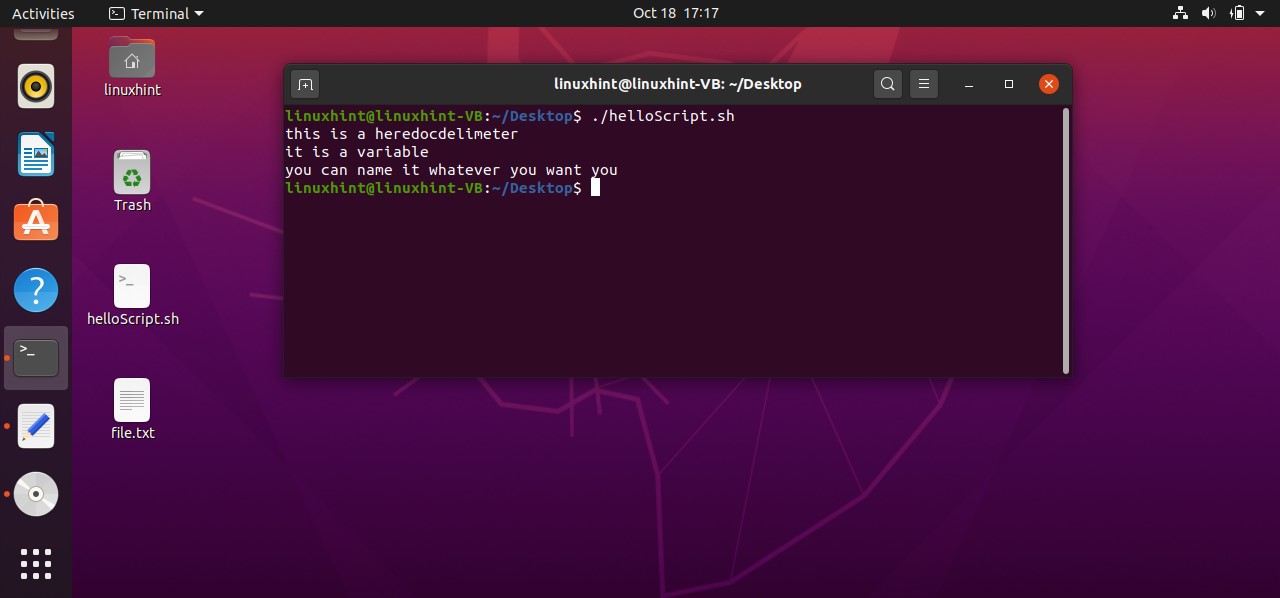
The next thing you are going to learn is hereDocDelimeter. Heredoc is a phenomenon, that helps you interact with the shell. The visible difference between the comments andhereDocDelimeter is that the lines under hereDocDelimeter are going to be displayed on the terminal and in the case of comments, the comments only exist within the script after their execution. The syntax of the hereDocDelimeter is given below.
cat << hereDocDelimeter
this is a hereDocDelimeter
It is a variable
You can name it whatever you want to
hereDocDelimeter
Execute the script and you will see the following output.
4. Conditional Statements
In this topic, you are going to know about if statements, if-else statements, if-else if statements, conditional statements using AND and OR operators.
If statement
To write the condition in if segment you have to give an extra within ‘[ ]’ before and after the condition. After that, state your condition code, go to the next line, write ‘then’, and state the lines of code you want to execute if the condition is true. In the end, use ‘fi’ to close the if statement. Below is an example script code that comprehends the syntax of the if statement.
count=10
if [ $count -eq 10 ]
then
echo "the condition is true"
fi
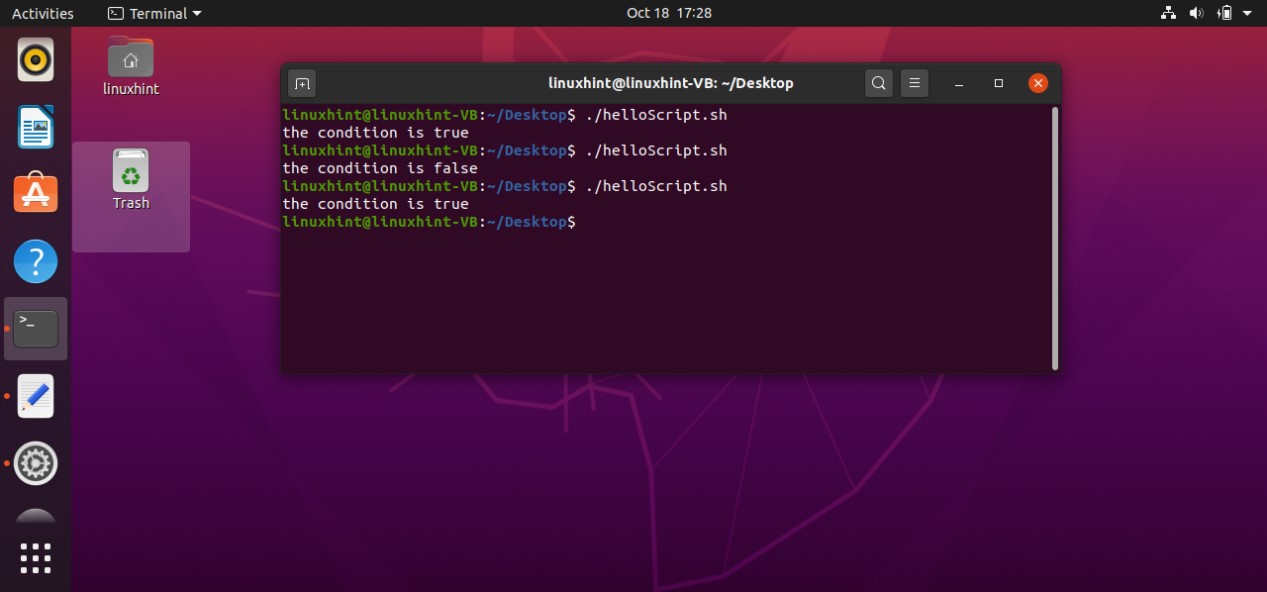
Firstly this script assigns a value of ‘10’ to a variable ‘count’. Coming towards the block of the ‘if’, ‘[ $count -eq 10 ]’ is a condition that checks whether the value of the count variable is ‘equals to’ 10 or not. If this condition becomes true, then the execution procedure will be moved towards the next statements. ‘then’ specify that if the condition is true, then execute the block of code written after me. At the end ‘fi’ is the keyword that shows the ending of this if-statement block. In this case, the condition is true, as the ‘$count’ is representing the value of the variable count which is 10. Condition is true, moving to ‘then’ keyword and printing ‘the condition is true’ on the terminal.

What if the condition is false? The program doesn’t know what to do because you don’t have an ‘else block’. In ‘else clock’ you can write the statements which are going to be executed when the condition is wrong. Here is the code you can write in your ‘helloScript.sh’ file to see how the else block works in your program.
count=11
if [ $count -eq 10 ]
then
echo "the condition is true"
else
echo "the condition is false"
fi
In this program, the ‘count’ variable is assigned with the value of 11. The program checks the ‘if statement’. As the condition in if block is not true, it will move towards the ‘else’ block ignoring the whole ‘then’ section. The terminal will show the statement that the condition is false.

There also exists another format for writing the condition. In this method all you have to do is to replace the ‘[ ]’ with ‘(( ))’ brackets and write the condition between them. Here is an example of this format.
count=10
if (( $count > 9 ))
then
echo "the condition is true"
else
echo "the condition is false"
fi
Executing the above code written in ‘helloScript.sh’ file will give you the following output.
If-else if statements
When you use an if-else if as a block of statements in your script, the program double-checks the conditions. Likewise, if you write the below example code in ‘helloScript.sh’, you will see that, the program first checks the ‘if’ condition. As the ‘count’ variable is assigned the value of ‘10’. In the first ‘if’ condition, the program makes sure that the ‘count’ has a value greater than 9 which is true. After that the statements written in the ‘if’ block will be executed and come out of it. For example, if we have a case in which the condition written in ‘elif’ is true, then the program will only execute the statements written in the ‘elif’ block and will ignore the ‘if’ and ‘else’ block of statements.
count=10
if (( $count > 9 ))
then
echo "the first condition is true"
elif (( $count <= 9 ))
then
echo "then second condition is true"
else
echo "the condition is false"
fi

AND operator
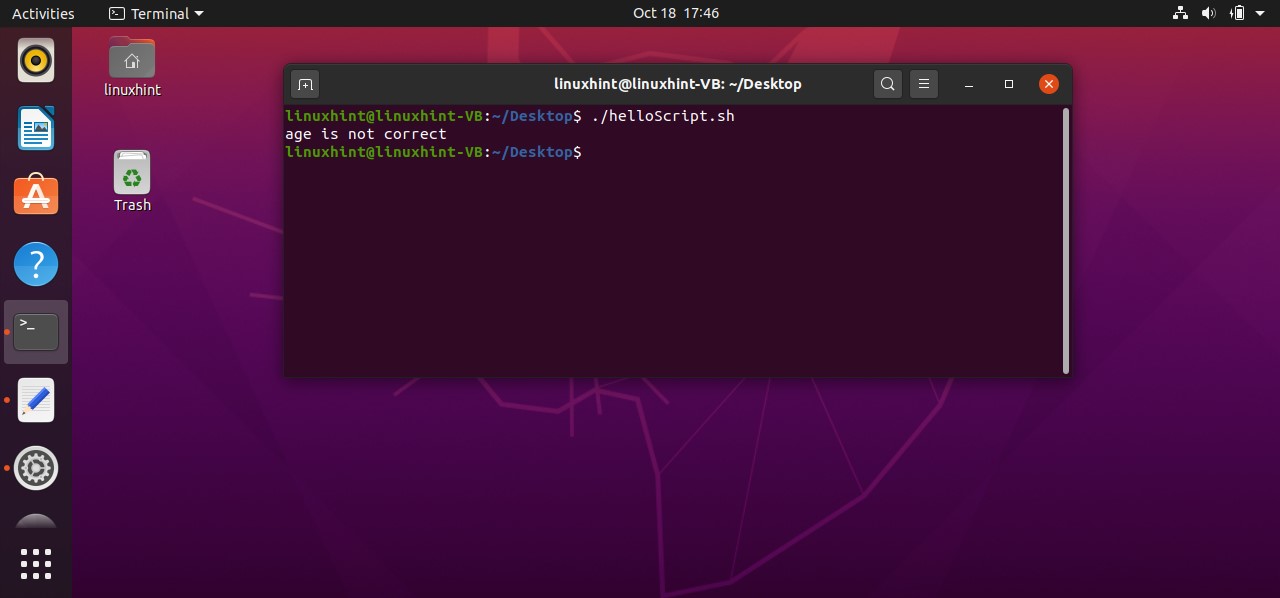
To use an ‘AND’ operator in your conditions you have to use the symbol ‘&&’ between your conditions to check both of them. For example, if you write the following code in your ‘helloScript.sh’ you will see that the program will check both conditions ‘[ “$age” -gt 18 ] && [ “$age” -lt 40 ]’ that if the age is greater than 18 AND the age is less than 40 which is false in your case. The program will neglect the statements written after ‘then’, and will move towards the ‘else’ block by printing “age is not correct’ on the terminal
age=10
if [ "$age" -gt 18 ] && [ "$age" -lt 40 ]
then
echo "age is correct"
else
echo "age is not correct"
fi
By executing the above code written in ‘helloScript.sh’, you will see the following output.
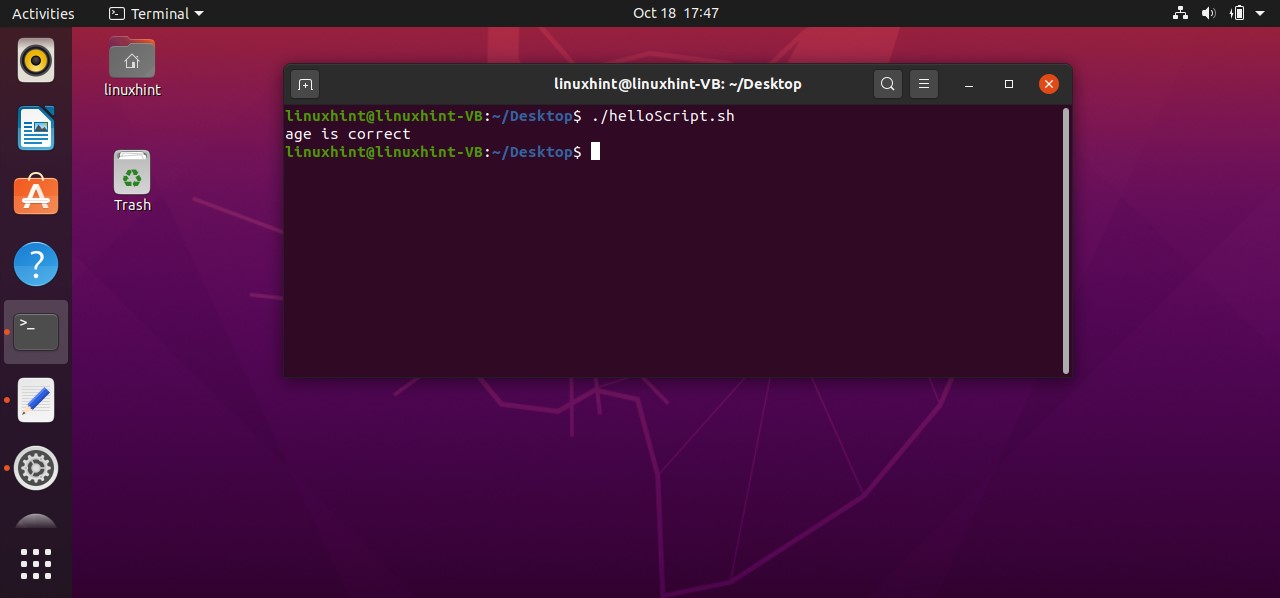
You may also write the condition in the following format.
age=30
if [[ "$age" -gt 18 && "$age" -lt 40 ]]
then
echo "age is correct"
else
echo "age is not correct"
fi
The condition is correct in this case, as the age is ‘30’. You will have the following output.

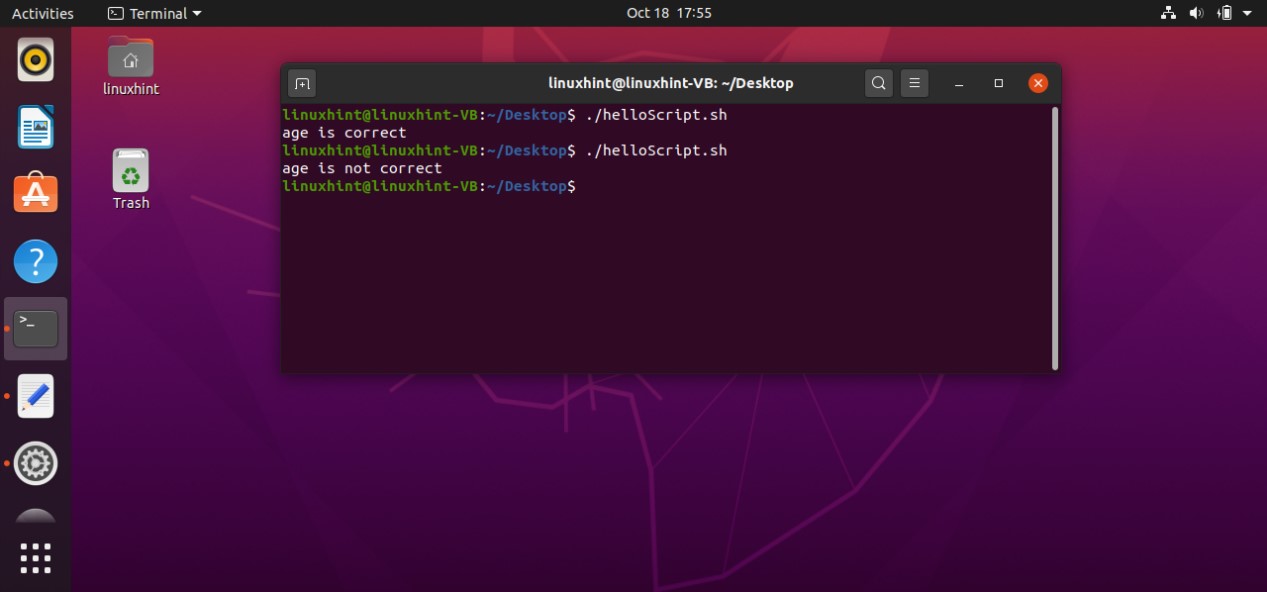
You can also use ‘-a’ in place of ‘&&’ to use the AND operator in your program’s conditions. It will work the same.
age=30
if [ "$age" -gt 18 -a "$age" -lt 40 ]
then
echo "age is correct"
else
echo "age is not correct"
fi
Save this code in your ‘helloScript.sh’ script and execute it from the terminal

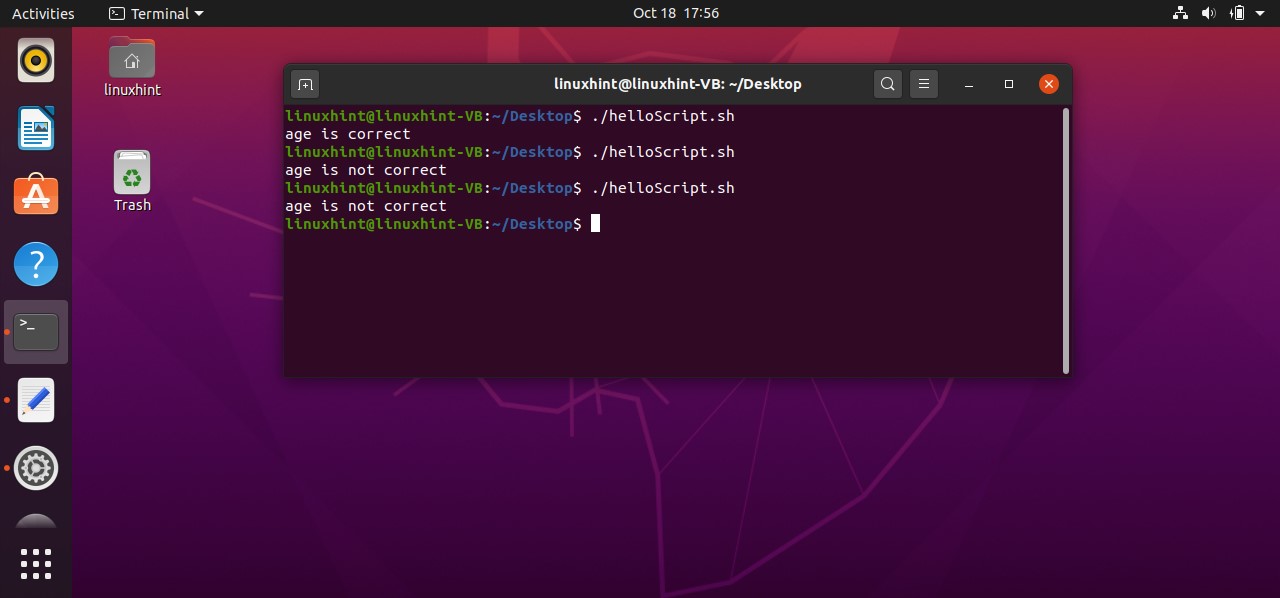
OR operator
If you have two conditions and you want to execute the preceding statements if any of them or both of them are true, OR operators are used in these cases. ‘-o’ is used for representing OR operator. You can also use the ‘ || ’sign for it.
Write the following sample code in ‘helloScript.sh’ and execute it from the terminal to check its working.
age=30
if [ "$age" -gt 18 -o "$age" -lt 40 ]
then
echo "age is correct"
else
echo "age is not correct"
fi

You can also try different conditions for a better understanding of the OR operator.
Some of the examples are given below. Save the script in ‘helloScript.sh’ and execute the file through the terminal by writing the command
age=30
if [ "$age" -lt 18 -o "$age" -lt 40 ]
then
echo "age is correct"
else
echo "age is not correct"
fi
age=30
if [ "$age" -lt 18 -o "$age" -gt 40 ]
then
echo "age is correct"
else
echo "age is not correct"
fi
age=30
if [[ "$age" -lt 18 || "$age" -gt 40 ]]
then
echo "age is correct"
else
echo "age is not correct"
fi
age=30
if [ "$age" -lt 18 ] || [ "$age" -gt 40 ]
then
echo "age is correct"
else
echo "age is not correct"
fi

5. Loops
In this topic, we will discuss
- While loops
- Until loops
- For loops
- Break and Continue statements
While loops:
While Loop executes the block of code (enclosed in do…done) when the condition is true and keeps executing that till the condition becomes false. Once the condition becomes false, the while loop is terminated. Go back to your script for writing the code has a loop in it. Use the keyword ‘while’ and after that write the condition to check. After that use the ‘do’ keyword, and then write a bunch of statements you want to execute if your program’s condition is true. You also have to write the increment status here as it let the loop to go on. Close the while loop by writing the keyword ‘done’. Save the script as ‘helloScript.sh’.
number=1
while [ $number -lt 10 ]
do
echo "$number"
number=$(( number+1 ))
done
Run the script using ‘$ ./helloScript.sh’ command in the terminal and you will see the following output on your terminal.
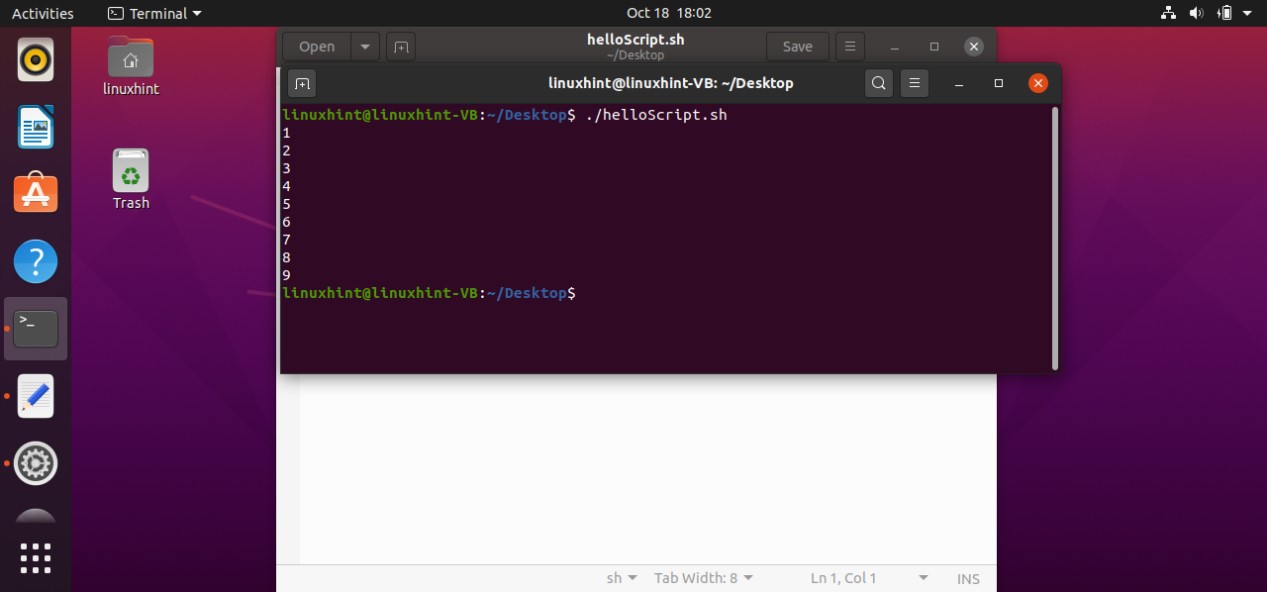
In the While loop, first of all, the condition is checked if it is true or not. In case the condition is false, it will come out of the loop and terminate the program. However, if the condition is true, the execution sequence will move toward the statement written after the keyword ‘do’. In your case, it will print the number due to the use of the ‘echo’ statement. Then you have to mention the increment statement that let the loop to loop itself. After incrementing the condition variable, It will again check the condition and move forward. When the condition becomes false it will come out of the loop and terminate the program.
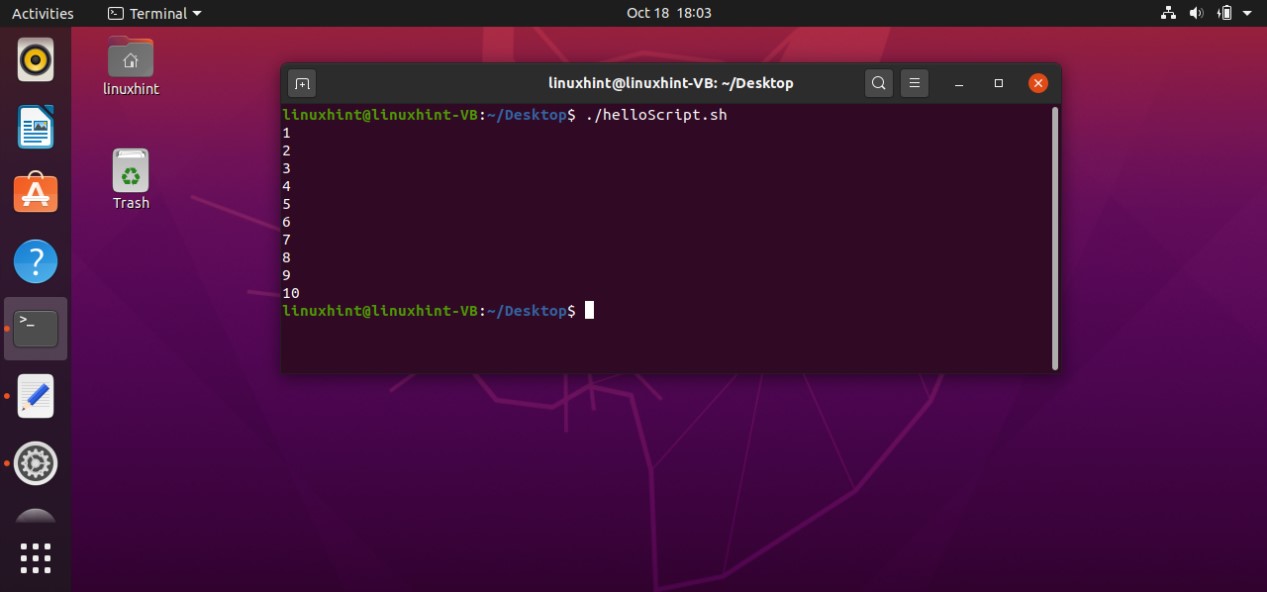
number=1
while [ $number -le 10 ]
do
echo "$number"
number=$(( number+1 ))
done
Until loops:
Until Loop executes the block of code (enclosed in do…done) when the condition is false and keep executing that till the condition becomes true. Once the condition becomes true, the until loop is terminated. The syntax of Until loops are almost the same as that of while loop except you have to use the word ‘until’ in place of ‘while’. In the example given below, a variable named ‘number’ is assigned a value of ‘1’. In this example, the loop will check the condition, if it is false it will move forward and print the value of the ‘number’ variable on the terminal. Next, we have the statement related to the increment of the ‘number’ variable. It will increment the value and will check the condition again. The value will be printed again and again until the ‘number’ variable values become 10. when the condition becomes false, the program will be terminated.
number=1
until [ $number -ge 10 ]
do
echo "$number"
number=$(( number+1 ))
done
Save the above code in your ‘helloScript.sh’ file. Run it using the command
You will see the following output.

For loops:
It is a type of loop in which we specify the condition according to which the loop will be executed repeatedly. There are two fundamental ways of writing the for loops in your code. In the first method, you can write the numbers for iteration. In the code given below, for loop will be executed 5 times, as these iterations are specified for the variable ‘i’ that controls the iterations. Save the code in the script file ‘helloScript.sh’.
for i in 1 2 3 4 5
do
echo $i
done
Execute the ‘helloScript.sh’ file by typing the following command in the terminal.
You will get the following output for the script.

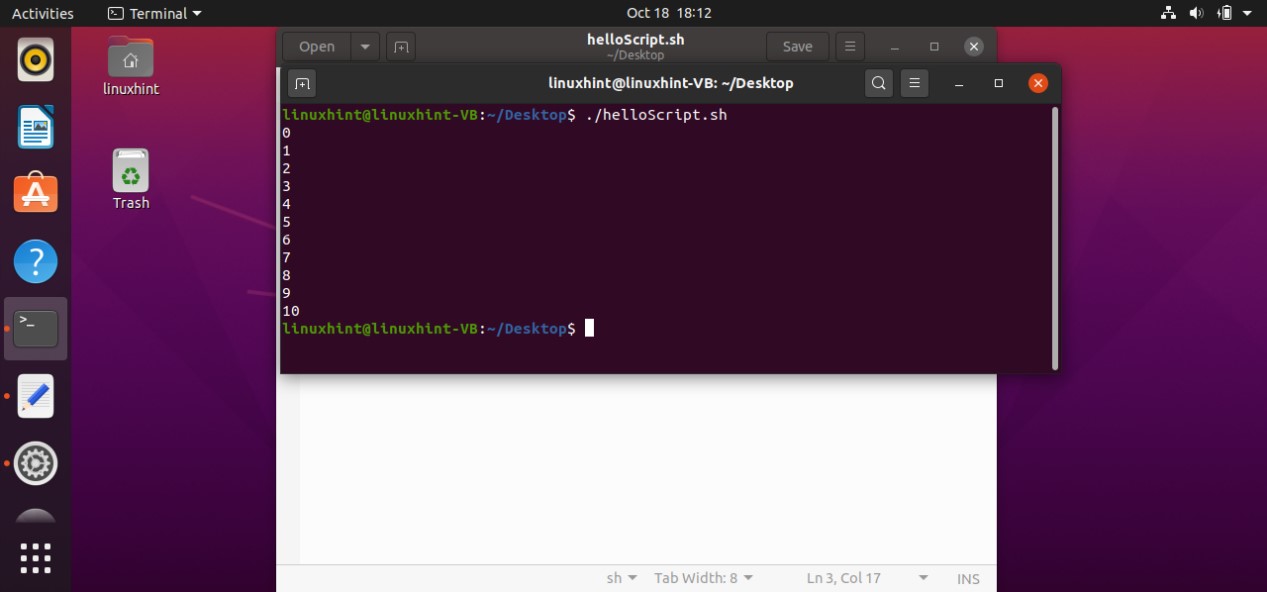
This method seems simple, but what if you want to execute 1000 times? You don’t have to write the number of iterations from 1 to 1000 instead use the other method of writing for a loop. In this method, you have to declare the starting and ending point of the iteration such as in the below example code ‘for i in {0..10}’, for loop will be executed 10 times. ‘0’ is defined as the starting point and ‘10’ is defined as the ending point of the iteration. This for loop will print the value of ‘i’ in each iteration.
for i in {0..10}
do
echo $i
done
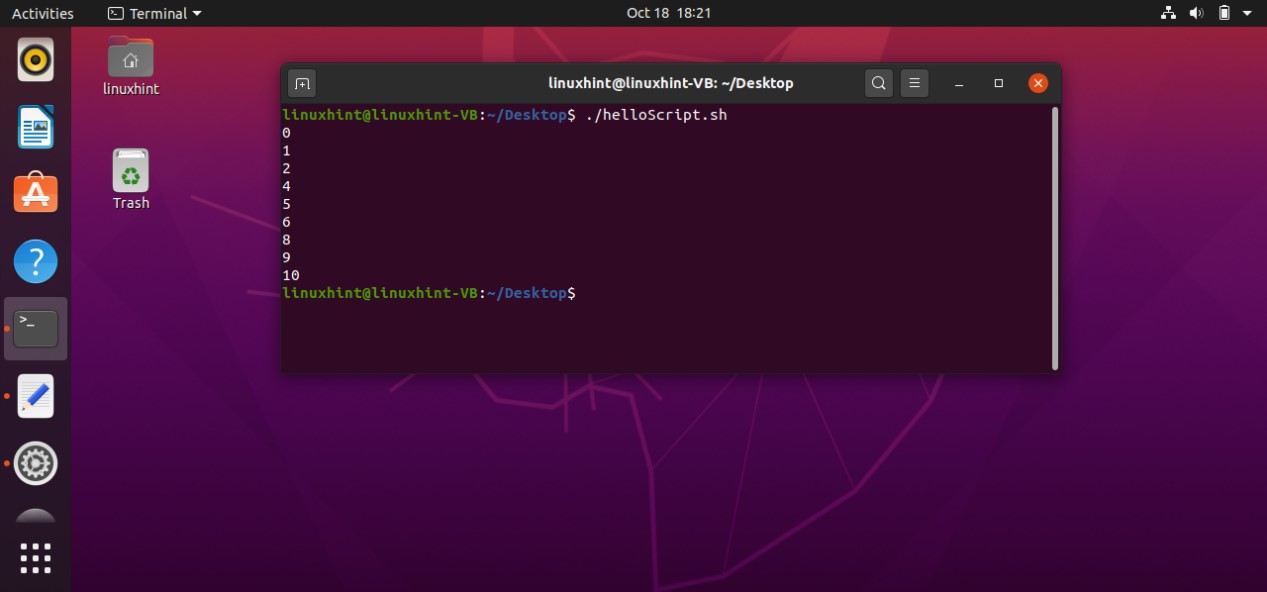
Save the code in the file ‘helloScript.sh’. Execute the file and you will see the following output.
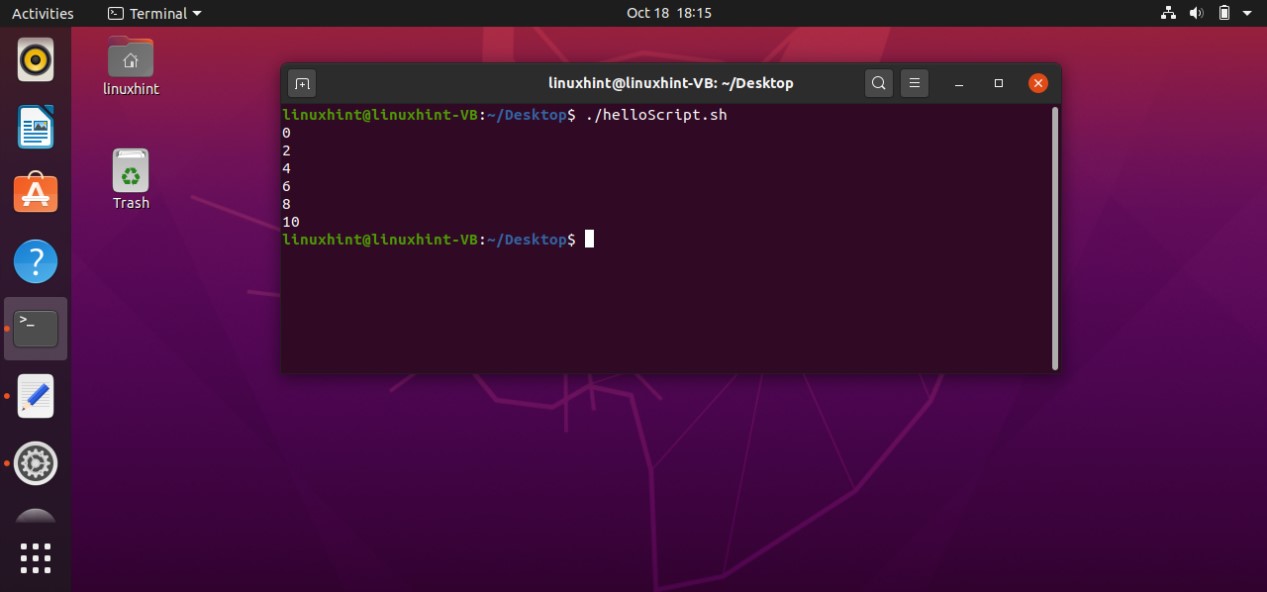
You can also define the increment value for the variable that controls the loop. For example in ‘for i in {0..10..2}’, 0 is the starting point of the loop, 10 is the ending point and the loop will execute the ‘echo $i’ statement with the increment of 2 in ‘i’. So in the example given below the program will printout 0 in the first run of the loop, then it will increment the value of ‘i’. Now the value of ‘i’ is 2. It will print 2 on the terminal. This code will print the value of ‘i’ as 0,2,4,6,8,10.
for i in {0..10..2}
#{starting..ending..increment}
do
echo $i
done
There is another method of writing the ‘for loop’ which is conventional across all the programming language. The below example code used this method to represent the ‘for loop’. Here in the statement ‘ for (( i=0; i<5; i++ ))’, ‘i’ is the variable that controls the whole loop. Firstly it is initialized with the value ‘0’, next we have the control statement of the loop ‘i<5’ that states that the loop will be executed when it has the value 0,1,2,3, or 4. Next, we have ‘i++’ which is the increment statement of the loop.
for (( i=0; i<5; i++ ))
do
echo $i
done
The program will come to the for a loop. ‘i’ is initialized with 0 and it will check the condition that ‘i’ has a value less than 5, which is true in this case. It will move on and print the value of ‘i’ as ‘0’ on the terminal. After that value of ‘i’ is incremented, and then the program will again check the condition whether its value is less than 5 which is true, so it will again printout the value of ‘i’ which is ‘1’. This execution flow goes on until ‘i’ reaches the value of ’5’ and the program will come out of the for loop and the program will be terminated.
Save the code. Execute the file from the terminal and it will show the following output.

Break and continue statement
A break statement is used to terminate the loop at the given condition. For example, in the code given below, for loop will do its normal execution until the value of ‘i’ is 6. As we have specified this thing in code that the for loop will break itself and stop further iterations when ‘i’ become greater than 5.
for (( i=0; i<=10; i++ ))
do
if [ $i -gt 5 ]
then
break
fi
echo $i
done
Save the script and execute the file. It will give you the following output.

Continue statement works as opposed to the break statement. It skips the iteration wherever the condition is true, and move toward the next iteration. For example, the code given below for loop will print the value of ‘i’ variable on the terminal from 0 to 20, except for 3 and 7. As the statement ‘if [ $i -eq 3 ] || [ $i -eq 7 ]’ tell the program to skip the iteration whenever the value of ‘’i equal to 3 or 7, and move to the next iteration without printing them.
Execute the following code for a better understanding of this concept.
for (( i=0; i<=10; i++ ))
do
if [ $i -eq 3 ] || [ $i -eq 7 ]
then
continue
fi
echo $i
done
6. Script input
The first example in this topic refers to the code where you can give a single command for executing your script and giving values as an input for the script.
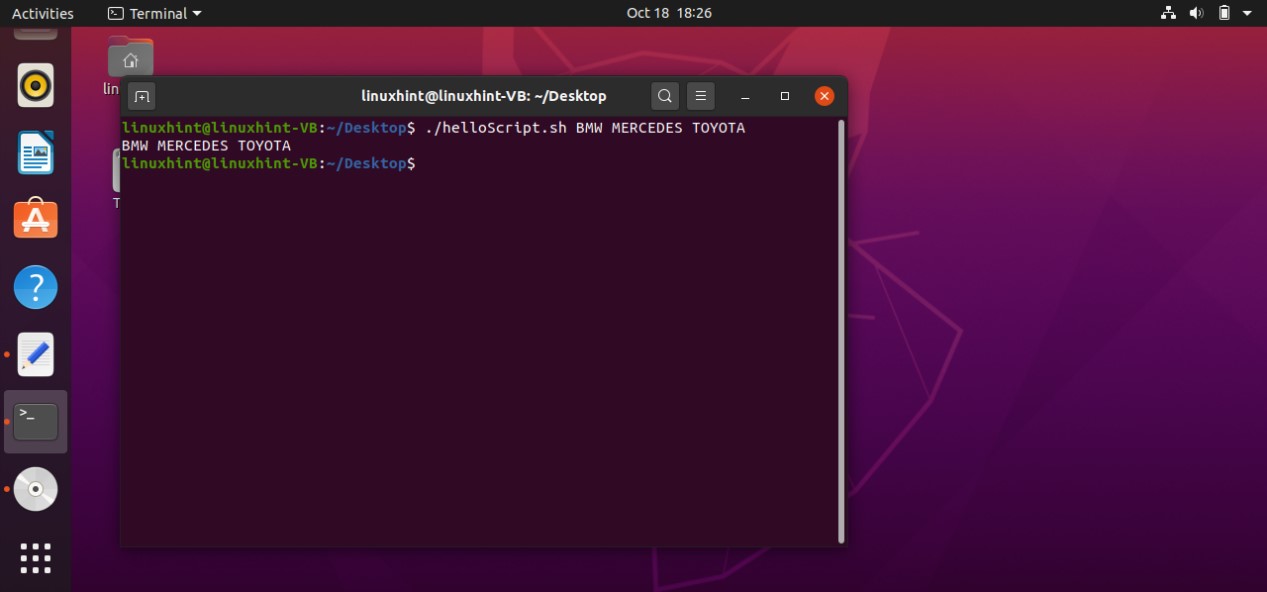
echo $1 $2 $3
This code will print out three values on the terminal. Save the above code in the script ‘helloScript.sh’ and write the command to ‘./helloScript.sh’ with three values which will be printed on the terminal In this example ‘BMW’ represents ‘$1’, ‘MERCEDES’ represents ‘$2’, and ‘TOYOTA’ represents ‘$3’.
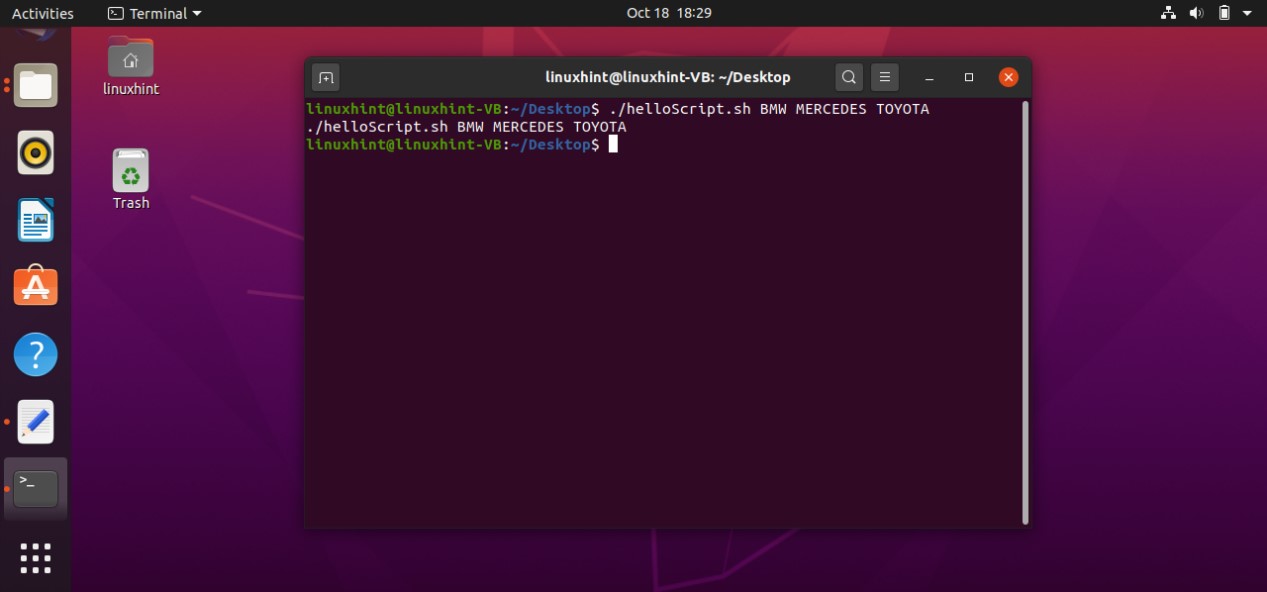
If you also specify ‘$0’ in the echo statement, it will print the script name also.
echo $0 $1 $2 $3
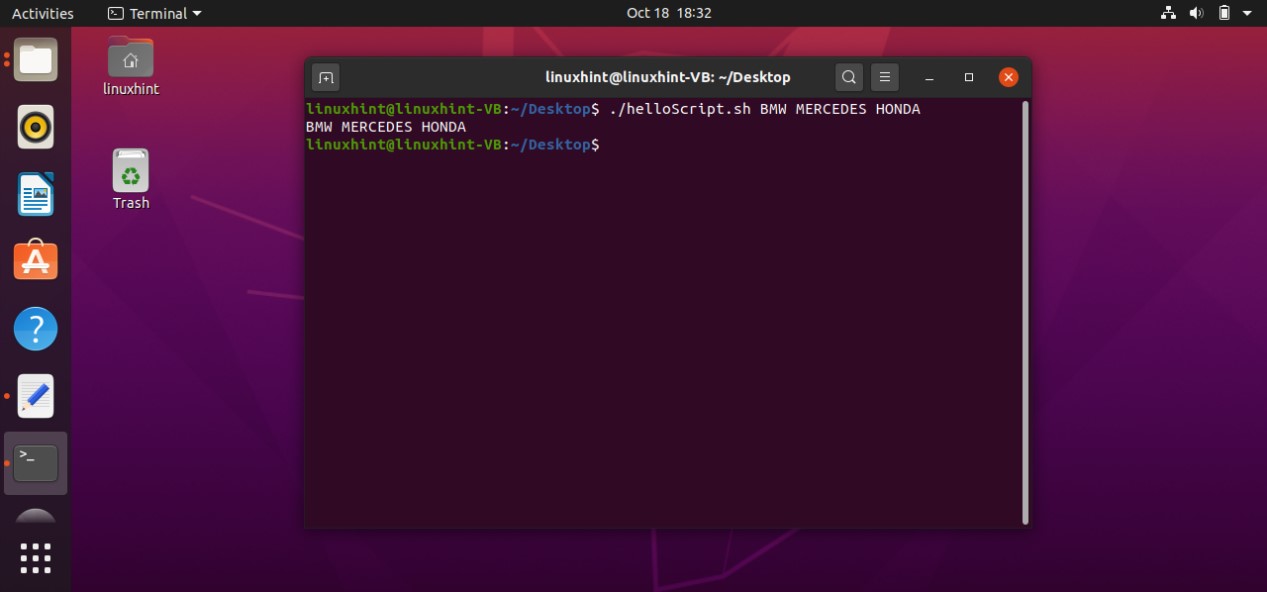
You can also use the arrays for this purpose. For declaring an array of infinite numbers use the code ‘args=(“$@”)’, in which ‘args’ is the name of the array and ‘@’ represents that it may have an infinite number of values. This type of array declaration can be used when you don’t know about the size of the input. This array will assign a block for each of the input and will continue to do so until it reaches the last one.
args=("$@") #you can also specify the array size here
echo ${args[0]} ${args[1]} ${args[2]}
Save the script in the file ‘helloScript.sh’. Open up the terminal and execute the file using the command ‘./helloScript.sh’ with the values that represent the elements of the declared array in the script. According to the command used below, BMW’ represents ${args[0]}, ‘MERCEDES’ represents ${args[1]}, and ‘HONDA’ represents ${args[2]}.
The code given below can be used to declare an array having an infinite number of values, and printing those values on the terminal. The difference between this and the previous example is that this example will print out all the values that represent the array elements and the command used in the previous example ‘ echo ${args[0]} ${args[1]} ${args[2]} will only print first three values of the array.
args=("$@")
echo $@

You can also print out the array size by writing ‘echo $# ’ in the script. Save the script. Execute the file using the terminal.
args=("$@")
echo $@ #prints all the array elements
echo $# #print the array size

Reading file using stdin
You can also read a file using ‘stdin’. To read a file using a script what you have to do is first use a while loop in which you will write the code to read the file line by line and printing that on the terminal. After closing the while loop using the keyword ‘done’, specify the path of the ‘stdin’ file’ < "${1:-/dev/stdin}" ’ as we are using it for reading a file. The script given below can be used for a better understanding of this concept.
while read line
do
echo "$line"
done < "${1:-/dev/stdin}"
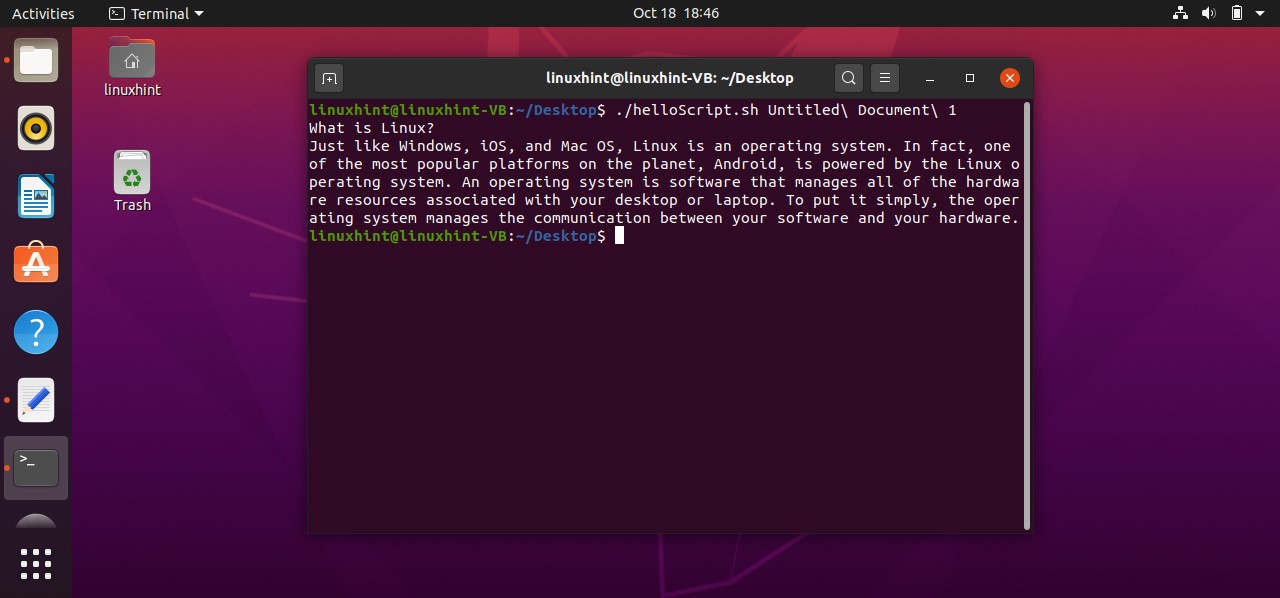
Save the script in the file ‘helloScript.sh’. Open up the terminal and write the command to execute ‘helloScript’ with the file name you want to read. In this case, the file we want to read is placed on Desktop with the name ‘Untitled Document 1’. Both ‘\’ is used to represent that this is a single file name, Otherwise simply writing ‘Untitled Document 1’ will be taken as multiple files.
7. Script output
In this topic, you are going to learn about standard output and standard error. Standard output is the output stream of the data which is the result of the commands whereas standard error is the location of the error messages from the command line.
You can redirect the standard output and standard error to single or multiple files. Script code given below will redirect both to a single file. Here ‘ls -al 1>file1.txt 2>file2.txt’, 1 represents the standard output and 2 represents the standard error. Standard output will be redirected to ‘file1.txt’ and standard error will be redirected towards ‘file2.txt’.
ls -al 1>file1.txt 2>file2.txt
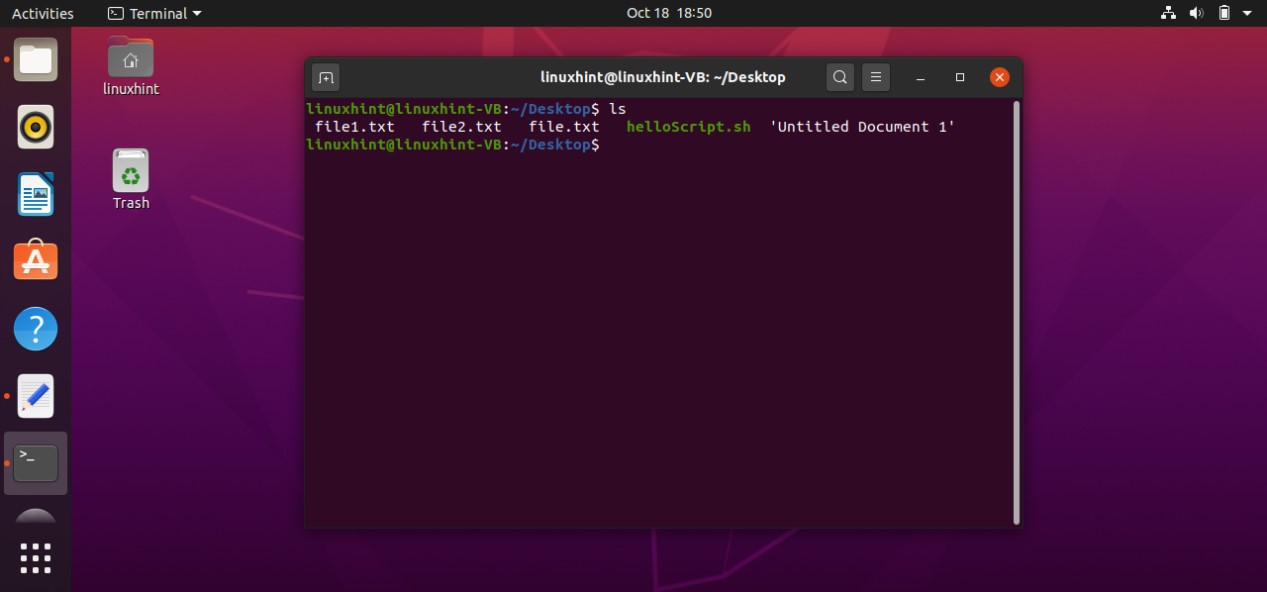
Save this code in ‘helloScript.sh’ and run it through the terminal using the command ‘$ ./helloScript.sh’. Firstly it will create the two files on Desktop and then redirect their respective output. After this, you can use the ‘ls’ command to check whether the files are created or not.
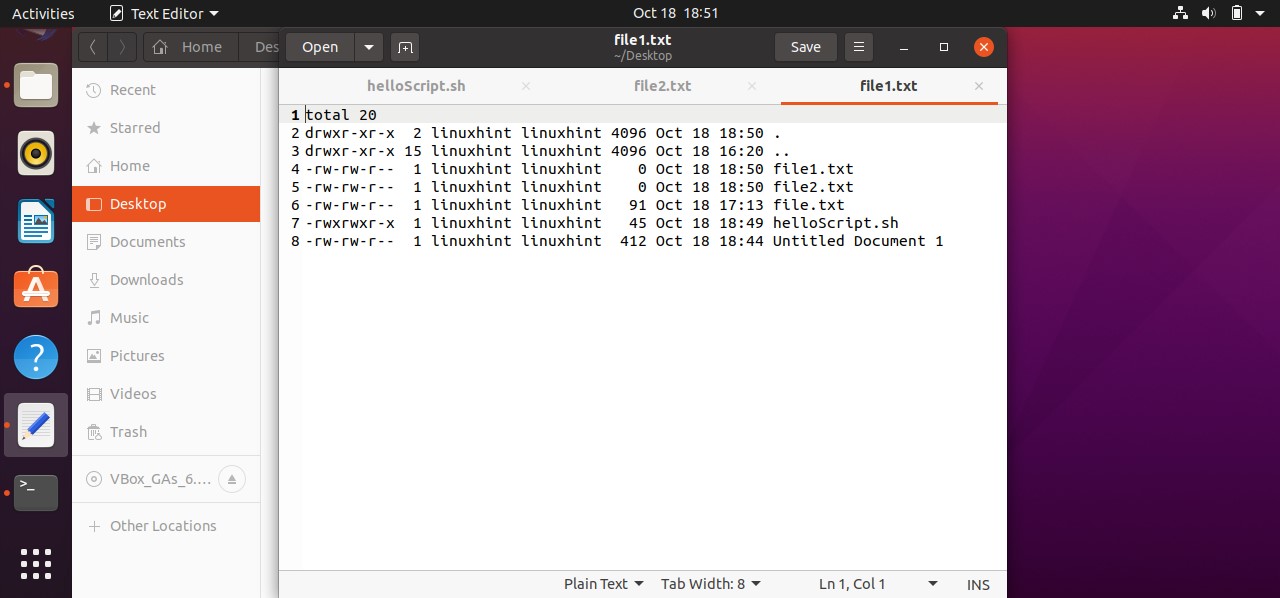
After that check the content of both files.
As you can see standard output is redirected to ‘file1.txt’.

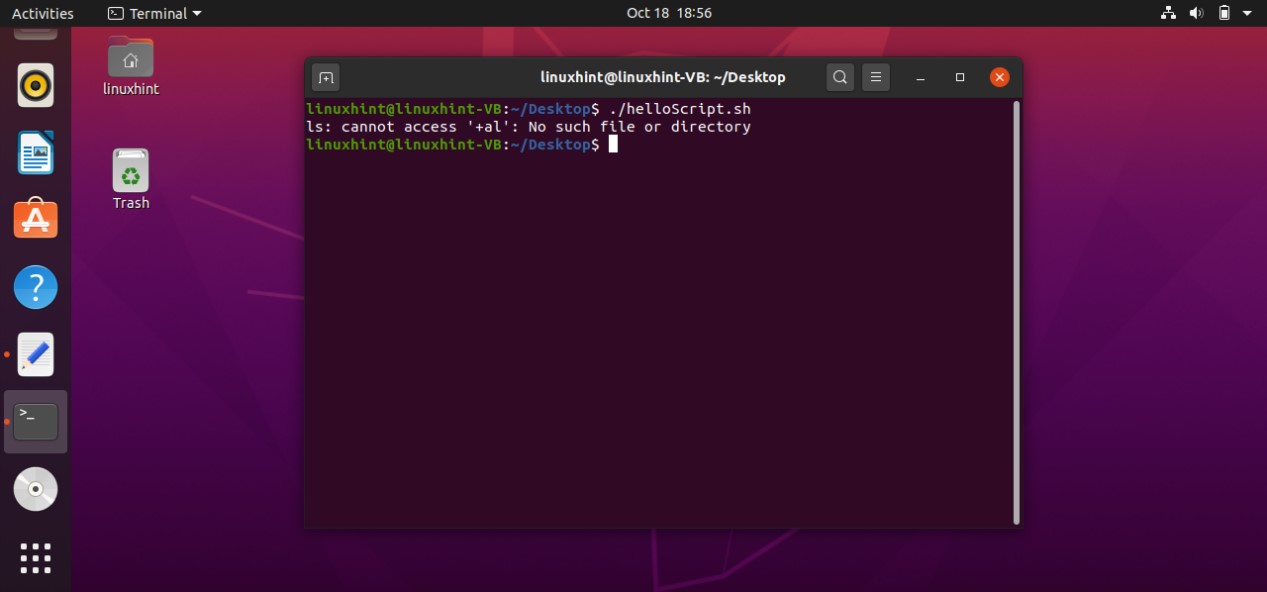
‘file2.txt’ is empty because there exists no standard error for the script. Now let’s try to create a standard error. For that, you have to change the command from ‘ls -al’ to ‘ls +al’. Save the script given below execute the file from the terminal, reload both files and see the results.
ls +al 1>file1.txt 2>file2.txt
Execute the file using the command ‘./helloScript.sh’ on the terminal and now check the files.
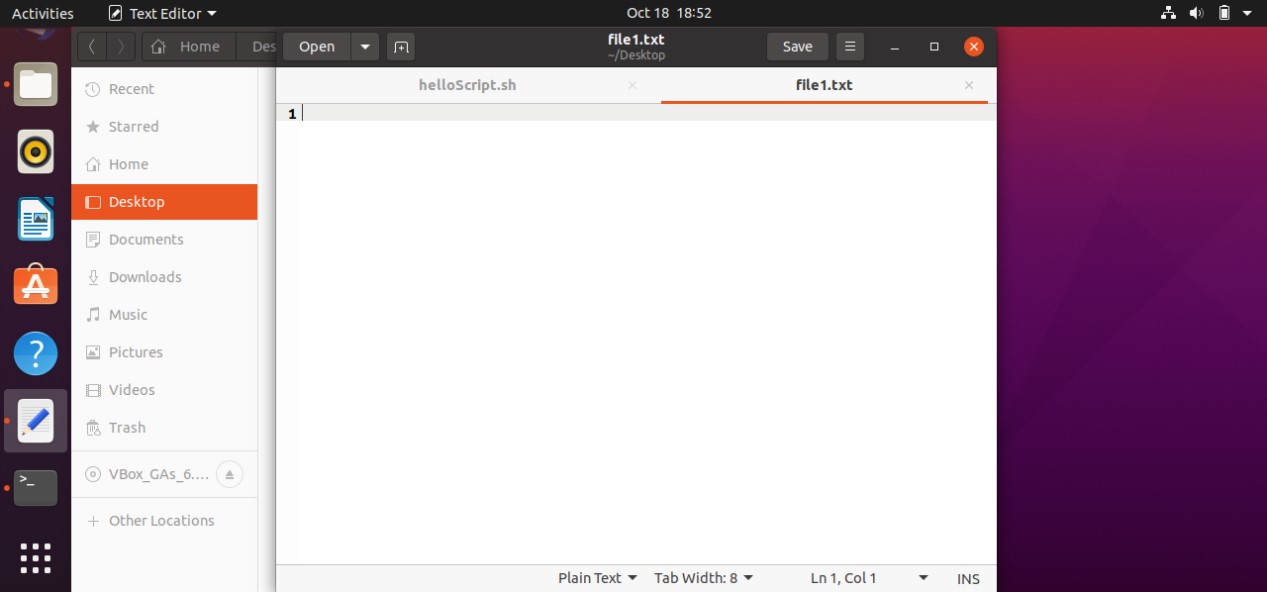
‘file1.txt’ is empty because there exists no standard output for the script and standard error will be saved in ‘file2.txt’, as shown below.

You can also create two separate scripts for this purpose. In this case, the first script is going to store the standard output in the ‘file1.txt’ and the second script will store standard error. Both scripts are given below with their respective outputs.
ls -al >file1.txt

ls +al >file1.txt
You can also use a single file for storing standard output and standard output. Here is the example script for that.
ls -al >file1.txt 2>&1
8. Send output from one script to another script
To send output from one script to another script, two things are essential to have. Firstly, both scripts should exist at the same place and both files have to be executable. Step 1 is to create two scripts. Save one as ‘helloScript’ and the other as ‘secondScript’.
Open the ‘helloScript.sh’ file and write the code given below.
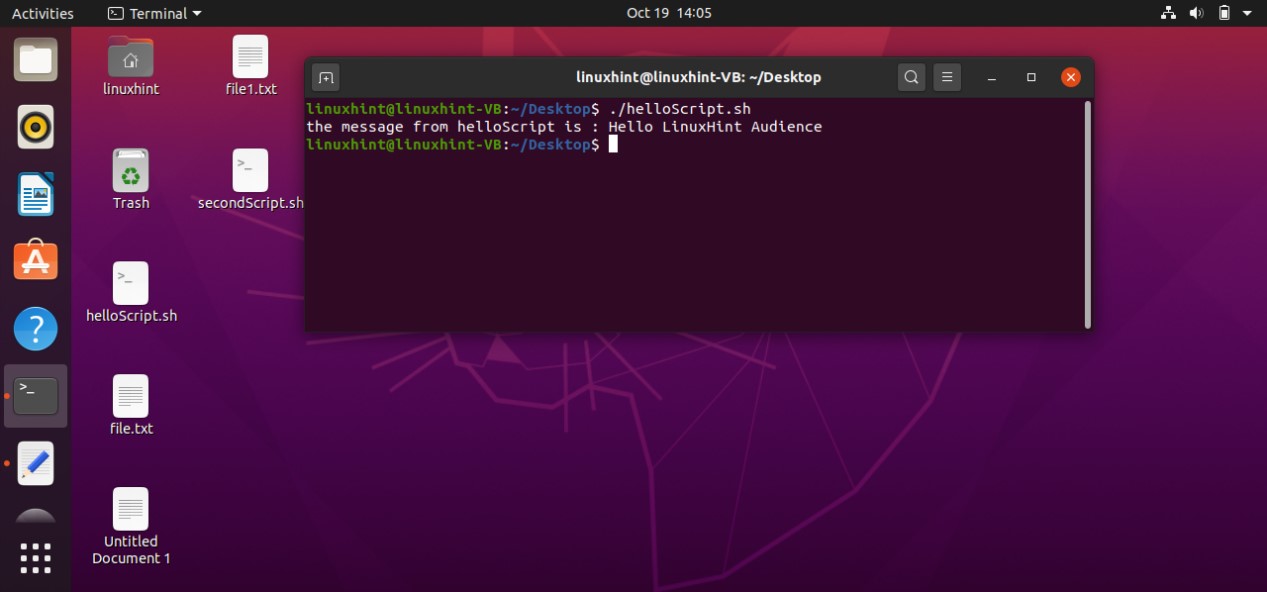
MESSAGE="Hello LinuxHint Audience"
export MESSAGE
./secondScript.sh
This script will export the value stored in the ‘MESSAGE’ variable which is essential “Hello LinuxHint Audience” to ‘secondScript.sh’.
Save this file and move on to other for coding. Write the following code in ‘secondScript.sh’ to get that ‘MESSAGE’ and printing it in terminal.
echo "the message from helloScript is: $MESSAGE"
So till now, both scripts have their code to export, get , and print the message on the terminal. Make the ‘secondScript’ executable by typing the following command on the terminal.
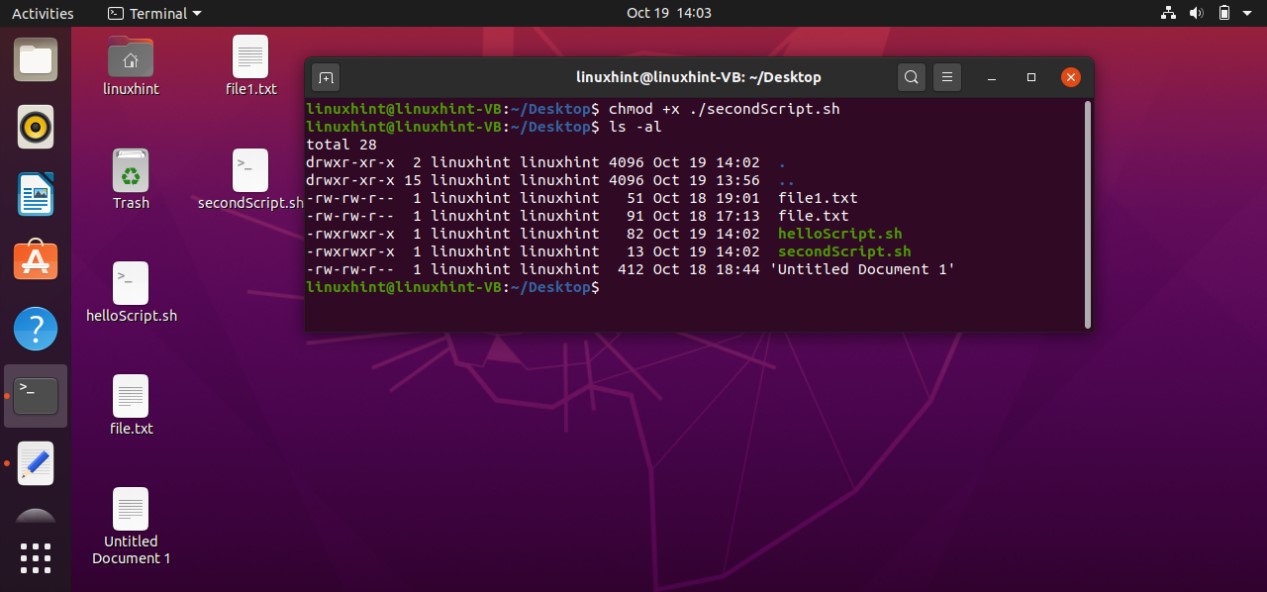
Now execute the ‘helloScript.sh’ file to get the desired result.
9. Strings processing
The first operation you are going to learn in this topic is string comparison. Take two inputs from the user in the form of strings. Read that values from the terminal and store that in two different variables. Use an ‘if’ statement to compare the values of both variables using the ‘==’ operator. Code the statement to display that the ‘strings match’ if they are the same and write ‘strings don’t match’ in its ‘else’ statement and then close the ‘if’ statement. Below is the script code of this whole procedure.
echo "enter Ist string"
read st1
echo "enter 2nd string"
read st2
if [ "$st1" == "$st2" ]
then
echo "strings match"
else
echo "strings don't match"
fi
Save the script in ‘helloScript.sh’. Execute the file from the terminal and give two strings for comparison.
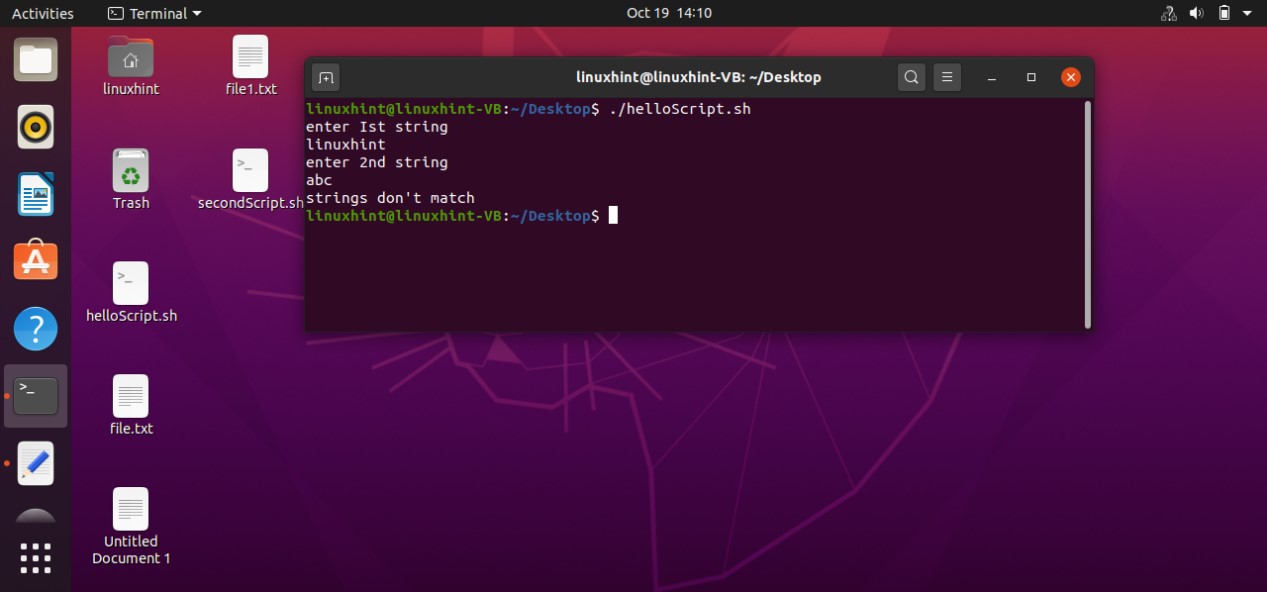
You can also test the code using different inputs.
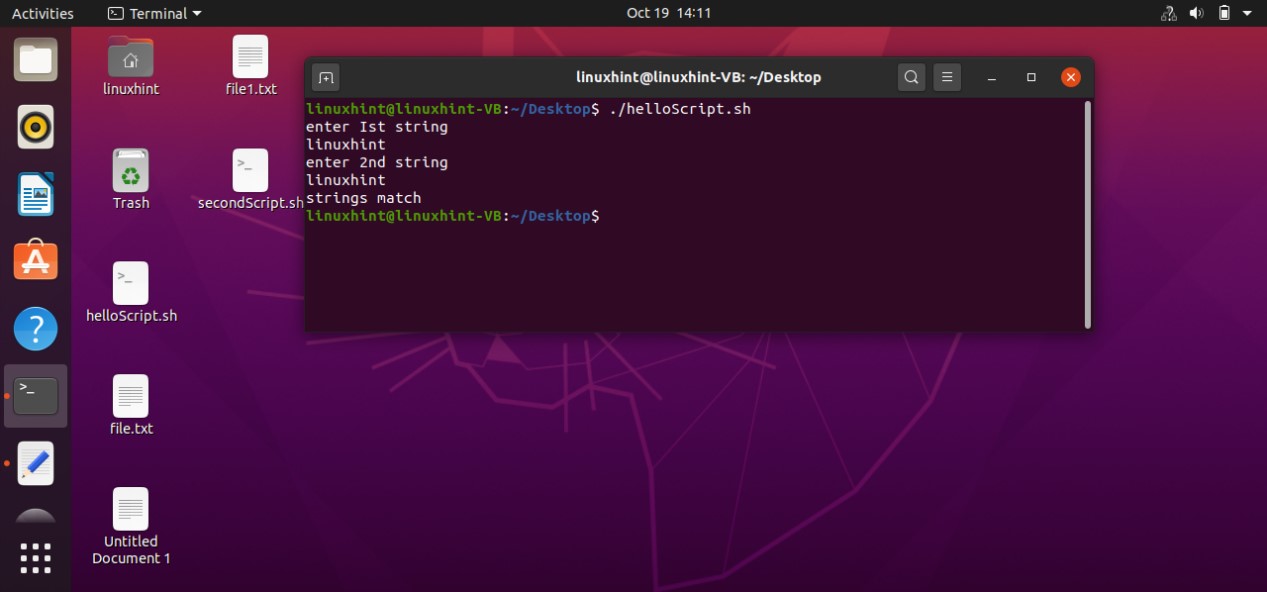
You can also check that if your program is actually comparing the strings or not just checking the length of the strings.

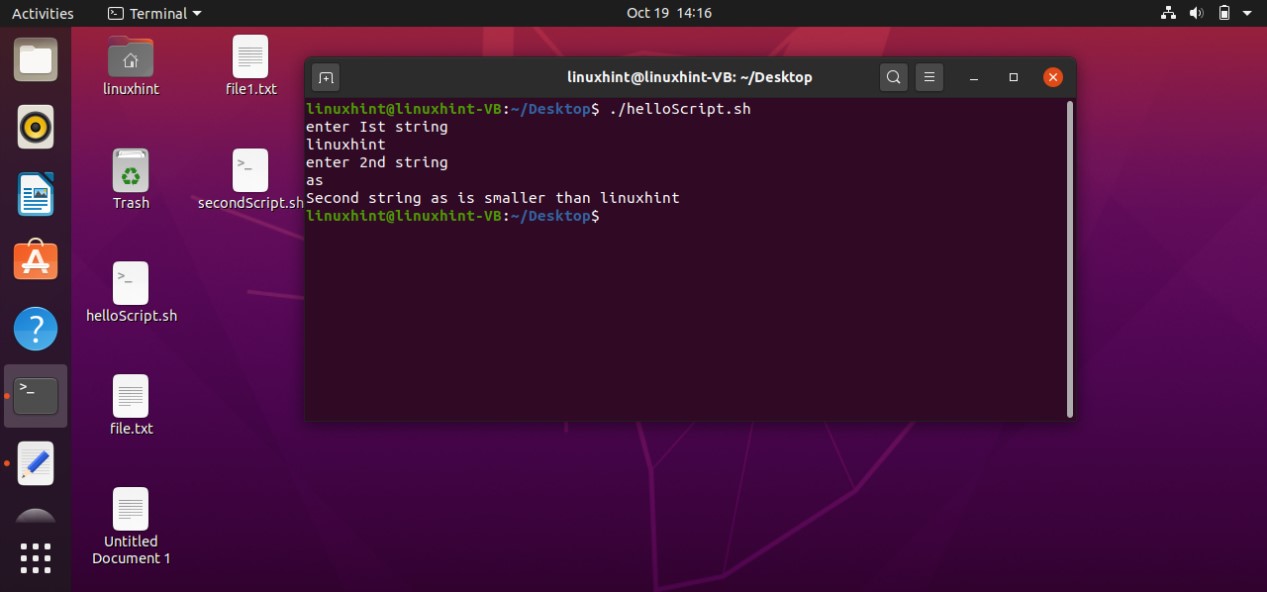
Checking string is smaller or not
You can also check that if a string is smaller or not. Take the input from the user, read the values from the terminal. After that compare the strings using the ‘\’ the first string or not.
echo "enter Ist string"
read st1
echo "enter 2nd string"
read st2
if [ "$st1" \ "$st2" ]
then
echo "Second string $st2 is smaller than $st1"
else
echo "strings are equal"
fi
Save this ‘helloScript.sh’ and execute it.


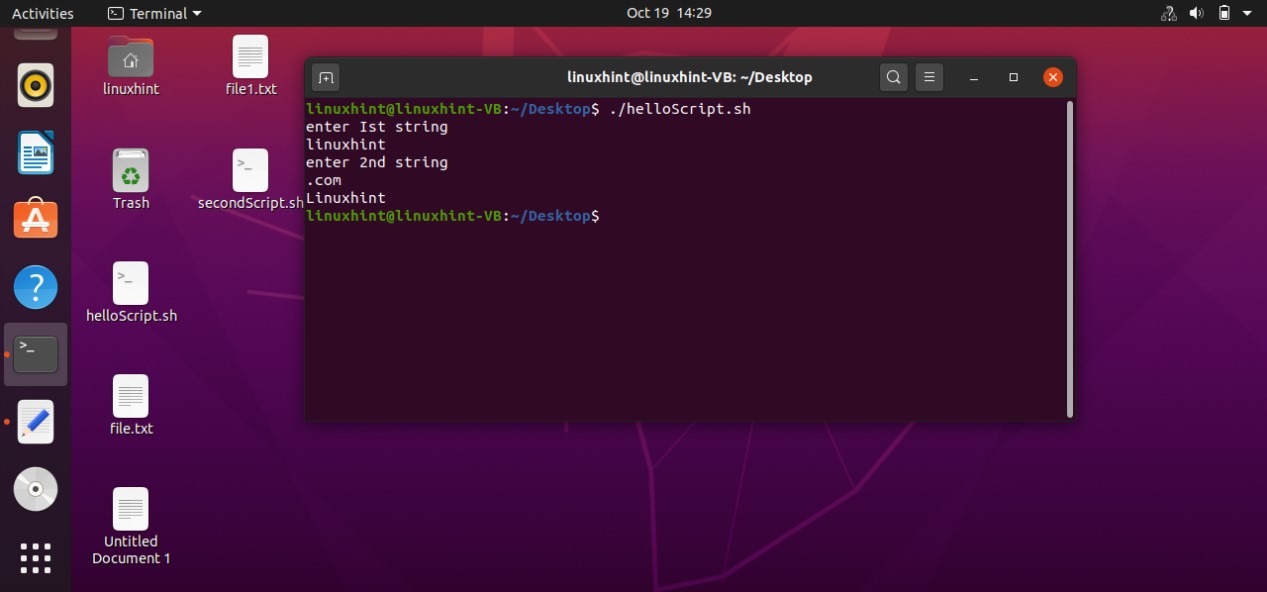
Concatenation
You can also concatenate two strings. Take two variables, read the strings from the terminal, and store them in these variables. The next step is to create another variable and concatenate both variables in it by simply writing ‘c=$st1$st2’ in the script and then print it out.
echo "enter Ist string"
read st1
echo "enter 2nd string"
read st2
c=$st1$st2
echo $c
Save this code in ‘helloScript.sh’, execute the file using the terminal, and check out the results.

Converting the input into lowercase and uppercase
You can also convert the input into lowercase and uppercase. For this, what you have to do is simply write a script to read the values from the terminal and then use the ‘^’ symbol with the variable name to print it in lowercase, and use ‘^^’ for printing it in upper case. Save this script, and run the file using the terminal.
echo "enter Ist string"
read st1
echo "enter 2nd string"
read st2
echo ${st1^} #for lowercase
echo ${st2^^} #for uppercase

Turning first letter capital
You can also convert only the first letter of the string by simply writing the variable as ‘$[st1^l}’.
echo "enter Ist string"
read st1
echo "enter 2nd string"
read st2
echo ${st1^l} #for capitalizing the first letter
10. Numbers and Arithmetic
In this topic, you will learn how to perform different arithmetic operations through scripting. Here, you will also see different methods for that. In the first method, step 1 is to define two variables with their values and then use the echo statement and the ‘+’ operator for printing the sum of these variables on the terminal. Save the script, execute it, and check out the result.
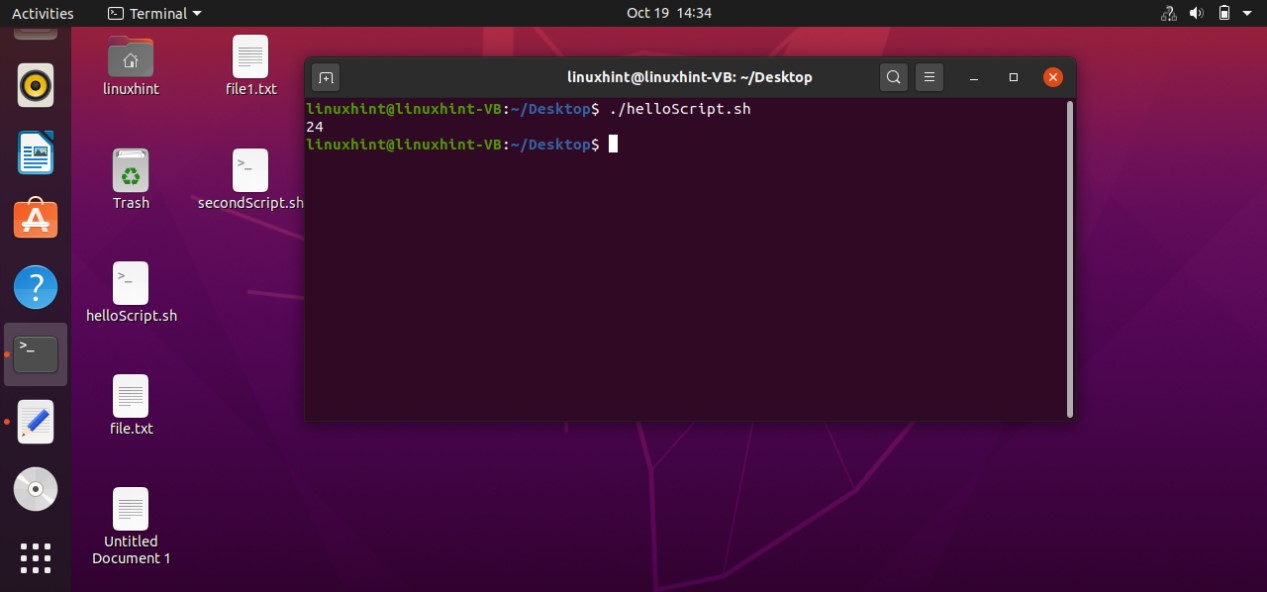
n1=4
n2=20
echo $(( n1 + n2 ))
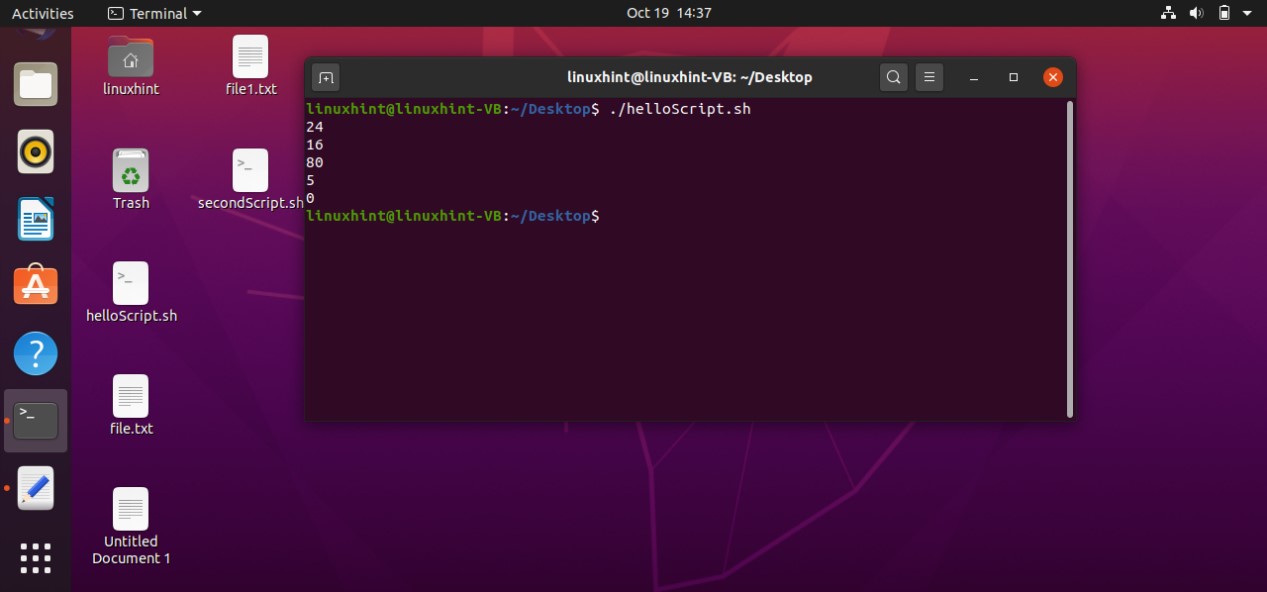
You can also write a single script for performing multiple operations like addition, subtraction, multiplication, division, etc.
n1=20
n2=4
echo $(( n1 + n2 ))
echo $(( n1 - n2 ))
echo $(( n1 * n2 ))
echo $(( n1 / n2 ))
echo $(( n1 % n2 ))
The second method for performing the arithmetic operation is by using ‘expr’. What this ‘expr’ does is that it considers these n1 and n2 as other variable and then perform the operation.
n1=20
n2=4
echo $(expr $n1 + $n2 )

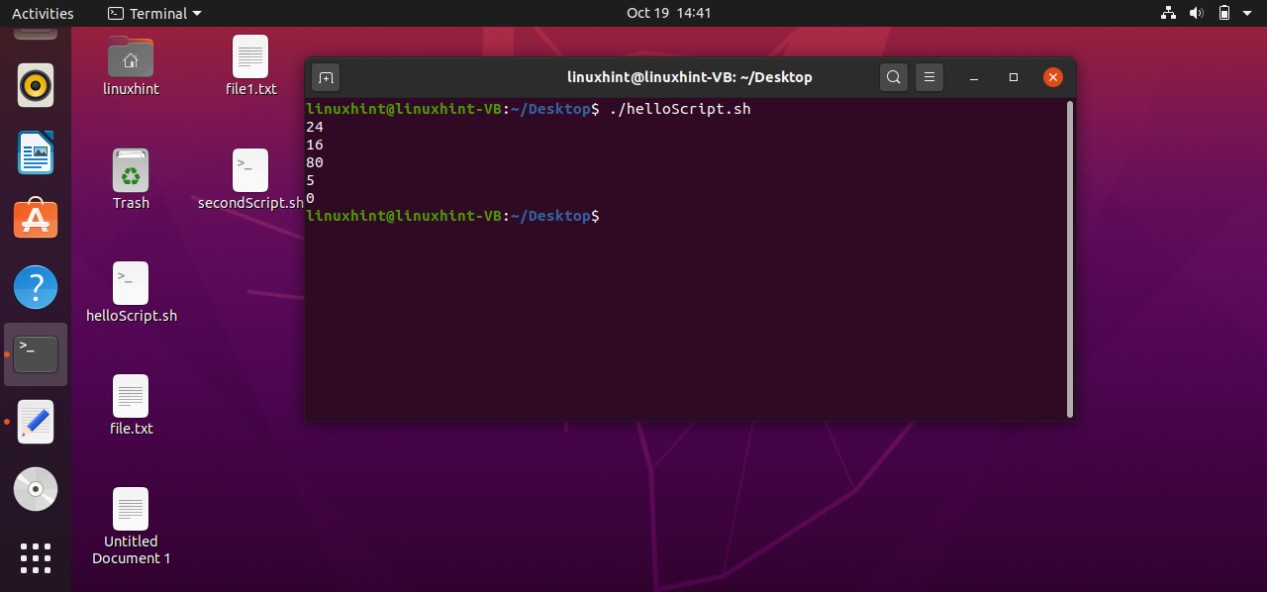
You can also use a single file to perform multiple operations using ‘expr’. Below is a sample script for that.
n1=20
n2=4
echo $(expr $n1 + $n2 )
echo $(expr $n1 - $n2 )
echo $(expr $n1 \* $n2 )
echo $(expr $n1 / $n2 )
echo $(expr $n1 % $n2 )
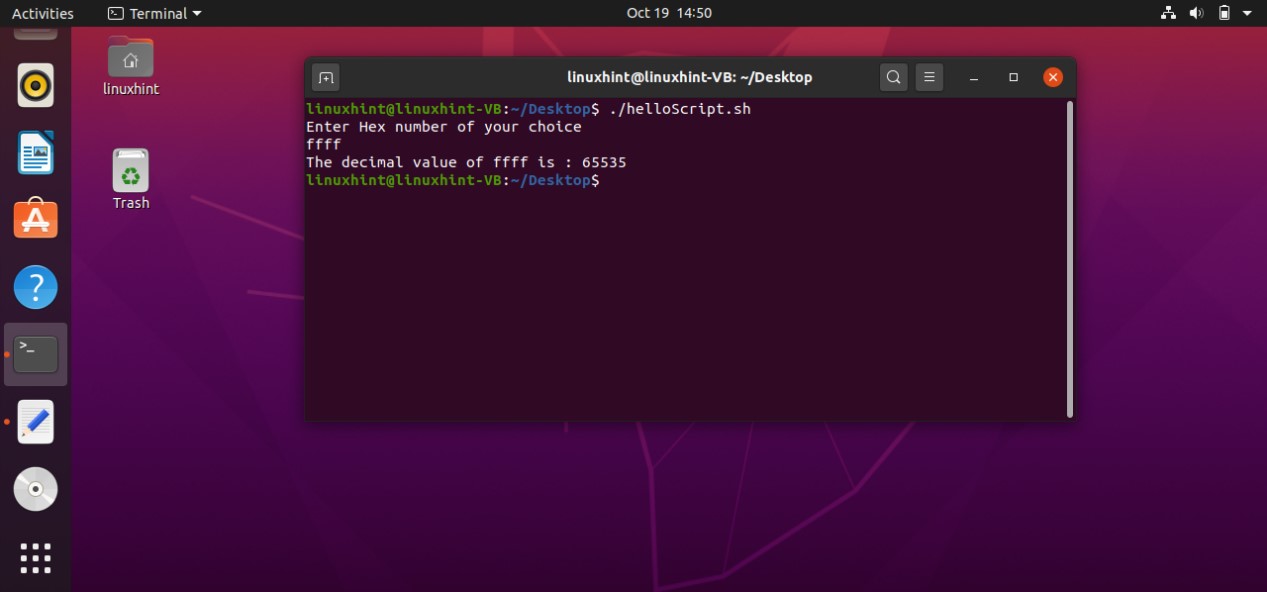
Converting hexadecimal into decimal
To convert a hexadecimal number into a decimal, write a script that takes the hex number from the user, and read the number. We are going to use the ‘bc calculator’ for this purpose. Define ‘obase’ as 10 and ‘ibase’ as 16. You can use the script code below for a better understanding of this procedure.
echo "Enter Hex number of your choice"
read Hex
echo -n "The decimal value of $Hex is : "
echo "obase=10; ibase=16; $Hex" | bc
11. Declare command
The idea behind this command is that bash itself doesn’t have a strong type system, so you cannot restrict the variable in bash. However, to allow type like behavior it uses attributes that can be set by a command which is the ‘declare’ command. ‘declare’ is a bash built-in command that allows you to update attributes applied to variables within the scope of your shell. It allows you to declare and peek into the variables.
Writing the command given below will show you a list of variables that exist already in the system.
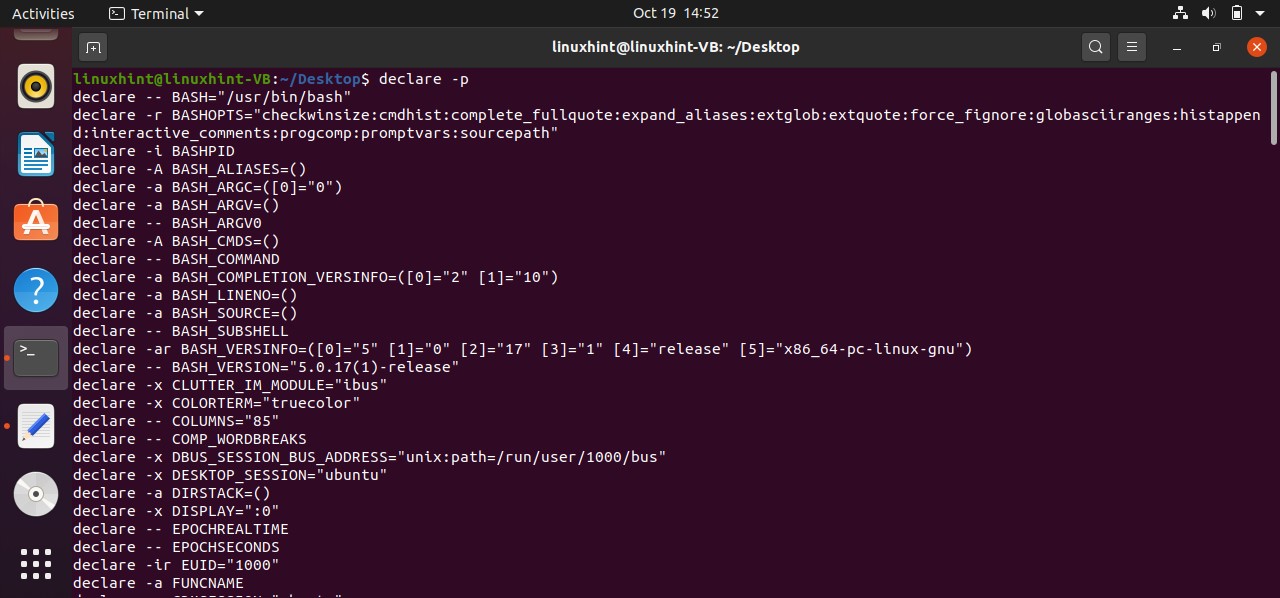
You can also declare your own variable. For that what you have to do is to use the declare command with the name of the variable.
After that use the ‘$ declare -p’command to check your variable in the list.
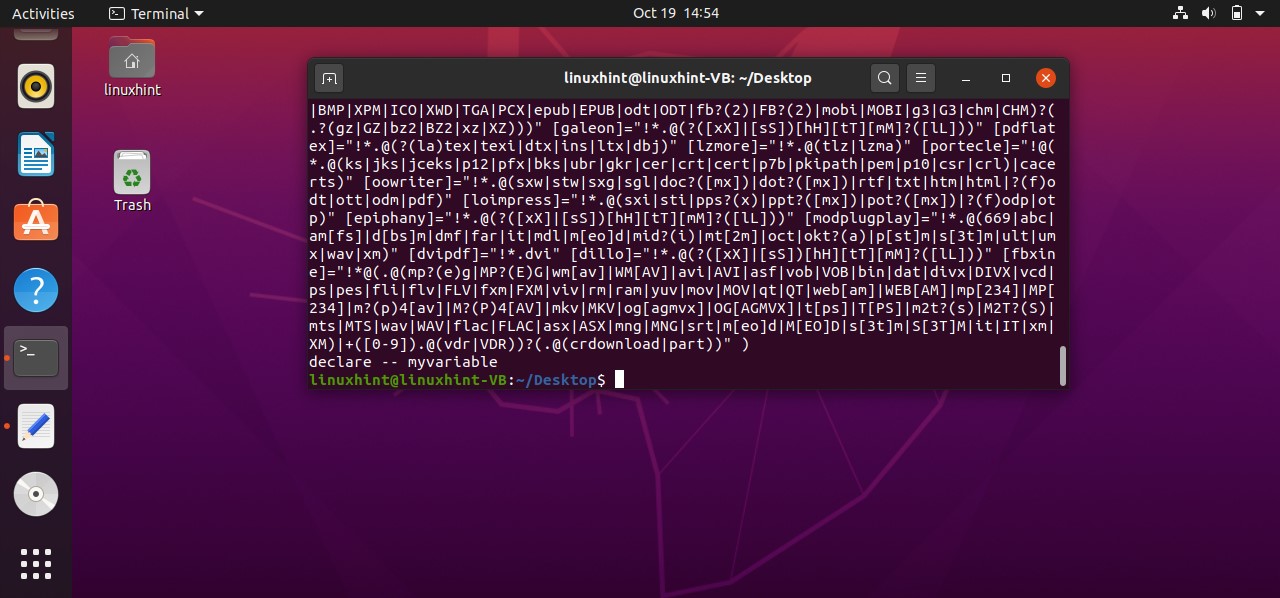
To define a variable with its value, use the command given below.
$ declare -p

Now let’s try to restrict a file. Use ‘-r’ to apply the read-only restriction to a file and then write the name of the variable with its path.
declare -r pwdfile=/etc/passwd
echo $pwdfile

Now let’s try to make some changes to the file.
declare -r pwdfile=/etc/passwd
echo $pwdfile
pwdfile=/etc/abc.txt
As the ‘pwdfile’ is restricted as a read-only file. It should display an error message after script execution.

12. Arrays
First of all, you are going to learn how to declare an array and store values in it. You can store as many values as you want. Write the name of the array and then define its values in ‘( )’ brackets. You may look up the below code to see how it works.
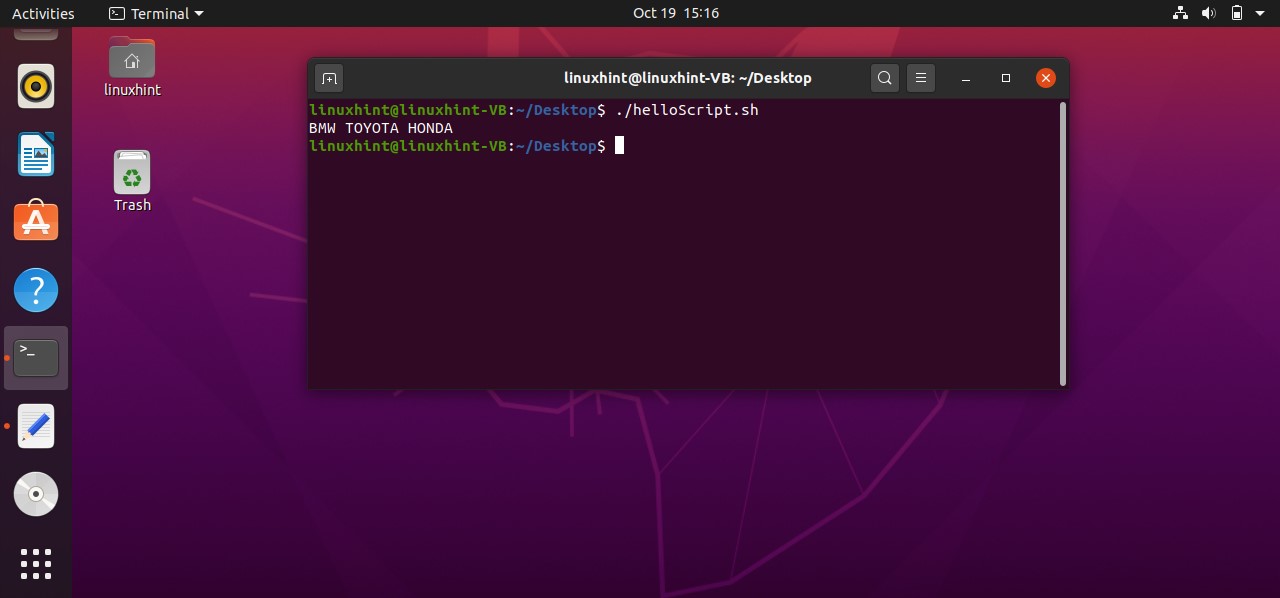
car=('BMW' 'TOYOTA' 'HONDA')
echo "${car[@]}"
You can also use the index of the array elements for printing them such as in below example ‘BMW’ is stored at ‘0’th index, ‘TOYOTA’ is stored at ‘1’ st index, and ‘HONDA’ is stored at ‘2’nd index. For printing ‘BMW’ you should write ${car[0]}, and vice versa.
car=('BMW' 'TOYOTA' 'HONDA')
echo "${car[@]}"
#printing value by using index
echo "printing value using index"
echo "${car[0]}"
echo "${car[1]}"
echo "${car[2]}"

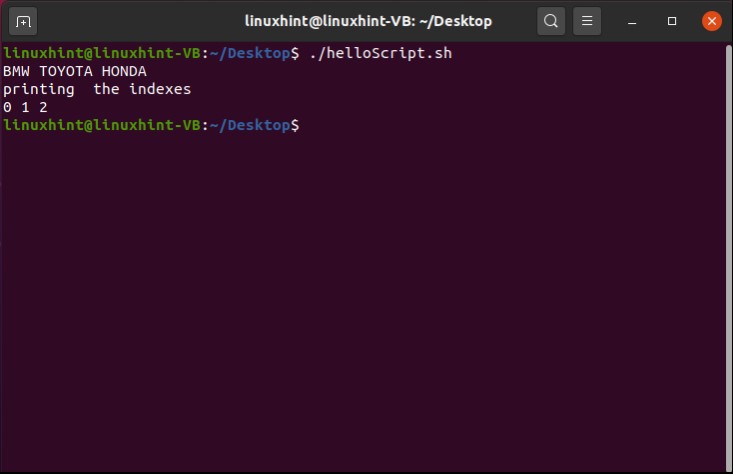
You can also print the indexes of the array. For this, you have to write “${!car[@]}”, here ‘!’ is used to representing the index, and ‘@’ represents the whole array.
car=('BMW' 'TOYOTA' 'HONDA')
echo "${car[@]}"
echo "printing the indexes"
echo "${!car[@]}"
If you want to print the total number of values in an array, simply write ‘${#car[@]}’ here # represents the total number of elements.
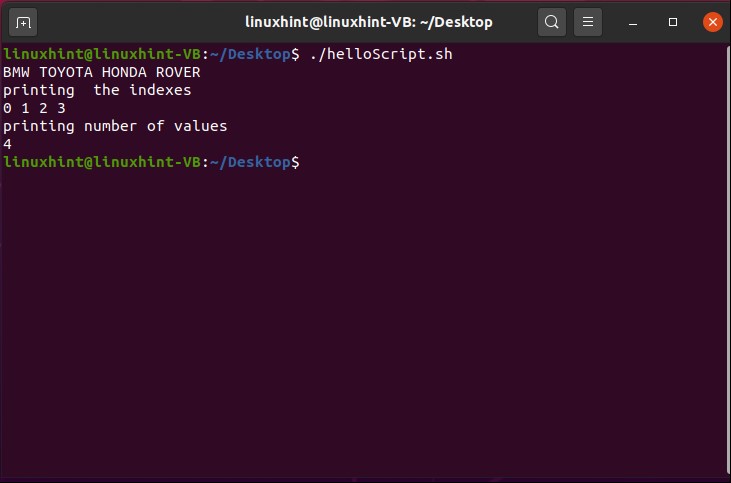
car=('BMW' 'TOYOTA' 'HONDA' 'ROVER')
echo "${car[@]}"
echo "printing the indexes"
echo "${!car[@]}"
echo "printing number of values"
echo "${#car[@]}"
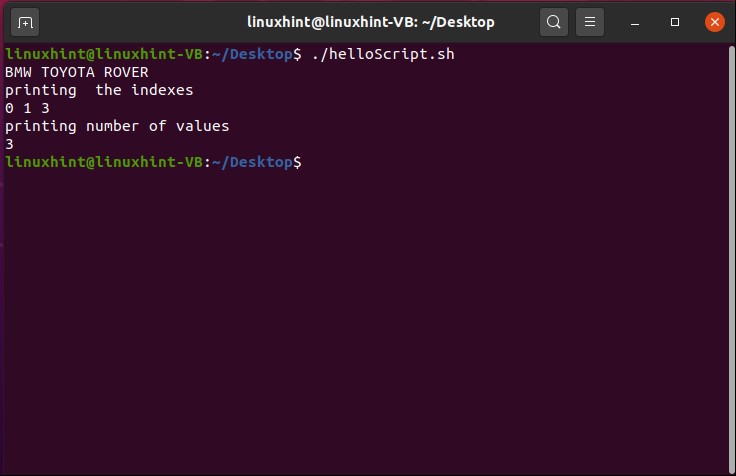
Let’s suppose, you declared an array, and then you want to delete any element. For deleting any element use the ‘unset’ command with the array name and the index of the element you want to delete. If you want to delete the value stored at the 2nd index of the ‘car’ array, simply write ‘unset car[2]’ in your script. Unset command will remove the array element with its index from the array Check out the following code for better understanding.
car=('BMW' 'TOYOTA' 'HONDA' 'ROVER')
unset car[2]
echo "${car[@]}"
echo "printing the indexes"
echo "${!car[@]}"
echo "printing number of values"
echo "${#car[@]}"
Save the following code in the ‘helloScript.sh’. Execute the file using ‘./helloScript.sh’.
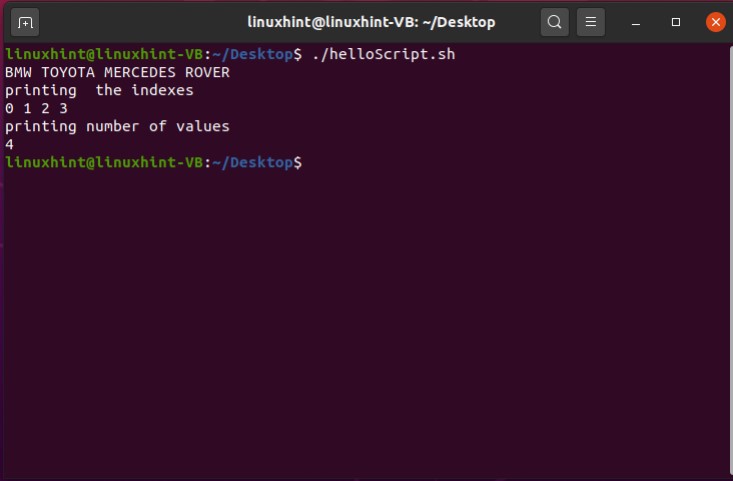
Now you know to delete an array element, but what if you want to store any other value such as ‘MERCEDES’ at its index which is 2. After using the unset command, in the next line write ‘car[2]=’MERCEDES’. That’s it.
car=('BMW' 'TOYOTA' 'HONDA' 'ROVER')
unset car[2]
car[2]='MERCEDES'
echo "${car[@]}"
echo "printing the indexes"
echo "${!car[@]}"
echo "printing number of values"
echo "${#car[@]}"
Save the script and run the file through the terminal.
13. Functions
Functions are basically reusable lines of code, that can be call out again and again. When you want to perform a certain operation again and again or you want to execute something repeatedly, it is a sign to use a function in your code. Functions save your time and effort to write tons of lines again and again.
Below is an example to show you the syntax of the function. One thing which is the most important thing to remember is that you should define or declare your function first, somewhere in the coding before calling it. For defining a function in your code, Step 1 is to use the ‘function’ command with the function name you want to give and then ‘( )’. Step 2 is to write the function code within the ‘{ }’. Step 3 is to call the function by using the function name, where you want to have its execution.
function funcName()
{
echo "this is new function"
}
funcName

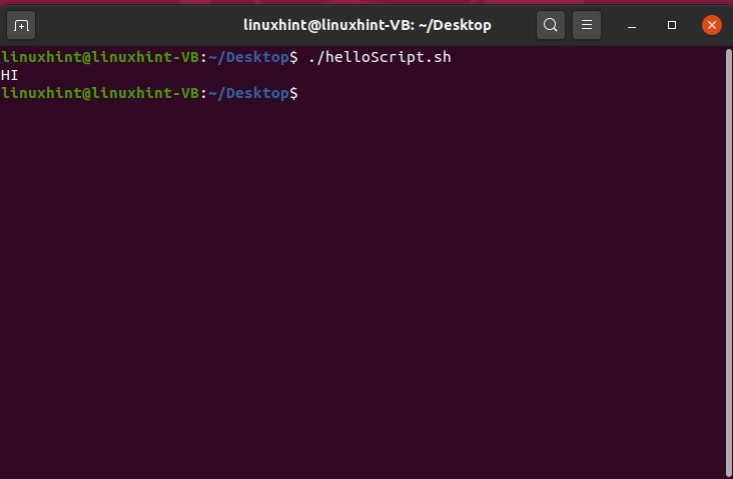
You can also give parameters to the function. For example, you want any word as an argument, which will be given at the time of function call. For this, what you have to do is simply create the function using the syntax discussed above, and in the body of the function write ‘echo $1’, this line will print the first parameter assigned at the time of function call. Come out of the body, call the function by using the function name, and with the words as ‘parameter’ you want to show on the terminal.
function funcPrint()
{
echo $1
}
funcPrint HI
You can use multiple parameters or arguments according to your program and then mention those parameter values at the time of function call.
Here is an example code.
function funcPrint()
{
echo $1 $2 $3 $4
}
funcPrint Hi This is Linuxhint

You can also check that the function is working perfectly or not.
function funcCheck()
{
returningValue="using function right now"
echo "$returningValue"
}
funcCheck
Save the code in ‘helloScript.sh’ and execute it through the terminal.

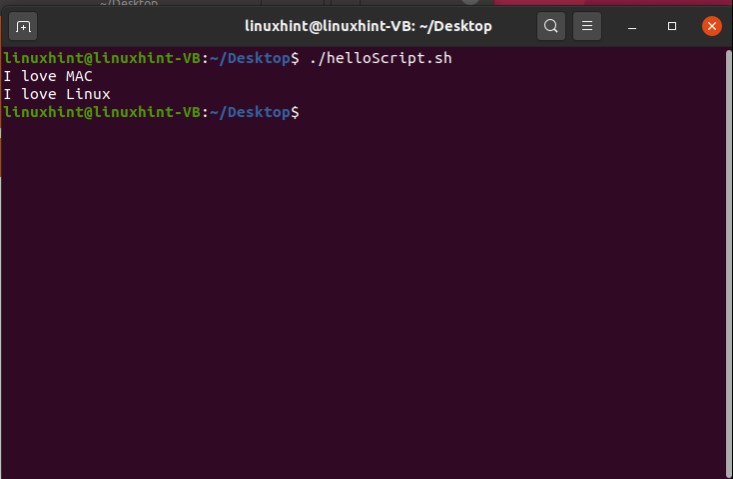
The variable which is declared inside of a function is local variable. For example, in the code given below ‘returningValue’ is a local variable. By the term local variable, we mean that its value is ’I love Linux’ within the scope of this function and we cannot access this variable outside of the function body. Wherever you call this function, the variable ‘returningValue’ will be assigned the value ‘I love Linux’.
function funcCheck()
{
returningValue="I love Linux"
}
returningValue="I love MAC"
echo $returningValue
funcCheck
echo $returningValue
In this script, you have a local function named as ‘funcCheck()’. This function has a local variable ‘returningValue’ with the value ‘I love Linux’. This ‘returningValue’ is a local variable. After defining the function, you see there is another statement as ‘returningValue=”I love MAC”’ but this time it is another variable, not the one defined in the function. Save the script and execute it you will see the difference.
14. Files and Directories
In this topic, you are going to learn how to create files and directories, how to check the existence of these files and directories using a script, reading text from the files line by line and how to append text in the files and last thing, how to delete a file.
The first example script is to create a directory named ‘ Directory2’. Creating a directory ‘mkdir’ command is used with the flag ‘-p’ that deals with the error of creating same directories or folder at a place.
Save this ‘helloScript.sh’. Open up the terminal and execute the file. Then use ‘ls -al’ to check its existence.
mkdir -p Directory2

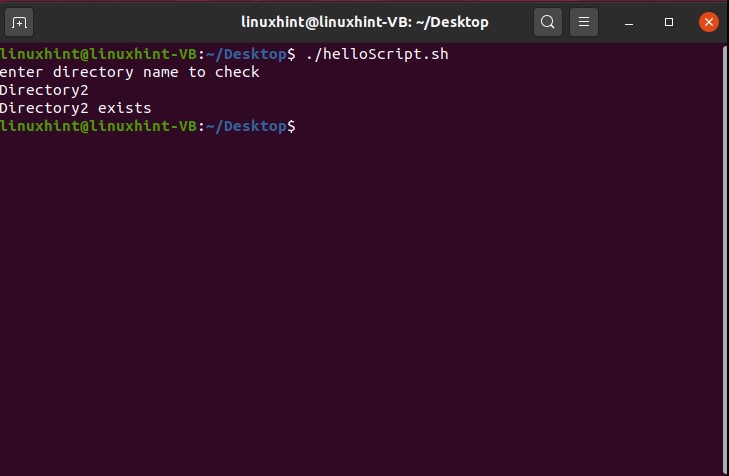
You can also use this ‘.helloScript.sh’ to check whether a directory exists in the current location or not. Below is the sample script for executing this idea. The first thing you have to do is to get the directory name from the terminal. Read the terminal line or directory name and store it in any variable. After that use an ‘if’ statement plus ‘-d’ flag which checks that the directory exists or not.
echo "enter directory name to check"
read direct
if [ -d "$direct" ]
then
echo "$direct exists"
else
echo "$direct doesn't exist"
fi
Save this ‘helloScript.sh’ file. Execute it from the terminal and enter the directory name to search.
Moving on towards creating a file. the ‘touch’ command is used to create a file. The whole procedure of taking a name and reading from the terminal is the same as that for creating a directory but for creating a file you have to use the ‘touch’ command instead of ‘mkdir’.
echo "enter file name to create"
read fileName
touch $fileName
Save the script, execute it, and check its existence through the terminal by using the ‘ls -al’ command.

You can also follow the script for searching a directory through the script, except for a little thing. What you have to do is to simply replace the ‘-d’ flag with ‘-f’, as the ‘-f’ flag searches for the file and ‘-d’ for the directories.
echo "enter file name to check"
read fileName
if [ -f "$fileName" ]
then
echo "$fileName exists"
else
echo "$fileName doesn't exist"
fi

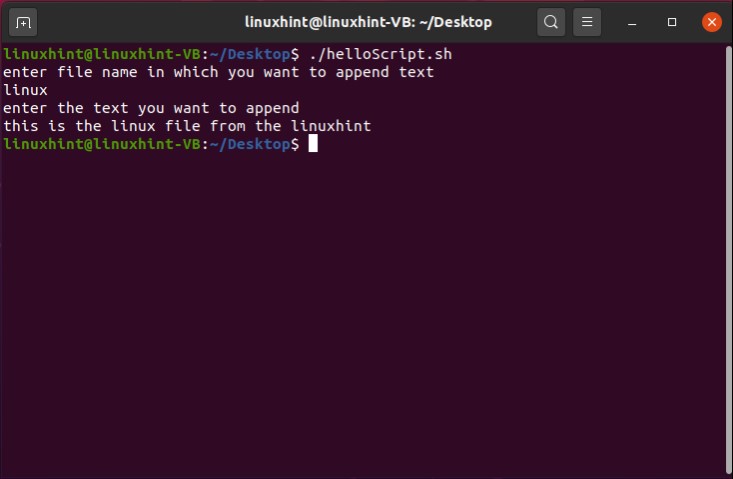
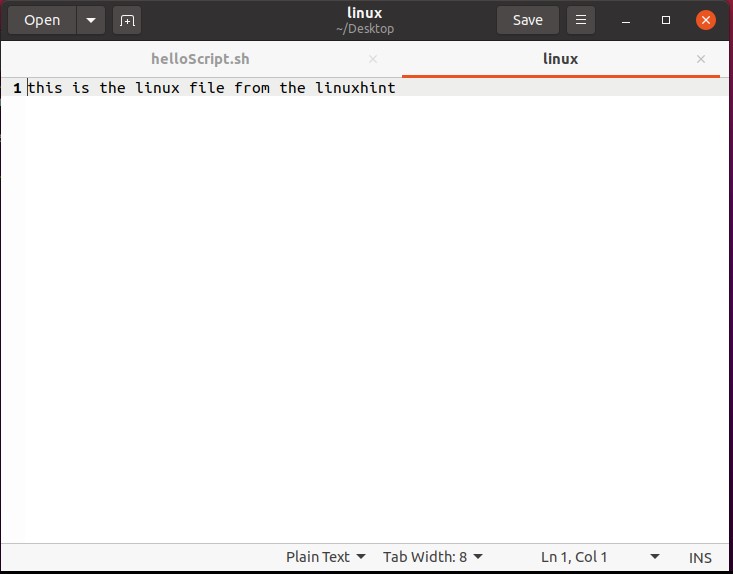
For appending the text in a file, we have to follow the same process. Step 1 is to get the file name from the terminal. Step 2 is to search for that file, if the program finds the file then asking to enter the text you want to append, else print that file doesn’t exist on the terminal. If the program finds out the file then t move towards the next step. Step 3 is to read that text and write the text in the searched file. As you can see, all of these steps are the same as that or file searching procedure, except for the text appending line. For appending text in the file you only have to write the following command ‘echo “$fileText” >> $fileName’ in your ‘helloScript.sh’
echo "enter file name in which you want to append text"
read fileName
if [ -f "$fileName" ]
then
echo "enter the text you want to append"
read fileText
echo "$fileText" >> $fileName
else
echo "$fileName doesn't exist"
fi
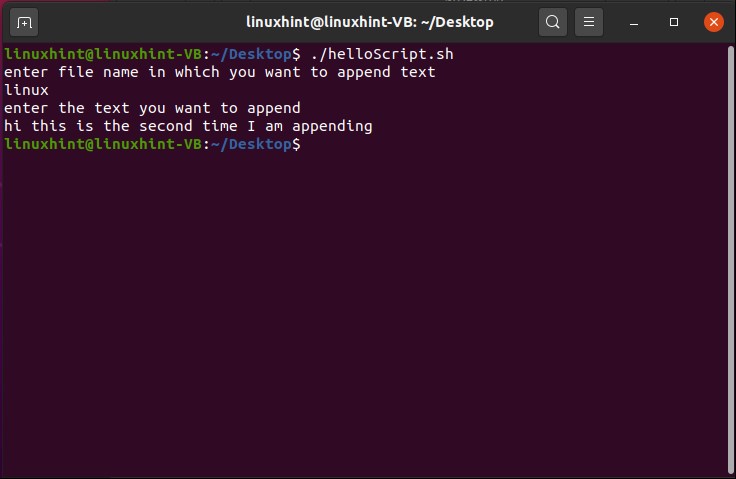
Execute the file to see the results.
Now open the file to see if it worked or not.
Execute the file again and append the second time to make sure.

For replacing the content of the file with the text you want to give at the run time, the only thing you have to do is to use the symbol ‘>’ instead of ‘>>’ in the same script.
echo "enter file name in which you want to append text"
read fileName
if [ -f "$fileName" ]
then
echo "enter the text you want to append"
read fileText
echo "$fileText" > $fileName
else
echo "$fileName doesn't exist"
fi
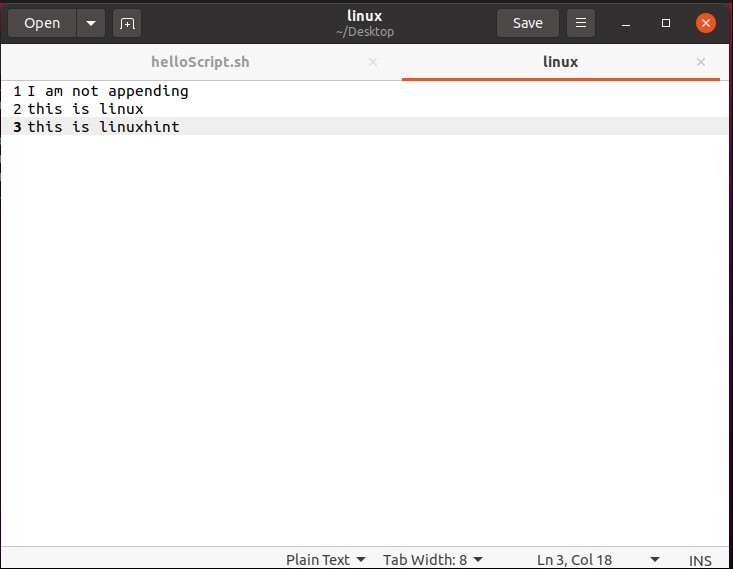
Save this ‘helloScript.sh’ and run the file through the terminal. You will see that text has been replaced.
Open the file to see the changes.
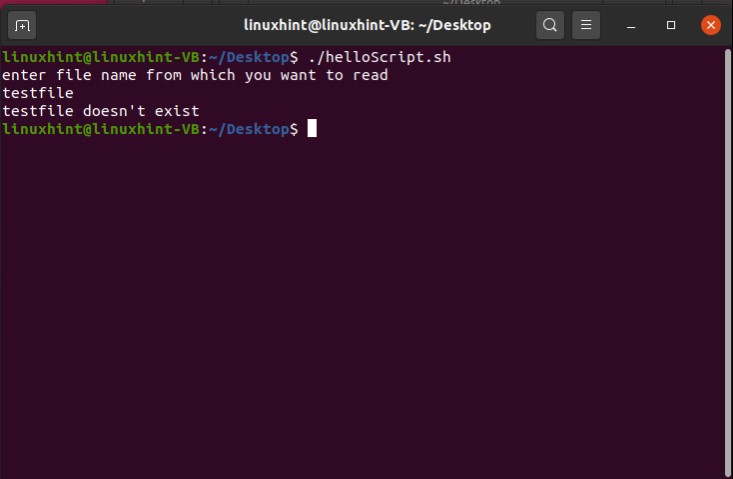
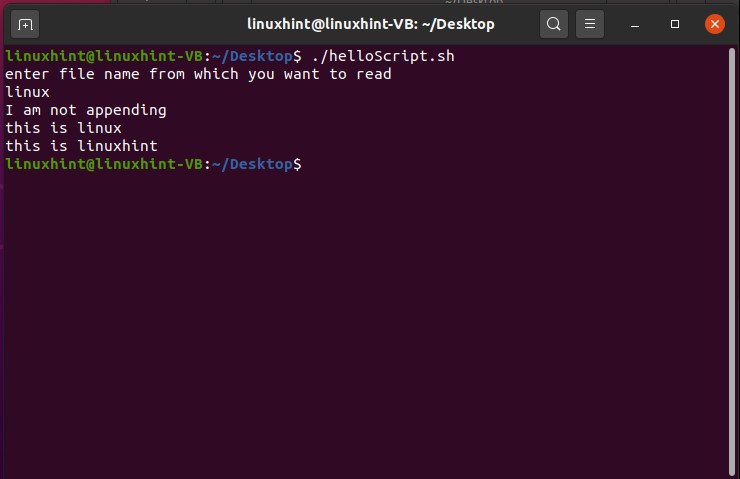
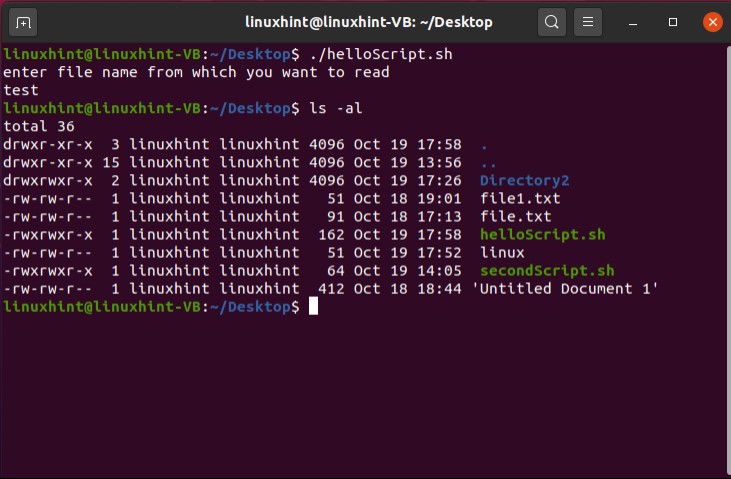
You can also read any file using the script. Follow the above method of finding the file. After that, use the while condition to read the file using the ‘read -r line’. As we are going to read the file so we will use this symbol ‘<’.
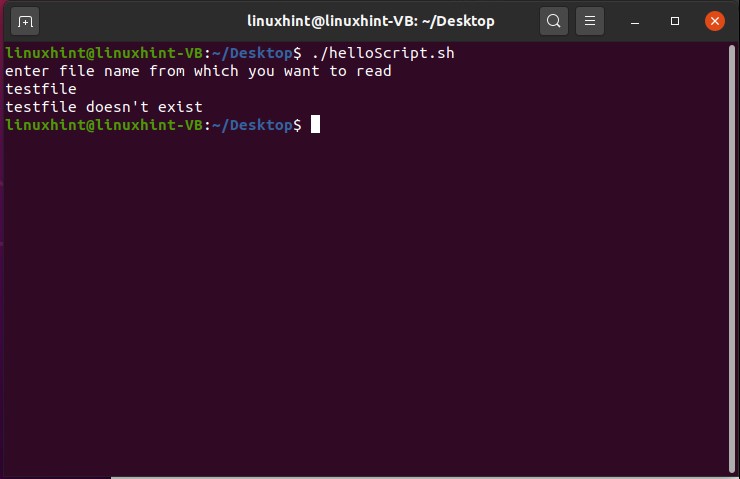
echo "enter file name from which you want to read"
read fileName
if [ -f "$fileName" ]
then
while IFS= read -r line
do
echo "$line"
done < $fileName
else
echo "$fileName doesn't exist"
fi
To delete a file, the first thing Is to find out that the file exists or not. After finding the file using the ‘rm’ command with the file name variable to delete it. For confirming its deletion use ‘ls -al’ to view the file system.
read fileName
if [ -f "$fileName" ]
then
rm $fileName
else
echo "$fileName doesn't exist"
fi
15. Sending email via script
There exist several methods for sending the email through the shell, but we are going to follow the simplest method of it. To work with your emails, the first thing you got to do is to install ‘ssmtp’
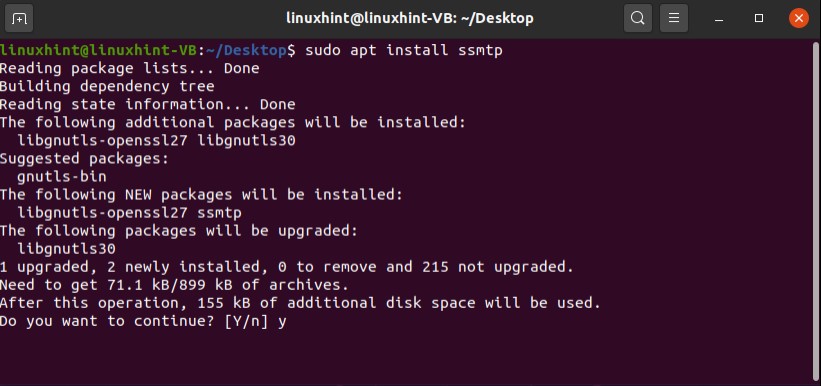
You can create a test email first for understanding the whole procedure. Here we have a testing email ‘[email protected]’.
Go to your Google account, under the ‘security’ tab turn on the option for ‘less secure app access’ and save the settings.
Next step is to edit the configuration file. Follow the commands given below to do it.
Or
Edit the following details in ssmtp.conf
mailhub=smtp.gmail.com:587
AuthUser=testingm731@gmail.com
AuthPass= (here you can give the password of your email)
UseSTARTTLS=yes
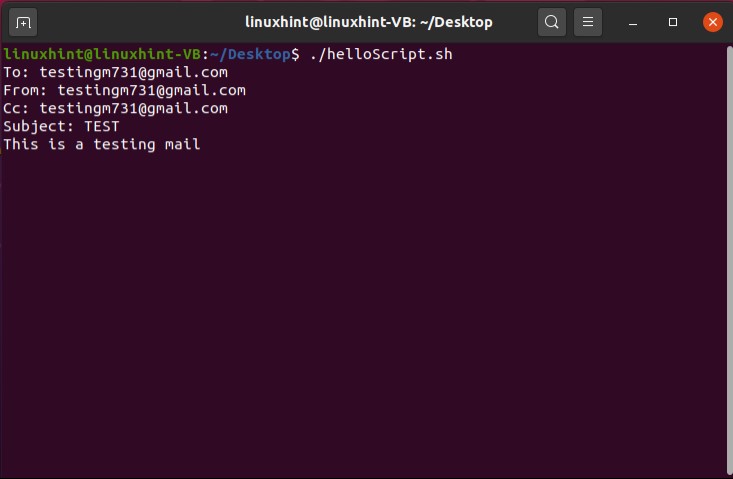
Now write the following lines of code in your ‘helloScript.sh’ file.
ssmtp testingm731@gmail.com
Open up the terminal and execute your ‘helloScript.sh’ and define the structure of your email. Give the following details for sending the test mail to your account by yourself.
To:testingm731@gmail.com
From:testingm731@gmail.com
Cc:testingm731@gmail.com
Subject:testingm731@gmail.com
bodytestingm731@gmail.com
Go back to your email account and check you inbox.
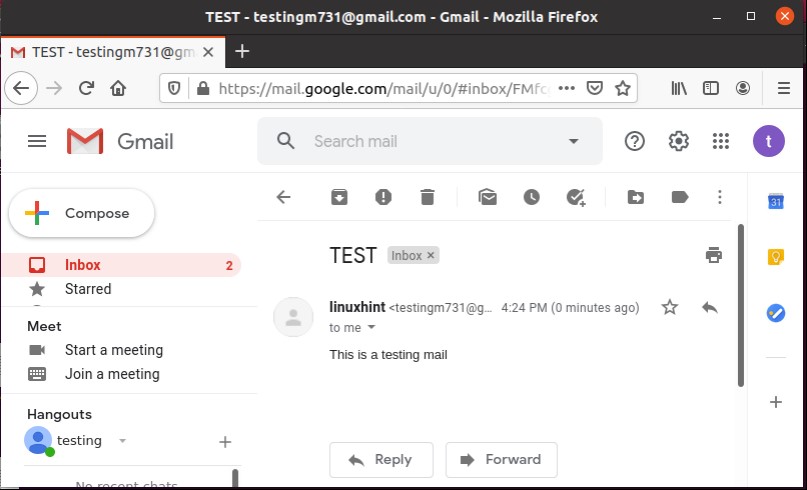
As you sent a test mail to yourself, then it should be present in the sent items too, makes sense? right.

16. Curl in Scripts
Curls are used to get or send any data files that can have URL syntax. To deal with the curls what you have to do first is to install the curl using the terminal.
After installing curl, go back to your ‘helloScript.sh’ and write the code to download a test file using a url. To download a data file using curl you should know two steps. The first one is to have the complete link address of that file. Next thing is to store that address in a ‘url’ variable in your script, and then use the curl command with that url to download it. Here ‘-O’ indicated that it will inherit its file name from its source.
url="http://www.ovh.net/files/1Mb.dat"
curl ${url} -O
To give the downloaded file a new name, simply use the ‘-o’ flag and after that write the new file name as shown in the script below.
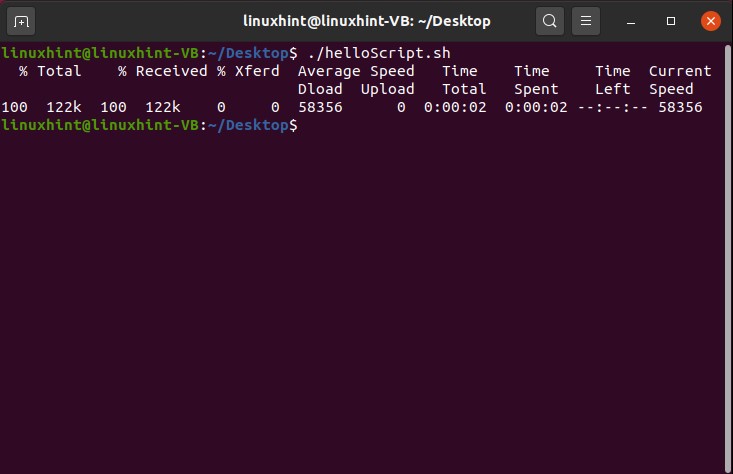
url="http://www.ovh.net/files/1Mb.dat"
curl ${url} -o NewFileDownload
Save this in ‘helloScript.sh’, execute the file and you will see the following output.

What if you want to download a file with the size of some hundreds of gigabytes? Don’t you think it will be easier for you if you know that you are downloading the right file or not. In this case, you can download a header file for confirmation. All you have to do is to write ‘-I’ before the url of the file. You will get the header of the file from which you can decide to whether download the file or not.
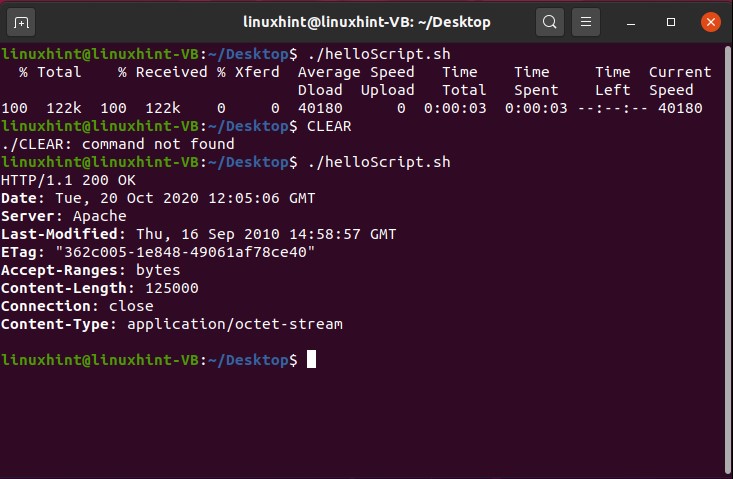
url="http://www.ovh.net/files/1Mb.dat"
curl -I ${url}
Save and execute the file using the command ‘./helloScript/sh’ then you will see the following output on the terminal.
17. Professional Menus
In this topic, you are going to learn two basic things: the first one is how you can deal with the select loop and the other is how you can wait for the input.
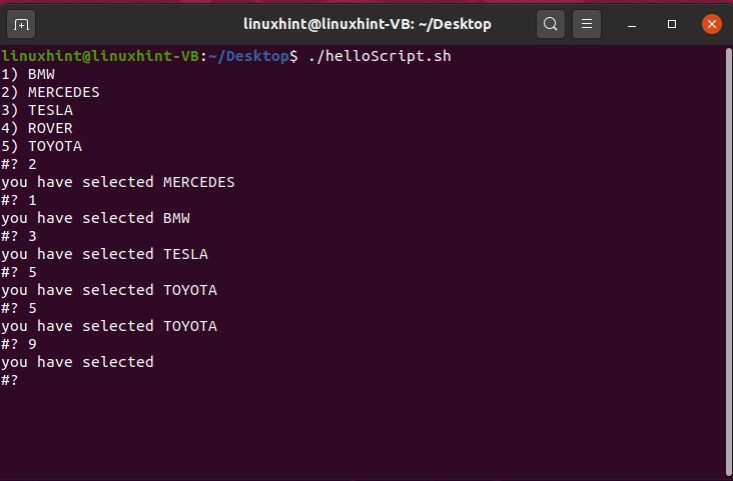
In the first example, we are going to create a car menu in the script using the select loop and on its execution when you will select any options from the available, it will print out that option by displaying ‘you have selected ‘ plus the option which you give as an input.
select car in BMW MERCEDES TESLA ROVER TOYOTA
do
echo "you have selected $car"
done
Save the code in ‘helloScript.sh’ and execute the file for a better understanding of the select loop working.
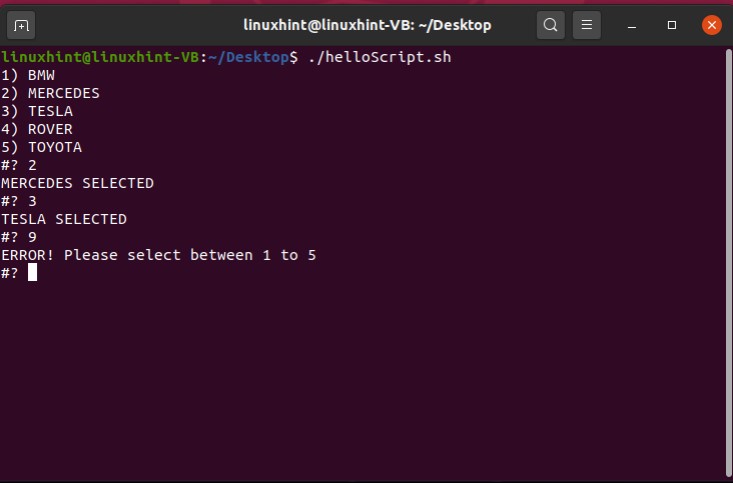
In this case, it will display the selected car option, but what if you give it another number except for the options it will do nothing. You can control this situation by using a switch case. Each case is used for a single menu option and in the case where the user input any other car option, it will display an error message that ‘Please select between 1 to 5’.
select car in BMW MERCEDES TESLA ROVER TOYOTA
do
case $car in
BMW)
echo "BMW SELECTED";;
MERCEDES)
echo "MERCEDES SELECTED";;
TESLA)
echo "TESLA SELECTED";;
ROVER)
echo "ROVER SELECTED";;
TOYOTA)
echo "TOYOTA SELECTED";;
*)
echo "ERROR! Please select between 1 to 5";;
esac
done
Save the script ‘helloScript.sh’ and execute the file using the terminal.
In professional menus, the program has to wait for the user input. You can also write a script for that. In this script ask the user to ‘press any key to continue’ and then send a reminder ‘waiting for you to press the key Sir’ to the user after every three seconds by using the command ‘read -t 3 -n 1’. In the other condition, check if the user pressed any key or not. This whole procedure is given below in a form of an example. Save this ‘helloScript.sh’ file, open up the terminal, and execute the file.
echo "press any key to continue"
while [ true ]
do
read -t 3 -n 1
if [ $? = 0 ]
then
echo "you have terminated the script"
exit;
else
echo "waiting for you to press the key Sir"
fi
done

18. Wait for filesystem using inotify
This topic will teach you to how to wait for a file and make changes in that file using inotify. inotify is basically ‘inode notify’. inotify is a Linux kernel subsystem that acts to extend filesystems to notice changes to the filesystem and report those changes to applications. To work with inotify, the first thing you have to do is to install inotify through the terminal.
You can try inotify on an imaginary directory to check how it will respond to that. For that, you have to write the following code in your ‘helloScript.sh’ file.
Inotifywait -m /temp/NewFolder
Save the script, execute it to check the behavior of inotify towards an imaginary file.

In the next part, you can create a directory to checks its functionality. The sample code is given below for doing this thing in your script.
mkdir -p temp/NewFolder
inotifywait -m temp/NewFolder
Save this ’helloScript.sh’ script, execute the file and you will see the following output on the terminal.

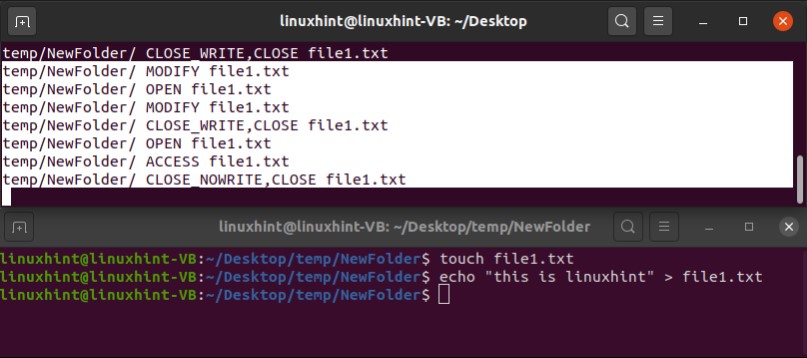
Now open that file side by side while checking the output on the terminal.

Here, you can see the working of the inotify as a monitor. Open another terminal window and create a file in that directory using ‘touch’ command, and then you will see inotify is watching all those actions which are currently happening in the filesystem.

Now try to write something in the ‘file1.text’ using the other terminal window and check the response from the terminal window working with inotify.
19. Introduction to grep
Grep stands for ‘global regular expression print’. This command is used to search a pattern within a file by processing the text line by line. First of all, we going to create a file named as filegrep.txt using the touch command. Type the following code in the terminal.
Open up the filegrep.txt and write the following content in the file.
This is Windows
This is MAC
This is Linux
This is Windows
This is MAC
This is Linux
This is Windows
This is MAC
This is Linux
This is Windows
This is MAC
Now, go back to your ‘helloScript.sh’ and now we are going to re-utilize the file searching code with a few changes according to our current program requirements. The basic method of file searching is discussed above in the topic of ‘Files and Directories’. First of all the script will get the file name from the user, then it will read the input, store that in a variable, and then ask the user to enter the text to search. After that, it will read the input from the terminal which is the text to search in the file. It will store the value in another variable named as ‘grepvar’. Now, you have to do the main thing which is the use of the grep command with the grep variable and file name. Ir will search the word in the whole document.
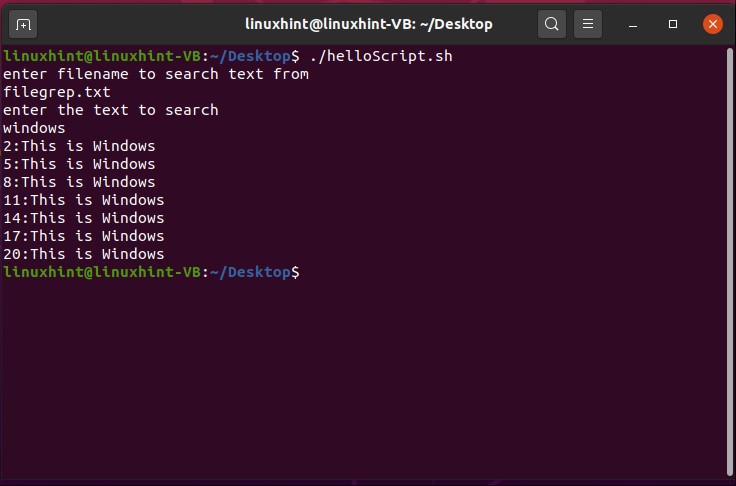
echo "enter a filename to search text from"
read fileName
if [[ -f $fileName ]]
then
echo "enter the text to search"
read grepvar
grep $grepvar $fileName
else
echo "$fileName doesn't exist"
fi
Save this ‘.helloScript.sh’ script and execute it using the command given below.
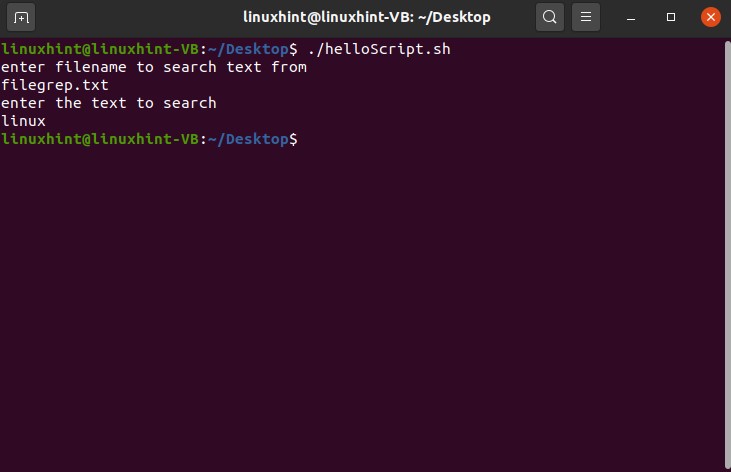
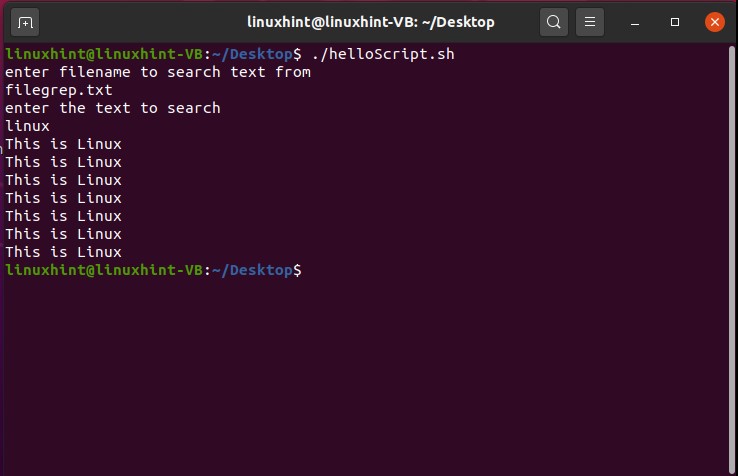
You cannot see anything after the searching procedure, because the input is ‘linux’ and the text in the file is written as ‘Linux’. Here you have to deal with this case-sensitivity issue by simply adding a flag of ‘-i’ in the grep command.
Now execute the script again.
You can also extract the line number with the output. For this, you only have to add another flag of ‘-n’ in your grep command.
Save the script and execute the file using the terminal.
You can also retrieve the number of occurrences of that specific word in the document. Add ‘-c’ flag in the grep command ‘grep -i -c $grepvar $fileName’, save the script, and execute it using the terminal.

You can also check out different grep commands by simply typing ‘man grep’ on the terminal.
20. Introduction to awk
Awk is the scripting language that is used for manipulating data and writing reports. It requires no compiling and allows other users to use variables, numeric functions, string functions, and logical operators as well. You can take it as it is a utility that enables a programmer to write tiny but effective programs in the form of statements that define text patterns that are to be searched for in each line of a document and the action that is to be taken when a match is found within a line.
You could ask what is this ‘awl’ useful for? So the idea is that awk transforms the data files and it also produces formatted reports. It also gives you the ability to perform arithmetic and strings operations and to use conditional statements and loops.
First of all, we going to scan a file line by line using the awk command. In this example, you are also going to see the file search code, because it is essential for getting the required file. After that use the ‘awk’ command with the operation of print ‘{print}’ and the file name variable.
echo "enter a filename to print from awk"
read fileName
if [[ -f $fileName ]]
then
awk '{print}' $fileName
else
echo "$fileName doesn't exist"
fi
Save this ‘.helloScript.sh, and execute it through the terminal.
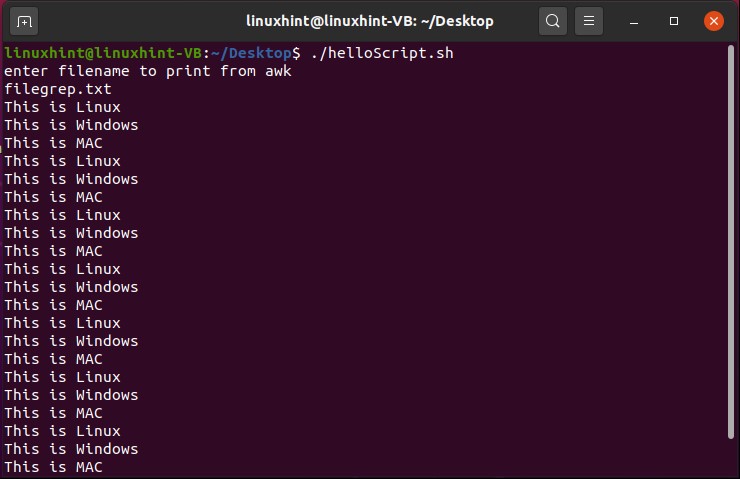
Don’t worry about the file name ‘filegrep.txt’. It is just a file name and ‘filgrep.txt’ name will not make this a grep file.
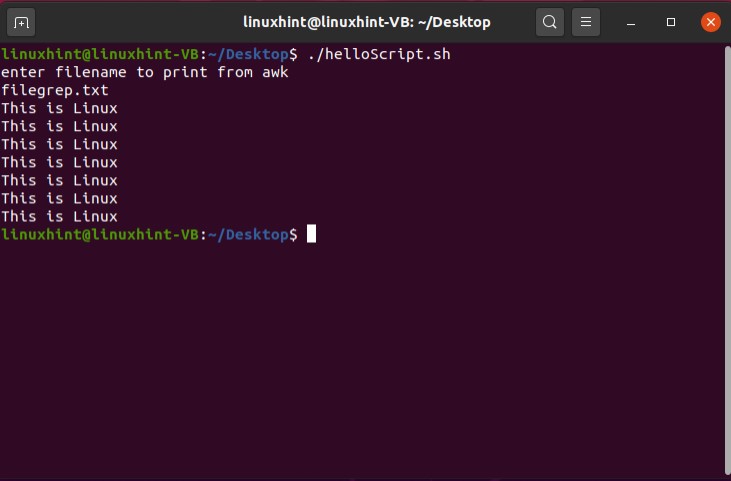
We can also search for a specific pattern using ‘awk’. For this what you have to do is simply replace the above awk command with this one ‘awk ‘/Linux/ {print}’ $fileName ’. This script will search for the ‘Linux’ in the file and will display the lines containing it.
echo "enter filename to print from awk"
read fileName
if [[ -f $fileName ]]
then
awk '/Linux/ {print}' $fileName
else
echo "$fileName doesn't exist"
fi
Now replace the content of the ‘filegrep.txt’ with the text given below for further experimentation.
This is Windows 3000
This is MAC 4000
This is Linux 2000
This is Windows 3000
This is MAC 4000
This is Linux 2000
This is Windows 3000
This is MAC 4000
This is Linux 2000
This is Windows 3000
This is MAC 4000
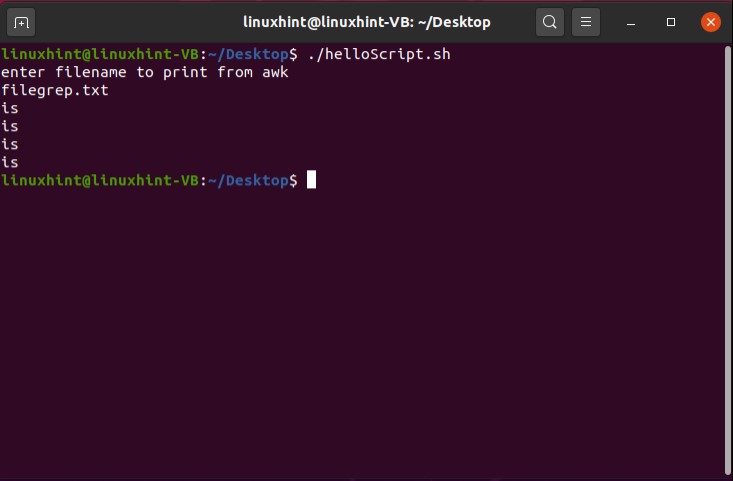
In the next example, you are going to see how we can extract the content from the lines, where the program found its targeted word. ‘$1’ represents the first word of that line, similarly ‘$2’ represents the second, ‘$3’ represents the third word and ‘$4’ represents the last word in this case.
echo "enter a filename to print from awk"
read fileName
if [[ -f $fileName ]]
then
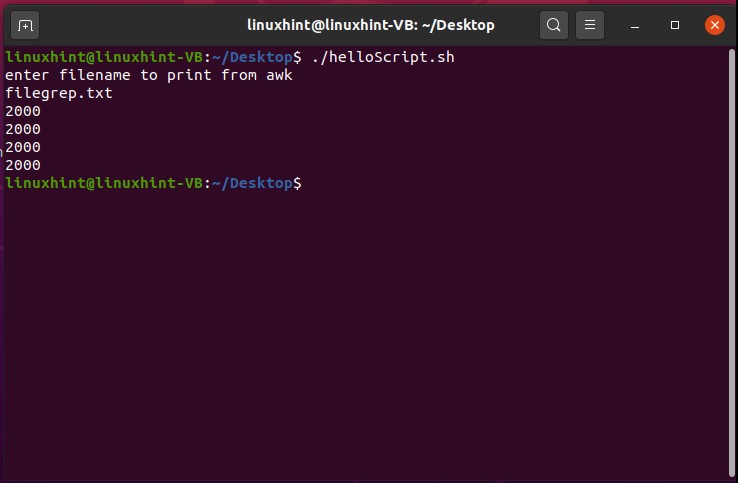
awk '/Linux/ {print $2}' $fileName
else
echo "$fileName doesn't exist"
fi
Save the script above and execute the file to see if it print out the second word of the lines where the program found the word ‘Linux’.
Now running the script with ‘awk’ command for retrieving the last word ‘$4’ of the lines where it found ‘Linux’.
echo "enter filename to print from awk"
read fileName
if [[ -f $fileName ]]
then
awk '/Linux/ {print $4} ' $fileName
else
echo "$fileName doesn't exist"
fi
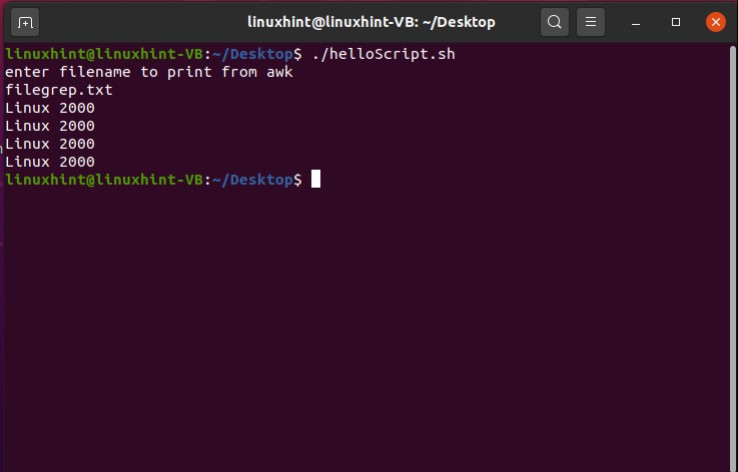
Now use ‘awk ‘/Linux/ {print $3,$4} ‘ $fileName’ command to see if it works for printing the second last and the last word of the lines containing ‘Linux’.
echo "enter filename to print from awk"
read fileName
if [[ -f $fileName ]]
then
awk '/Linux/ {print $3,$4} ' $fileName
else
echo "$fileName doesn't exist"
fi
21. Introduction to sed
The sed command stands for stream editor, performs editing operations on text coming from standard input or a file. sed edits line-by-line and in a non-interactive way. This means that you make all of the editing decisions as you are calling the command, and sed executes the directions automatically. You are going to learn a very basic kind use of ‘sed’ here. Use the same script which we used for the previous task. We are going to substitute the ‘i’ with the ‘I’. For that simply write the following sed command ‘cat filegrep.txt | sed ‘s/i/I/’’, here cat command is used to get the content of the file and after the pipe ‘|’ sign, with the ‘sed’ keyword we specify the operation which is substitution this case. Therefore ‘s’ is written here with the slash and the letter which going to be substituted, then again slash and then the last letter with which we will substitute.
echo "enter filename to substitute using sed"
read fileName
if [[ -f $fileName ]]
then
cat filegrep.txt | sed 's/i/I/'
else
echo "$fileName doesn't exist"
fi
Save the script and execute the script using the terminal.
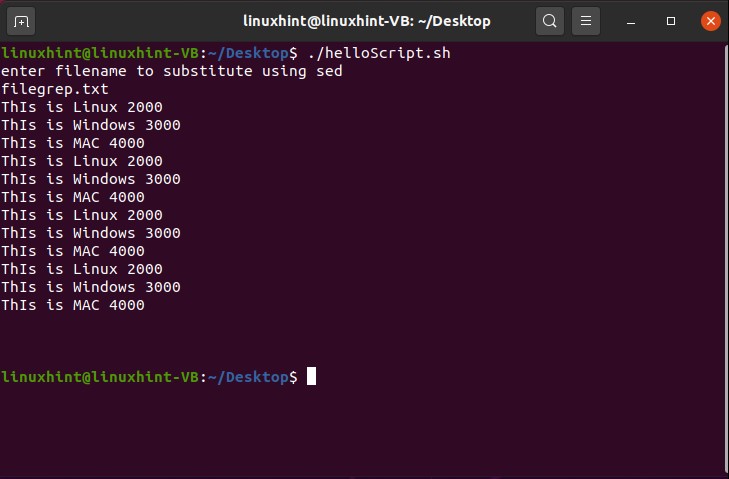
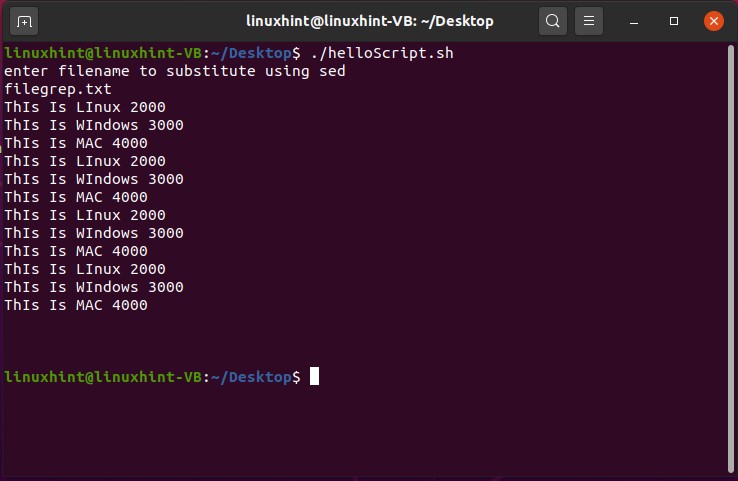
You can see from the output that only the first instance of ‘i’ has been substituted with the ‘I’. For the whole document’s ‘i’ instances substitution, what you have to do is to only write the ‘g’ (which stands for the global) after the last ‘/’ slash. Now save the script and execute it and you will see this change in the whole content.
echo "enter filename to substitute using sed"
read fileName
if [[ -f $fileName ]]
then
cat filegrep.txt | sed 's/i/I/g'
else
echo "$fileName doesn't exist"
fi
These changes are only made at the run time. You can also create another file for storing the content of the file displayed on the terminal by simply writing the following command in the ‘helloScript.sh’
You can also substitute the whole word with another. For example, in the script given below all the instances of the ‘Linux’ will be replaced with the ‘Unix’ while displaying it on the terminal.
echo "enter filename to substitute using sed"
read fileName
if [[ -f $fileName ]]
then
sed 's/Linux/Unix/g' $fileName
else
echo "$fileName doesn't exist"
fi

22. Debugging Bash Scripts
Bash offers an extensive debugging facility. You can debug your bash script and if something doesn’t go according to the plan, then you can look at it. This is the thing which we are going now. Let’s make an error intentionally to see the type of error we will get on the terminal. Save the following code in the ‘helloScript.sh’ file. Execute the file using the terminal and check out the result.
echo "enter filename to substitute using sed"
read fileName
if [[ -f $fileName ]]
then
sed 's/Linux/Unix/g' $fileName
else
echo "$fileName doesn't exist"
fi

From the error, we can see that it exists at line 4. But when you have thousands of lines of code and you face multiple types of errors then this thing becomes so hard to identity. For that, what you can do is to debug your script. The first method is the step by step debugging using bash. For this, you only have to write the following command in your terminal.
Now run the script.
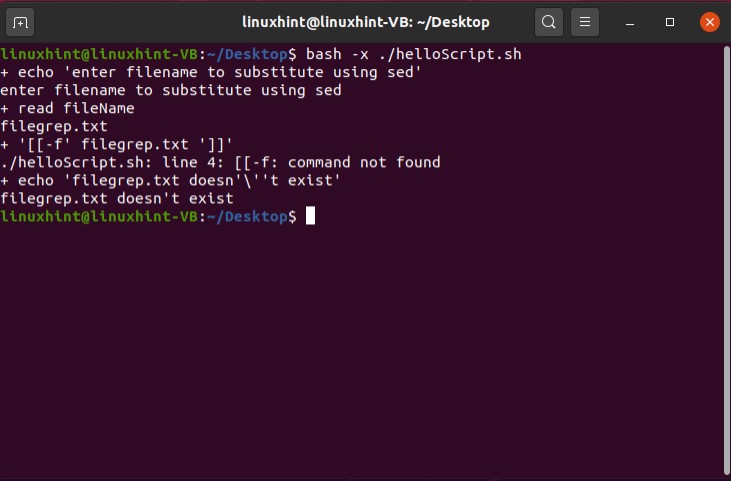
Simply put the ‘-x’ flag in the first line of the script after the bash path. In this method, you are going to debug your script, with the script.
echo "enter filename to substitute using sed"
read fileName
if [[ -f $fileName ]]
then
sed 's/Linux/Unix/g' $fileName
else
echo "$fileName doesn't exist"
fi

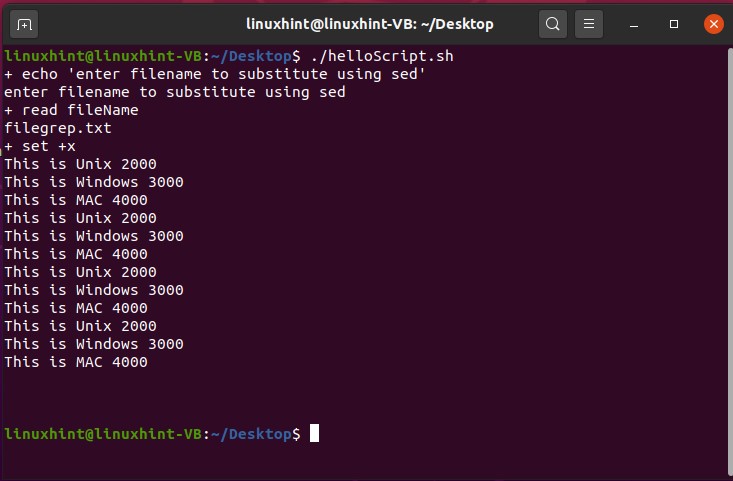
So in the final method, you can select the starting and ending points for the debugging. Write down the command ‘set -x’ at the starting point of the debugging and for ending it simply write ‘set +x’, save this ‘helloScript.sh’, execute it through the terminal, and check out the results.
set -x
echo "enter filename to substitute using sed"
read fileName
set +x
if [[ -f $fileName ]]
then
sed 's/Linux/Unix/g' $fileName
else
echo "$fileName doesn't exist"
fi
Watch 3 Hour BASH COURSE On YouTube: