


Every User Should Know


Linux distributions offer you a “shell,” an interface used for accessing the system services. The majority of the Linux distros utilize their Graphical User Interface (GUI) as “shell”, primarily for user convenience. However, it is recommended to use the Command Line Interface (CLI) as it is more effective and powerful. Also, the tasks that are performed through multi-steps in the Linux GUI process can be completed in seconds through the CLI or Linux terminal.
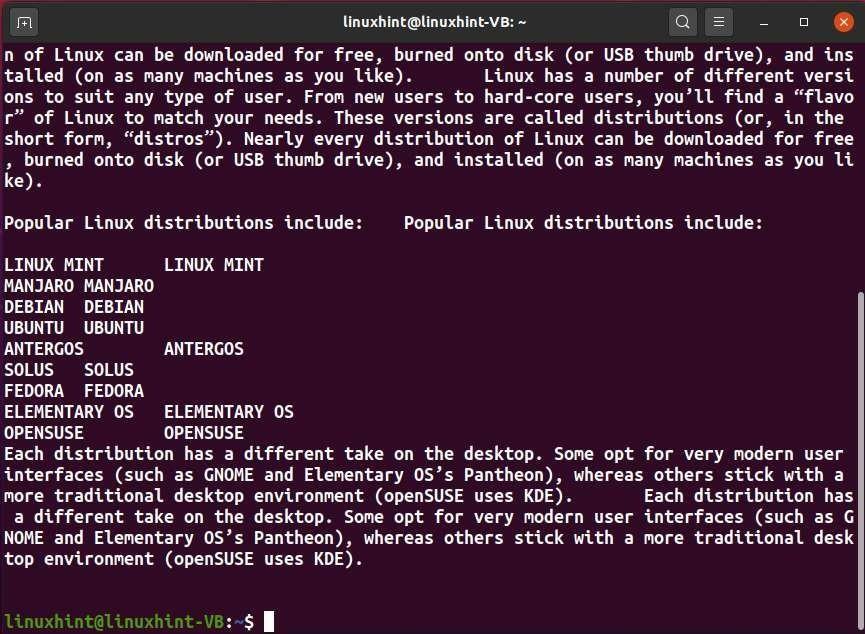
Mastering the basic Linux commands can help you a lot if you consider using Linux on your system. We have provided an e-book comprising the 101 Linux commands that every Linux user should know. Whether you are a newbie, a developer, an average Linux user, or a system administrator, this e-book will undoubtedly assist in navigating through Linux.
In this eBook, we will cover the following 101 commands:
- pwd command
- ls command
- clear command
- cd command
- cat command
- touch command
- head command
- tail command
- echo command
- sudo command
- cal command
- df command
- bc command
- help command
- uname command
- factor command
- whatis command
- mkdir command
- who command
- gzip command
- free command
- finger command
- man command
- group command
- w command
- passwd command
- History command
- Whoami command
- cp command
- Lscpu command
- top command
- mvcommand
- env command
- printenv command
- ps command
- hostname command
- rm command
- nano command
- ip command
- ifconfig command
- curl command
- wget command
- last command
- yes command
- iostat command
- locate command
- shutdown command
- reboot command
- dir command
- apt command
- exitcommand
- paste command
- sort command
- tar command
- gunzip command
- zip command
- unzip command
- diff command
- hostnamectl command
- lsof command
- netstat command
- iptables command
- service command
- mpstatcommand
- vmstatcommand
- uniqcommand
- ncdu command
- stat command
- sleep command
- split command
- ping command
- du command
- useradd command
- usermod command
- userdel command
- awk command
- dig command
- whereis command
- pstree command
- tree command
- printf command
- find command
- sed command
- rmdir command
- chown command
- lsblk command
- screen command
- chmod command
- grep command
- basename command
- which command
- wc command
- fdisk command
- datecommand
- tr command
- fold command
- zcat command
- parted command
- tac command
- Neofetch Command
- xeyes command
So, let’s start!
-
pwd command
pwd is an acronym for “Print Working Directory”. This Linux command is utilized to print out the current working directory of your system.
Syntax:
Now, execute the below-given “pwd” command in your Linux terminal:
From the output, you can see that “/home/linuxhint” is our current working directory:

Other options of pwd command:
| Option | Description |
|---|---|
| -P | The “-P” option is utilized in the “pwd” command for printing the current directory’s fully resolved name, except for the symbolic links. |
| -L | The “-L” option is utilized in the “pwd” command for printing the absolute name of the current working directory with no “..” or “.” components, and it also outputs symbolic links. The “pwd” command with the “-L” option is also considered the default behavior of the pwd Linux command. |
-
ls command
“ls” is an acronym for “List”. The ls command permits the Linux users to check the directories and files present inside the specified directory, and alphabetical order is followed while listing the content of a directory.
Syntax:
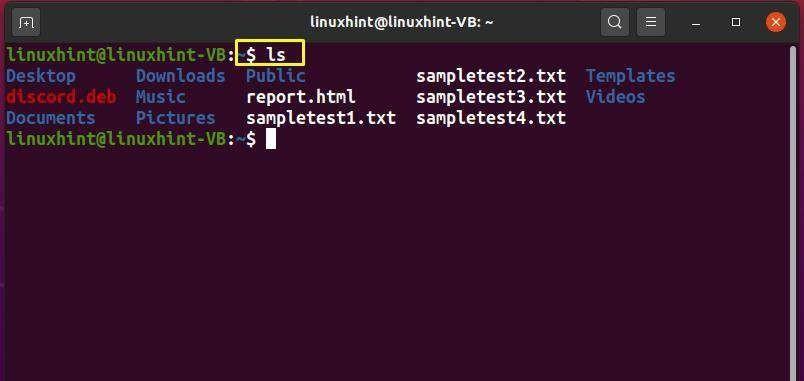
In your Linux terminal, execute the “ls” command to check the files and directories present inside your current working directory.
Here, you can see the content of our “/home/linuxhint” directory:
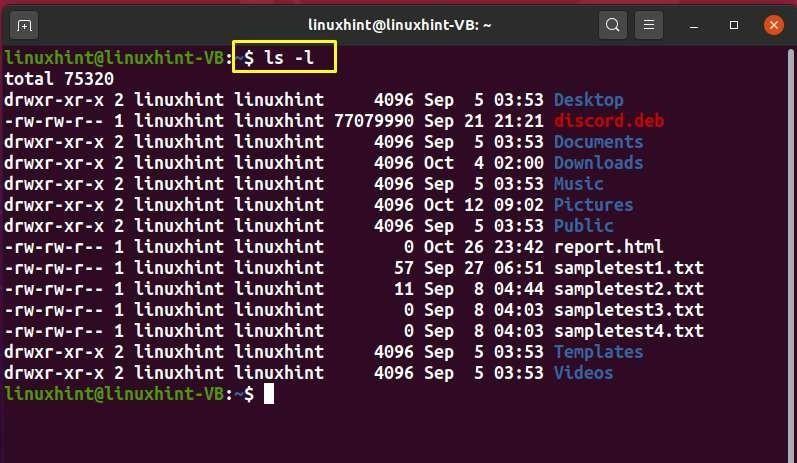
To print out the list in long format, add the “-l” option in your “ls” command:
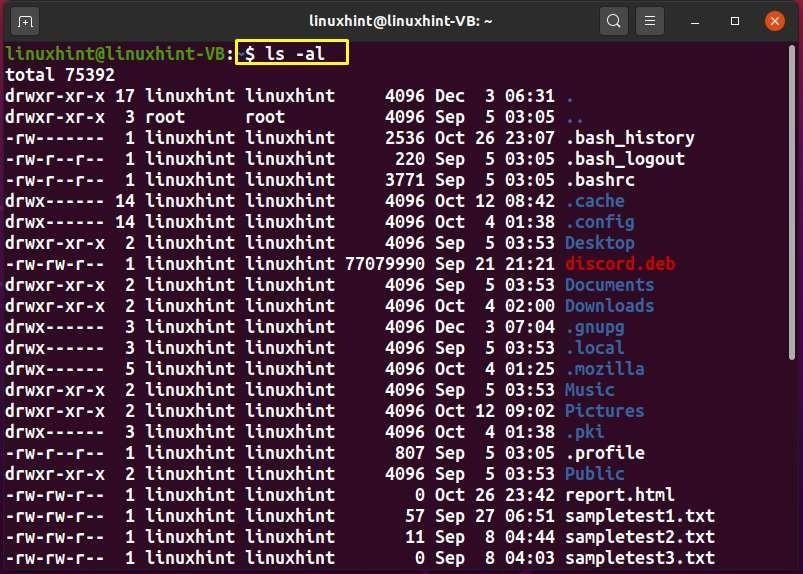
To get to know about all of the directory content, including the “hidden files”, utilize the “-a” option in the “ls” command:

You can also combine two or more options to perform the specified operation simultaneously. For instance, we have added “-al” options in our “ls” command.
Now the execution of the above-given “ls” command will help us to view the content, including the hidden files, in the long format:
Other options of ls command:
| Option | Description | |
|---|---|---|
| -S | The “-S” option is utilized with the “ls” command for sorting the file size. | |
| -d | The “-d” option is utilized with the “ls” command to show the details related to the directories. | |
| -A | The “-A” option is utilized with the “ls” command to view all files except the parent and the current working directory. | |
| -t | The “-t” option is utilized with the “ls” command for sorting the output by the modification time. | |
| -F | The “-F” option is utilized with the “ls” command to append an indicator at the end of each directory name. | |
| -r | The “-r” option is utilized with the “ls” command for showing files and directories in descending alphabetical order. | |
| -h | The “-h” option is utilized with the “ls” command to display the file size in human-readable units, not bytes. | |
-
Clear command
The clear command is used to clear the screen of the Linux terminal.
Syntax:
For instance, we want to remove all previous commands and their outputs from the terminal. For this purpose, we will execute the “clear” command:

After executing the “clear” command, the terminal screen will be cleared:
-
cd command
“cd” is an acronym for “Change Directory”. In the Linux terminal, you can use the “cd” command for changing the current working directory.
Syntax:
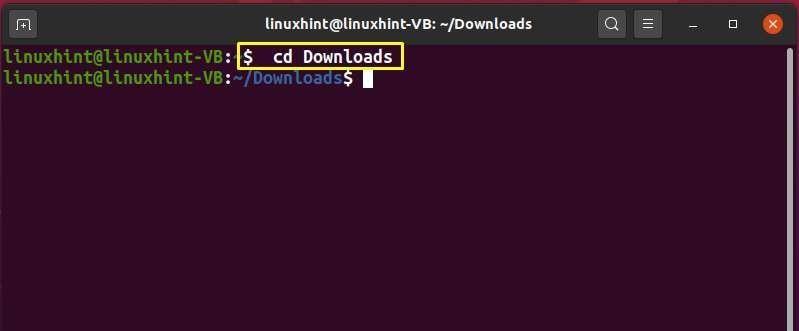
For instance, to make “Downloads” our current working directory, we will execute the command:
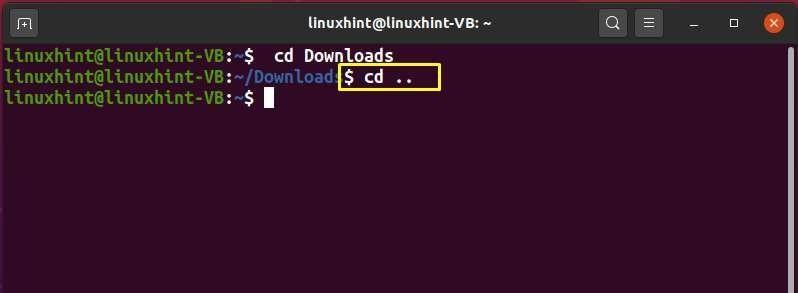
Now, we will move back one directory by adding “..” with the “cd” command:
You can also set your home directory as the current working directory by executing simple “cd” command:

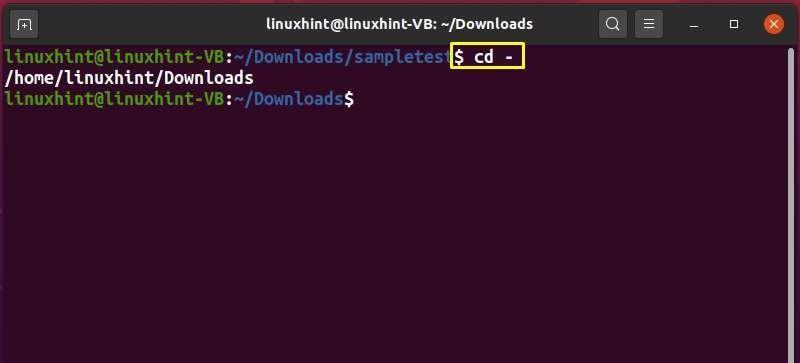
The “cd -” command will let you move to the previous directory:
Other options of cd command:
| Option | Description |
|---|---|
| -L | The “-L” option is utilized with the “cd” command to follow the symbolic link, and it is also considered as the default behavior of the “cd” command. |
| -P | The “-P” option is utilized to restrict the “cd” command to follow the symbolic links. |
-
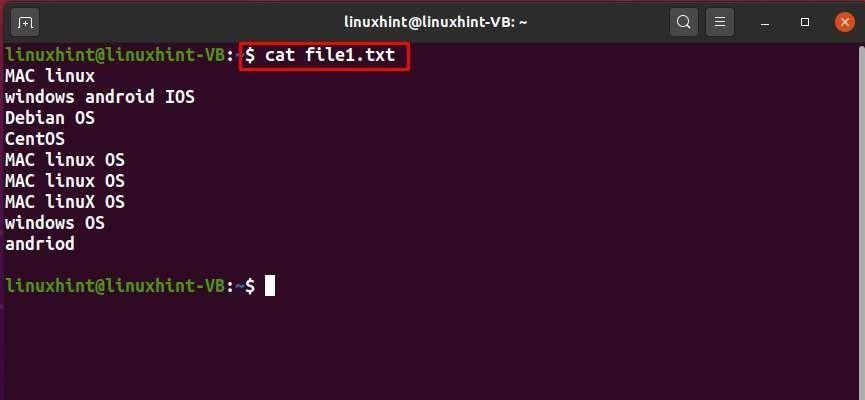
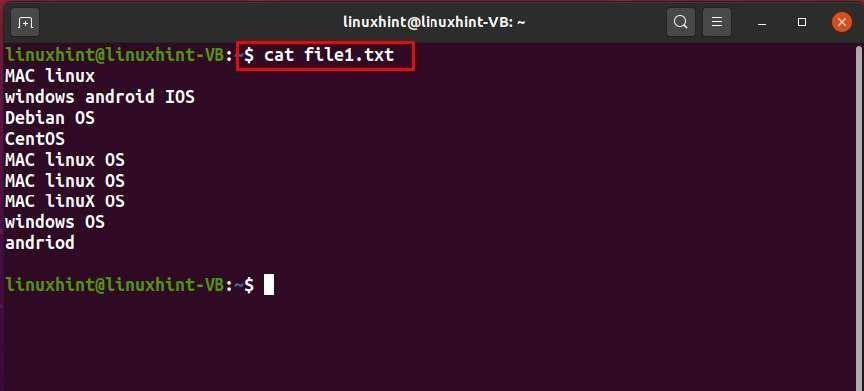
cat command
“cat” is an acronym for “Concatenate”. The “cat” command permits the Linux users to check out the content of a file, redirect the output to files or terminals, and concentrate files.
Syntax:
To output the content of a file in your Linux terminal, execute the cat command and specify the name of your selected file with it in the following way:
The output of the above-given command will display the “testfile1.txt” content in our terminal:

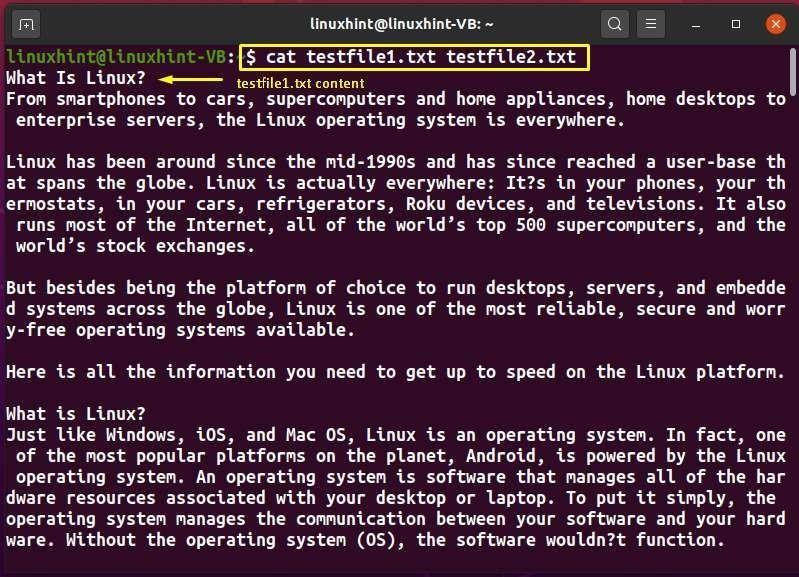
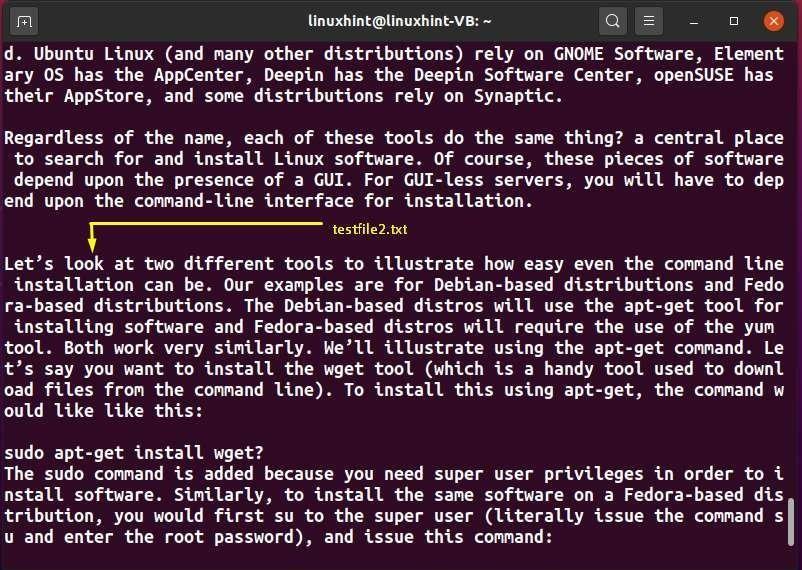
By using the “cat” command, you can also view the content of multiple files in the terminal. In the following example, we will try to display the content of “testfile1.txt” and “testfile2.txt” with the help of the “cat” command:
Other options of cat command:
| Option | Description | |
|---|---|---|
| -n | The “-n” option is utilized with the “cat” command to number the output lines. | |
| -b | The “-b” option is utilized with the “cat” command to number the nonempty output lines. | |
| -E | The “-E” option is utilized with the “cat” command for displaying the file with the line numbers. | |
| -T | The “-T” option is utilized with the “cat” command for displaying tab-separated lines in a file. | |
-
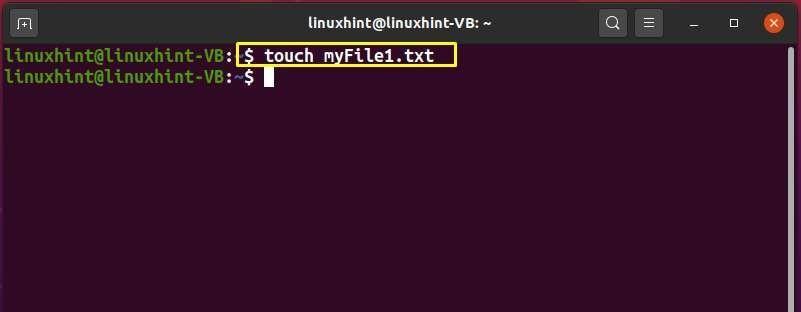
Touch command
In the Linux terminal, you can write out the “touch” command to modify a file’s timestamp. In case the file you specified in the “touch” command does not exist, an empty file with the same name will be created in the current directory.
Syntax:
For instance, to match the timestamp of the “myFile.txt” with the current system time, we will execute the following command:
If the “myFile1.txt” does not exist on our system, the “touch” command will create an empty “myFile.txt”:
What if you only want to change the timestamp of the specified file, rather than creating one if it does not exist? In such case, you can add the “-c” option in your “touch” command:

Other options of touch command:
| Option | Description | ||
|---|---|---|---|
| -d | The “-d” option is utilized in the “touch” command to set the specified file’s access time and modification time. | ||
| -a | The”-a” option is utilized in the “touch” command only to change the specified file’s access time. | ||
-
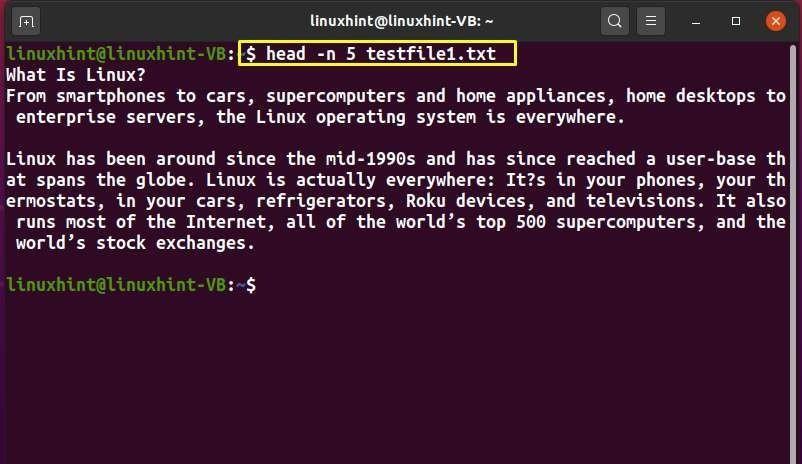
Head Command
The head command is used for printing the starting lines of the selected file.
Syntax:
By default, the head command prints out the first ten lines of the specified file, which is “testfile1.txt” in our case:

In the head command, you can add the “-n” option with the number of lines that you want to display from the selected file:
The execution of the above-given command will print out the first five lines of the “testfile1.txt” file:
Other options of head command:
| Option | Description |
|---|---|
| -v | The “-v” option is utilized in the “head” command for printing the file’s headers. |
| -q | The “-q” option is utilized in the “head” command to restrict it to print file headers. |
| -c | The “-c” option is utilized in the “head” command for printing the first “n” bytes of the specified file. With the “-c” option, you must add a number “n” representing the bytes. |
-
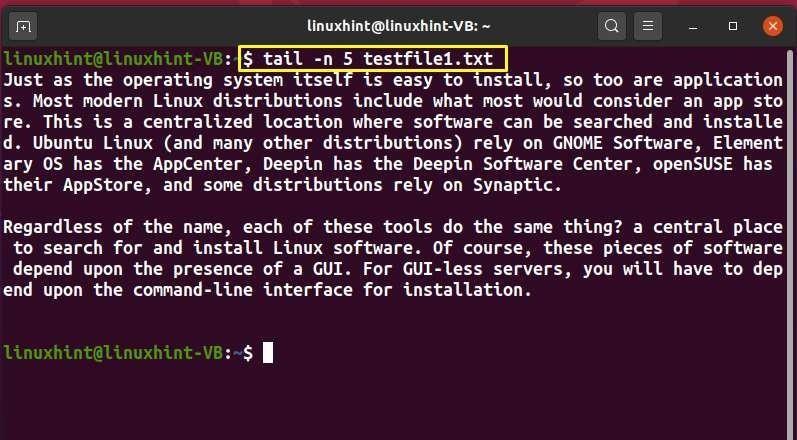
Tail Command
The tail command is used for printing the last lines of the selected file.
Syntax:
By default, the tail command prints out the last ten lines of the specified file, which is “testfile1.txt” in our case:

In the tail command, you can add the “-n” option with the number of lines that you want to display from the selected file:
The execution of the above given “tail” command will display the last five lines from the “testfile1.txt”:
-
Echo Command
The “echo” command is used for printing out the string or text that is passed as an argument with it.
Syntax:
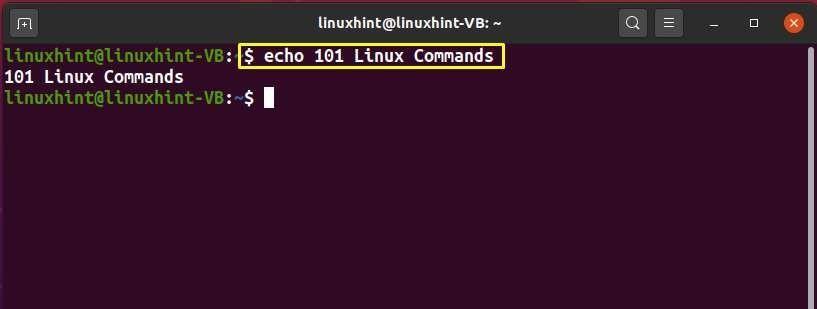
Here, we added “101 Linux Commands” as a string in the echo command:
The execution of the above command will print out “101 Linux Commands” on the terminal:
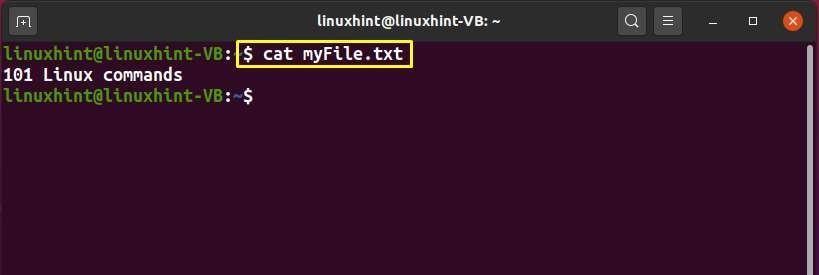
You can also add text to a file with the help of the “echo” command. For instance, the below-given “echo” command will add the “101 Linux commands” text to the “myFile.txt” file:

To view the content added into the “myFile.txt”, specify the filename in the “cat” command and execute it:
-
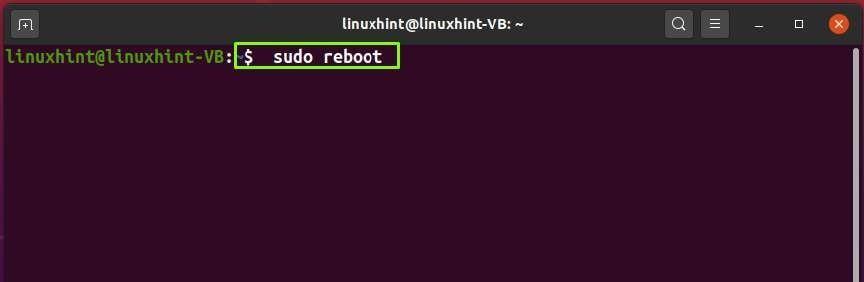
Sudo Command
“sudo” is an acronym for “Super User Do”. The “sudo” command allocates permissions to a user, which allows them to execute the commands that superusers do. It assigns root privileges to the current user’s account.
Syntax:
For instance, to reboot the Linux system, the user requires “sudo” privileges:
Other option of sudo command:
| Option | Description |
|---|---|
| -V | The “-V” option is utilized in the “sudo” command for printing the version number. |
| -h | The “-h” option is utilized in the “sudo” command for printing a usage message and exit. |
| -K | The”-K” option is utilized in the “sudo” command to remove the user’s timestamp. |
-
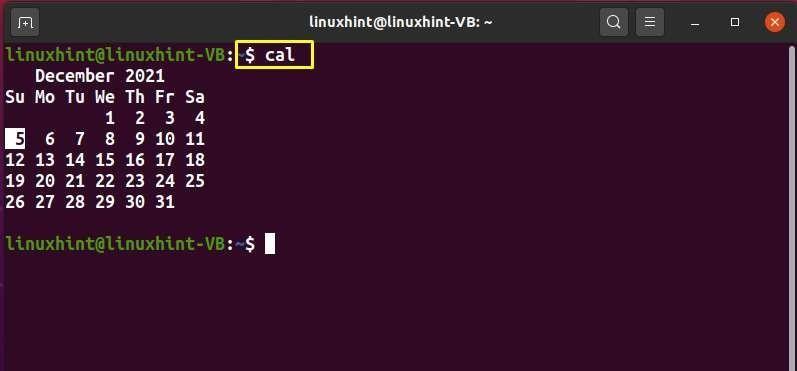
Cal Command
“cal” is an acronym for “Calendar”. It is used to display a formatted calendar in the Linux terminal. If you do not add any options in the “cal” command, it will print out the current month.
Syntax:
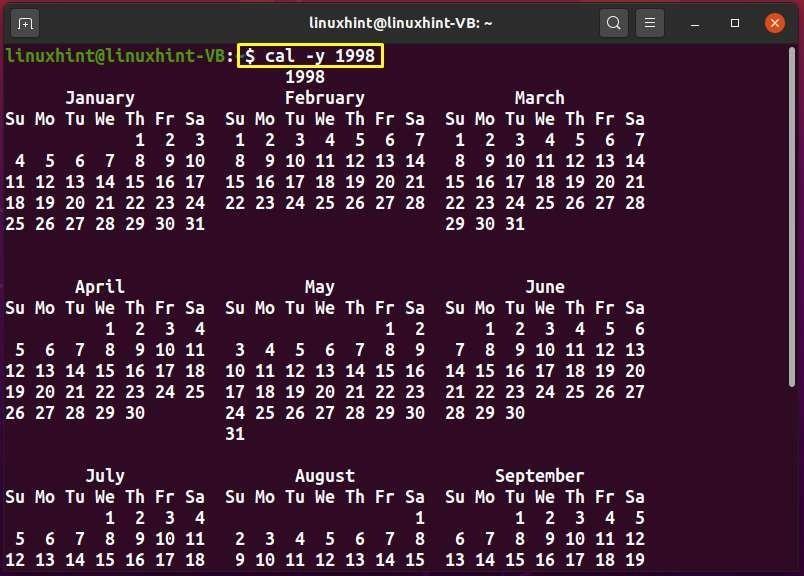
First of all, we will execute the simple “cal” command to view the calendar of the current month:
To print out the calendar of a specific year, you have to add the “-Y” option in the cal command. For instance, the following command will output the entire calendar of the year 1998:
Other options of cal command:
| Option | Description |
|---|---|
| -m | The “-m” option is utilized in the “cal” command to display a specific month’s calendar. |
| -h | The “-h” option is utilized in the “-h” command for displaying the current month calendar without highlighting today. |
-
df Command
“df” is an acronym for “Disk Free”, and the “df” helps to retrieve the details related to your disk usage.
Syntax:
The simple “df” command will print out the available disk space in bytes:

Other options of df command:
| Option | Description |
|---|---|
| -T | The “-T” option is utilized in the “df” command for excluding a specified file system from the output. |
| -h | The “-h” option is utilized in the “df” command for displaying available disk space for a specific file system. |
| -i | The “-i” option is utilized in the “df” command for displaying the file system type. |
-
bc Command
“bc” is an acronym for “Basic Calculator”, and it is used to perform various mathematical calculation operations in the Linux terminal.
Syntax:
In the following example, the “bc” command will calculate “9+6,” and the “echo” command will show its result on your terminal screen:

Other options of bc command:
| Option | Description |
|---|---|
| -w | The “-w” option is utilized in the “bc” command to show a warning if non- standard constructed are added. |
| -s | The “-s” option is utilized in the “bc” command for treating the non-standard bc constructs as errors |
| -i | The “-i” option is utilized in the “bc” command for forcing the interactive mode. |
| -q | The “-q” option is utilized in the “bc” command for restricting bc to printing the header in interactive mode. |
| -l | The “-l” command is utilized in the “bc” command for using the predefined mat routines. |
-
Help Command
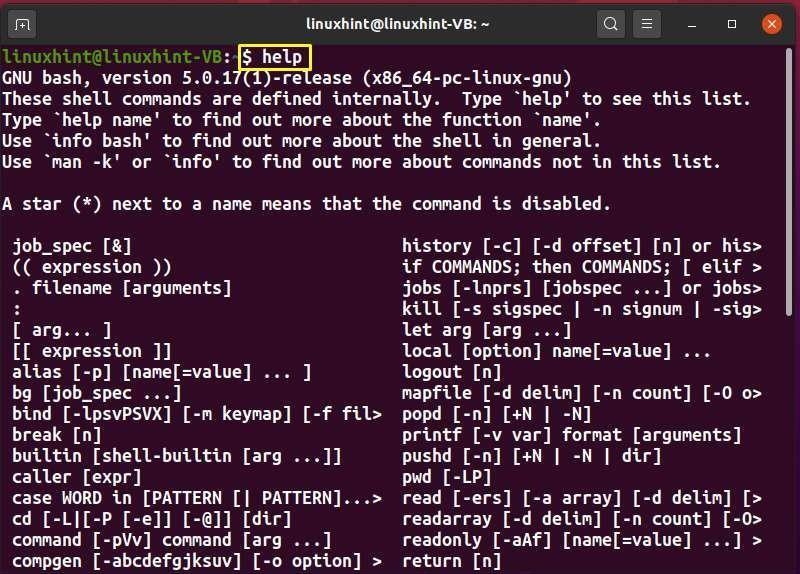
The “help” command is used for displaying the information related to the built-in Linux commands.
Syntax:
Now, execute the “help” command in your terminal and check out its output:
Other options of help command:
| Option | Description |
|---|---|
| -s | The “-s” option is utilized in the “help” command for displaying a short usage synopsis. |
| -m | The “-m” option is utilized in the “help” command for displaying the usage in pseudo- manpage format. |
| -d | The “-d” option is utilized in the “help” command for displaying the short description for each topic. |
-
Uname Command
In the Linux terminal, the “uname” command displays the kernel and system-related information.
Syntax:
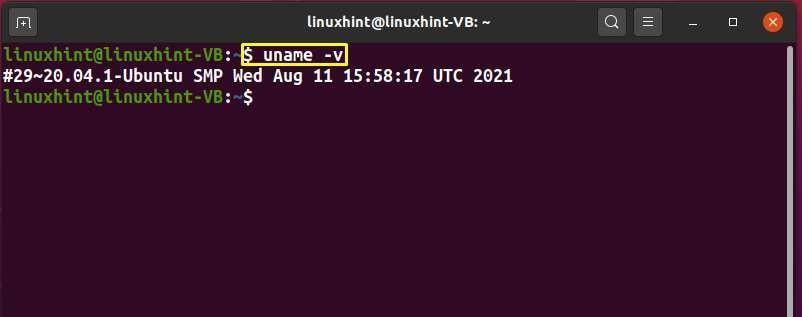
Now, execute the following command to get your kernel version in the terminal:
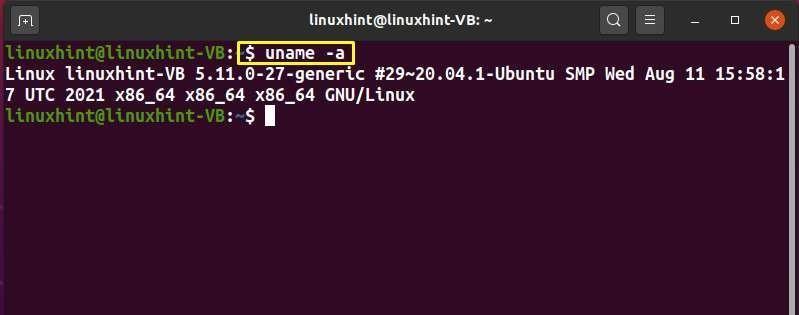
The “-a” option is added in the “uname” command to print out the system information:
Other option for uname command:
| Option | Description |
|---|---|
| -o | The “-o” option is utilized in the “uname” command for displaying the operating system name. |
| -s | The “-s” option is utilized in the “uname” command for displaying the kernel name. |
| -i | The “-i” option is utilized in the “uname” command for displaying the information related to the hardware platform. |
| -r | The “-r” option is utilized in the “uname” command for displaying the kernel release. |
| -p | The “p” option is utilized in the “uname” command for displaying the processor type. |
| -m | The “-m” option is utilized in the “uname” command for displaying the machine hardware name. |
| -n | The “-n” option is utilized in the “uname” command to display the network node’s hostname. |
-
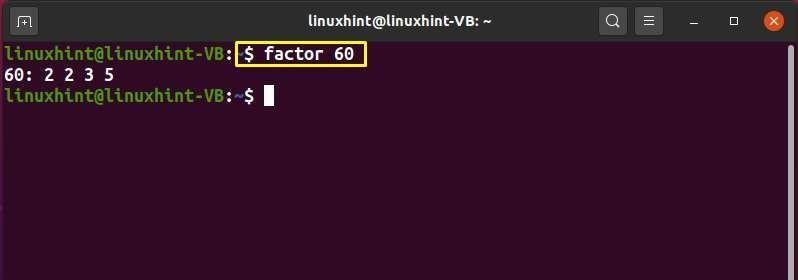
Factor Command
The “factor” command shows the prime factors of the specified integer.
Syntax:
For instance, to print out the prime factors of “60”, we will write out the “factor” command in the following way:
Other options of factor command:
| Option | Description |
|---|---|
| –version | The “–version” option is utilized to print out the version information. |
| –help | The “–help” option is utilized to print out a help message. |
-
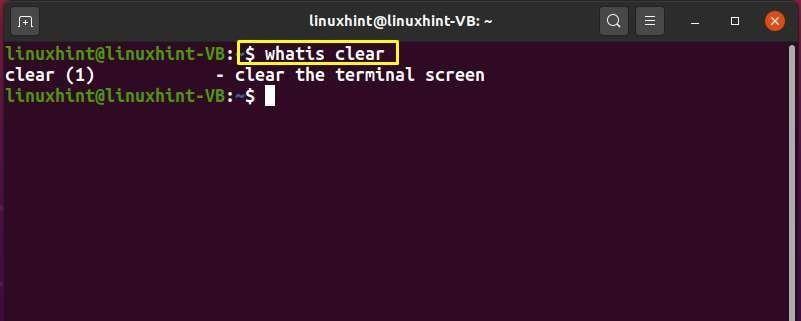
Whatis Command
If you want to print a one-line manual page description for the specified command, then go for the execution of the “whatis” command in your Linux terminal. It is used to display a short introduction of the added command.
Syntax:
For instance, the execution of the below-given command will show a one-line description of the “clear” command:
Other options of whatis command:
| Option | Description | |||
|---|---|---|---|---|
| -r | The “-r” option is utilized in the “whatis” command for interpreting each keyword as a regex. | |||
| -d | The “-d” option is utilized in the “whatis” command for displaying the debugging messages. | |||
| -w | The “-w” option is utilized in the “whatis” command when the specified keyword contains wildcards. | |||
-
mkdir Command
“mkdir” stands for “Make Directory”. In Linux-based systems, the mkdir command is used for creating a directory.
Syntax:
Now, we will try to create a “myFolder” directory with the help of the mkdir command:

Next, confirm the existence of the created “myFolder” directory in pwd:

-
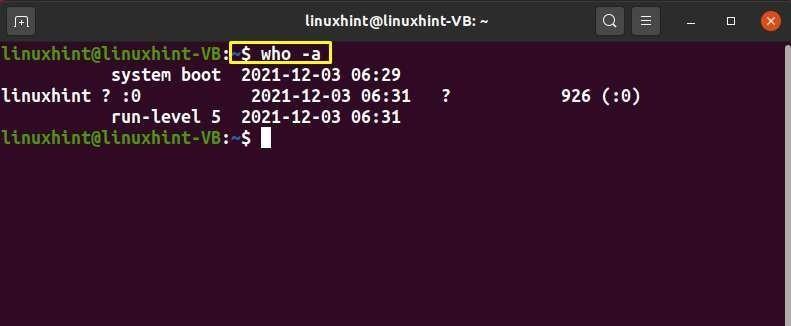
Who Command
The “who” command is used for printing the time of the last system boot, the current system level, and the list of logged-in users.
Syntax:
If you only want to know about the users who are currently logged in to the system, then add the “-a” option in the “who” command:
Other option of who command:
| Option | Description |
|---|---|
| -b | The “-b” option is utilized in the “who” command for printing the last system boot time. |
| -r | The “-r” option is utilized in the “who” command for printing the current run level. |
| -h | The “-h” option is utilized in the “who” command for printing the heading of the displayed columns. |
| -q | The “-q” option is utilized in the “who” command for printing the total number of logged-in users and their log-in names. |
| -d | The “-d” option is utilized in the “who” command for printing the information related to the dead processes. |
-
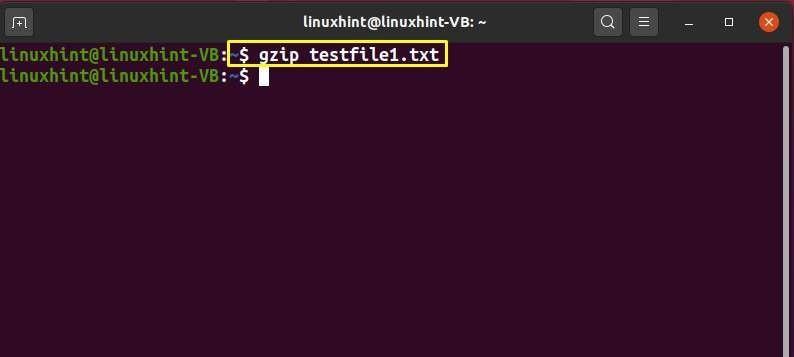
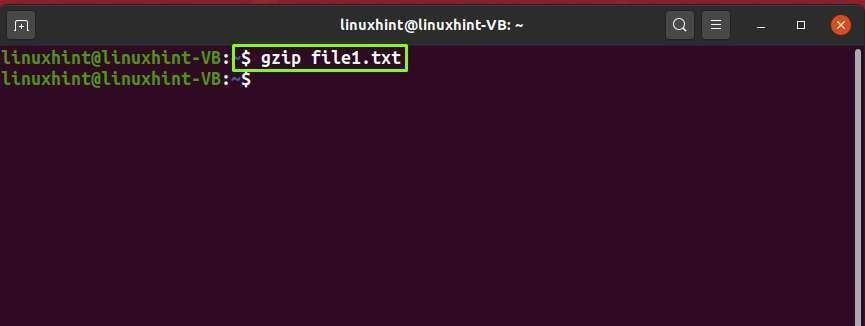
gzip Command
“gzip” stands for “GNU Zip”. In Linux-based systems, gzip command is used for compressing and decompressing data files.
Syntax:
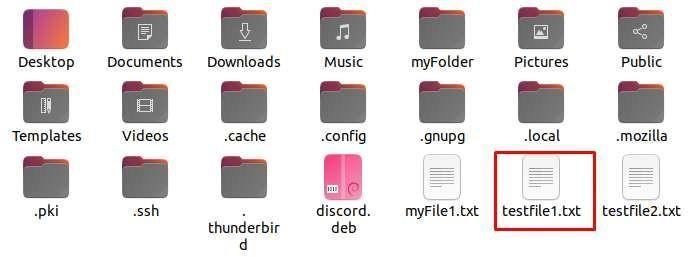
For instance, to compress the “testfile1.txt” file, we will execute the following command:
As you can see, the compressed file of “testfile1.tar.gz” is now created in our home directory:

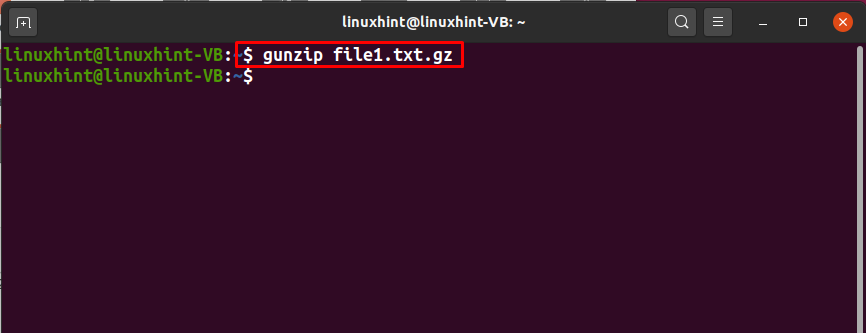
Now, add the “-d” option to decompress the “testfile1.txt.gz” file:
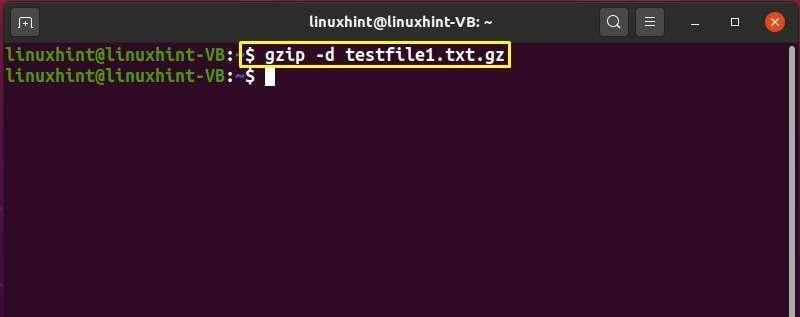
After executing the above-given command, the “testfile1.txt.gz” will be decompressed:
-
Free Command
In the Linux terminal, you can write out the “free” command to show the memory-related information.
Syntax:
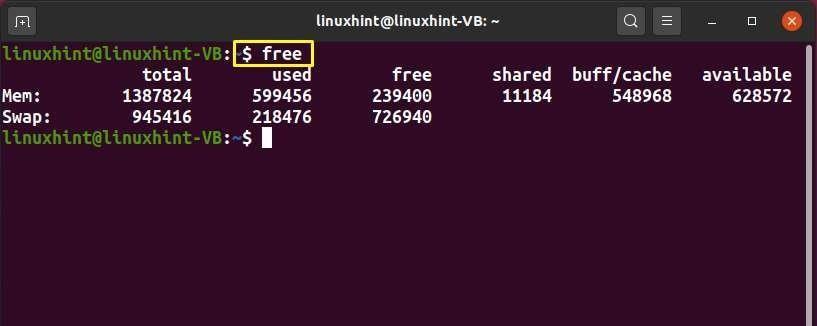
Now, execute the “free” command to get to know about memory usage details such as total memory, used and free memory space, shared, available, and buff/cache memory:
Other options of free command:
| Option | Description |
|---|---|
| -h | The “-h” option is utilized in the “free” command to output the values in the “GB/MB” (human-readable) form. |
-
Finger Command
The “finger” command is used for displaying the information related to system users.
Syntax:
Before using it, you have to install the finger package on your Linux system. To do so, write out the following command:

After completing the installation, execute the “finger” command and add the username to view its details:

Other options of finger command:
| Option | Description |
|---|---|
| -l | The “-l” option is utilized in the “finger” command to force the long output format. |
| -s | The “-s” option is utilized in the “finger” command to force the short output format. |
| -m | The “-m” is utilized in the “finger” command for matching the arguments only on the username. |
-
Man Command
In Linux, “man” is an acronym for “Manual”. The “man” command is used to print out the manual of the specified command on the Linux terminal.
Syntax:
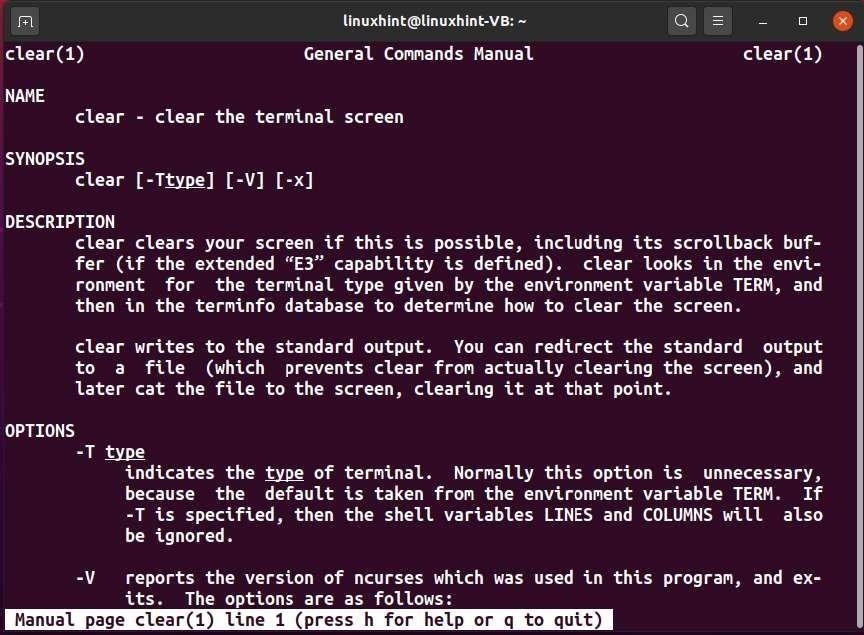
To check out the manual page of the “clear” command, we will type out the following “man” command:

Other options of man command:
| Option | Description |
|---|---|
| -I | The “-l” option is utilized in the “man” command for searching the command manual (case sensitive). |
| -w | The “-w” option is utilized in the “man” command to return the location of the specified command man page. |
| -k | The “-k” option is utilized in the “man” command to search out the specified command with “RegEx” in all man pages. |
| -a | The “-a” option is utilized in the “man” command to display the specified command’s manual pages. |
-
Groups Command
The “groups” command is used for printing the name of the primary and supplementary groups of the specified user.
Syntax:
For instance, to check out the “linuxhint” user groups on the system, we will write out this command:

-
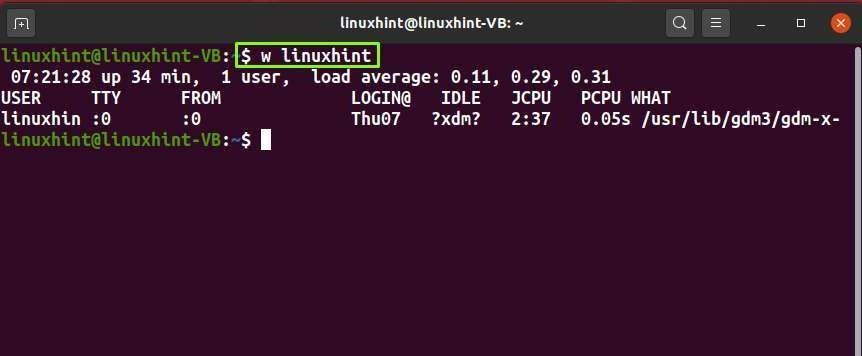
w Command
The “w” command shows the information about the active users and their respective processes on the system.
Syntax:
To check out the active processes of “linuxhint” users, we will write out the below-given command in the Linux terminal:
Other options of w command:
| Option | Description |
|---|---|
| -o | The “-o” option is utilized in the “w” command for printing out a blank space for idle time. |
| -h | The “-h” option is utilized in the “w” command to restrict it from printing the header. |
| -s | The “-s” option is utilized in the “w” command for displaying the abbreviated output. |
| -V | The “-v” option is utilized in the “w” command for displaying the version information. |
| -u | The”-u” option is utilized in the “w” command to display all current processes and CPU times. |
-
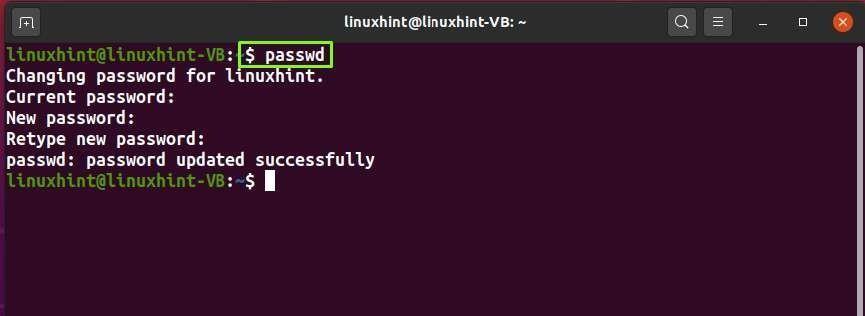
passwd Command
“passwd” is an acronym for “Password”. The “passwd” command is used in Linux-based systems to change the current user password.
Syntax:
For instance, we want to change the password of our current user, which is “linuxhint”. For this purpose, we will execute the “passwd” command in the Linux terminal:
Here, we will type out the current password, new password for the user, and lastly, retype it for the authentication:
Other options of passwd command:
| Option | Description |
|---|---|
| -S | The “-S” option is utilized in the “passwd” command for displaying the account status information. |
| -e | The “-e” option is utilized in the “passwd” command to expire the current account password immediately. |
| -d | The “-d” option is utilized in the “passwd” command to delete a user’s password. |
| -r | The “-r” option is utilized in the “passwd” command to change the repository password. |
| -l | The “-l” option is utilized in the “passwd” command for locking the user account’s password. |
-
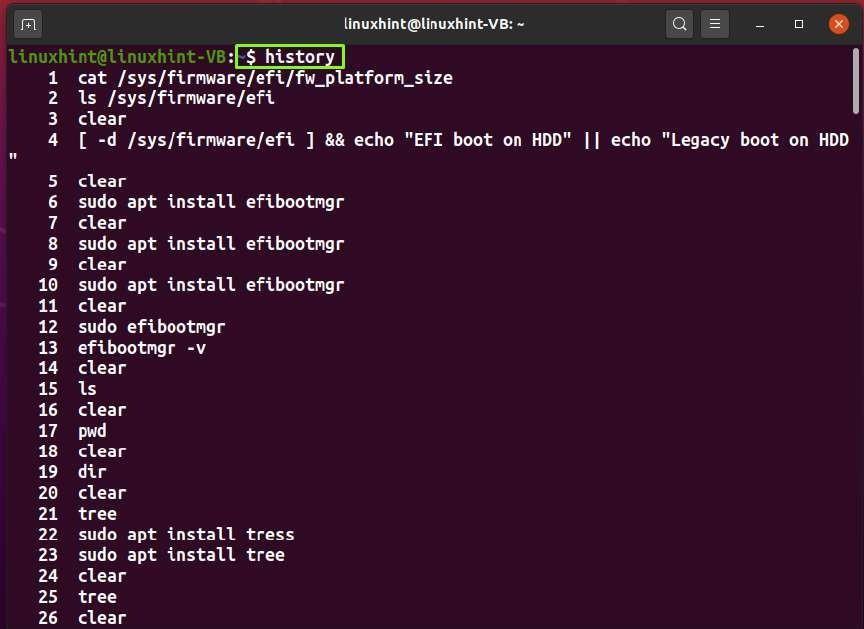
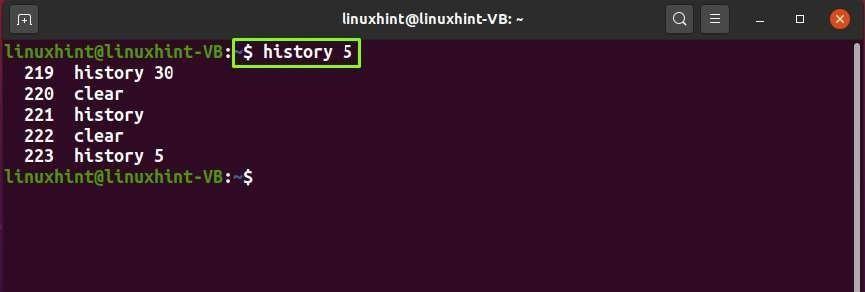
History Command
With the help of the “history” command, you can view the list of the last five hundred executed commands in your terminal.
Syntax:
Now, execute the simple “history” command and check out the command list:
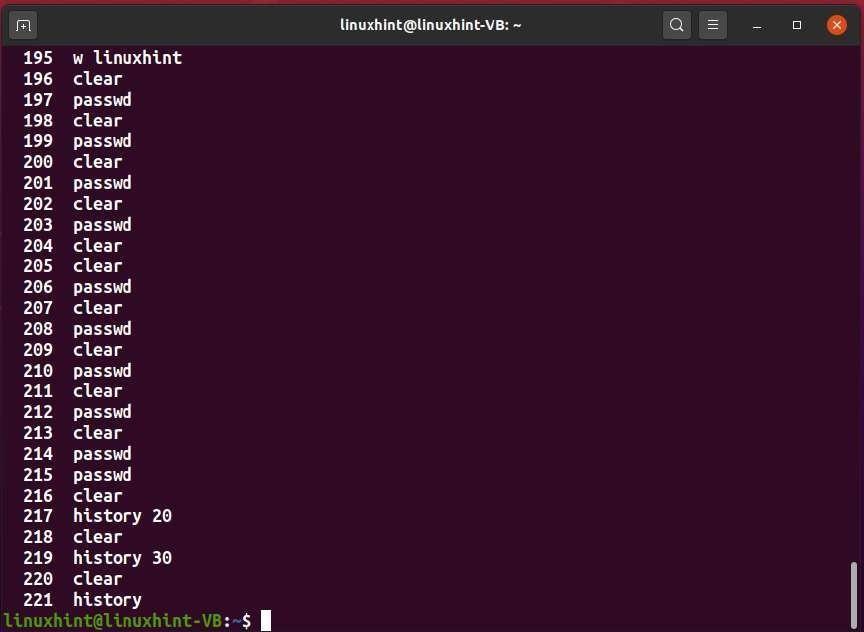
You can also specify the number of commands you want to retrieve from the whole list. For instance, to view the last five executed commands, we will write the “history” command in the following way:
-
Whoami Command
The “whoami” command is used for displaying the username of the currently logged-in user.
Syntax:
Now, execute the “whoami” command in your terminal to view your current username.

-
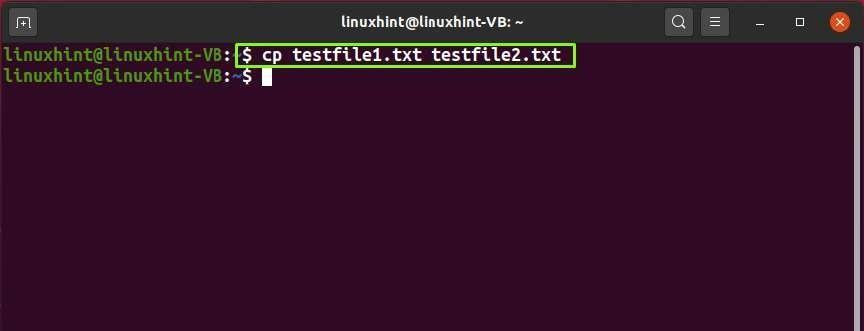
cp Command
“cp” is an acronym for “Copy”. In Linux, the “cp” command is used to copy single or multiple files while creating an exact copy with a different name.
Syntax:
To copy source file to the Destination file:
To copy source file to the Destination directory:
To copy multiple source files to the Destination directory:
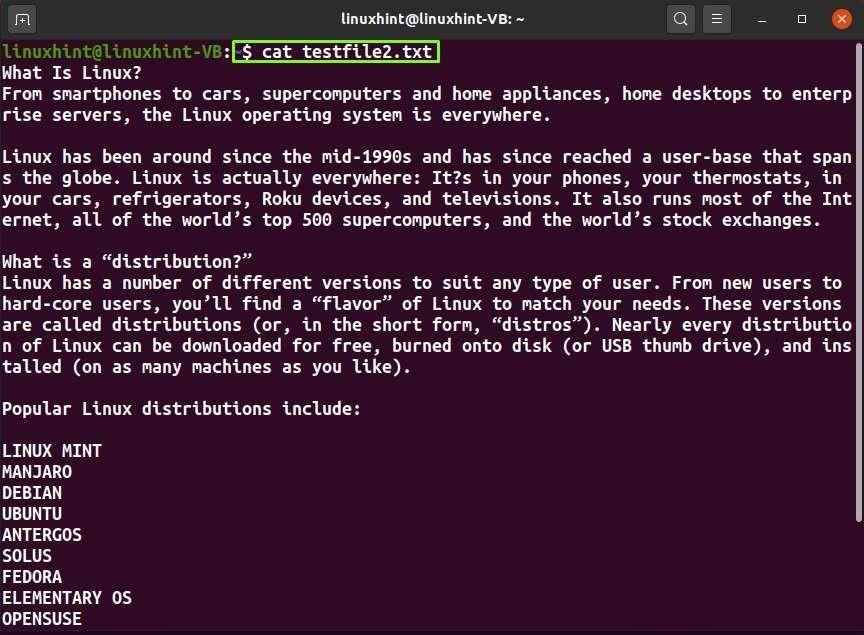
Now, we will execute the following “cp” command for copying the content of the “testfile1.txt” to the “testfile2.txt”:
View the content of the “testfile2.txt” to confirm the copy operation which is performed:
Other options of cp command:
| Option | Destination |
|---|---|
| -b | The “-b” option is utilized in the “cp” command to create a backup of the destination file with a different name and format in the same directory. |
| -f | The “-f” option is utilized in the “cp” command to force the removal of the existing destination file. |
| -r | The “-r” option is utilized in the “cp” command to recursively copy the whole directory structure. |
| -i | The “-i” option is utilized in the “cp” command for prompting before overwriting the destination file. |
-
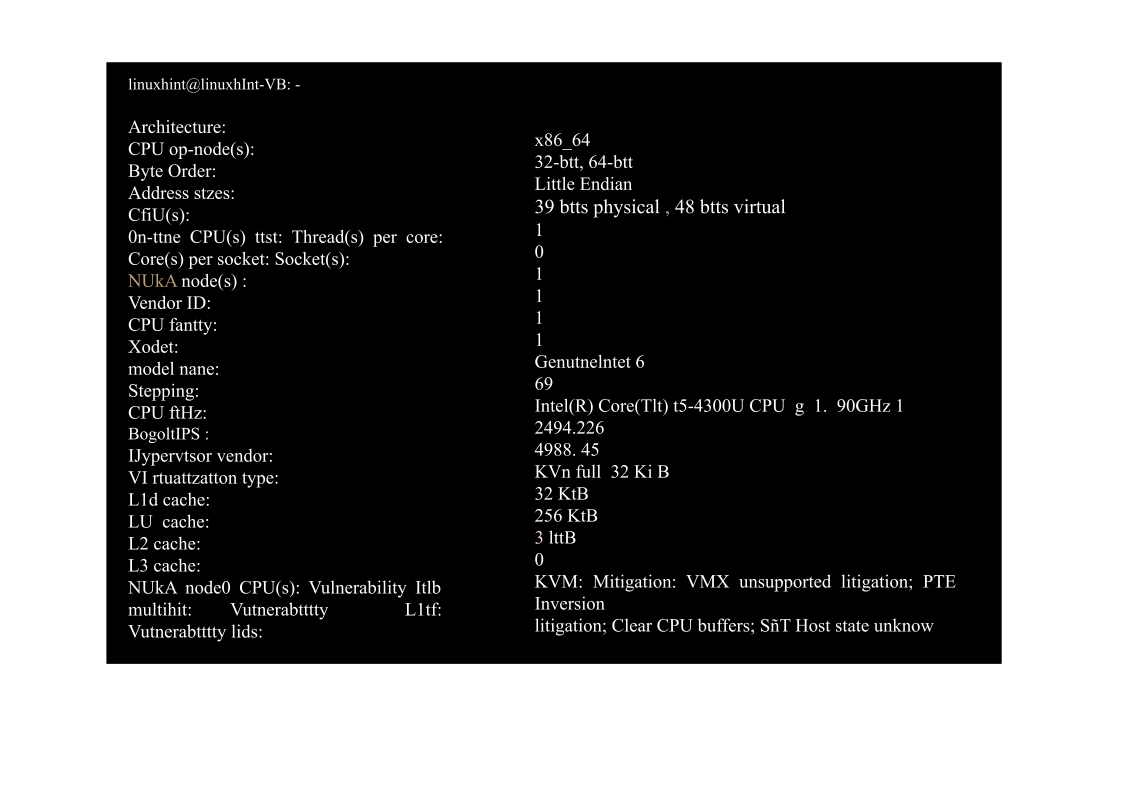
lscpu Command
In Linux-based systems, the “lscpu” command shows the CPU architecture information.
Syntax:
For instance, executing the simple “lscpu” command will display the CPU details such as CPU op-mode, Address sizes, CPU MHz, Sockets, Vendor ID, CPU family, Virtualization type, and Flags:
![]()
![]()

-
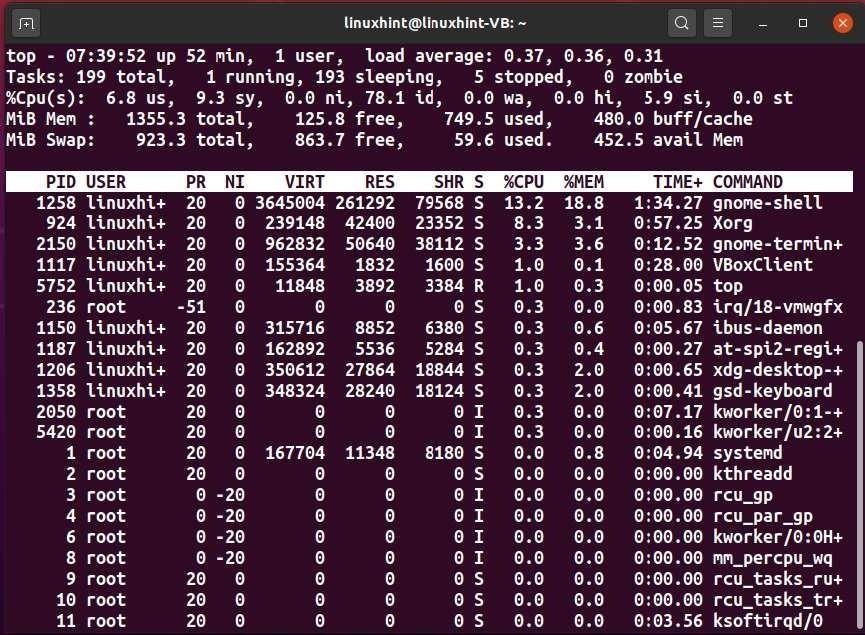
Top Command
“top” command stands “Table of Processes”. It is used to display the CPU-consuming processes and RAM usage information.
Syntax:
Execute the simple “top” command for viewing the dynamic real-time information about the active processes:
Other option of top command:
| Option | Description |
|---|---|
| -b | The “-b” option is utilized in the “top” command for activating batch mode operation. |
| -a | The “-a” option is utilized in the “top” command for sorting the processes by memory usage. |
| -h | The “-h” option is utilized in the “top” command for only displaying the processes owned by the current user. |
-
mv Command
“mv” stands for “move”. In Linux, the “mv” command is used for moving single or multiple files or directories from one directory to another. You can also rename a file or a directory with the help of the “mv” command.
Syntax:
To move a file to a directory:
To rename a file:
Now, we will try to move the “myFile.txt” text file to the “Downloads” folder by executing the following “mv” command:
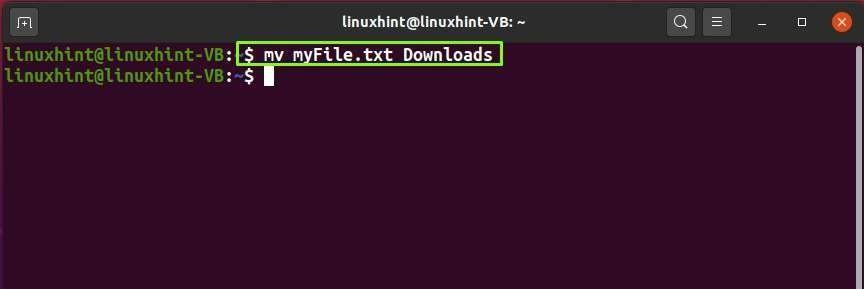
You can confirm the performed operation by listing out the content of the directory where you have moved your file:
From the below-given image, you can see that “myFile.txt” is successfully moved to our “Downloads” directory:

Other options of mv command:
| Option | Description |
|---|---|
| -b | The “-b” option is utilized in the “mv” command for creating a backup of the existing destination file. |
| -f | The “-f” option is utilized in the “mv” command to move by overwriting the destination file forcefully. |
| -u | The “-u” option is utilized in the “mv” command for moving the source file if it is newer than the destination file. |
| -i | The “-I” option is utilized in the “mv” command to enable an interactive prompt before overwriting a file. |
-
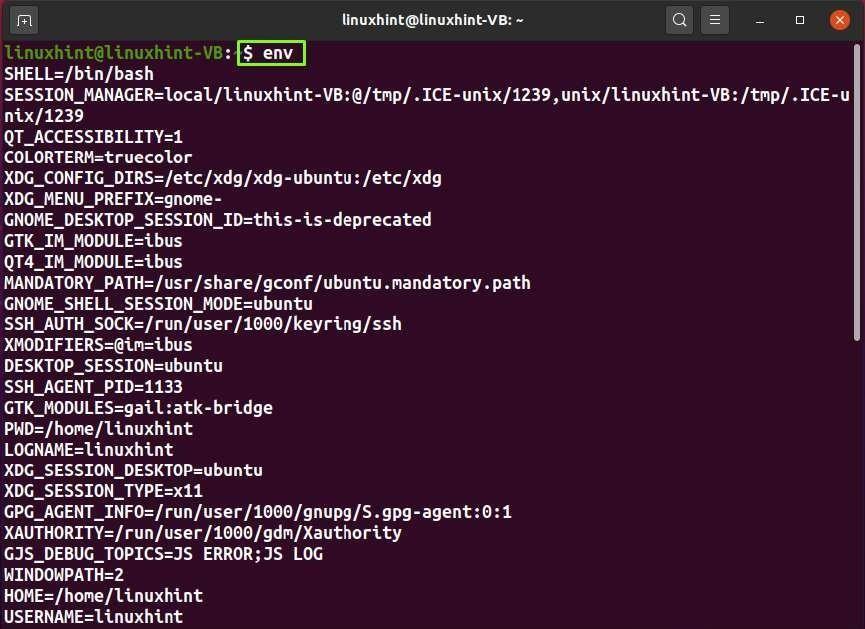
env command
“env” is an acronym for “Environment”. The “env” command is used for printing out the list of current environment variables in your Linux system.
Syntax:
Now, we will execute the following command for getting the list of our current environment variables:

Other options for env command:
| Option | Description |
|---|---|
| -u | The “-u” option is utilized in the “env” command for removing an environment variable. |
| -C | The “-C” option is utilized in the “env” command for changing the working directory. |
| -i | The “-i” option is utilized in the “env” command for starting with an empty environment. |
-
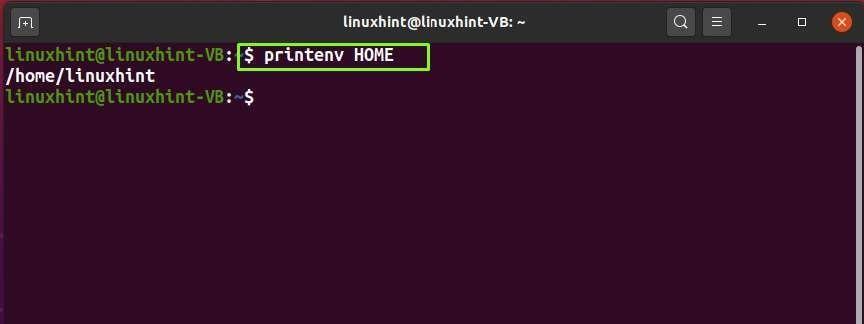
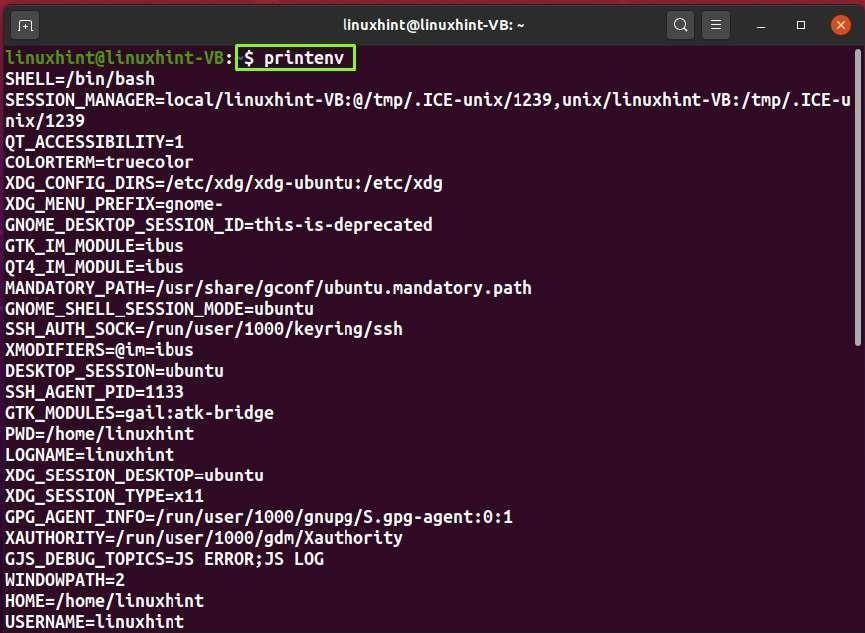
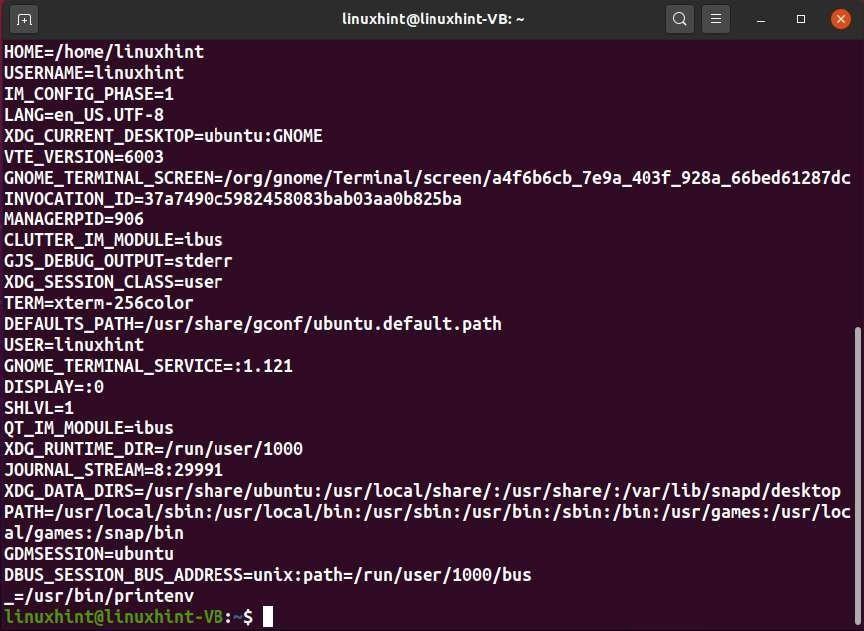
printenv Command
In the Linux terminal, the “printenv” command is used to display the value of the specified environment variable.
Syntax:
For instance, we will execute the below-given command for displaying the home directory of the current user:
You can also get a list of all environment variables by using the “printenv” command:
Other options of the “printenv” command:
| Option | Description |
|---|---|
| -0 | The “-0” option is utilized in the “printenv” command to end each output line with a “0” byte. |
-
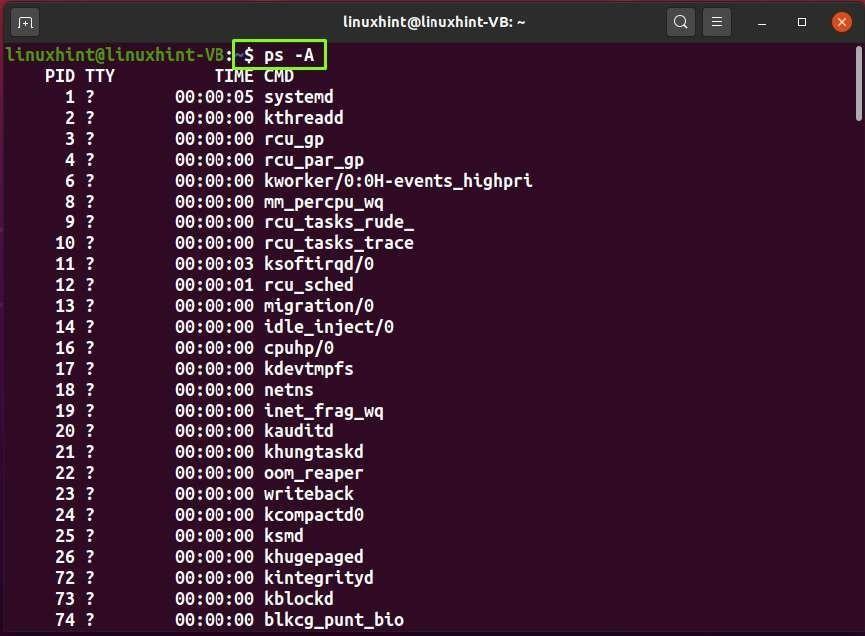
ps command
“ps” is an acronym for “Process Status”. In the Linux terminal, you can use the “ps” command to check the active processes and programs and their consumed resources.
Syntax:
You can add the “-A” option with the “ps” command to view all running processes of the system:
Other options of ps command:
| Option | Description |
|---|---|
| -r | The “-r” option is utilized in the “ps” command for restricting it only to select the running processes. |
| -e | The “-e” option is utilized in the “ps” command for listing all processes. |
| -d | The “-d” option is utilized in the “ps” command for selecting all processes except the session headers. |
-
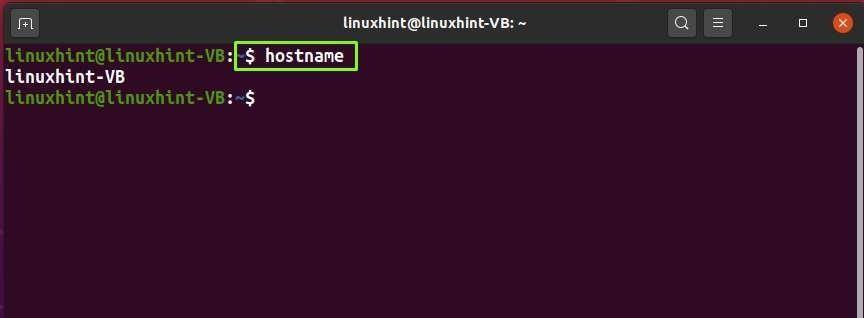
Hostname Command
The “hostname” command is used for viewing or setting the hostname and the system DNS name.
Syntax:
Now, let’s check out the result of executing the simple “hostname” command in the terminal: Our hostname is “linuxhint-VB,” which can see in the following image:
-
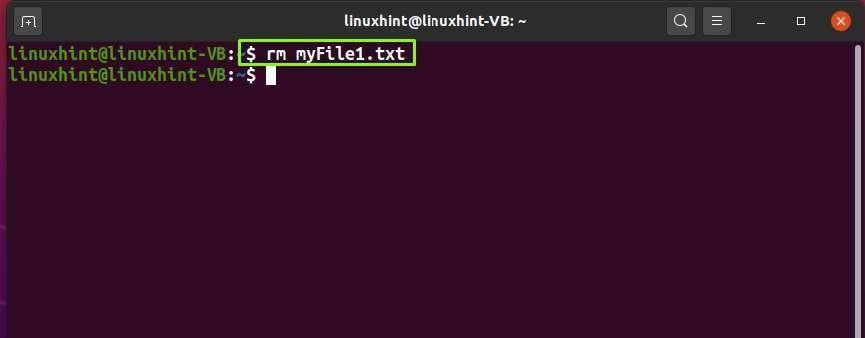
rm Command
“rm” is an acronym for “Remove”. The “rm” command is used for deleting or removing the specified file or directory from the system.
Syntax:
To remove file:
To remove a directory:
For instance, to remove the “myFile1.txt” from our Linux system, we will write out the “rm” command in this form:
The error-free output signifies that the specified file is successfully removed:
-
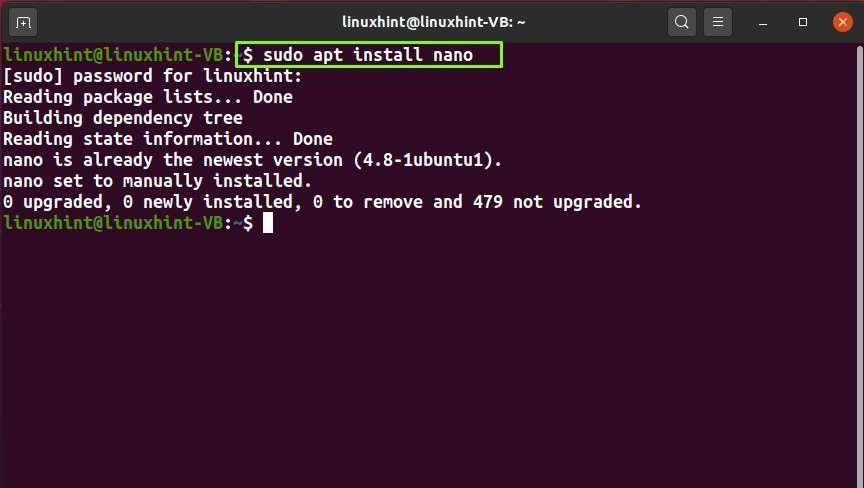
Nano Command
The “nano” command is used to create and edit the text files in the GNU nano editor. Before editing files in nano editor, you have to install it on your system, if you do not have nano editor already:
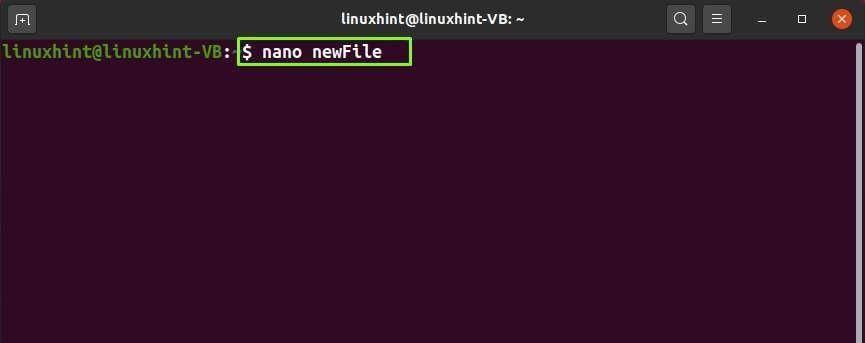
Now, after completing the “nano” installation process, move ahead and create a sample text file named “newFile” by executing the following nano command:
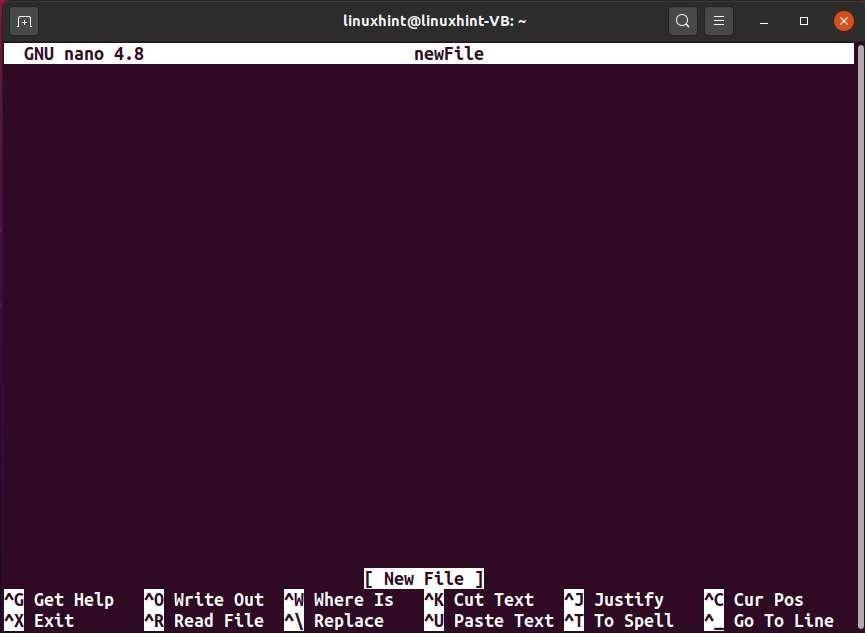
Once the file is created and opened in the nano editor, you can easily add some content to it:
Shortcuts of the nano editor:
| Shortcut | Description |
|---|---|
| CTRL+O | The “CTRL+O” shortcut is utilized in the nano editor for writing out the current file content. |
| CTRL+U | The “CTRL+U” shortcut is utilized in the nano editor to paste the content of the cut buffer. |
| CTRL+S | The “CTRL+S” shortcut is utilized in the nano editor for saving the current file. |
| ALT+6 | The “ALT+6” shortcut is utilized in the nano editor for copying the current line into the cut buffer. |
| CTRL+K | The “CTRL+K” shortcut is utilized in the nano editor to cut the current line into a cut buffer. |
| ALT+E | The “ALT+E” shortcut is utilized in the nano editor to redo the last undone operation. |
| CTRL+U | The “CTRL+U” shortcut is utilized in the nano editor to paste the cut buffer content. |
| ALT+U | The “ALT+U” shortcut is utilized in the nano editor to undo the last operation. |
-
ip Command
“ip” is an acronym for “Internet Protocol”. The “ip” command is used to perform various network- related operations such as listing IP addresses, configuring the routing table, and setting up IP routes and IP addresses.
Syntax:
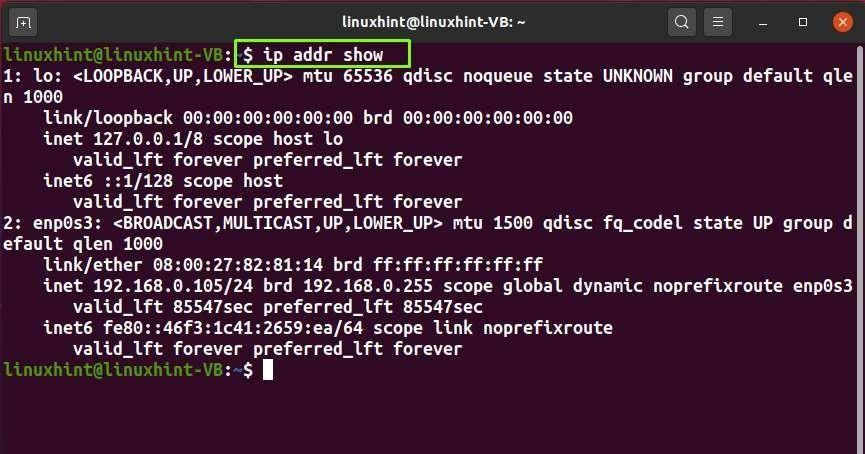
The“ip”command can also show you the detailed information of the network interfaces, such as their MAC Address and IP address information:
Other options of ip command:
| Option | Description |
|---|---|
| -f | The “-f” option is utilized in the “ip” command for specifying the protocol family to use. |
| -a | The “-a” option is utilized in the “ip” command for displaying and configuring the IP addresses. |
| -n | The “-n” option is utilized in the “ip” command for displaying the changing the neighbor objects. |
| -l | The “-l” option is utilized in the “ip” command for displaying and configuring the network interfaces. |
| -r | The “-r” option is utilized in the “ip” command for displaying and changing the routing table. |
| -c | The “-c” option is utilized in the “ip” command for configuring the color output. |
-
ifconfig Command
“ifconfig” is an acronym for “Interface Configuration”. The “ifconfig” Linux command is used for configuring the kernel-resident network interfaces. It also shows you the list of the active interfaces on your system.
Syntax:
Or
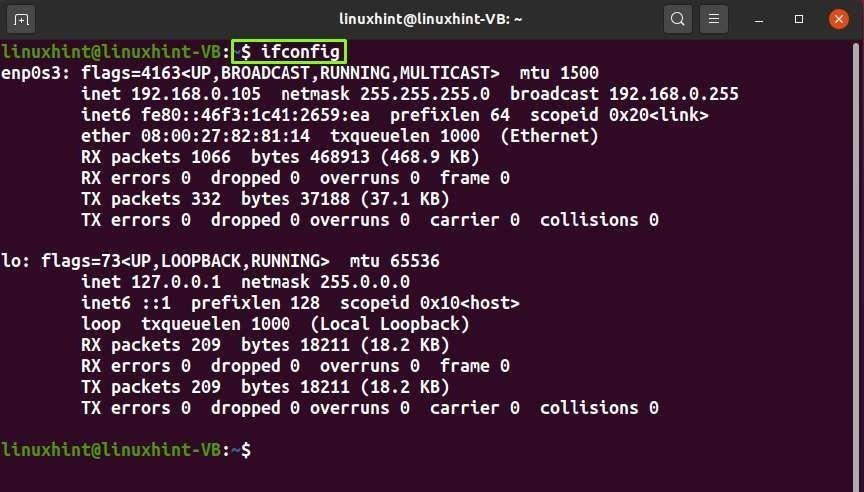
Now, execute the following “ifconfig” command to view the currently active interfaces:
Other options of ifconfig command:
| Option | Description |
|---|---|
| -v | The “-v” option is utilized in the ifconfig command for displaying the error conditions. |
| -a | The “-a” option is utilized in the ifconfig command for showing all network interfaces. |
| -s | The “-s” option is utilized in the ifconfig command for showing a shortlist. |
-
Curl Command
“curl” is an acronym for “Client URL”. It is a command-line utility used to transfer data to or from a server by utilizing its supported protocol.
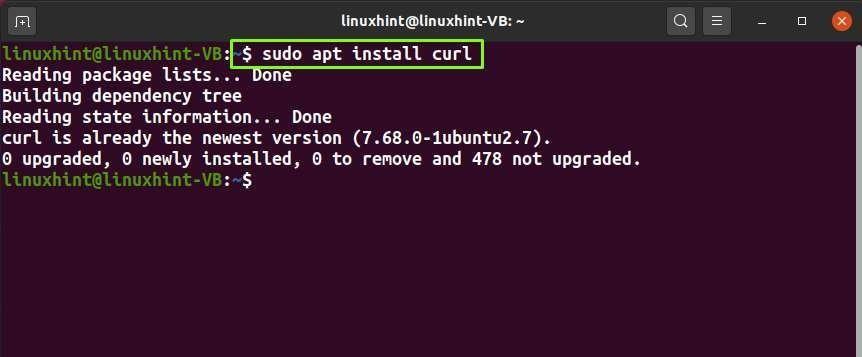
If you do not have “curl” on your Linux-based system, then first install it by writing out the following command:
Syntax:
To print out the source code of any website such as “google.com”, execute the curl command and specify the URL in the following way:

Other options of curl command:
| Option | Description |
|---|---|
| -a | The “-a” option is utilized in the “curl” command for appending the target file instead of overwriting it. |
| -K | The “-K” option is utilized in the “curl” command for specifying a text for reading the curl argument. |
| -C | The “-C” option is utilized in the “curl” command for resuming a file transfer at the given offset. |
| -b | The “-b” option is utilized in the “curl” command for passing the data to the HTTP server in Cookie Header. |
| -d | The “-d” option is utilized in the “curl” command to send the specified data in a POST request to the HTTP server. |
| -I | The “-I” option is utilized only in the “curl” command for fetching the header. |
-
wget Command
“wget” is an acronym for “Web Get”. The “wget” command is used in the terminal to download the specified file from the internet using different protocols such as FTP, HTTP, and HTTPS.
Syntax:
Before using “wget”, you have to install it first on your system:

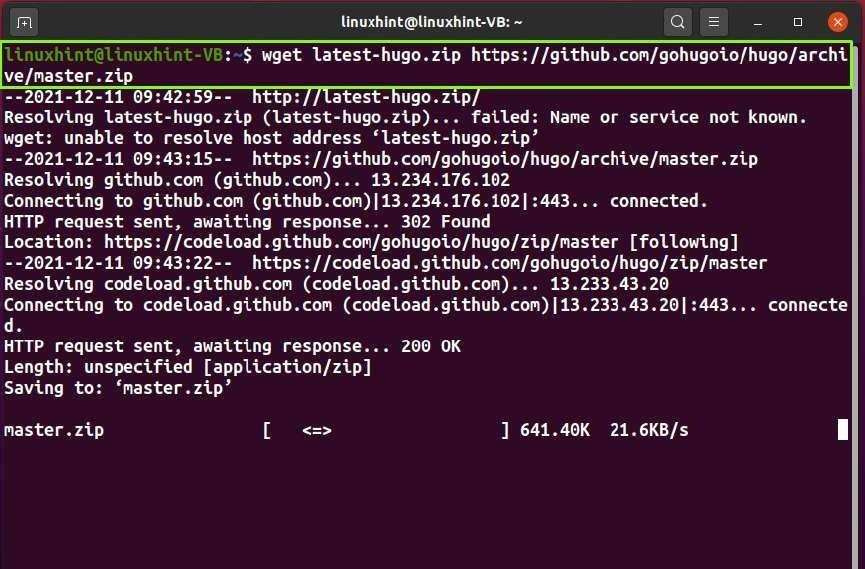
The above-given error-free output indicates that “wget” is now successfully installed on your system. Now, specify the file link which you want to download in the “wget” command and execute it:
Other options of wget command:
| Option | Description |
|---|---|
| -c | The “-c” option is utilized in the “wget” command for resuming a partially downloaded file. |
| -v | The “-v” option is utilized in the “wget” command for printing the wget version available on your system. |
| -t | The “-t” option is utilized in the “wget” command to specify the number of retries. |
| -b | The “-b” option is utilized in the “wget” command for sending a process to the background when it starts. |
-
Last Command
The “last” command displays the list of currently logged users. You can also specify some parameters to enhance the functionality of the “last” command.
Syntax:
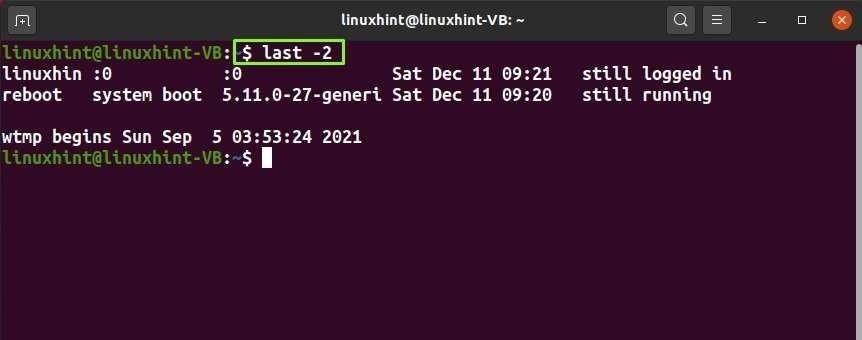
For instance, you can add the “-2” to the “last” command for checking the last 2 logs:
Other options of the last command:
| Option | Description |
|---|---|
| -F | The “-F” option is utilized in the “last” command for checking the date, login, and log-out time. |
-
Yes Command
The “yes” command is used in Linux-based systems to print a continuous stream of the added text or String.
Syntax:
For instance, we will execute the below-given command for printing the String “101 Linux commands” infinitely in our Linux terminal:


-
iostate Command
“iostate” is an acronym for “Input/Output Statistics”. The “iostate” command monitors the statistics of the input/output devices and partitions. It also tracks system input/output by looking at how long devices are turned on in proportion to their average transfer rates.
To use “iostate” command in your Linux terminal, firstly install the “sysstat” package with the help of following command:
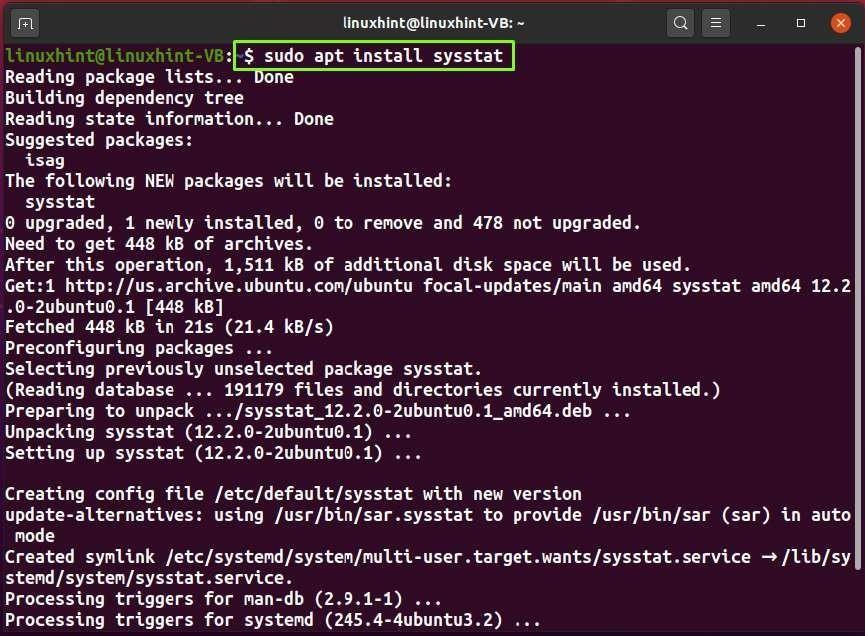
The “sysstat” package comprises various monitoring tools including the “iostate”:

Other options of iostat command:
| Option | Description |
|---|---|
| -p | The “-p” option is utilized in the “iostate” command to display the blocked devices’ statistics. |
| -x | The “-x” option is utilized in the “iostate” command for retrieving more extensive statistics information. |
| -k | The “-k” option is utilized in the “iostate” command for capturing the statistics in kilobytes or megabytes. |
| -d | The “-d” option is utilized in the “iostate” command for displaying only the device report. |
| -c | The “-c” option is utilized in the “iostate” command for showing only the CPU statistics. |
-
Locate Command
The “locate” command is used for searching a specific file or directories in the file system.
Syntax:
For instance, to find out the location of “testfile1.txt”, we will execute the following time:
From the output, you can see that “testfile1.txt” is located in our “/home/linuxhint” directory:

Other option of locate command:
| Option | Description |
|---|---|
| -i | The “-i” option is utilized in the “locate” command to ignore the specified patterns’ case sensitivity. |
| -c | The “-c” option is utilized in the “locate” command for writing the number of matched entries. |
| -b | The “-b” option is utilized in the “locate” command for matching only the base name. |
| -A | The “-A” is utilized in the “locate” command to display only entries matched with the specified pattern. |
-
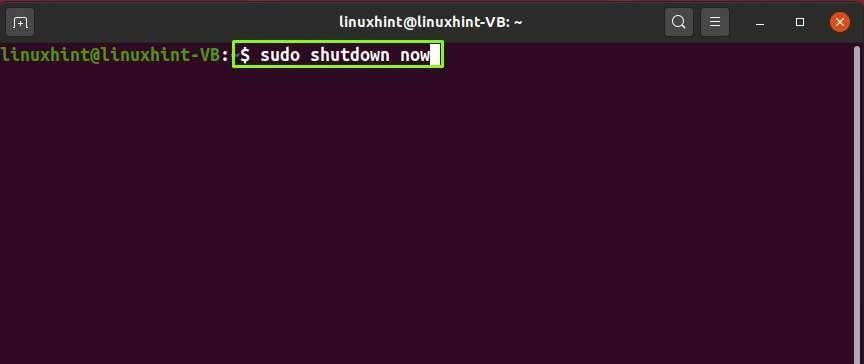
Shutdown Command
The “shutdown” command is used to shut down the system in a secure way, and it also permits to specify a time for bringing your system down.
Note: To run the “shutdown” command, you must be root or have “sudo” Privileges.
Syntax:
To immediately shut down your system, type out the following “shutdown” command:
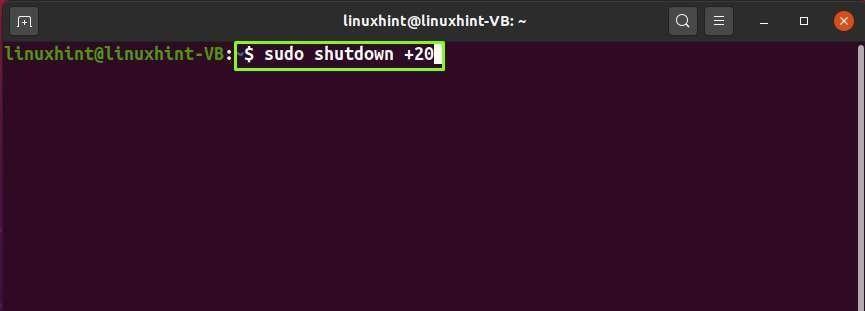
In the next “shutdown” command, we have added the option to turn the system down after “20” minutes:
You can also write out a message in the shutdown command:

Other options of shutdown command:
| Option | Description |
|---|---|
| -c | The “-c” option is utilized in the “shutdown” command for canceling the scheduled shutdown process. |
| -r | The “-r” option is utilized in the “shutdown” command for rebooting the system. |
-
Reboot Command
The “reboot” command is used for rebooting the Linux-based system. This command also needs “sudo” privileges to execute.
Syntax:
Here is the basic command for the system reboot:

Other options of the reboot command:
| Option | Description |
|---|---|
| -halt | The “-halt” option is utilized in the “reboot” command for stopping the machine. |
| -w | The “-w” option is utilized in the “reboot” command for only writing the shutdown entry. It does not make the system halt, power off, or reboot. |
-
dir Command
“dir” is an acronym for “Directory”. In a Linux-based system, the “dir” command is used to list a directory’s content. Its listing format differs from the “ls” command, and it vertically sorts the files and directories in columns.
Syntax:
By default, the simple “dir” command lists out the directory of the current working directory:

You can also add the “-l” option to list out the directory content with their detailed information:

Other options of dir command:
| Option | Description |
|---|---|
| -S | The “-S” option is utilized in the “dir” command for sorting the size of the file (descending order). |
| -s | The “-s” option is utilized in the “dir” command for printing the allocated file size. |
| -v | The “-v” option is utilized in the “dir” command for printing the source and the destination files. |
| -a | The “-a” option is utilized in the “dir” command for displaying all hidden files. |
-
Apt Command
“apt” is an acronym for “Advanced Package Tool”. In Linux-based systems such as Ubuntu, the “apt” command is used to install, update, delete, and perform various other actions.
Syntax:
To install a package:
To remove a package:
To search a package:
To remove all unused packages:
To update all system packages:
To upgrade all system packages:
To upgrade a package:
For instance, to install the “flameshot” package on our system, we will execute the command:
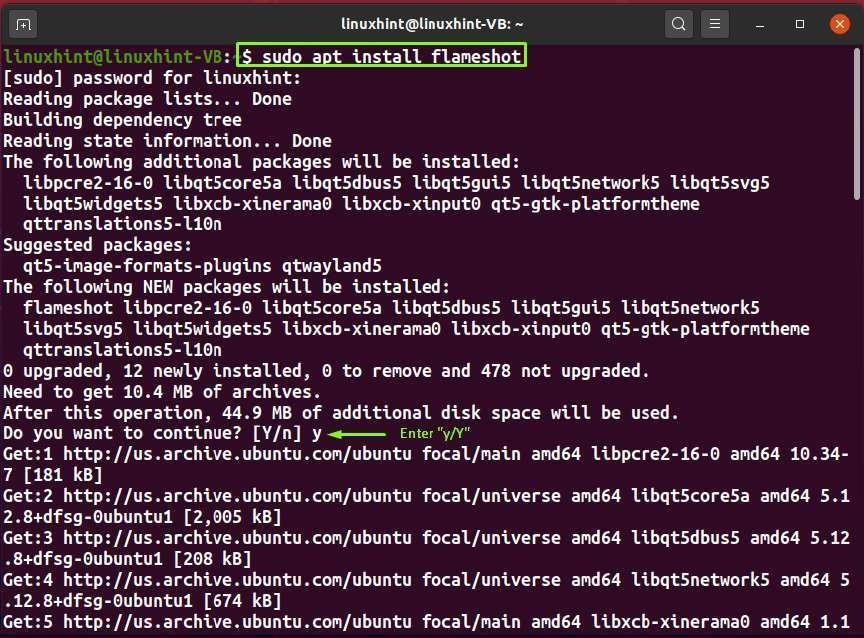

The error-free output indicates that now we have flameshot installed on the Ubuntu system:

To remove the “flameshot” package from our system, we will write out the following command:

-
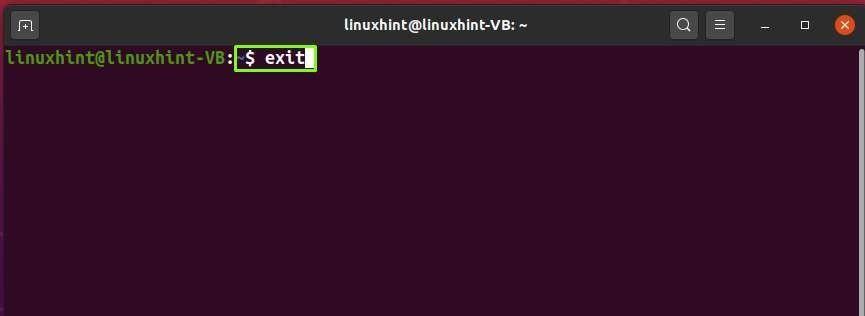
Exit Command
The “exit” command is used for terminating the active shell session of the Linux terminal.
Syntax:
Now, we will execute the “exit” command to end up the current terminal session:
You can also press “CTRL+D” for performing the same function:

-
Paste Command
The “paste” command is used for merging lines of the specified file horizontally.
Syntax:
Now, we will join the lines or content of “testfile1.txt” and “testfile2.txt” by executing the below-given “paste” command:
The “paste” will show the result in your Linux terminal:

Other option of paste command:
| Option | Description |
|---|---|
| -z | The “-z” option is utilized in the “paste” command for setting lines delimiter to NULL. |
| -s | The “-s” option is utilized in the “paste” command for pasting one file at a time instead of parallel merging. |
| -d | The “-d” option is utilized in the “paste” to use TAB as a delimiter. |
-
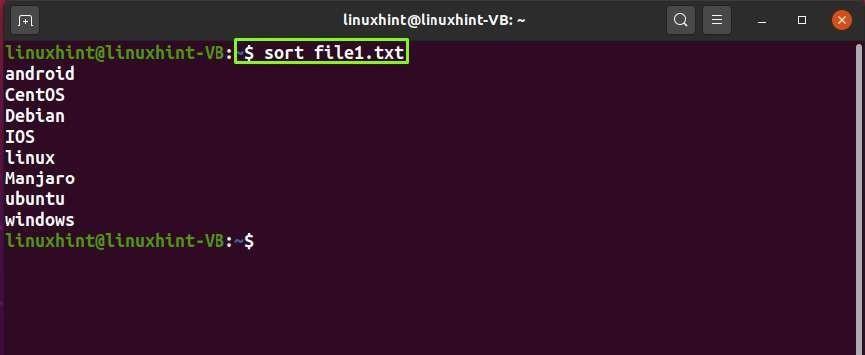
Sort Command
The “sort” command is used for sorting the file in a specific order.
Syntax:
To sort out the content of “file1.txt”, we will type the following command: The “file1.txt” content is alphabetically sorted out on the terminal:
-
Tar Command
“tar” is an acronym for “Tape Archive”. The “tar” command is used for creating an archive file, and this command also offers you the functionality to extract the archive files.
Syntax:
For instance, to create a “file.tar” file of the “/home/linuxhint/Downloads” directory, we will execute the below-given command:
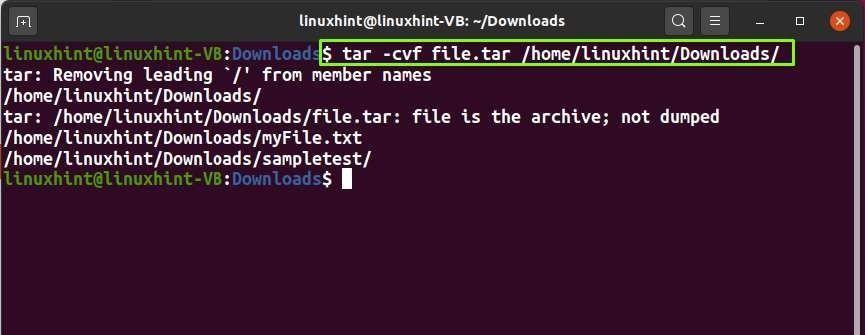
As you can see that “file.tar” is successfully created with the help of the tar command:

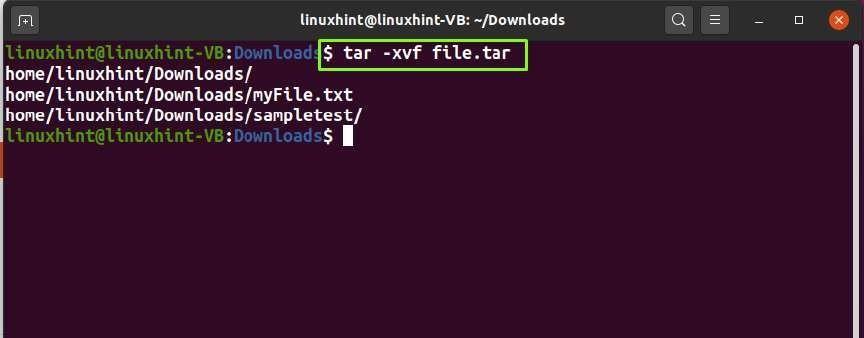
Now, to extract or un-tar the “file.tar” in the present working directory, write out the following command in your Linux terminal:

Other options of tar command:
| Option | Description |
|---|---|
| -x | The “-x” option is utilized in the “tar” command for extracting the archive file. |
| -c | The “-c” option is utilized in the “tar” command for creating the archive file. |
| -v | The “-v” option is utilized in the “tar” command for displaying the verbose information. |
| -t | The “-t” option is utilized in the “tar” command for listing the files in an archived file. |
| -f | The “-f” option is utilized in the “tar” command for creating an archive with the specified file name. |
-
gunzip Command
“gunzip” is an acronym for “GNU unzip”. The “gunzip” command is used to decompress the compressed file with the “gzip” command.
Syntax:
Firstly, we will compress the “file1.txt” using the following gzip command:

After doing so, we will execute the below-given “gunzip” command to uncompress the “file1.txt.gz” file:
Other options of gunzip command:
| Option | Description |
|---|---|
| -k | The “-k” option is utilized in the “gunzip” command for keeping the input files. |
| -r | The “-r” option is utilized in the “gunzip” command for recursively compressing directories. |
| -t | The”-t” option is utilized in the “gunzip” command to test the compressed file’s integrity. |
| -l | The “-l” option is utilized in the “gunzip” command for listing the content of the compressed file. |
| -S | The “-S” option is utilized in the “gunzip” command for using suffixes on compressed files. |
-
Zip Command
The “zip” command compresses the specified files while reducing their size. This command stores compressed files in different segments or multiple files.
Syntax:
Here, we are zipping “file1.txt” by using the following command:
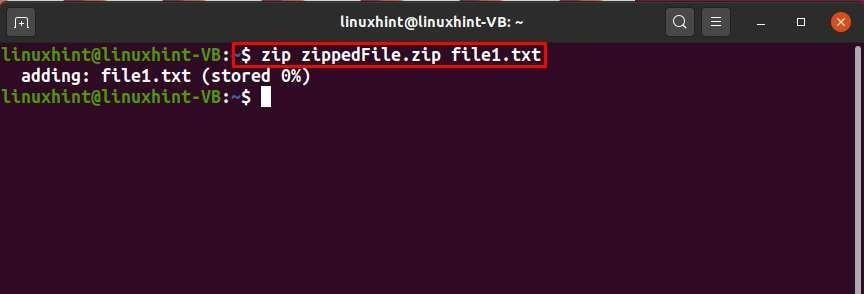
The zipped file of the “file1.txt” will be saved as a “zipped File.zip” file in the present working directory:

Other options of zip command:
| Option | Description |
|---|---|
| -x | The “-x” option is utilized in the “zip” command for excluding some specific files while creating the zip. |
| -m | The “-m” option is utilized in the “zip” command for deleting the original files after zipping. |
| -d | The “-d” option is utilized in the “zip” command for removing the file from the zip archive. |
| -r | The “-r” option is utilized in the “zip” command for zipping the directory recursively. |
| -u | The “-u” option is utilized in the “zip” command for adding new files to the existing zipped file. |
-
Unzip Command
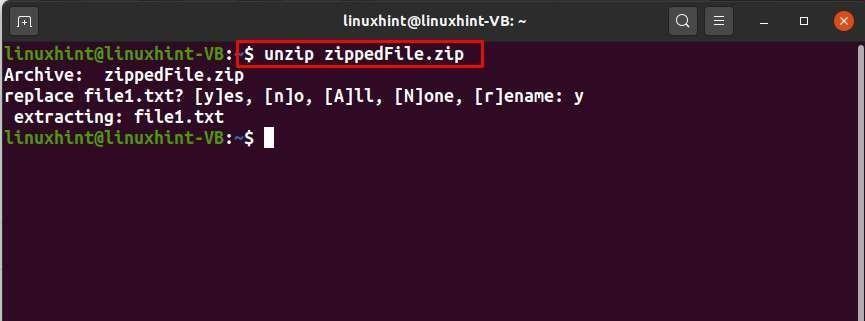
The “unzip” command is used for extracting the files from the zipped archive.
Syntax:
To unzip the “zippedFile.zip,” which we have already created in the previous section, we will execute the below-given command:

Other option of Unzip command:
| Option | Parameter | Description | |
|---|---|---|---|
| -x | Filename(s) | The “-x” option is utilized in the “unzip” command to exclude the specified files while archiving. | |
| -o | – | The “-o” option is utilized in the “unzip” command for overwriting the files. | |
| -l | – | The “-l” option is utilized in the “unzip” command to list the archive file contents. | |
| -d | /path/to/directory | The “-d” option is utilized in the “unzip” command for unzipping an archive to a different directory. | |
| -n | – | The “-n” option is utilized in the “unzip” command for restricting it to overwrite existing files. | |
-
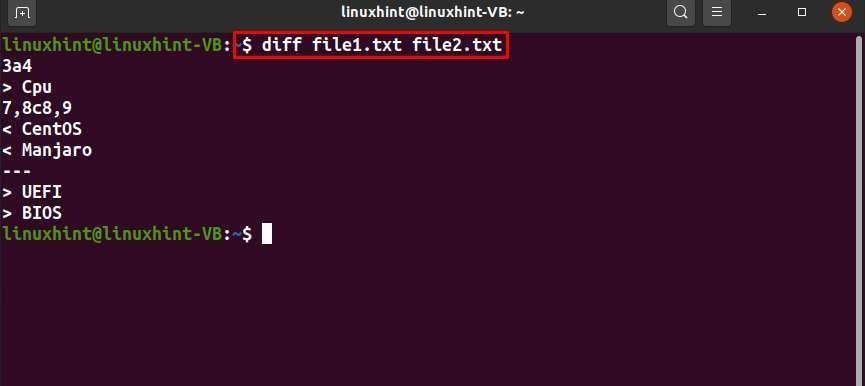
Diff Command
“diff” is an acronym for “Difference”. The diff command is used for displaying the line-by-line difference between the specified files.
Syntax:
For instance, to check out the difference between “file1.txt” and “file2.txt” files, we will execute the following diff command:
Other options of diff command:
| Option | Description |
|---|---|
| -i | The “-i” option is utilized in the “diff” command for making the command case insensitive. |
| -u | The “-u” option is utilized in the “diff” command showing the difference in unified mode. |
| -c | The “-c” option is utilized in the “diff” command for viewing the difference in context mode. |
-
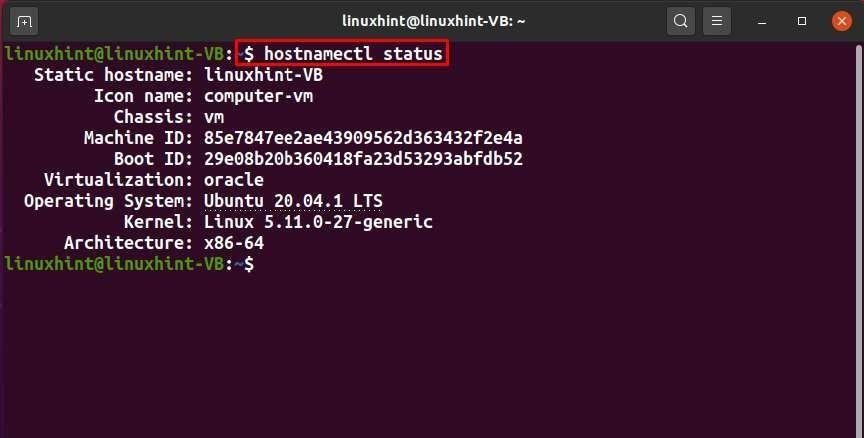
hostnamectl Command
The “hostnamectl” command is used to view and change the system hostname.
Syntax:
If you want to check out the current hostname, execute the following command: Here, the “status” command is added to view the settings of the current hostname:
Other options of hostnamectl command:
| Option | Description |
|---|---|
| –static | The “–static” option is utilized in the “hostnamectl” command for changing the static hostname to the specified one. |
| –transient | The “–transient” option is utilized in the “hostnamectl” command for changing the transient hostname. |
-
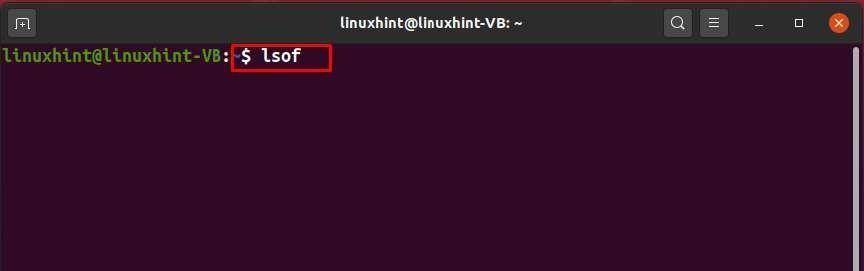
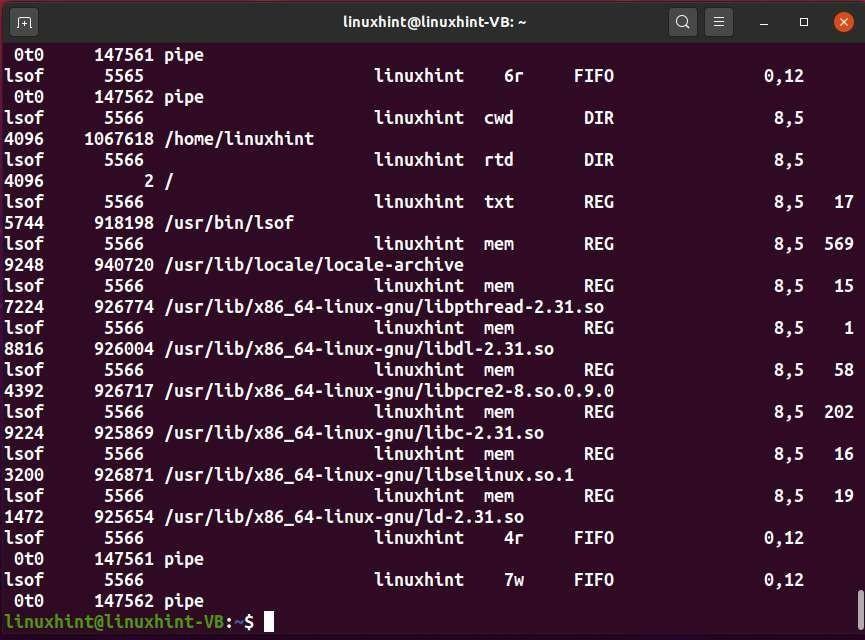
lsof Command
“lsof” is an acronym for “List Open Files”. The “lsof” command is used for displaying the information related to the opened files.
Syntax:
If you want to view the files opened by the active processes of the current user, then execute the simple “lsof” command in your Linux terminal:
Other options of lsof command:
| Option | Description |
|---|---|
| -c | The “-c” option is utilized in the “lsof” command to list the specified process files. |
| -i | The “-i” option is utilized in the “lsof” command for listing all network connections. |
| -p | The “-p” option is utilized in the “lsof” command for listing the opened files by a particular process id. |
-
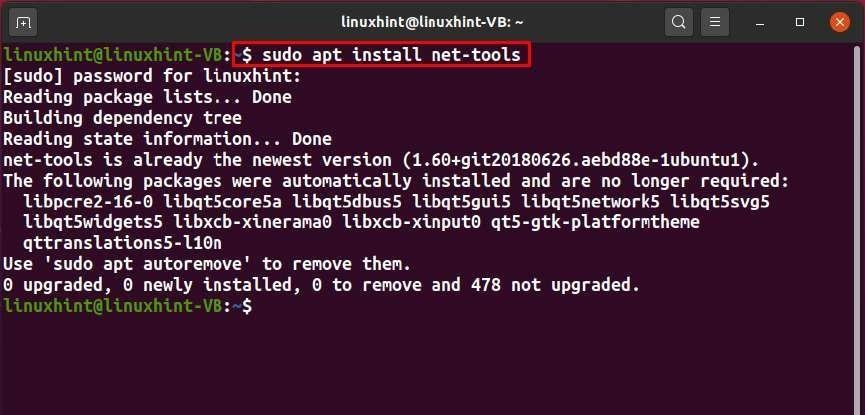
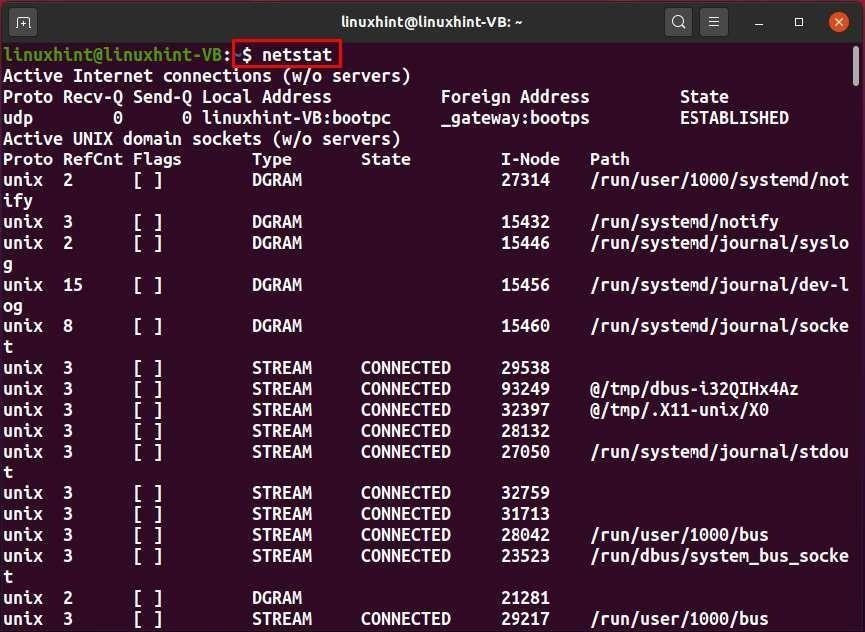
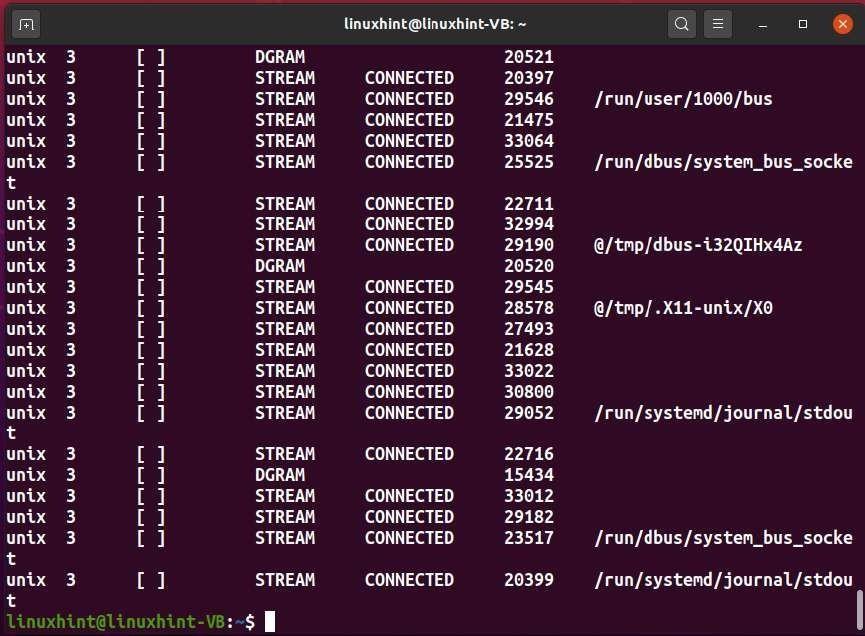
Netstat Command
“netstat” is an acronym for “Network Statistics”. The netstat command is used for displaying the statistics related to networking protocols, network connections, and other interfaces.
Syntax:
To use netstat on your Linux system, you have to install the “net-tool” first:
Now, execute the simple “netstat” command and view the network statistics of your system:
Other options of netstat command:
| Option | Description |
|---|---|
| -l | The “-l” option is utilized in the “netstat” command for showing the list of all active connections. |
| -i | The “-i” option is utilized in the “netstat” command for showing the statistics of currently configured network interfaces. |
| -u | The “-u” option is utilized in the “netstat” command to display the UDP port connections list. |
| -t | The”-t” option is utilized in the “netstat” command to display the TCP port connections list. |
-
iptables Command
The “iptables” command is used for setting up the Netfilter firewall for IPv4.
Syntax:
For instance, the execution of the below-given command will drop all the upcoming traffic on any port:

Other options of iptables command:
| Option | Description |
|---|---|
| -A | The “-A” option is utilized in the “iptables” command for appending the chain which is provided chain. |
| -C | The “-C” option is utilized in the “iptables” command for checking if a rule exists in the chain or not. |
-
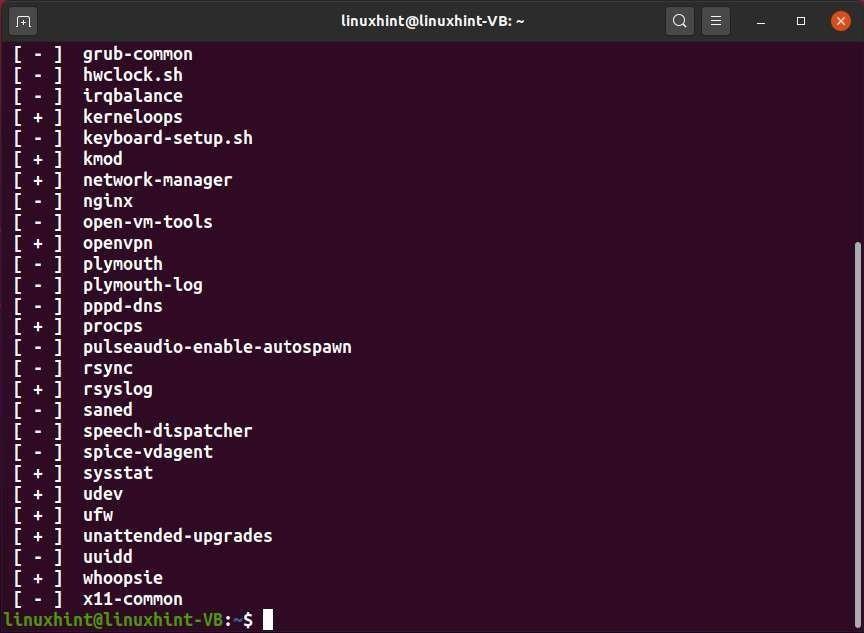
Service Command
The “service” command operates a System V init script that can be used for starting, stopping, restarting, or checking the status of the services.
Syntax:
Now, we will execute the following “service” command for checking the status of currently active services:

Other options of service command:
| Option | Description |
|---|---|
| stop | The “stop” option is utilized in the “service” command for stopping service. |
| start | The “start” option is utilized in the “service” command for starting a service. |
| restart | The “restart” option is utilized in the “service” command for restarting a service. |
-
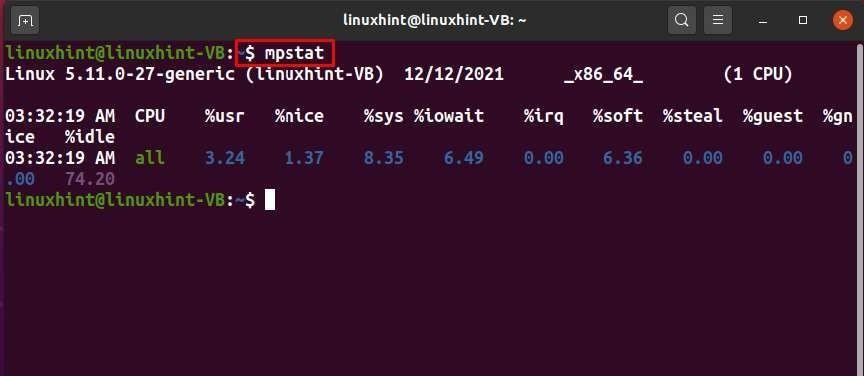
mpstat Command
“mpstat” is an acronym for “Multiprocessor Statistics”. The “mpstat” command is used for reporting the statistics related to the processor, CPU usage, and its performance.
Syntax:
Now, we will execute the below-given command for displaying the CPU and processor statistics:
Other options of mpstat command:
| Option | Description |
|---|---|
| -u | The “-u” option is utilized in the “mpstat” command for displaying the CPU utilization report. |
| -A | The “-A” option is utilized in the “mpstat” command to display detailed statistics. |
| -I | The “-I” option is utilized in the “mpstat” command for displaying the interrupts statistics. |
| -T | The “-T” option is utilized in the “mpstat” command for displaying the topology elements. |
| -o | The “-o” option is utilized in the “mpstat” command for displaying the statistics in the JSON format. |
-
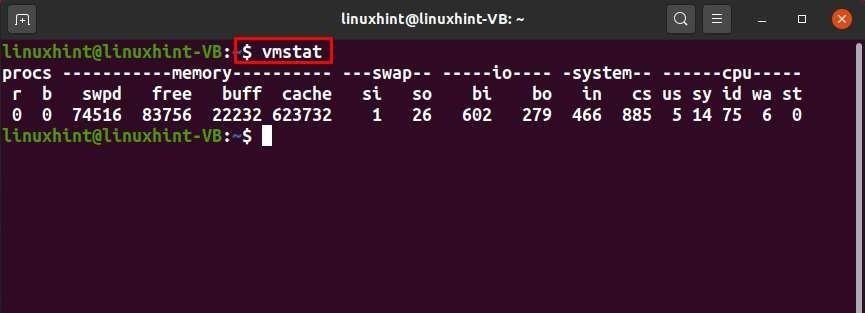
vmstat Command
“vmstat” is an acronym for “Virtual Memory Statistics”. The “vmstat” command is used for displaying the information related to disk, memory, processes, paging, CPU scheduling, and the block IO.
Syntax:
Now, execute the “vmstat” command in your Linux terminal and check out the output:
Other options of vmstat command:
| Option | Description |
|---|---|
| -d | The “-d” option is utilized in the “vmstat” command for showing the disk statistics. |
| -a | The “-a” option is utilized in the “vmstat” command to show your system’s active and inactive memory. |
-
uniq Command
“uniq” is an acronym for “Unique”. The unique command filters the repeated line in the specified file.
Syntax:
In the following “uniq” command, we have added the “-c” option for printing out the number of repeated lines on the terminal:
The “uniq” command identified “ubuntu linux” is repeated three times in the “file1.txt”:

Other options of uniq command:
| Option | Description |
|---|---|
| -d | The “-d” option is utilized in the“uniq” command for only printing out the repeated lines. |
| -u | The “-u” option is utilized in the “uniq” command for only printing the unique lines. |
| -w | The “-w” option is utilized in the “uniq” command for only comparing the “n” characters in a line. |
-
ncdu Command
“ncdu” is an acronym for “NCurses Disk Usage”. The “ncdu” command is used to check out the amount of disk consumed by the directories.
Syntax:
Now, install “ncdu” on your Linux system with the help of the following command:

In the below-given “ncdu” command, we have added the “-q” option for running it in quiet mode:


Other options of ncdu command:
| Option | Description |
|---|---|
| -x | The “-x” option is utilized in the “ncdu” command for omitting the mounted directories usage. |
-
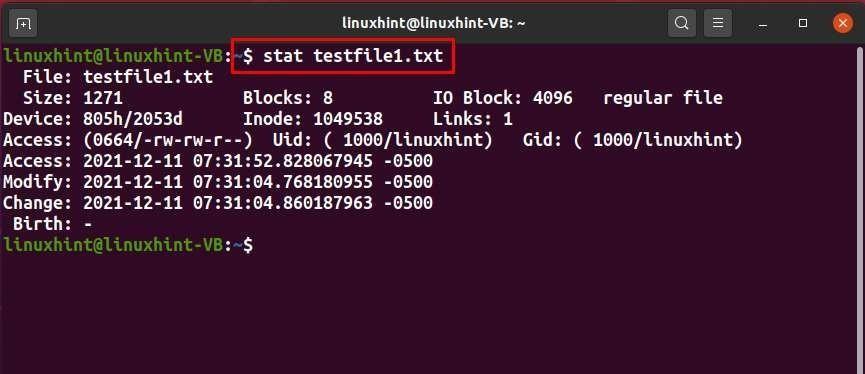
Stat Command
“stat” is an acronym for “Status”. In Linux-based systems, the “stat” command is used to display a file system status.
Syntax:
For instance, the status of our “testfile1.txt”, we will execute the command:
Other options of stat command:
| Option | Description |
|---|---|
| -f | The “-f” option is utilized in the “stat” command for displaying the file system status. |
| -t | The “-t” option is utilized in the “stat” command for printing out the information in the terse form. |
| -L | The “-L” option is utilized in the “stat” command for following the links. |
| -c | The “-c” option is utilized in the “stat” command for specifying the format. |
-
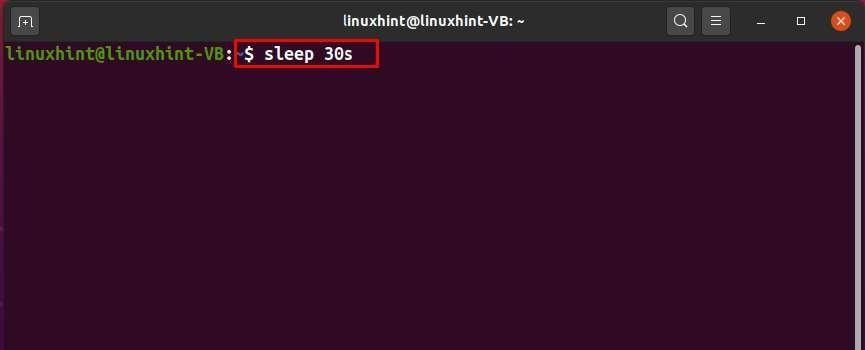
Sleep Command
The “sleep” command is used for creating a dummy job that assists in delaying the execution in a system.
Syntax:
For instance, to make the system sleep for thirty seconds, we will write out the “sleep” command:
-
Split Command
In the Linux terminal, the “split” command is used for splitting a single file into smaller files or segments.
Syntax:
We will split up the “testfile1.txt” into “5″ segments in the following example. The name of each segment will start with “what”, which is added as a prefix in the “split” command:

From the below-given image, you can see that the five segments of our “testfile1.txt” are saved having the names: whataa, whatab, whatac, whatad, and whatae:

-
Ping Command
“ping” is an acronym for “Packet Internet Groper”. The “ping” command checks the network between the server/host and host. You have to adda specific IP address as an input, and then the ping command sends a data packet. After getting the response from the host or server, the time is recorded, which is known as latency, and it is displayed in the output:
Syntax:
In the following example, we will check that the “yahoo.com” remote server is up or not:

Other options of ping command:
| Option | Description |
|---|---|
| -i | The “-i” option is utilized in the “ping” command for changing the interval time. |
| -s | The “-s” option is utilized in the “ping” command for specifying the number of pings. |
-
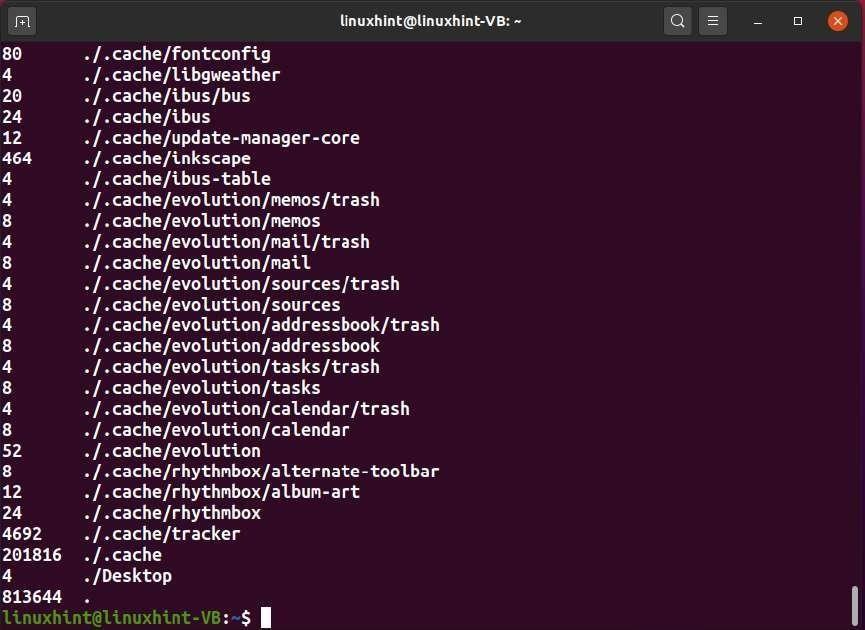
Du Command
“du” is an acronym for “Disk Usage”. The “du” command retrieves the disk usage information in a particular directory.
Syntax:
Now, execute the simple “du” command for showing the estimated size of the sub-directories in the present directory:

Other options of du command:
| Option | Description |
|---|---|
| -s | The “-s” option is utilized in the “du” command for displaying only the total file size. |
| -a | The “-a” option is utilized in the “du” command for displaying the information related to files and directories. |
| -h | The “-h” option is utilized in the “du” command for displaying the file size in human-readable units. |
| -c | The “-c” option is utilized in the “du” command for displaying the total file size at the end. |
-
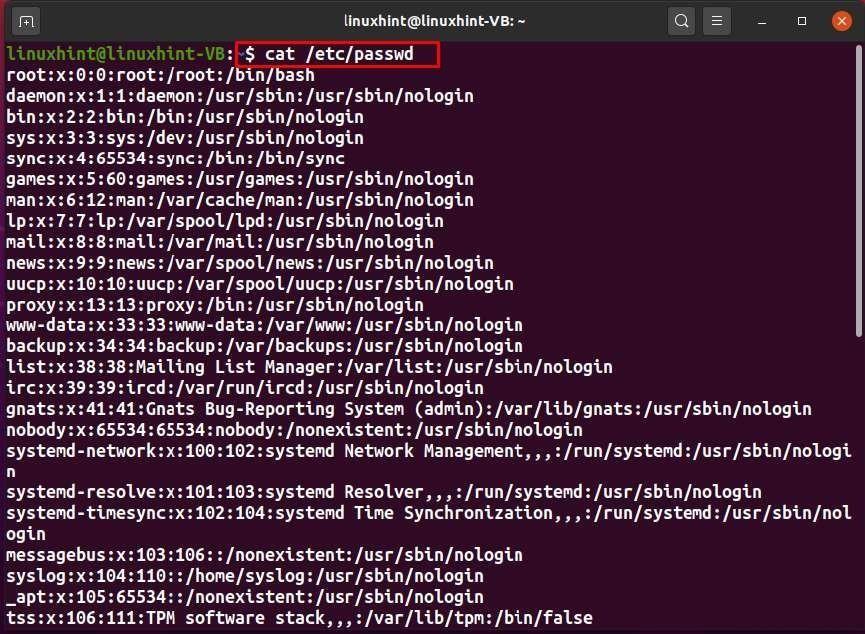
Useradd Command
In a Linux-based system, the “useradd” command is used to add a new user account.
Syntax:
Now, we will create a new “linuxuser” in our system with the help of the following “useradd” command:

Confirm the existence of the newly created “linuxuser” user through the “/etc/passwd” file content:
Other options of the useradd command:
| Option | Description |
|---|---|
| -p | The “-p” option is utilized in the “useradd” command for setting an unencrypted password. |
| -u | The “-u” option is utilized in the “useradd” command for assigning the numerical value to the user ID. |
| -c | The “-c” option is utilized in the “useradd” command for creating a user with a comment. |
| -e | The “-e” option is utilized in the “useradd” command for creating a user with an expiry date. |
-
Usermod Command
The “usermod” command is used to change an existing user’s properties through the terminal.
Syntax:
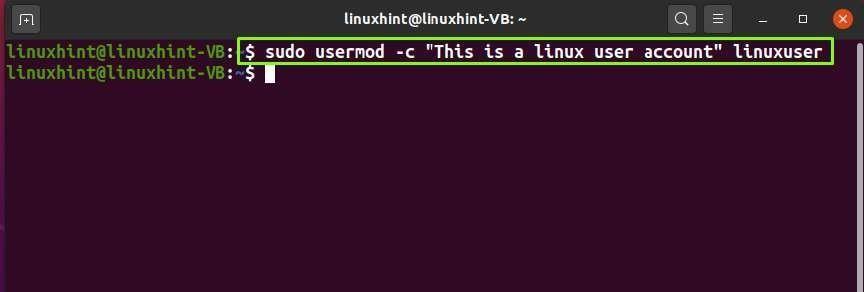
Here, we will write a description for our “linuxuser” by adding the “-c” option in the usermod command:
Other options of usermod command:
| Option | Description |
|---|---|
| -u | The “-u” option is utilized in the “usermod” command for changing the user ID. |
| -U | The “-U” option is utilized in the “usermod” command for unlocking the user. |
| -L | The “-L” option is utilized in the “usermod” command for locking the user. |
| -g | The “-g” option is utilized in the “usermod” command for changing the user group. |
| -e | The “-e” option is utilized in the “usermod” command to change the user’s expiry date. |
-
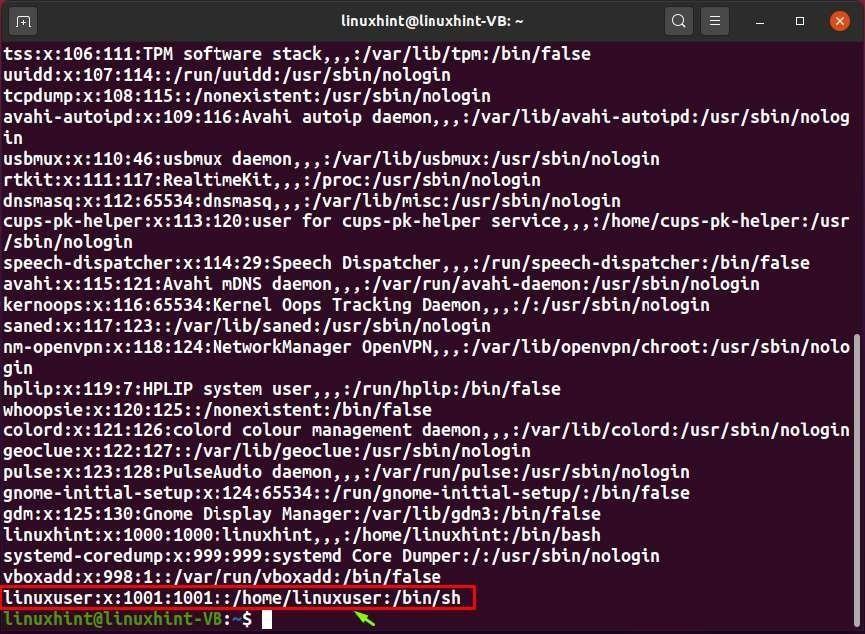
Userdel Command
The “userdel” command is used in a Linux system for deleting a specific user account and its related files.
Syntax:
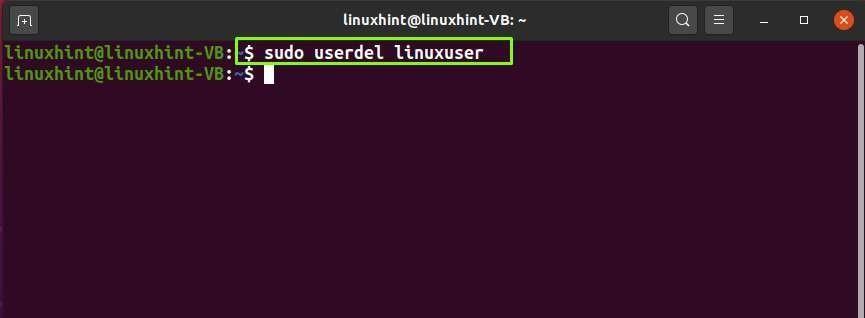
For instance, to delete the “linuxuser” which we have created in the previous section, we will run the following “userdel” command:
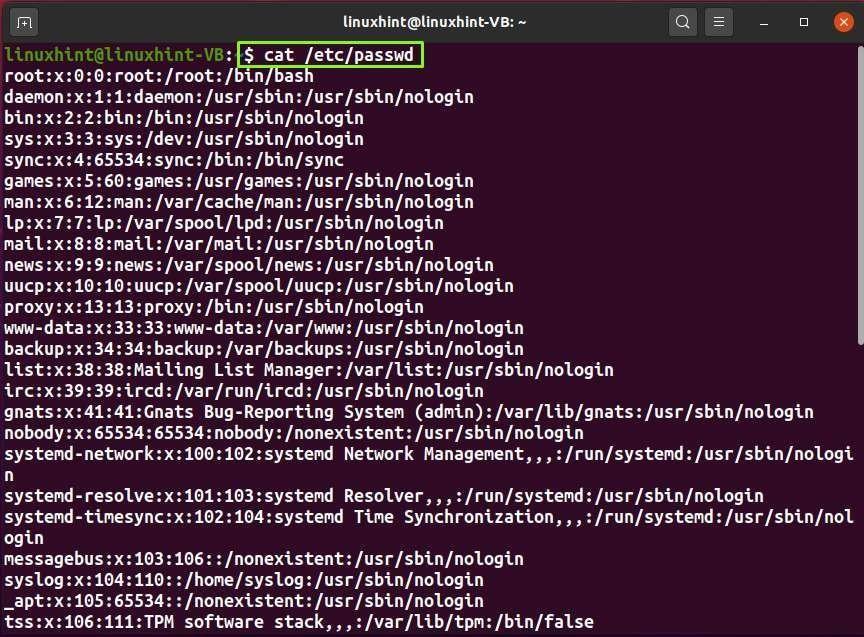
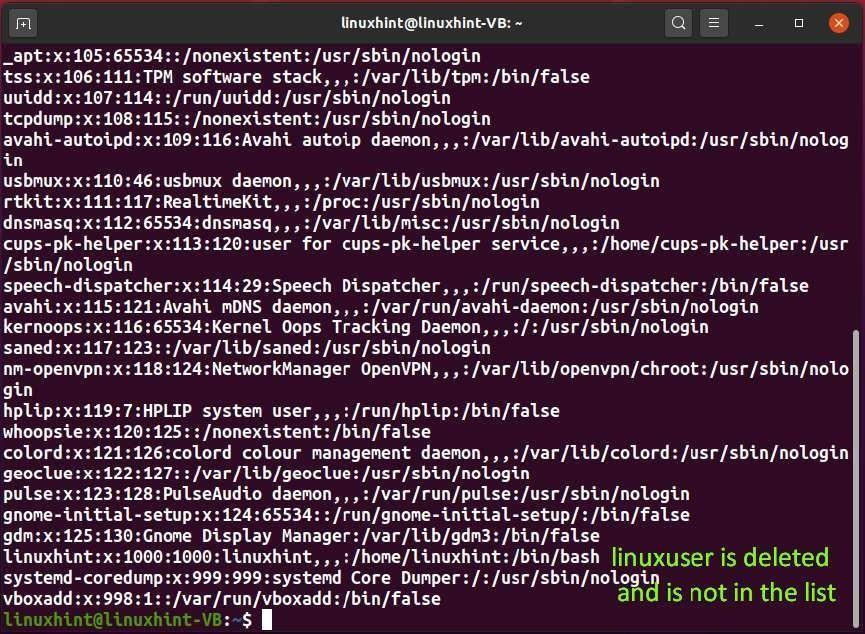
Now, check out the content of the “/etc/passwd” to confirm the “linuxuser” account deletion:
Other options of userdel command:
| Option | Description |
|---|---|
| -Z | The “-Z” option is utilized in the “userdel” command for removing the SELinux mapping of the specified user. |
| -r | The “-r” option is utilized in the “userdel” command to remove the user account files, home directory, and the user’s mail spool. |
| -f | The “-f” option is utilized in the “userdel” command for forcefully removing the specified user. |
-
awk Command
“awk” is an acronym for “Aho, Weinberger, and Kernighan”. “awk” is used as an analysis and reporting tool for advanced text processing in Linux-based systems:
Syntax:
We will use the “awk” command to operate text processing on the”file.txt” file. Before moving ahead, let us show you the content of “file1.txt” by executing the following “cat” command:
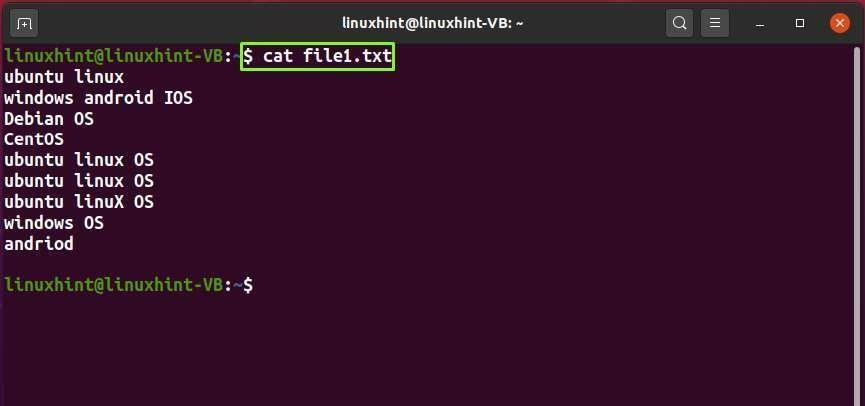
Next, we will define “OS” as a pattern in our “awk” command and execute it:
The above-given “awk” command will look for each line that gets matched with the added pattern. After searching, it will print them out in our Linux terminal:

-
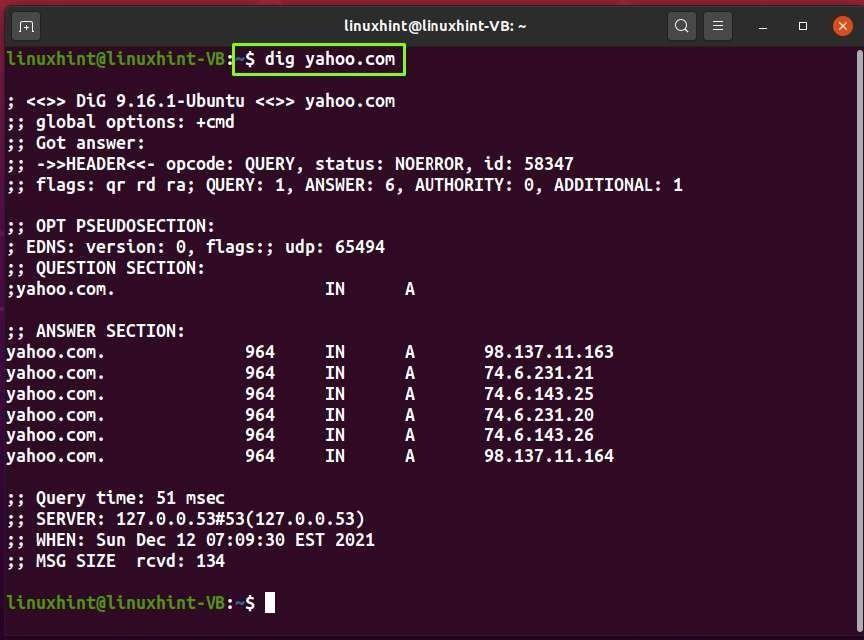
Dig Command
“dig” is an acronym for “Domain Information Groper”. The “dig” command is used to extract the information related to Domain Name servers.
Syntax:
Now, we will query the Yahoo name servers (DNS) by executing the following command:
-
Whereis Command
The “whereis” command is used for searching the location of a command’s source or binary files.
Syntax:
For instance, to locate the manual or binary file of the “netstat” command, we will write out the “whereis” command in the following format:

Other options of the whereis command:
| Option | Description |
|---|---|
| -f | The “-f” option is utilized in the “whereis” command for terminating the last directory list. |
| -b | The “-b” option is utilized in the “whereis” command for only searching for binary files. |
| -S | The “-S” option is utilized in the “whereis” command to limit or change places where it searches for the files. |
-
pstree Command
The “pstree” command lists out the active processes in the form of a tree.
Syntax:
You can execute the following command to display the currently running processes’ hierarchical tree structure:

Other options of the pstree command:
| Option | Description |
|---|---|
| -T | The “-T” option is utilized in the “pstree” command for hiding the threads in the output. |
| -h | The “-h” option is utilized in the “pstree” command to highlight the current processes and ancestors. |
| -n | The “-n” option is utilized in the “pstree” command for sorting the output by the process ID (PID). |
| -p | The “-p” option is utilized in the “pstree” command for showing process IDs. |
| -t | The “-t” option is utilized in the “pstree” command for showing the full thread names. |
-
Tree Command
The “tree” command is used for recursively listing the directories in the tree structures.
Syntax:
The execution of the following command will display a tree of the current directory in the Linux terminal:
Other options of tree command:
| Option | Description |
|---|---|
| -d | The “-d” option is utilized in the “tree” command only listing directories. |
| -l | The “-l” option is utilized in the “tree” command for following the symbolic links into directories. |
| -a | The “-a” option is utilized in the “tree” command to print the hidden files and others. |
-
printf Command
“printf” is an acronym for “Print Formatted”. In Linux-based systems, the “printf” command is used to show the variable value formatted by defining some rules.
Syntax:
In the below-given example, we have three arguments “50”, “smaller than”, and “100”. The “printf” command will interpret these variables from the left to right side with the given strings: %f,%d, and %s:
The above-given command will show the following output:

Other attributes of the printf command:
| Attribute | Description |
|---|---|
| %b | The “%b” attribute is utilized in the “printf” command for expanding backslash escape sequences. |
| %u | The “%u” attribute is utilized in the “printf” command for printing in the unsigned decimal integers format. |
| %o | The “%o” attribute is utilized in the “printf” command for printing in the octal integers format. |
| %s | The “%s” attribute is utilized in the “printf” command for printing arguments as strings. |
-
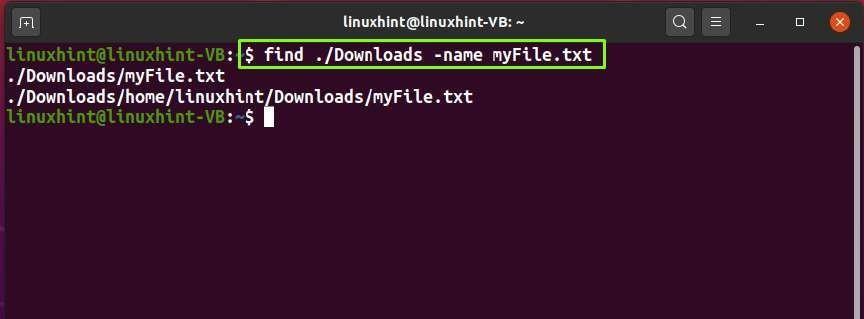
Find Command
The “find” command is used for searching for a specific file in the directory hierarchy.
Syntax:
For instance, we will execute the below-given command for searching the “myFile.txt” in the “./Downloads” directory:
Other options of find command:
| Option | Description |
|---|---|
| -p | The “-p” option is utilized in the “find” command for printing the current file name. |
| -d | The “-d” option is utilized in the “find” command for specifying a directory. |
| -f | The “-f” option is utilized in the “find” command for specifying a file. |
-
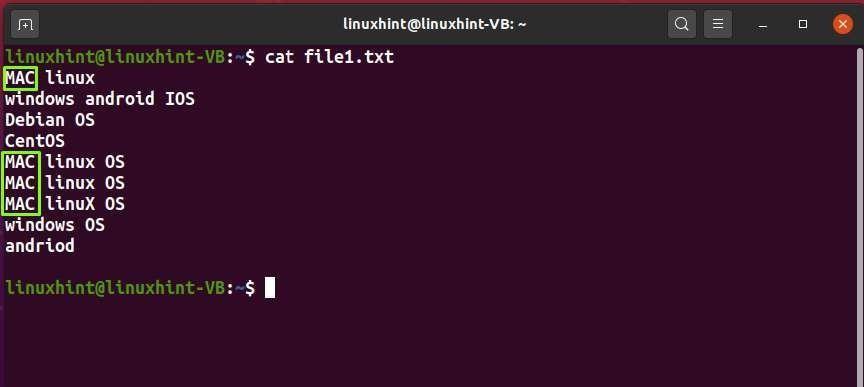
Sed Command
“sed” is an acronym for “Stream Editor”. The “sed” command is used for performing the basic text transformation operations on the input stream.
Syntax:
We will use the “sed” command to find and replace a string. For this purpose, firstly view the content of the “file1.txt” file:

The below-given “sed” command will find the “ubuntu” in the “file1.txt” and replace it with “MAC”:

After executing the “sed” command, again check the content of the “file1.txt”:
As you can see, the “Ubuntu” string is now replaced with “MAC” in over the “file.txt” file:
-
rmdir Command
“rmdir” is an acronym for “Remove Directory”. The “rmdir” command is used for removing the empty directory from your file system.
Syntax:
Let’s have a look at the list of the directories present inside our home directory: Here, “Folder1” is an empty directory:
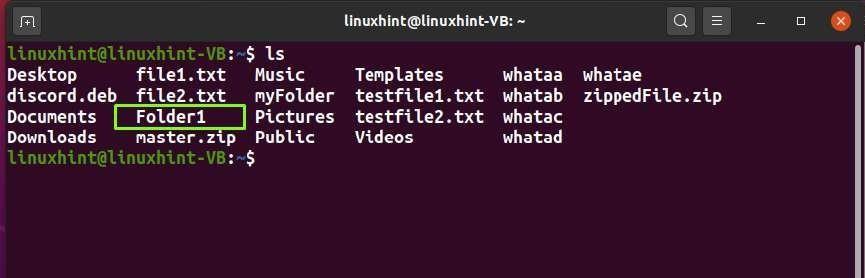
Now, to delete the “Folder1” directory, we will execute the following “rmdir” command:

Other options of the rmdir command:
| Option | Description |
|---|---|
| -d | The “-d” option is utilized in the “rmdir” command for using DELIM ads a field delimiter instead of TAB. |
| -p | The “-p” option is utilized in the “rmdir” command for removing the specified directory and its ancestors. |
-
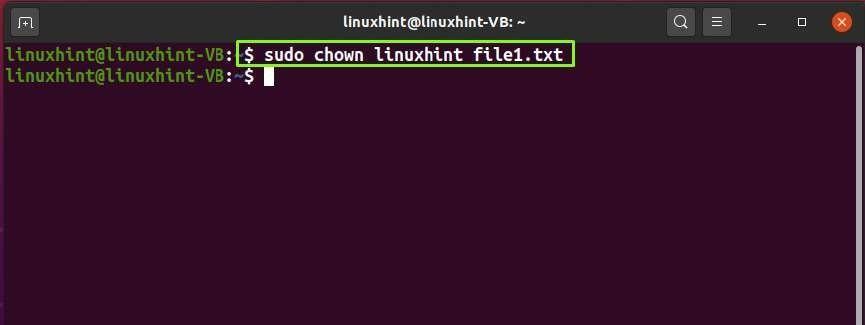
Chown Command
“chown” is an acronym for “Change Owner”. In Linux-based systems, the “chown” command is used for changing the file owner or the ownership of a directory.
Syntax:
Below-given “chown” command will change the owner to the “file1.txt” to “linuxhint”:
Syntax for changing the filegroup:
Syntax for changing the user and group at once:
-
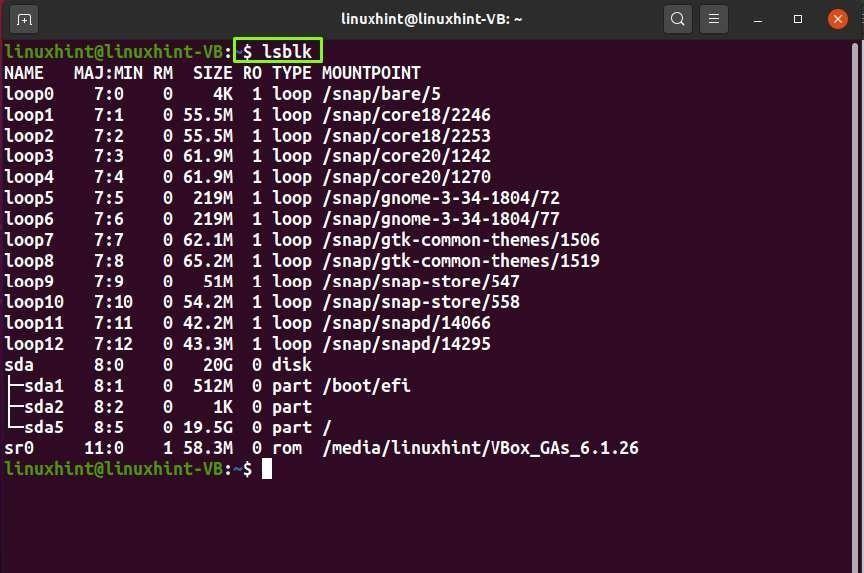
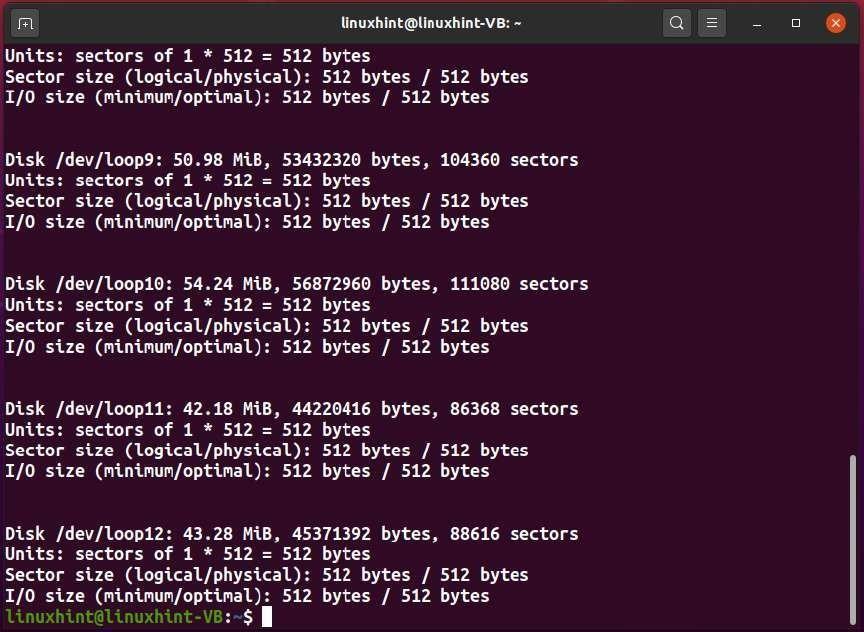
lsblk Command
In the Linux system, the “lsblk” command is used to display the loop and block devices.
Syntax:
Now, execute the “lsblk” command and check out the output in the terminal:
Other options of the “lsblk” command:
| Option | Description |
|---|---|
| -d | The “-d” option is utilized in the “lsblk” command for skipping the entries for slaves. |
| -m | The “-m” option is utilized in the “lsblk” command for displaying the information related to owner, mode, and group. |
| -i | The “-i” option is utilized in the “lsblk” command for using the ASCII characters for tree formatting. |
| -z | The “-z” option is utilized in the “lsblk” command for printing the zone model for each device. |
| -b | The “-b” option is utilized in the “lsblk” command for printing the size information in bytes. |
| -a | The “-a” option is utilized in the “lsblk” command to display the empty devices. |
-
Screen Command
The “screen” command is used for creating and using multiple shell sessions from the opened session. This command is useful for executing scripts that run very long.
Firstly, install the screen on your Linux system if you do not have it already:
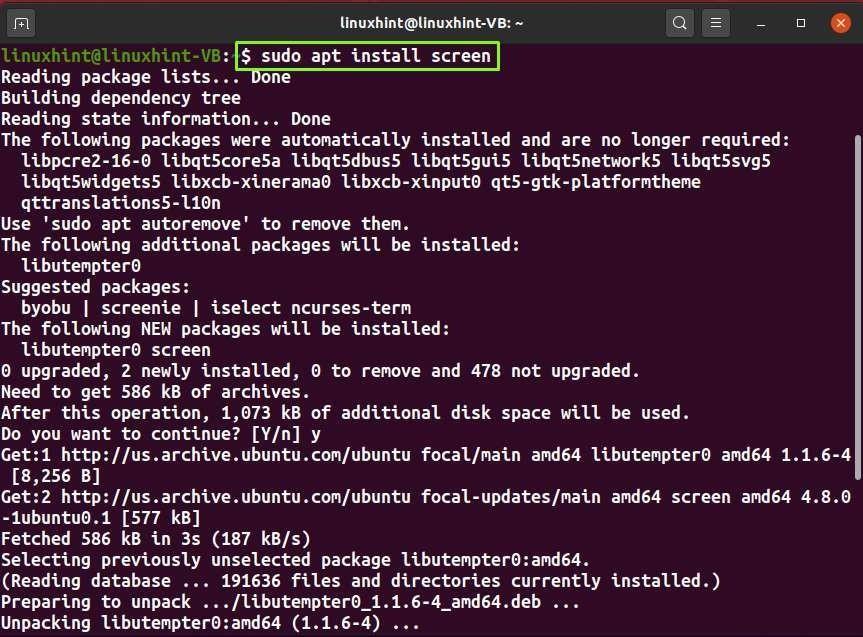
To create a screen session, type out the screen in the terminal, press “CTRL+a” and then c. This specified action will open up a new window:

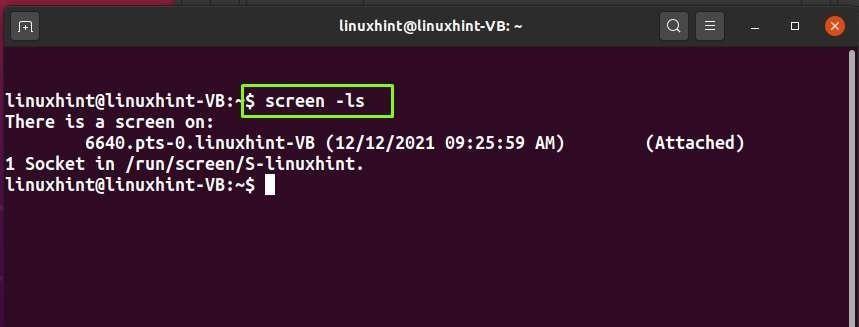
You can execute the screen command with the “-ls” options to list the current screen sessions of the system:
Other screen commands:
| Command | Description |
|---|---|
| Ctrl+a + A | The “Ctrl+a + A” command is executed to rename the current window. |
| Ctrl+a + “ | The “Ctrl+a + ” ” command is executed to list all windows. |
| Ctrl+a + X | The “Ctrl+a + X” command is executed to close the current region. |
| Ctrl+a + 0 | The “Ctrl+a + 0” command is executed for switching the screen session 0. |
| Ctrl+a + tab | The “Ctrl+a + tab” command switches the input focus to the next region. |
-
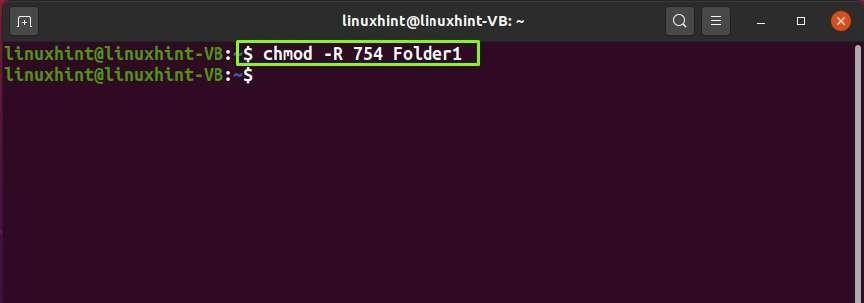
chmod Command
“chmod” is an acronym for “Change Mode”. In the Linux system, the “chmod” command permits the users to change the file permissions using the numeric or symbolic mode.
In numeric mode:
- “-0” represents “no permission”
- “-1” represents “execute”
- “-2” represents “write”
- “-4” represents “read”
In symbolic mode:
- “u” represents “user”
- “g” represents “group”
- “o” represents “other”
- “r” represents “read”
- “w” represents “write”
- “x” represents “execute”
Syntax:
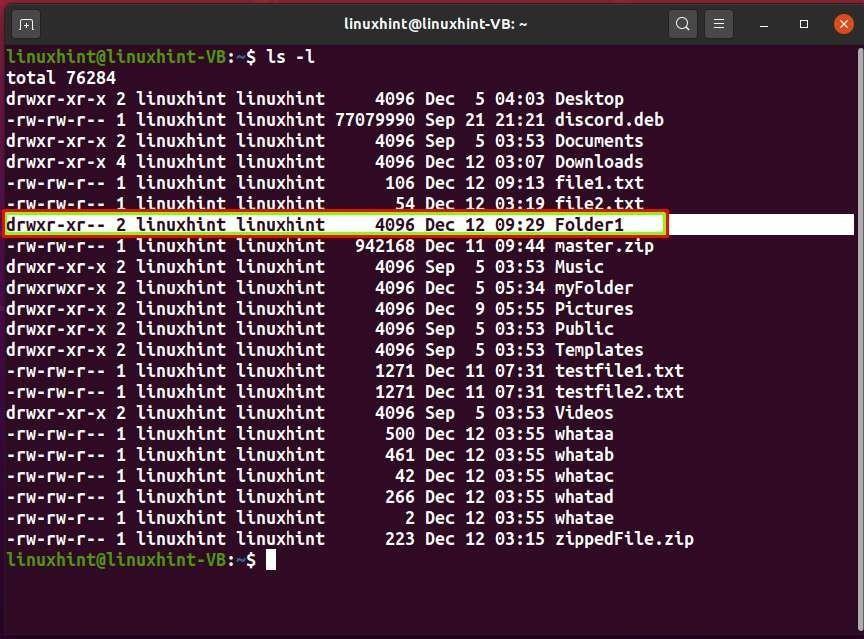
Now, we will execute the below-given “chmod” command for changing the permission of the “Folder1” directory:
This command will assign the “read, write, and execute” permissions to the user and “read” permission to both group and others:
List out the directories in the long format and check out the file permissions of the “Folder1”:
-
grep Command
“grep” is an acronym for “Global Regular Expression Print”. The “grep” command is used to search a specified pattern in a file and then output the lines that comprise the pattern.
Syntax:
In the below-given example, we will execute the “grep” command for finding the “MAC” pattern in the “file1.txt” file:

Other options of grep command:
| Option | Description |
|---|---|
| -l | The “-l” option is utilized in the “grep” command to display the filenames list. |
| -c | The “-c” option is utilized in the “grep” command for printing the matched line count. |
| -v | The “-v” option is utilized in the “grep” command for displaying the unmatched lines. |
| -h | The “-h” option is utilized in the “grep” command for only displaying the matched lines. |
| -w | The “-w” option is utilized in the “grep” command for matching the whole word. |
-
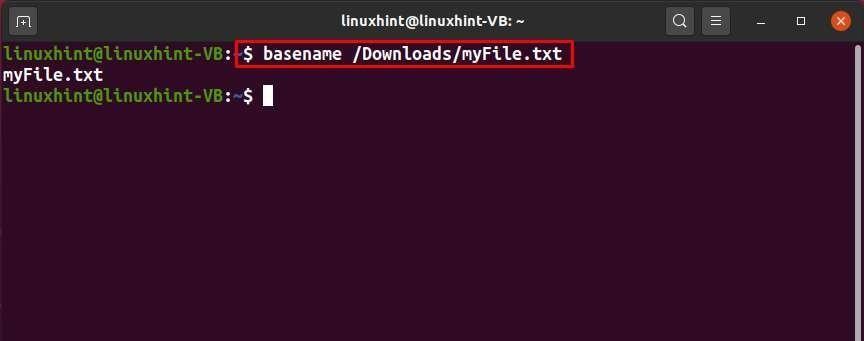
Basename Command
The “basename” command is used in cases when you want to extract the file names. It displays the last element of the specified file path in the Linux terminal.
Syntax:
Now, we will execute the below-given “basename” command for printing the filename while removing the leading directories:
-
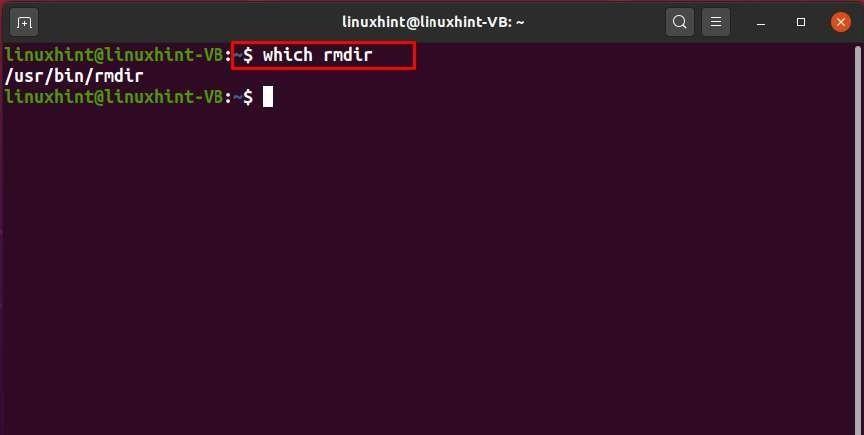
Which Command
The “which” command is used for identifying the executable binary file that launches when we issue any command in the Linux terminal.
Syntax:
For instance, you can execute the following command for displaying the paths of “rmdir” executable files:
Other options of which command:
| Option | Description |
|---|---|
| -s | The “-s” option is utilized in the “which” command for restricting it to only return 0 or 1: 1 if the executable files are not found and 0 if the executable file exists on the system. |
| -a | The “-a” option is utilized in the “which” command for listing all instances of the executable files. |
-
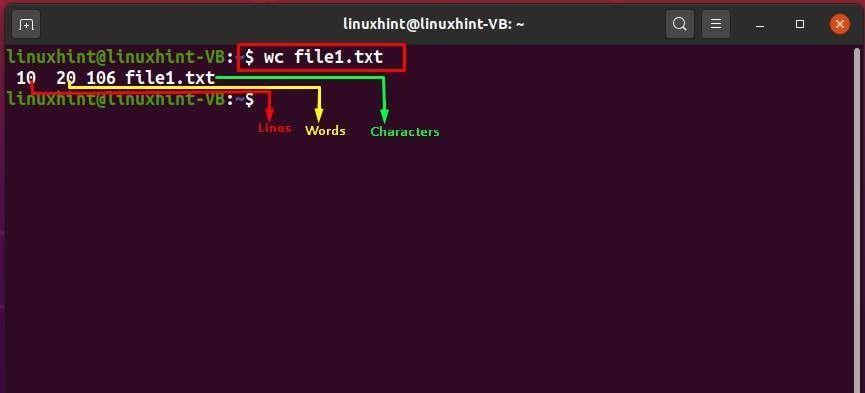
wc Command
“wc” is an acronym for “Word Count”. In a Linux-based system, the “wc” command is used for counting and printing out the number of lines, words, and characters of the specified file in the terminal.
Syntax:
Now, we will execute the below-given “wc” command for counting the number of words, lines, and characters in the “file1.txt” file:
Other options of the wc command:
| Option | Description |
|---|---|
| -w | The “-w” option is utilized in the “wc” command for printing the word count. |
| -m | The “-m” option is utilized in the “wc” command for printing the character counts. |
| -c | The “-c” option is utilized in the “wc” command for printing the byte counts. |
| -l | The “-l” option is utilized in the “wc” command for printing newline counts. |
| -L | The “-L” option is utilized in the “wc” command for printing the maximum display width. |
-
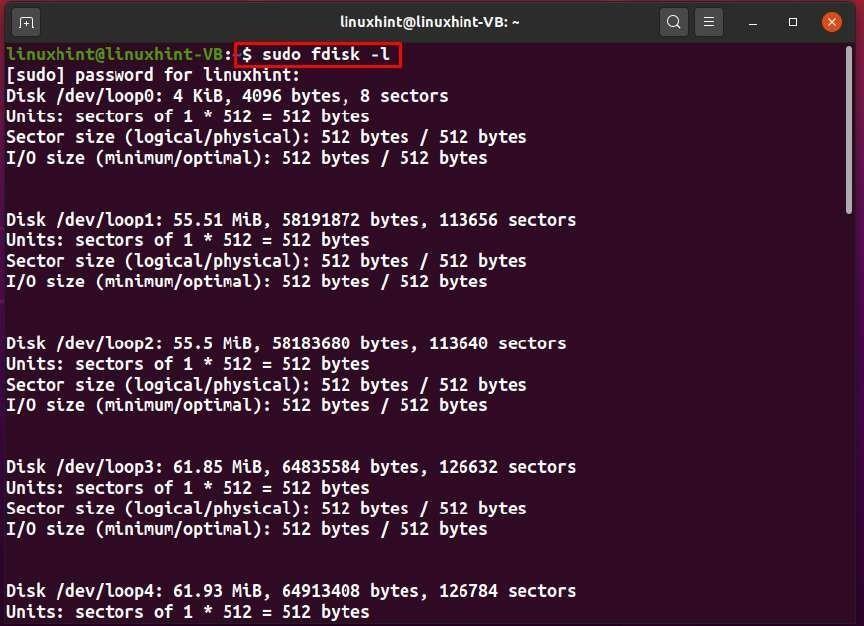
fdisk Command
“fdisk” is an acronym for “Fixed Disk Editor”. The “fdisk” command is used to view and change the entries in the disk partition table. It also permits Linux users to move data into new partitions, modify old drives, manage space for new drives or partitions.
Syntax:
Now, execute the following command for checking out the basic details of your system partitions:
Other options of the fdisk command:
| Option | Description |
|---|---|
| -s | The “-s” option is utilized in the “fdisk” command for showing the partition size. |
| -h | The “-h” option is utilized in the “fdisk” command to view the help message and other options of the fdisk command. |
-
Date Command
The “date” command is used for printing or setting the current date and time of the Linux system.
Syntax:
For displaying the date and time in the UTC format, you can type out the following command:

Other options of date command:
| Option | Description |
|---|---|
| -s | The “-s” option is utilized in the “date” command for setting the time according to the specified string. |
| -d | The “-d” option is utilized in the “date” command for converting the specified string into a formatted date. |
-
tr command
“tr” is an acronym for “Translate”. The “tr” command is used for various text transformation options such as converting lowercase to uppercase, deleting the specified characters, and finding and replacing strings.
Syntax:
Now, we will demonstrate the procedure of using the “tr” command for converting all of the text of “file1.txt”. For this purpose, firstly, we will check out the content of “file1.txt” with the help of the “cat” command:
Executing the following “tar” command will convert the lowercase text of “file1.txt” to uppercase:

Other options of tr command:
| Option | Description |
|---|---|
| -s | The “-s” option is utilized in the “tr” command for combining the sequences of characters specified in the String1. |
| -d | The “-d” option is utilized in the “tr” command for deleting the specified string from the file. |
| -c | The “-c” option is utilized in the “tr” command for complementing the characters in String1. |
-
Fold Command
The “fold” command is used for wrapping each line of the specified file according to the added width.
Syntax:
For instance, we will execute the following “fold” command for wrapping the lines of “testfile1.txt” to the width of “30” columns:

Other options of fold command:
| Option | Description |
|---|---|
| -s | The “-s” option is utilized in the “fold” command for breaking the lines into spaces. |
| -b | The “-b” option is utilized in the “fold” command for limiting the width in terms of bytes rather than columns. |
-
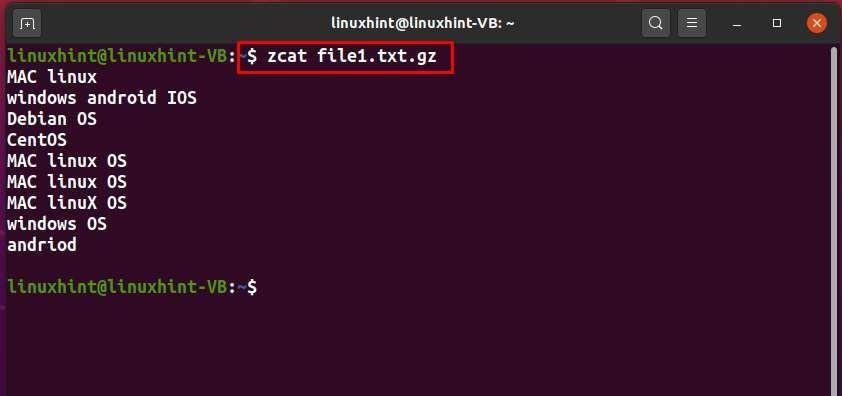
zcat Command
“zcat” command permits you to look into the compressed file content.
Syntax:
For viewing the content of the “file1.txt.gz” file, we will execute the following command:
-
Parted Command
The “parted” command is used for managing the partitions of your Linux hard drive, and it also permits you to add, shrink, delete, or extend the partitions.
Syntax:
For displaying the partition layout of all block devices of your system, execute the “parted” command with the “-l” option:

Other options of parted command:
| Option | Description |
|---|---|
| -m | The”-m” option is utilized in the “fold” command for displaying the parse able machine output. |
| -a | The “-a” option is utilized in the “fold” command to set the alignment type for the newly created partition. |
-
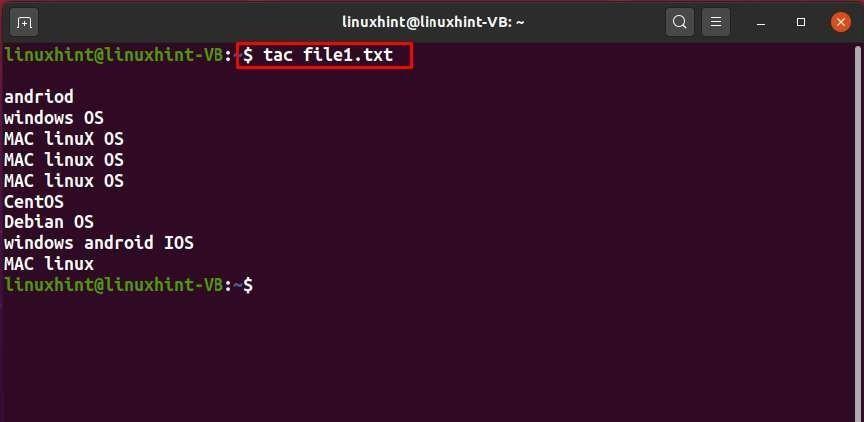
Tac Command
“tac” command is used for reversing the order of the file content.
Syntax:
Now, before reversing the content order of the “file.txt”, check out its original order:
Next, we will execute the below-given “tac” command:
From the output, you can see that the content order of “file1.txt” is reversed:
Other options of the tac command:
| Option | Description |
|---|---|
| -s | The “-s” option is utilized in the “tac” command for using the specified string as a separator. |
| -r | The “-r” option is utilized in the “tac” command for interpreting the separator as a regular expression. |
| -b | The “-b” option is utilized in the “tac” command for attaching the separator before instead of after. |
-
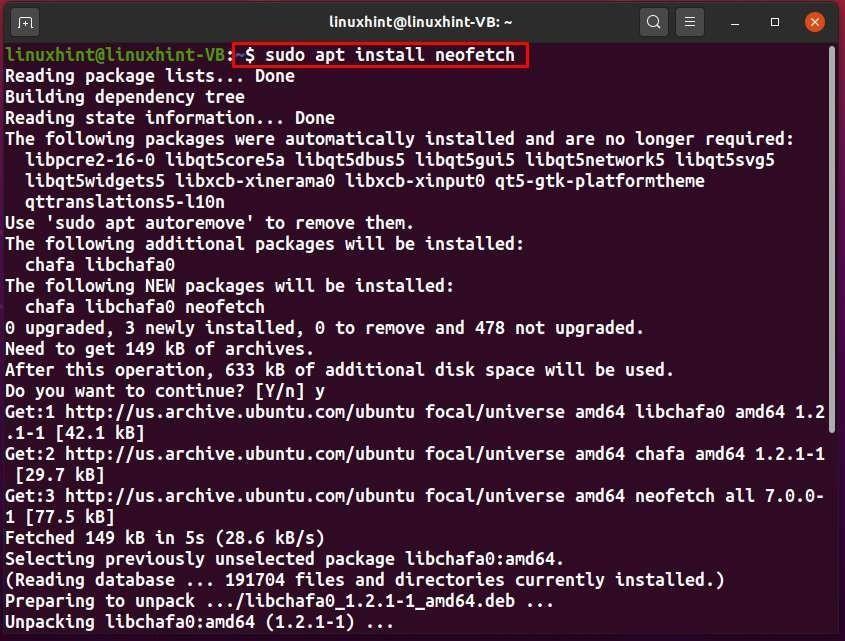
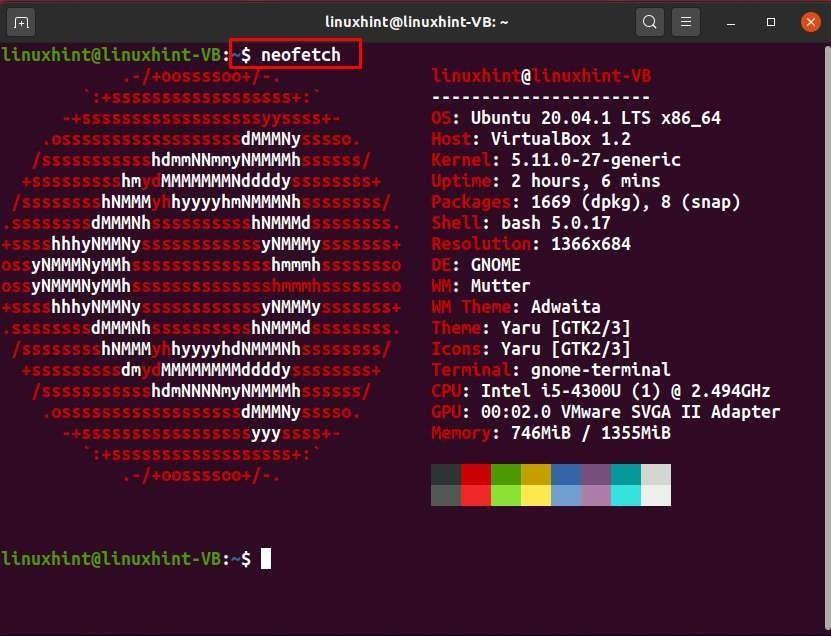
Neofetch Command
Neofetch is a command-line utility used to display the system-related information such as shell, hardware, and kernel version.
To install neofetch on your system, type out the following command:
After completing its installation, execute “neofetch” command in your Linux terminal and check the output:
-
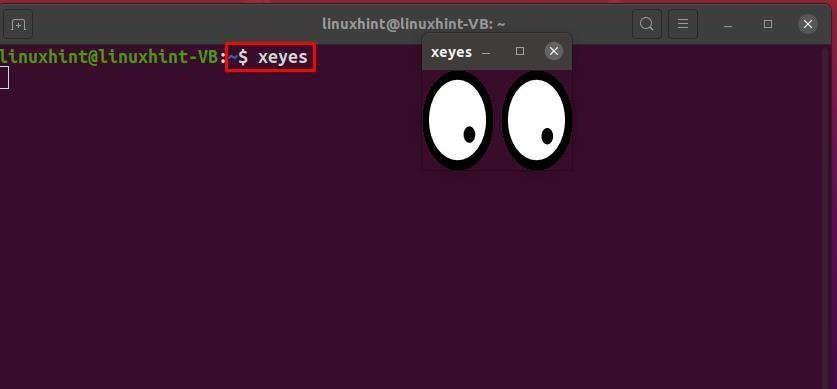
xeyes Command
“xeyes” is a GUI program that permits you to follow the mouse pointer which sometimes becomes hard to locate. It is mainly utilized in the multi-headed system where the monitors are at a distance from each other.
Type out “xeyes” in your Linux terminal for creating an eye set on your Desktop:
Conclusion
Basic Linux commands permit users to complete their system-related tasks efficiently and quickly. Knowing and mastering these Linux commands will undoubtedly be advantageous to you. However, it is not easy to remember many Linux commands and tools. Our eBook has carefully compiled the best 101 Linux commands that every Linux user should know. Practice them in your terminal to better understand Linux core principles. Good Luck!